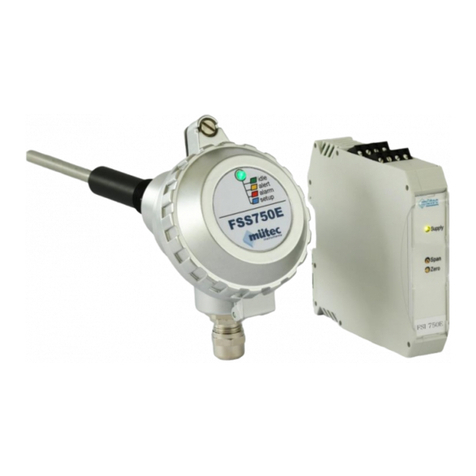
Mutec MF3000 Ex User manual

11/2018
2
Manual for MF3000 Ex
MF-SMART-program for calibration and parameterization
No. MSBA00063-20
Date: 07/2020
Manufacturer:
Mütec Instruments GmbH
Bei den Kämpen 26
21220 Seevetal
Deutschland
Tel.: +49 (0) 4185 8083-0
Fax: +49 (0) 4185 808380
Email: [email protected]
Internet: www.muetec.de
License, trademark and copyright notes
Windows™ is a registered trademark of Microsoft Corp.
Copyright © Mütec Instruments GmbH 2020 All rights reserved
This document is copyright protected. It supports the user in making reliable and efficient use of the unit.
Reproduction and distribution of this document as well as utilization and disclosure of its content are
prohibited unless expressly permitted. Any breach or infringement shall result in liability for damages.
The software described in this document is licensed and may only be used and copied in accordance
with the terms of the license.
All rights reserved.
Disclaimer
We have checked the content of the printed document for compliance with the described hardware and
software. Nevertheless, deviations cannot be excluded and consequently we cannot assume any
guarantee for complete accordance. The data in this printed document are checked regularly.
Corrections and additions are made in the following version in each case. We would be grateful for any
suggestions for improvement.
Subject to technical modifications

11/2018
3
Contents
1. Classification of the safety instructions..........................................................................................4
2. General instructions ..........................................................................................................................5
3. General information for installation and operation ........................................................................6
4. Technical Data....................................................................................................................................8
4.1. Dimensions of the housing ..........................................................................................................................9
5. Terminal connections......................................................................................................................10
6. System structure..............................................................................................................................11
6.1. Jumper Configuration ................................................................................................................................12
6.2. Block Diagram of MFI 3000 .......................................................................................................................12
7. Mounting and Assembly .................................................................................................................13
8. Function Description .......................................................................................................................16
9. Calibration of Measured Value .......................................................................................................17
10. Configuration Program MF-SMART............................................................................................18
10.1. Read device settings .............................................................................................................................18
10.2. Products: measurement range...............................................................................................................19
10.3. Products: Input calibration .....................................................................................................................20
10.4. Products: Digital outputs........................................................................................................................22
10.5. Analog output.........................................................................................................................................23
10.6. System...................................................................................................................................................24

11/2018
4
1. Classification of the safety instructions
This manual contains instructions that you have to observe for your personal safety as well as to avoid
material damage. These instructions are highlighted using a triangular warning sign and shown as
follows, depending on the degree of risk.
HAZARD
means that death or severe physical injury will occur if the
appropriate precautionary measures are not taken.
WARNING
means that death or severe physical injury may occur if the
appropriate precautionary measures are not taken.
CAUTION
with a triangular warning sign means that minor physical injury may
occur if the appropriate precautionary measures are not taken.
CAUTION
without a triangular warning sign means that material damage may
occur if the appropriate precautionary measures are not taken.
ATTENTION
means that an undesired result or state may ensue if
the corresponding instruction is not followed.
NOTE
denotes important information about the product, handling of the
product or the respective part of the documentation, is aimed at
drawing special attention to the latter and should be complied with.
In addition to the instructions in this manual, the generally applicable safety and accident prevention
regulations must be observed.
If the information contained in this document should not be sufficient in any specific case, you can obtain
more detailed information from our telephone service.
Please read this manual carefully prior to installation and commissioning.

11/2018
5
2. General instructions
This device left the plant in flawless condition in terms of its safety features. To preserve this condition
and to ensure safe operation of the device, the user has to observe the instructions and warning notes
indicated in this operating manual.
NOTE
For the sake of clarity the manual does not contain complete detailed information on all product types
and can therefore not take into account every conceivable case with respect to installation, operation
and maintenance.
If you wish further information or should special problems arise that are not treated in sufficient detail in
the manual, you can obtain the necessary information by telephone.
Moreover, we point out that the content of the manual shall not constitute part of or amend a previous
or existing contract, agreement or legal relationship. All obligations of Mütec Instruments GmbH shall
result from the respective contract of purchase, which also contains the complete and solely valid
warranty terms. These contractual warranty terms shall neither be extended nor limited by the
information contained in the manual.
The content reflects the technical status at the time of printing. It is subject to technical modifications in
the course of further development.
DISCLAIMER
All modifications to the device fall under the responsibility of the user unless expressly specified
otherwise in the operating manual.
Qualified PERSONNEL
are persons who are familiar with installation, assembly, repair and operation of the product and have
the qualifications necessary for their work, such as:
• Training, instruction and/or authorization to operate and maintain equipment/systems in
accordance with the standards of safety technology for electrical circuits, high pressures and
corrosive as well as hazardous media.
• In the case of equipment with explosion protection: training, instruction and/or authorization
to perform work on electrical circuits for potentially explosive equipment.
• Training or instruction in accordance with the standards of safety technology regarding care
and use of appropriate safety equipment.
CAUTION
Potentially electrostatic components may be destroyed by voltage that is far below the limits of human
perception. Such voltage occurs even when you touch a component or electrical connections of a
component and are not electrostatically discharged. The damage that occurs to a component because
of overvoltage usually cannot be detected immediately and does not become noticeable until after a
longer operating period.

11/2018
6
3. General information for installation and operation
Fig. 1 Fig. 2
Identification in accordance with directive 2014/34/EU for use in dust explosive areas:
Explosion protected
II
Equipment group: equipment for non-mining applications
1/2
Equipment category: very high / high level of protection (equipment with partition wall)
D
Type of explosive atmosphere: dust
Identification of type of protection:
Ex
Explosion protection
ta/tb
Type of protection: protection by enclosures,
incl. level of protection: ta/tb (equipment with partition wall)
IIIC
Dust group: conductive dust
T135°C
Maximum surface temperature: 135°C
Da/Db
EPL (Equipment Protection Level): Very high / high level of protection (dust)
Identification in accordance with directive 2014/34/EU for use in gas explosive areas:
Explosion protected
II
Equipment group: equipment for non-mining applications
3
Equipment category: normal level of protection
G
Type of explosive atmosphere: gas, vapor, mist
Identification of type of protection:
Ex
Explosion protection
ec
Type of protection: increased safety
IIC
Gas group: highest requirements (most explosive gases)
T4
Temperature class: maximum surface temperature = 135°C
Gc
EPL (Equipment Protection Level): Enhanced level of protection (gas)
CE mark
This product meets the specifications according to the EMC-directive 2014/30/EU and the ATEX-
directive 2014/34/EU.

11/2018
7
Safety instructions:
If it is ascertained that safe and reliable operation is no longer possible, the device must be taken out
of operation and has to be secured against accidental operation.
Reasons for this can be:
•visible damage of the device
•failure of electrical function
•storage at temperatures over 85 °C for a longer period of time
•heavy transport stress
Before the device can be put back into operation, a professional routine check must be performed in
accordance with DIN EN 61010, Part 1. This examination should be necessarily carried out by the
manufacturer. Repair work at Ex devices may be accomplished only under attention by §9 of the Ex
regulation (Elex V).
Proper Use
The MF3000 Ex system consists of the sensor MFS3000 Ex and the transmitter MFI3000 and is
intended to measure the mass flow of solids in free fall or pneumatic pipes.
WARNING
The maximum permissible ambient and process temperature for the sensor MFS3000
Ex must be observed. This must not exceed the temperature range, specified in the
technical data, chap. 4.
The maximum permissible ambient temperature for the transmitter MFI3000 must not
exceed the temperature range, specified in the technical data, chap. 4.
Type
Area
Identification
Certificate-no.
MFS3000-K-ExD
MFS3000-T-ExD
Dust-Ex
II 1/2D
Ex ta/tb IIIC T135°C Da/Db
KIWA 20ATEX0029 X
MFS3000-K-ExG
Gas-Ex
II 3G
Ex ec IIC T4 Gc
KIWA 20ATEX0030
Installation and operation
WARNING
For the safe operation a protective grounding connection to the sensor MFS3000 Ex
has to be established, to ensure a permanent integration into the potential equalization.
The assembly/disassembly, installation, operation, and maintenance may only be performed by qualified
personnel in the automation industry under appropriate regulations and the MF3000 Ex service manual.
The technical data and the power supply information must be considered during installation.
Maintenance:
The device maintenance should be done with a dry cloth and it is not allowed to use any solvents.
Warning
Rubbing on the name plate (e.g. during cleaning) can lead to electrostatic charging and
represents an ignition hazard! It must be ensured that there is no friction in the presence
of an ignitable atmosphere.

11/2018
8
4. Technical Data
Flow Sensor MFS3000-Ex
Medium touched parts: Stainless steel 1.4307 or 1.4571 (optional) and PA 6.6GF30
(MFS300-K-Ex*) or PTFE (MFS3000-T-ExD)
Process connection: Welding branch
Housing material: Stainless steel 1.4307 or 1.4571 (optional)
Protection class: IP 65
Transmit frequency range: 24.150 … 24.250 GHz
Transmit power: 12.7 dBm
ATEX:
Thermal data
Permissible ambient temperature: -10 to +75°C (MFS3000-*-Ex*)
Permissible process temperature: -20 to +80°C (MFS3000-K-ExD and MFS3000-K-ExG)
-20 to +100°C (MFS3000-T-ExD)
Surface temperature: max. 135°C
Electrical data (maximum values)
Current supply circuit (clamps 3 and 4)
Voltage 16 … 24 VDC
Current 25 mA
RS485 interface current circuit (clamps 1 and 2)
Voltage 6 VDC
Current 50 mA
Applied standards:
EN IEC 60079-0:2018, EN 60079-7:2015, EN 60079-31:2014
Transmitter MFI3000
Analog output
Current: 0 … 20 mA
Output value: max. 22 mA
Load: max. 750 Ω
Accuracy: ≤ 0,02 % of the final value
Load influence: ≤ 0,01 %
Response time: ≤ 150 ms
Damping: filter 1st order for (0,1 - 99)s; adjustable
Voltage: 0 … 10 V
Output value: max. 11 V
Load: min. 50 kΩ
Accuracy: ≤ 0,02 % of the final value
Load influence: ≤ 1 % at 50 kΩ
Response time: ≤ 150 ms
Damping: filter 1st order for (0,1 - 99)s; adjustable
Pulse output
Operational mode: Open-Collector, open-circuit principle
Switching capacity: ≤ 1,4 W
Switching voltage: ≤ 28 VDC
Switching current: ≤ 50 mA
Pulse duration: ≤ 50 ms

11/2018
9
Alarm relay
Operational mode: normally opened or normally closed
Alarm function: MAX, MIN oder sensor fault
Fail-LED/red: permanent light → limiting value alarm
Relay contact: 1 opener or closer
Switching capacity: max. 30 VA at AC, max. 15 W at DC
Switching voltage: max. 30 VDC or 125 VAC
Switching current: max. 0,5 A
Min-Contact voltage: 10 mVDC
Min-Contact current: 10 µA
Contact material: AgPd+Au or PdRu+Au
Interfaces
USB: Front socket connection (USB-B mini) for PC/Notebook
RS485: 2400, 4800, 9600 or 19200 bps, device address: 1-255
Power supply
Type: energy supply class A.C.3 or D.C.4 by IEC 654 part 2
AC: 24 VAC, -20% to +20 %, 50-60 Hz
DC: 24 VDC, -20 % to +30 %
Power consumption: max. 2 W
Power-LED/green: good condition of the supply
Electromagnetic Compatibility
This product meets the specifications according to the EMC directive 2014/30/EU.
More Data
Fail-LED/red: slow blink → no sensor connection
fast blink → FRAM-memory error
Form of construction: Housing for 35 mm DIN rail (EN 50022)
Dimension: 22,5 x 99 x 114,5 mm
Ambient temperature: -10 to +60°C
Protection class: IP 20
Weight: 150 g
4.1. Dimensions of the housing
Fig. 3

11/2018
10
5. Terminal connections
Fig. 4

11/2018
11
6. System structure
The system MF3000-Ex consists of a cylindrical flow sensor with welding flange, a DIN-rail transmitter
and the software MF-SMART. The process interface is realized by the welding branch, in which the
sensor is screwed flush with the inside of the pipe. The sensor is connected to the transmitter by a
4- wire cable. The transmitter contains an analog output, a pulse output, an alarm relay output, as well
as a USB and a RS485 interface.
Fig. 5
Flow-Sensor MFS3000-*-Ex*
Fig. 6

11/2018
12
6.1. DIP-Switch Configuration
The output signal can be configured via a DIP switch behind the front panel. After carefully removing
the front panel, the following switch positions can be used to make settings for the RS485 interface
and analog output:
Fig. 7
Switch 1/2: Switch to ON for RS485 interface termination.
Switch 3: Defines the analog output mode
4-20 mA DC current (Schwitch 3 OFF) or
0-10 V DC voltage (Switch 3 ON)
Switch 4: not connected
6.2. Transmitter MFI3000 Block Diagram
Fig. 8

11/2018
13
7. Mounting and Assembly
Scope of delivery
• Flow sensor MFS3000-*-Ex*
• Transmitter MFI3000, DIN-rail mountable
• Software MF-SMART for Windows
• Installation manual
• USB interface cable (USB-A to USB_B mini)
• Welding branch for the flow sensor (optional)
Preparation for sensor assembly
A welding device and a drilling machine (drill = 18 mm ø) are needed for the installation. Some important
notes should be observed, regarding the choice of the optimal installation position. The welding branch
can be installed into a horizontal transport line or into a vertical free fall line.
The assembly is always expedient into a free fall line. The vertical line tracing has to be preferred upward
in case of air conveying lines.
The distances of the inlet/outlet pipe to the MFS3000-*-Ex*shouldn’t fall below the following distances
as a multiple of the nominal diameter (DN).
Fig. 9
Fig. 10
90,00°
90,00°

11/2018
14
The split between welding branch and pipe wall has to be closed by a weld seam after fixing the flow
sensor flange vertical and in a 90° angle to the pipe axis.
The quality of the welding seam can be checked by a following pressure test. For boring out the pipe
wall for the necessary measuring window, an 18mm drill is needed. The welding branch which has been
welded on before can be used as drilling jig. After the drilling, the hole has to be deburred thoroughly,
to avoid material deposits at the sensor.
In a vertical pipe the flange will be placed horizontal and also in the 90° angle to the pipe axis.
Flow Sensor Mounting
Before screwing in the flow sensor into the welding branch, the total depth of welding branch and pipe
thickness should be marked at the shaft of the flow sensor.
The measuring window shall be mounted flush with the pipe wall so that it doesn't reach into the pipe.
The screwing of the flow sensor into the welding branch occurs up to the marked line. The use of Teflon
ribbon is recommended for the better insulation. The polarization axis indicated on the type plate is
aligned in parallel to the pipe axis. A firm attracting of the jam nut (wrench size 32) on the thread shaft
fixes the flow sensor permanently.
Fig. 11
Electrical connection and wiring
The DIN-rail transmitter MFI3000 always should be installed in a switch cabinet or dry room and it has
to be supplied with 24V AC/DC. The electrical connection between the flow sensor and the transmitter
has to be executed as a 4-wire cable. For wire lengths up to 60 m a wire cross-section of 0,75mm² is
sufficient. Beyond this it is necessary to apply > 1,0 mm² proportionally to wire length. A standard
shielded cable can be used.
NOTE
For an easy ground point connection, a PE-connection (M4 threaded bolt) is available
at the housing.
WARNING
The flow sensor must not be opened when energized!

11/2018
15
Fig. 12
To avoid potential equalization currents on the shielded wiring it has to be grounded only at one end of
the cable. For practical reason this should always carried out on the transmitter side. For the wiring at
the flow sensor the cable sheath and the shielded wiring must be removed. With a piece of shrinkage
tube slid over the end of the cable sufficient insulation of the shielded wiring to the screwed cable gland
or housing is achieved and an undesired grounding contact can be avoided.
Fig. 13

11/2018
16
8. Function Description
The MF3000-*-Ex*system is designed for the flow measuring of solid substances in metallic pipelines.
It enables the flange mount at vertical pipes at the free-fall transport and at horizontal pipes at the
pneumatic material transport. Equipped with the newest microwave technology, a modern K band
transceiver is used. As a result, the supply current for the MF3000-*-Ex*sensor could be reduced to
less than 25 mA. The working frequency of the probe lies in the internationally free available frequency
area between 24.15 ... 24.25 GHz, in which the maximum radiated power is less than 20 mW. An at the
pipe welded installation flange, through which the pipe wall will be drilled afterwards, serves as a
mechanical mount for the MF3000-*-Ex*sensor. From the flush mounted MF3000-*-Ex*inside of the
pipe, the microwave will be radiated into the metallic pipeline which serves as a measuring chamber.
The radiated wavefronts meet the flowing solid substances and lead to a frequency displacement
(Doppler effect) of the reflected signal. The intermediate frequency signals, whose frequency and
amplitude are proportional to speed and size of the solid substance parts, will be collected and used as
basis for the calculation of the solid substance quantity. Deposits at the pipe wall will not influence the
measurement.
Placed in a stainless steel housing, the measuring sensor is connected to the MFI3000 transmitter by a
4-wire cable and can be parameterized and calibrated online by a RS485 interface.
The raw measuring value of the solid substance quantity is transmitted for analysis to the transmitter.
The result is provided as an analogue 0/4-20mA- or 0/2-10 V- signal or as a digital process value at the
RS485 interface.
A passive pulse output enables the external integration of the solid substance quantity. A relay output
is used as the min/max alarm or can be used for sensor monitoring. After parameterization and
calibration of the MF3000-*-Ex*system, the measuring value can be observed at the online-mask or by
using the data logger of the software MF-SMART.
Fig. 14

11/2018
17
9. Calibration of Measured Value
After the installation of the software MF-SMART,it is possible to parameterize the MF3000-*-Ex*.
For exact measurements, a multipoint calibration is essential. At least two reference measurements with
a known quantity of bulk material are necessary.
In case of a calibration for 3 to a maximum of 10 calibration points, the different reference quantities or
weighing equipment are needed accordingly.
• Convey or fill quantity 1 with constant pressure and constant speed into the free fall pipe
• The calibration routine for the first calibration point will be started with the installed software MF-
SMART on the PC. The measured raw value will be determined and assigned to the real mass
flow (the reference value).
• For the second calibration point and the second quantity, repeat the steps in the same way.
2-point-calibration linear characteristic curve:
Fig. 15 Fig. 16
Calibration of 3 points or more
In case of pneumatic and free fall conveyance, the flow structure changes according to the conveyed
quantity. Therefore the curve won’t be a linear function in most areas of the measuring range. It has to
be compensated by a piecewise linear function. Up to 10 linearization points are available.
3-point-calibration for non linear characteristic curve:
Fig. 27 Fig. 38

11/2018
18
10. Configuration Program MF-SMART
10.1. Read device settings
Fig. 49
Extras:
Read device settings - read in all MFI3000 - device data
Program parameters - write parameter from PC-program in MFI3000
Program parameters - Parameter and calibration values from PC-program
and calibration write in MFI3000
Online-display - display with layout of raw measuring values
(unfiltered + filtered) and integrator
PC-Settings:
USB - Virtual serial interface COM1 … COM10
Device address:
USB-front socket - MFI3000-device address: direct
RS485-Interface - MFI3000-device address: 1… 255
Baud rate - 19200 bps (fixed)
Data logger:
File name - File name for stored measuring values
Acquisition rate - 5 measuring values/h, 20 measuring values/min
to 1 measuring value/s (max)

11/2018
19
10.2. Products: measurement range
Fig. 20
The initial input mask of the MF-SMART-configuration program shows the available displays for
parameterization, calibration and online presentation.
Parameterization for measurement settings:
Product selection - Selection between 1 … 24
Tag No. - Device-No. of MFI3000
Unit - Measuring unit of flow rate
Decimal point - 0 to max. 3 decimal places
Range begin - 0 % - value of measuring range
Range end - 100 % - value of measuring range
Filter - Filter 1st order between 1 … 500 s adjustable
Information about status bar:
Version 3.xx - MF-SMART program version
Device address - MODBUS-address: direct or 1 …. 255
COM1, 19200 - PC-interface COM-1 with Baud rate 19200 bps
Interface status - Status of PC-interface
Data logger - Data logger is off
Device software - Program version of MFI3000
Changed parameters will be lost when you leave the screen mask. They will be transferred and stored
in the MFI3000 by the instruction Extras/Program parameters.
Max. 6 characters are available for the text of measuring unit. Unused characters must be padded with
blanks and have to be deleted first in case of a later text change.
With each change of the decimal place, an already registered value shifts the beginning and end of
the measuring range by a decade. These values have to be corrected, if necessary.

11/2018
20
10.3. Products: Input calibration
Fig. 21
Calibration of measuring value:
Calibration time - Filter 1st order adjustable between 1 … 999 s
Number of calibration - 2-point-calibration for linear characteristic line or up to
points 10-point-calibration for not linear characteristic curve
Input attenuator - 4 dividing factors: 140:1, 70:1, 18:1 and 1:1 enable an
optimal input signal adaption
Gain - available gain factors between 70 and 1280
1. / 2. Calibration point/ - The raw value can be inserted manually or
Read raw value automatically by using the button read raw value
Any calibration value in the calibration mask must be stored first, before pressing another button in the
screen mask.
Changed parameters and calibration values will be lost by leaving the screen mask. They will be
transferred and stored in the MFI3000 by the instruction Extras/Program parameters and calibration.
Important information about sensor calibration:
The measured value is digitized by a 10-Bit ADC and consists of values between 0 and 1023. In order
to avoid any distortion of the characteristic curve, the product of input attenuator and gain has to be
adjusted in the way that the available value range of max. 1023 digit will not be exceeded. For a high
measuring accuracy, the smallest possible input attenuator should be used in order to keep the
adjustable gain factor small as well. The input attenuator and gain should be selected with respect to
the digital value at the end of the measuring range (100 % - value).
Table of contents
Other Mutec Measuring Instrument manuals