16 17
5.3 Controller opera ng instruc ons
Controller X-Drone Direc on Control Method
ThelejoysckcontrolstheX-Drone
e l e v a o n .
Pushthelejoysckupwardsoverthe
centreposiontomaketheX-Dronetake
ofromtheground.(Pleasepushthele
joysckslowlytopreventtheX-Drone
fromsuddenlyandunexpectedlyrising).
Pushthejoysckup,theX-Dronerises.
Pullthejoysckdown,theX-Drone
descends.Keepthejoysckatthecentre
posionandtheX-Dronewillhoveratthat
parcularheight.
Thelejoysckalsocontrolsthe
X-Dronerotaon.
PushthejoysckleandtheX-Drone
rotatescounterclockwise.Pushthejoysck
rightandtheX-Dronerotatesclockwise.
Ifthejoysckiscentred,theX-Dronewill
yinthesamedireconwithoutrotang.
Thejoysckcontrolstherotangangular
velocityoftheX-Drone.Movethe
joyscktoincreaseX-Dronerotaon
velocity.
TherightjoysckcontrolstheX-Drone’s
front&backlt.
PushthejoysckupandtheX-Drone
willltandyforward.Pullthejoysck
downandtheX-Dronewillltandy
backwards.TheX-Dronewillkeeplevel
andstraightifthejoysckiscentred.
Movethejoysckfastertoincreasethe
ltangle(maximumis30degrees)and
forfasterightvelocity.
Controller X-Drone Direc on Control Method
Therightjoysckalsocontrolsthe
X-Dronele&rightlt.
PushthejoysckleandtheX-Drone
willltandyle.Pushthejoysckright
andtheX-Dronewillltandyright.The
X-Dronewillkeeplevelandstraightifthe
joysckiscentred.
Movethejoysckfastertoincreasethe
ltangle(maximumis30degrees)and
fasterightvelocity.
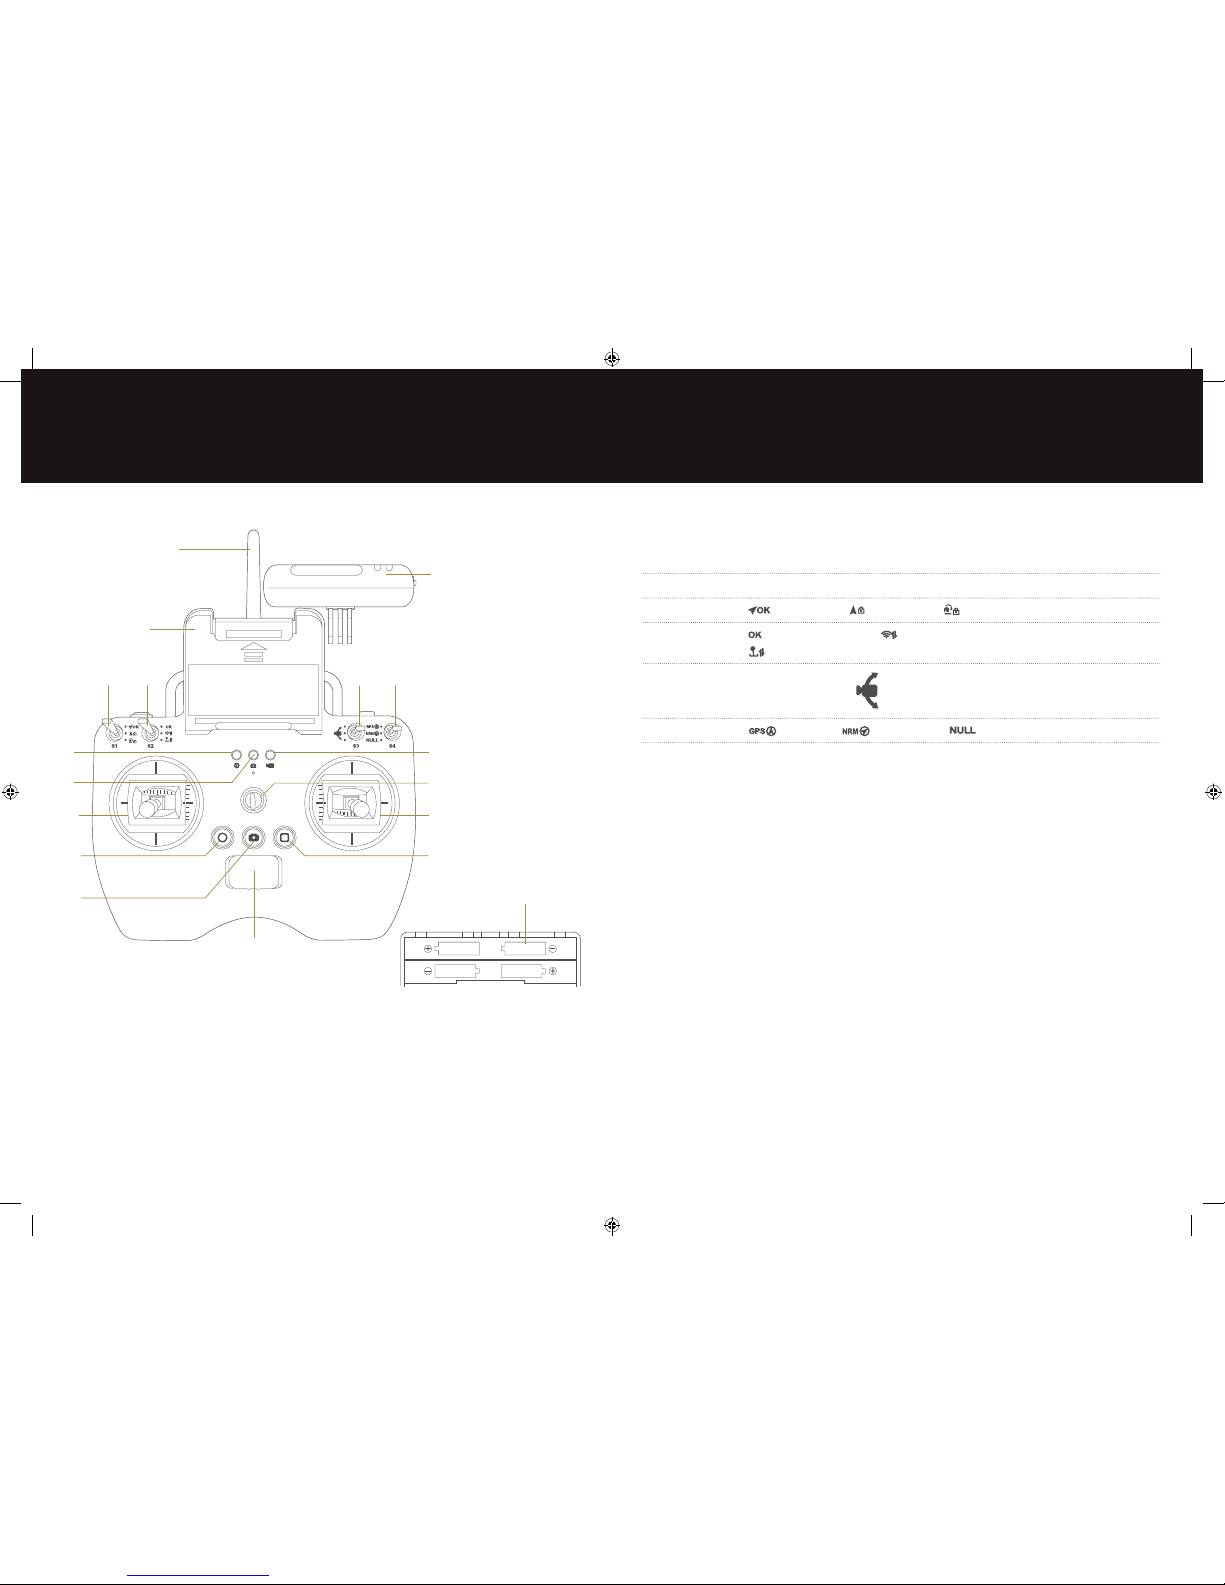
S2isusedtocalibratetheleandright
joyscks.
MoveS2toposion3,andturnonthe
controller.Thenmovebothjoyscks
clockwiseandcounterclockwisetwice,
ensuringeachrotaonreachesthe
maximumdegrees.Aerwards,release
thejoyscksandmoveS2toposion1.
Thevideorecordingindicator(green)
willlightupfor3secondstoindicate
thecompleonofthecalibraon.
S4switchistheightmodetoggle
switch.
Posion1-GPSmode
Posion2-NRM(normal)mode
Posion3-NULLisreservedfuncon