MV LINE BORA User manual

1Insert the upper bayonet in the groove
of the upper rail.
NB: the bayonet fasten the profile,
so the insect screen will open on the
opposite side.
A CB D
Remove both the screws from the
chain eyelet.
Unfasten the support and remove
the roller wheel.
Replace the roller wheel. Replace the support in the chain
eyelet and fix it.
HOW TO REMOVE AND REPLACE THE LOWER ROLLER WHEEL FOR BOTTOM RAIL
BORA
INSTALLATION INSTRUCTIONS
WARNING: the insect screen is provided with a low bottom rail; the 16 mm roller wheel under the handlebar is compatible with that bottom rail.
If you need to use Bora without the floor rail, it’s necessary to replace the default roller wheel with the 20mm roller wheel (optional,
provided by request), when not expressly ordered with the flyscreen. Please follow replacement instructions carefully.
3Hook the caps to the upper
rail.
We suggest this insect screen to be assembled by qualified sta only in compliance with the followings instructions.
Please use only screws or plugs suited for the specific wall where the screen should be installed. Assure that jambs are
parellel and right-angled; in case of out-of-squared jambs, please make them regular before to grant a parallel and right-
angled surface to the screen’s profiles.
20mm
16mm
2Insert the brushes in the upper rail.
WARNING: insert the brush nr. 3in the internal side of the
rail, and the brush nr. 1 outside.
1
1
2
2
3
3
Internal side
Outside
9
17
5
15
5
19
5Place the upper bayonettes close to
the cap (the red pawl stands as a tem-
plate) then lock the grubscrews.
4Fix the upper rail to the wall drilling
two holes.
B
C
A
B
C
A
6Hook the caps to the upper end of
both the side profiles.
All the pictures represent the
internal view.

13 14
Insert the insect screen under the bottom rail on the bayonet side and adhere
it to the side wall where the bayonet profile is mounted.
The magnet will be on the opposite side.
Verify the proper functioning of the in-
sect screen.
MAGNETE
Remove the tape protective film from the bottom rail and adhere it to the floor, placing it between the two
side profiles. Put the guide between the lateral profiles, ensuring that it is a 3mm margin with the hook.
Fix the side profile drilling some holes.
798
Insert the bottom hook in the profile
without magnet.
WARNING: the bottom hook and the
upper bayonet must be placed on the
same side.
Insert the side profile in the upper rail
and adhere it to the wall.
UPPER BAYONET
BOTTOM HOOK
10 11 Fix the side profile drilling some
holes.
Fix the bottom hook to the wall. Check magnet polarity.
Place the side profile on the handlebar and if
they don’t attract, remove the magnet, over-
turn and replace it.
+
-
1
2
A
3
2
1
4
B
A
5
6
C
3
4
This drawing is MVLINE's exclusive ownership, protected by law. Cannot be reproduced or handed over without preventive written consent.
FORMATO
A4
FOGLIO 1 DI 1
SCALA 1:1
VARIANTE
/ /
REVISIONE N.
DATA
ANNO
CATEGORIA
MODELLO
01
2016
laterale
Valeria 45 Basic
laterale
12
B
C
D
1
2
A
3
2
1
4
B
A
5
6
C
3
4
This drawing is MVLINE's exclusive ownership, protected by law. Cannot be reproduced or handed over without preventive written consent.
FORMATO
A4
FOGLIO 1 DI 1
SCALA 1:1
VARIANTE
/ /
REVISIONE N.
DATA
ANNO
CATEGORIA
MODELLO
01
2016
laterale
Valeria 45 Basic
laterale
B
C
D
1
2
A
3
2
1
4
B
A
5
6
C
3
4
This drawing is MVLINE's exclusive ownership, protected by law. Cannot be reproduced or handed over without preventive written consent.
FORMATO
A4
FOGLIO 1 DI 1
SCALA 1:1
VARIANTE
/ /
REVISIONE N.
DATA
ANNO
CATEGORIA
MODELLO
01
2016
laterale
Valeria 45 Basic
laterale
3 mm
DoP
The undersigned
MV LINE s.p.a.
Via Umbria - Lotto 69 70021 Acquaviva delle Fonti (BA), Italy
Hereby declares that the product:
Wind Resistance Class: NPD
also complies to the following EU directives (including all applicable
modifications):
Machinery Directive 89/392/CEE and Norm UNI EN 13561 Appendix ZA.1
Year of CE marking: 2017.
Acquaviva delle Fonti, 01.03.2017
Signature
Paolo Montanaro
(CEO)
EN 13561
17
MV LINE s.p.a.
Via Umbria - Lotto 69 70021
Acquaviva delle Fonti (BA)
Product: INSECT SCREEN
Class: NPD
BORA
This document is an integral part of the product and is intended for
the benefit of all persons using the screen (users + installation and
maintenance operators).
All the instructions listed in this document comply with the EU Ma-
chinery Directive and provides for the correct use, installation and
maintenance of the screen, with the aim of avoiding damage to per-
sons and to the product.
MV LINE would like to congratulate you on your purchase of this
insect screen.
This guide will help you appreciate the advantages of this screen
and assist you during the use, installation and maintenance phases.
The company reserves the right to implement partial or complete
modifications without prior notice and declines any responsibility in
relation to any possible inaccurate or incomplete information.
This guide is the property of MV LINE.
Reproduction (even partial) of this document is expressly prohibi-
ted without prior authorisation from MV LINE.
INTENDED USE
The insect screen is intended, as its name would suggest, to act as a
protective screen against intrusive insects in the room or area whe-
re it has been located. Any other use shall be considered improper.
The manufacturer will not be held responsible for damage arising
from improper, erroneous and irrational use.
PACKAGING, MOVEMENT AND TRANSPORT
• The screens are packaged in transparent bags, cardboard and
polyethylene wrapping which protect the unit during transport.
• The screen can be moved by hand and does not require any special
equipment to facilitate movement.
• Please take every precaution to avoid any possible damage to the
screen.
• After removing the packaging, check that the screen is in perfect
condition and that there are no visibly damaged parts.
If in doubt, do not use the screen and contact the supplier.
ATTENTION!!!
Packaging materials must not be left within the reach of children.
USE
Avoid use (opening and closing of the screen) by children.
MAINTENANCE
Regularly clean the magnetic parts using a damp cloth.
• In the case of wear and tear, lubricate the bearings using a silicone
spray.
• All extraordinary maintenance operations must be carried out by
suitably qualified personnel.
• Spare-parts are available from retailers or directly from MV LINE.
DISASSEMBLY AND DECOMMISSIONING
Before disassembling the screen, please consult the instructions
manual. The screen does not contain dangerous materials. There
are no specific guidelines for decommissioning or disposal.
GUARANTEE
Do not disassemble apparently malfunctioning parts or accessories
on your own initiative, please contact the retailer who shall organise
technical support and spare-parts, failure to do so will aect the
conditions of the guarantee. The guarantee includes the complete
or partial replacement of the unit or parts in the case of functional
issues arising from manufacturing defects and is exempt from da-
mage and deterioration caused by the customer.
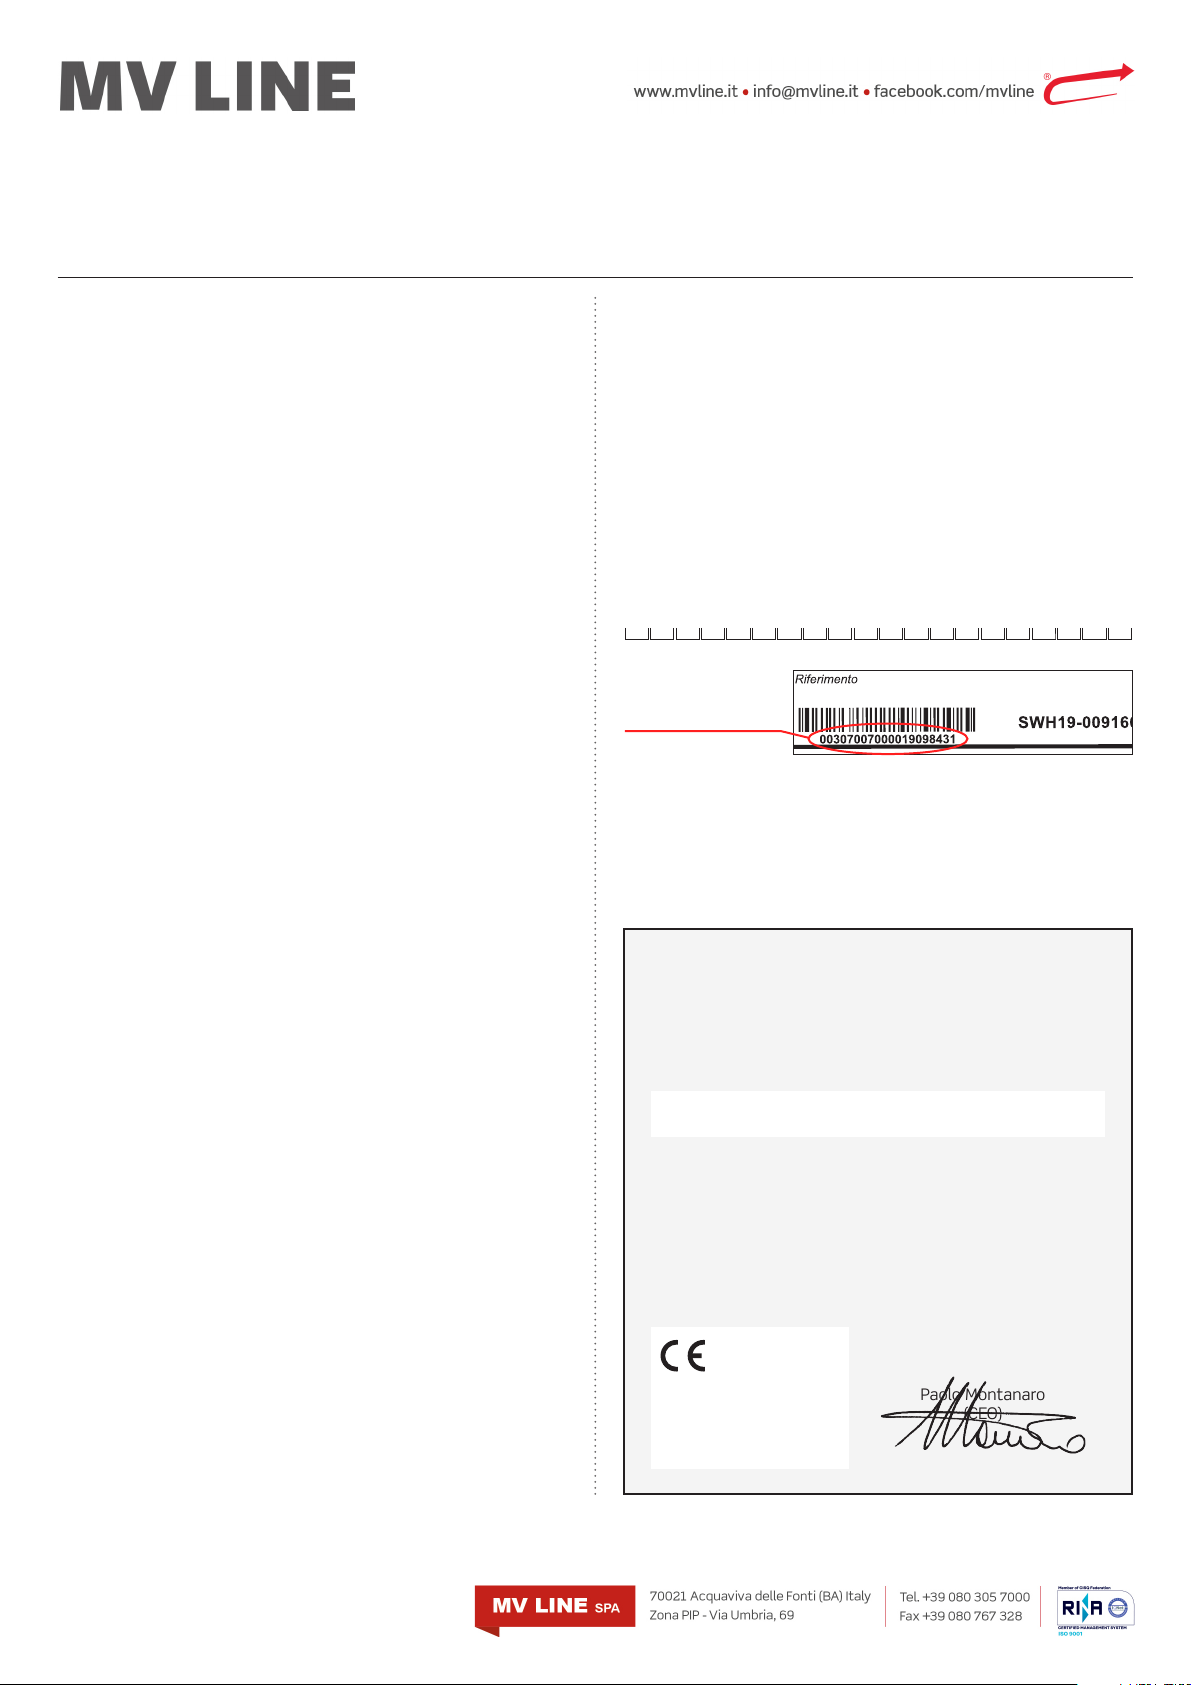
In order to use the guarantee you must copy the INSECT SCREEN
CODE as displayed on the label attached to the screen housing into
the white space below (see fac-simile fig. 1) and attach the relevant
proof of purchase (receipt or invoice).
This screen is guaranteed by MV LINE for a period of 24 months.
Code:
PRODUCT INFORMATION
USE • MAINTENANCE • GUARANTEE
Find and copy the code
displayed on the label
attached to the screen
housing as shown here.
Popular Lawn And Garden Equipment manuals by other brands


Milwaukee
Milwaukee M18 FUEL FOPH-EA Operator's manual

Flowtron
Flowtron Mosquito PowerTrap MT-125 operating instructions

Westermann
Westermann WKB 330 operating instructions

MASSEY FERGUSON
MASSEY FERGUSON 9005 FORTIA - 300-425 brochure

Simplicity
Simplicity 725 manual

OWIM
OWIM Z31913 Operation and safety notes


