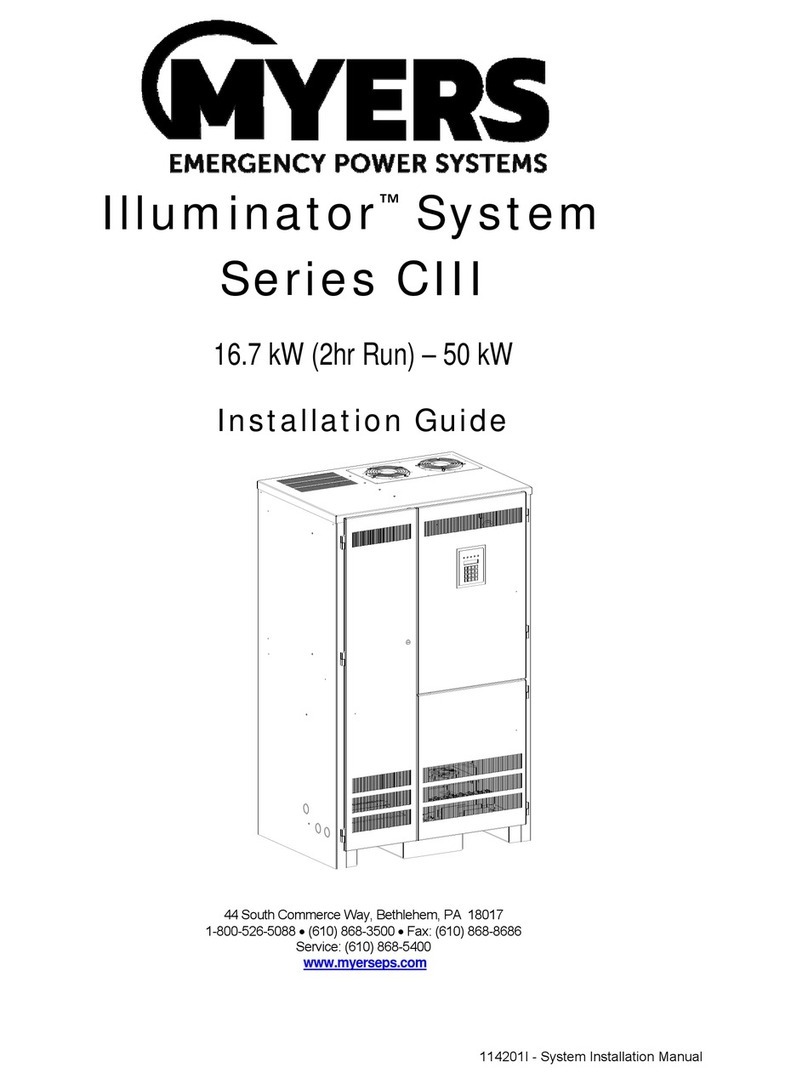
MYERS Illuminator E Series User manual

114061H System Installation Manual
1
This unit contains LETHAL VOLTAGES. All repairs and service should be performed by
AUTHORIZED SERVICE PERSONNEL ONLY! There are NO USER SERVICEABLE
PARTS inside this unit.
IMPORTANT SAFEGUARDS
When using electrical equipment, you should always follow basic safety
precautions, including the following:
1. READ AND FOLLOW ALL SAFETY
INSTRUCTIONS.
2. Do not install the system outdoors.
3. Do not install near gas or electric heaters or in other high-temperature
locations.
4. Use caution when servicing batteries. Depending on battery type, batteries
contain either acid or alkali and can cause burns to skin and eyes. If
battery fluid is spilled on skin or in the eyes, flush with fresh water and
contact a physician immediately.
5. Equipment should be mounted in locations where unauthorized personnel
will not readily subject it to tampering.
6. The use of accessory equipment not recommended by Manufacturer may
cause an unsafe condition and void the warranty.
7. Do not use this equipment for other than its intended use.
8. Qualified service personnel must perform all servicing of this equipment.
SAVE THESE INSTRUCTIONS
The installation and use of this product must comply with all national, federal,
state, municipal, or local codes that apply. If you need help, please call
Service at 1-610-868-5400.

114061H System Installation Manual
2
C A U T I O N
READ ENTIRE MANUAL AND REVIEW ALL DOCUMENTATION BEFORE ATTEMPTING SYSTEM
INSTALLATION!
FOR SERVICE OR INSTALLATION INFORMATION:
TELEPHONE: (610) 868-5400 (24 HR. HOTLINE)
FAX: (610) 954-8227
FOR YOUR PROTECTION....
PLEASE COMPLETE AND RETURN WARRANTY REGISTRATION CARD IMMEDIATELY.

114061H System Installation Manual
3
C H A P T E R 1
SAFETY WARNINGS
Read the following precautions before you install the system.
IMPORTANT SAFETY INSTRUCTIONS
SAVE THESE INSTRUCTIONS. This manual contains important instructions that you should
follow during installation and maintenance of the system and batteries. Please read all instructions
before operating the equipment and save this manual for future reference.
DANGER
This system contains LETHAL VOLTAGES. AUTHORIZED SERVICE PERSONNEL should
perform all repairs and service ONLY. There is NO USER SERVICEABLE PARTS inside the
system.
WARNING
•Do not install the system outdoors.
•Do not install near gas or electric heaters or in other high-temperature locations.
•Use caution when servicing batteries. Battery acid can cause burns to skin and eyes. If acid is
spilled on skin or in the eyes, flush with fresh water and contact a physician immediately.
•Equipment should be mounted in locations where unauthorized personnel do not readily subject
it to tampering.
•The use of accessory equipment not recommended by the manufacturer may cause an unsafe
condition.
•Do not use this equipment for other than intended use.
•Only qualified service personnel (such as a licensed electrician) should perform the system and
battery installation and initial startup. There is a risk of electrical shock.

114061H System Installation Manual
4
C H A P T E R 2
INTRODUCTION
Please read this manual thoroughly before operating your safety system. Keep this manual and
the system User’s Guide in the folder mounted inside the unit’s door.
WARNING
Only qualified service personnel (such as a licensed electrician) should perform the system
and battery installation and initial startup. There is a risk of electrical shock.
Please record your unit’s model number, serial number, and part number below. You can find
these numbers on the label on the inside of the system’s right-hand door.
Model Number __________________________
Serial Number __________________________
Part Number __________________________

114061H System Installation Manual
5
C H A P T E R 3
BEFORE INSTALLING THE UNIT
Installation Dimensions and Clearances
Figure 3.1 System Dimensions
Table 3.1 Dimensions
Unit (A) (B) (C) (D) (E) (F) (G) (H) (J) (K) (L) (M) (N) (P) (R)
Unit #1
47”
(119.60
cm)
30”
(76.34
cm)
25”
(63.62
cm)
22 1/8”
(56.30
cm)
8”
(20.36
cm)
11 ½”
(29.27
cm)
7”
(17.82
cm)
11 ½”
(29.27
cm)
4 3/8”
(11.14
cm)
3 3/8”
(8.59
cm)
9 ¼”
(23.54
cm)
21 ½”
(54.71
cm)
18 7/8”
(47.94
cm)
19 ½”
(49.53
cm)
2”
(5.08
cm)
Unit #2
76”
(193.39
cm)
48”
(122.14
cm)
25”
(63.62
cm)
19 ¾””
(50.26
cm)
18 7/8”
(47.94
cm)
47”
(119.60
cm)
49 5/8”
(126.05
cm)
2”
(5.08
cm)
Table 3.2 Required Clearances
Sides Top Front
0”
(0.0 cm)
12”
(30.5 cm)
39”
(100.0 cm)
Table 3.3 Conduit Knockouts
Larger Smaller
1 ¾” / 2”
(4.45 cm / 5.08 cm)
7/8” / 1 1/8”
(1.59 cm / 2.86 cm)
1
2

114061H System Installation Manual
6
Location Guidelines
Keep the following guidelines in mind when choosing the location for your system and batteries:
•Verify that the environment meets the requirements in “Storage and Operating Environment” on
page 7. The environment can affect the reliability and performance of both the unit and the
batteries.
•Choose a permanent location for the unit. Attempting to move the unit after you have installed the
batteries can damage the batteries and the cabinet.
CAUTION
Do not move the unit after you install the batteries. If you do, the unit and batteries may be
damaged.
CEC requires the unit to be located in a service room. If the room is equipped with a sprinkler
system, the unit must be provided with sprinkler proof covers.
The system should be connected to the emergency generator, if available.
This equipment is heavy. Refer to Table 3.4 when you choose a site to make sure that the floor
can support the weight of the system, the batteries, and any other necessary equipment.
Table 3.4 System weight [in lbs. (kg)]
System Models for 90 Minute run-time
1.5kw 2.25kw
3.0kw 3.75kw
5.0kw 6.0kw 8.0kw 10.0kw
12.5kw 16.7kw
Unit with Standard
SLC Batteries
511
(232)
674
(305)
827
(376)
980
(445)
1168
(530)
1715
(778)
2120
(962)
2561
(1162)
3025
(1373)
3845
(1744)
Unit without
Batteries
215
(97)
230
(104)
235
(107)
240
(109)
280
(127)
605
(274)
640
(290)
785
(356)
805
(366)
885
(401)
System Models for 120 Minute run-time
Unit with Standard
SLC Batteries
674
(305)
827
(376)
980
(445)
1168
(530)
1715
(778)
2120
(962)
2561
(1162)
3025
(1373)
3845
(1744)
Consult
Factory
Unit without
Batteries
230
(104)
235
(107)
240
(109)
280
(127)
605
(274)
640
(290)
785
(356)
805
(366)
885
(401)
885
(401)
Receiving and Moving the Unit and the Batteries
Systems weigh several hundred pounds, (see Table 3.4; ask your sales representative for additional
information). Make sure you are prepared for these weights before you unload or move the unit or the
batteries. Do not install any batteries until you have permanently installed the unit and connected all
conduit and wiring.

114061H System Installation Manual
7
Storage and Operating Environment
Make sure you store and install the system in a clean, cool, dry place with normal ventilation and level
floors.
Storage Temperature
Store the batteries (in the system) at -18 to 40°C (0 to 104°F). Batteries have a longer shelf life if they
are stored below 25°C (77°F). Keep stored batteries fully charged. Recharge the batteries every 90–
180 days. The system without batteries may be stored at -20 to 70°C (-4 to 158°F).
Ventilation
The air around the unit must be clean, dust-free, and free of corrosive chemicals or other
contaminants. Do not place the system or batteries in a sealed room or container.
Operating Temperature
System can operate from 20° to 30°C (68° to 86°F) and up to 95% relative humidity. The batteries’
service life is longer if the operating temperature stays below 25°C (77°F).
Batteries
The temperature should be near 25°C (77°F) for optimum battery performance. Batteries are less
efficient at temperatures below 18°C (65°F), and high temperatures reduce battery life. Typically, at
about 35°C (95°F), battery life is half of what it would be at a normal temperature of 25°C (77°F). At
about 45°C (113°F), battery life is one-fourth of normal.
Make sure that heaters, sunlight, air conditioners, or outside air vents are not directed toward the
batteries. These conditions can make the temperature within battery strings vary, which can cause
differences in the batteries’ voltages. Eventually, these conditions affect battery performance.
Do not allow tobacco smoking, sparks, or flames in the system location because hydrogen is
concentrated under the vent cap of each cell of the battery. Hydrogen is highly explosive, and it is
hard to detect because it is colorless, odorless, and lighter than air.
Every type of battery can produce hydrogen gas, even sealed maintenance-free batteries. The gas is
vented through the vent caps and into the air, mainly when the unit is charging the batteries. The
batteries produce the most hydrogen when maximum voltage is present in fully charged batteries; the
batteries do not produce hydrogen during float charging. The amount of current that the charger
supplies to the batteries (not the battery ampere-hour) determines how much hydrogen is produced.
High Altitude Operation
The maximum operating ambient temperature drops 1°C per 300m (2°F per 1000 ft) above sea level.
Maximum elevation is 3000m (10,000 ft).

114061H System Installation Manual
8
C H A P T E R 4
INSTALLATION OVERVIEW
Figure 4.1 shows typical installations of system. Standard 1.5 kW, 2.25 kW, 3.0 kW, 3.75 kW, 5.0 kW,
6.0 kW, 8.0 kW, 10.0 kW, 12.5 kW, and 16.7 kW models do not have external battery cabinets.
Figure 4.1 Typical Hardwired Installation
Building
Service
Panel
To
Supported
Loads
Building
Service
Panel
To
Supported
Loads

114061H System Installation Manual
9
C H A P T E R 5
AC INPUT &AC OUTPUT INSTALLATION
WARNING
Only qualified service personnel (such as a licensed electrician) should perform the AC
installation. There is a risk of electrical shock.
Read the following cautions before you continue.
CAUTION
•Unit contains hazardous AC and DC voltages. Because of these voltages, a qualified
electrician must install the system, AC line service, and batteries. The electrician must
install the AC line service according to local and national codes and must be familiar
with batteries and battery installation.
•Before you install, maintain, or service the unit, always remove or shut off all sources of
AC and DC power and shut off the system. You must disconnect AC line input at the
service panel and turn off the Installation Switch (S1), the Main AC Input Circuit
Breaker (CB1), and the Battery Fuse(s) to make sure the unit does not supply output
voltage.
•Whenever AC and/or DC voltage is applied, there is AC voltage inside the unit; this is
because the unit can supply power from AC line or from its batteries. To avoid
equipment damage or personal injury, always assume that there may be voltage inside
the unit.
•Remove rings, watches, and other jewelry before installing the AC wiring. Always wear
protective clothing and eye protection and use insulated tools when working near
batteries. Whenever you are servicing an energized unit with the inside panel open,
electric shock is possible; follow all local safety codes. TEST BEFORE TOUCHING!
•To reduce the risk of fire or electric shock, install the unit and its batteries in a
temperature and humidity-controlled indoor area free of conductive contaminants. See
page 7 for operating environment specifications.
1. Open the unit’s doors. Make sure the installation switch and the input circuit breaker are
off, and the battery fuse(s) removed.
2. Look at the ID label on the inside right door. Write down the following information:
Input Voltage: __________
Output Voltage: __________
3. Now, make sure the input and output voltages are what you need. Remember that the
system provides single-phase power only.
•Does the input voltage available for the system at the AC service panel match the
input voltage shown on the unit’s ID label?
Service Panel Voltage = ____________ Input Voltage __Yes /__No
•Does the output voltage on the ID label match the voltage your loads (protected
equipment) need?
Load Voltage = _____________ Output Voltage __Yes/__No
If you answered NO to either of the preceding questions, call SERVICE.

114061H System Installation Manual
10
4. Now, use the information you wrote down in Step 2 to find the correct circuit breaker for
the service panel that is for your system.
Table 5.1 Recommended Circuit Breaker for Maximum Input Current
System Input Voltage (Vac) Max. Current Recommended
Circuit Breaker
1.5 kW
120V
16 amps
20A
1.5 kW
208V
9 amps
15A
1.5 kW
240V
8 amps
10A
1.5 kW
277V
7 amps
10A
2.25 kW
120V
24 amps
30A
2.25 kW
208V
14 amps
20A
2.25 kW
240V
12 amps
15A
2.25 kW
277V
11 amps
15A
3.0 kW
120V
32 amps
40A
3.0 kW
208V
18 amps
25A
3.0 kW
240V
16 amps
20A
3.0 kW
277V
14 amps
20A
3.75 kW
120V
39 amps
50A
3.75 kW
208V
23 amps
30A
3.75 kW
240V
20 amps
25A
3.75 kW
277V
17 amps
25A
5.0 kW
120V
52 amps
70A
5.0 kW
208V
30 amps
40A
5.0 kW
240V
26 amps
35A
5.0 kW
277V
23 amps
30A
6.0 kW
120V
63 amps
80A
6.0 kW
208V
36 amps
45A
6.0 kW
240V
32 amps
40A
6.0 kW
277V
27 amps
35A
8.0 kW
120V
84 amps
100A
8.0 kW
208V
48 amps
60A
8.0 kW
240V
42 amps
50A
8.0 kW
277V
36 amps
45A
10.0 kW
120V
104 amps
125A
10.0 kW
208V
60 amps
80A
10.0 kW
240V
52 amps
70A
10.0 kW
277V
45 amps
60A
12.5 kW
120V
131 amps
175A
12.5 kW
208V
75 amps
90A
12.5 kW
240V
65 amps
80A
12.5 kW
277V
57 amps
70A
16.7 kW
120V
174 amps
225A
16.7 kW
208V
100 amps
125A
16.7 kW
240V
87 amps
110A
16.7 kW
277V
76 amps
100A
WARNING: THE EXTERNAL INPUT CIRCUIT BREAKER PROTECTING THE SYSTEM MUST
BE A “MOTOR START”, DELAYED TRIP TYPE. * IF INPUT AUTO OR INPUT
ISOLATION TRANSFORMER WAS ADDED TO THE SYSTEM. CONSULT
FACTORY. THIS IS DUE TO MAGNETIC INRUSH CURRENT DRAWN DURING
APPLICATION OF AC POWER.

114061H System Installation Manual
11
5. Write down the circuit breaker value that applies to your system from Table 5.1:
__________
6. Now, look at Table 5.2 below, and use the notes below to find the proper gauge wire
for the recommended circuit breaker recorded in step 5.
Table 5.2 Recommended Minimum Wire Sizes
Read These Important Notes! For this Input
Circuit Breaker
Size...
Use this Size 90°C
Copper Wire
This table lists the AWG and mm2 wire size for each circuit breaker size.
The minimum recommended circuit breaker sizes for each model and
voltage application are listed in Table 5.1. The temperature rating of
conductor must not be less than 90° C wire. Based on the ampacities
given in Tables 310-16 of the National Electrical Code, ANSI/NFPA 70-
1993 (Table 2 of the CEC), and NEC article 220 (CEC Section 4). Circuit
conductors, must be the same size (ampacity) wires and equipment-
grounding conductors must meet Table 250-95 of the National Electrical
Code. Code may require a larger wire size than shown in this table
because of temperature, number of conductors in the conduit, or long
service runs. Follow local code requirements.
AWG Mm2
10, 15, 20
12
3.31
25, 30
10
5.26
35, 40, 45
8
8.36
50, 60
6
13.30
70, 80
4
21.15
90, 100
2
33.62
110
1
42.11
125
1/0
53.49
150, 175
3/0
67.43
225
4/0
74.40
7. The input circuit breaker in the input service panel provides the means for disconnecting AC
to the unit. Only authorized persons shall be able to disconnect AC to the unit [see NEC 700-20
and 700-21(CEC Section 46)]. If you are using the input circuit breaker to disconnect AC, you
must make sure that only authorized persons have control of the circuit breaker panel to meet
the requirements of NEC 700-20 (CEC Section 46).
8. Read the following caution, before removing conduit knockouts.
CAUTION
To prevent electrical shock or damage to your equipment, the Installation Switch (S1), the Main
AC Input Circuit Breaker (CB1), and the circuit breaker at the input service panel should all be
turned off. The Main DC Battery Fuse and the Battery Disconnect Fuse(s) (if you have one)
should be removed.
9. Remove knockouts for AC Input and AC Output in the top or left and right side of the system
(See figure 4.1). AC input conductors and AC output conductors must be installed in separate
conduits, and emergency and non-emergency output circuits must be installed in separate
conduits.
CAUTION
Do not drill the cabinet; drill filings may damage the unit and keep it from operating. If you
need larger knockouts, use a chassis punch to punch out the appropriate knockout. Do not
create additional knockouts.
10. Install the conduit. You must run the AC input service conductors and AC output conductors
through separate conduits. Emergency output conductors and non-emergency output conductors
must also be run through separate conduits. Emergency output circuits shall be installed in
dedicated conduit systems and not shared with other electrical circuits as described in NEC 700-
9(b) [CEC Section 47-108].

114061H System Installation Manual
12
The next step explains where to make the AC connections to the system.
INSTALLING AC INPUT WIRES:
11. Connect AC utility from the service panel to the system’s terminal block labeled “INPUT”.
For 2-wire input: connect hot wire to the input block marked “Line”, connect the common
wire to the input block marked “Neutral” and connect the ground wire to the Green/Yellow
terminal block marked “Ground”.
For 3-wire input: connect each hot wire to each of the input block positions marked “Line”,
connect the ground wire to the Green/Yellow terminal block marked “Ground”.
INSTALLING AC OUTPUT WIRES:
12. Connecting load wires without system distribution circuit breakers – connect load wires to the
system’s terminal block labeled “OUTPUT”. Connect hot wire(s) to the output block marked
“Nor. On”, the common wire(s) to the output block marked “Neutral” and the ground wire(s) to
the Green/Yellow terminal block marked “Ground”. Emergency only load hot wires must be
connected to the optional circuit on the output terminal block labeled “Nor. Off”.
Connecting load wires with system distribution circuit breakers – connect the hot wire from each
branch circuit to a circuit breaker, connect the common wire from each branch circuit to the
neutral connection bar and connect ground wire to the Green/Yellow terminal block at the output
for 1.5KW – 5.0KW systems or the ground connection bar for 6.0KW – 16.7KW systems.

114061H System Installation Manual
13
Figure 5.1 AC Connections for 1.5 k W– 5.0 kW systems
Figure 5.2 AC Connections for 6 kW – 16.7 kW systems (5.0 kW system for 120 Minute run-time)

114061H System Installation Manual
14
C H A P T E R 6
INSTALLING BATTERIES AND DC WIRING
WARNING
Only qualified service personnel (such as a licensed electrician) should perform the
battery and DC wiring installation. There is a risk of electrical shock.
This section explains how to install system batteries, fuses, and cables. For all models, you
must install the batteries in the system cabinet. An electrician who is familiar with battery
installations and applicable building and electrical codes should install the batteries.
WARNING
The batteries that will need to be installed in this system could cause you harm or severely
damage the electronics if proper precautions are not followed. Batteries connected in series
parallel configuration could produce lethal voltages with unlimited current. All batteries
should be inspected for damage prior to installation. Never install a battery that is leaking
electrolyte. Battery terminals should be cleaned with a wire brush to remove any oxidation.
All tools should be insulated. Rubber gloves and safety glasses are recommended. IN THIS
SYSTEM BATTERY NEGATIVE IS TIED TO GROUND INSIDE THE INVERTER. This
means that the cabinet and shelves are at ground potential as soon as negative connections
are made to the batteries. It is strongly recommended to make all negative connections to
the batteries the last step to prevent any chance of shorting battery positive to ground. With
the DC fuse(s) removed, make connections to battery positive first, working your way towards
battery negative. Leave individual strings of batteries open at the last battery negative until
all batteries are installed. Then connect each string’s negative.
Safety Instructions
IMPORTANT SAFETY INSTRUCTIONS
SAVE THESE INSTRUCTIONS
This section contains important instructions that a qualified service person should
follow during installation and maintenance of the system and batteries. ONLY a
qualified service person should work with the batteries.
CAUTION
Full voltage and current are always present at the battery terminals. The batteries used
in this system can produce dangerous voltages, extremely high currents, and a risk of
electric shock. They may cause severe injury if the terminals are shorted together or to
ground (earth). You must be extremely careful to avoid electric shock and burns
caused by contacting battery terminals or shorting terminals during battery installation.
Do not touch un-insulated battery terminals.

114061H System Installation Manual
15
A qualified electrician familiar with battery systems and required precautions must
install and service the batteries. Any battery used with this unit shall comply with the
applicable requirements for batteries in the standard for emergency lighting and power
equipment, UL 924 (Canada’s National Building Code). Cabinets are designed to be
used with, and batteries must be replaced with, manufacturer battery number BAT-
CG12105 or a manufacturer approved equivalent (see the battery wiring diagram that
came with the battery cables). If you substitute batteries not supplied by manufacturer,
the unit’s UL (cUL) listing is void and the equipment may fail. Installation must conform
to national and local codes as well. Keep unauthorized personnel away from batteries.
The electrician must take these precautions:
Wear protective clothing and eyewear. For battery systems >48vdc, wear rubber
gloves and boots. Batteries contain corrosive acids or caustic alkalis and toxic
materials and can rupture or leak if mistreated. Remove rings and metal wristwatches
or other metal objects and jewelry. Don’t carry metal objects in your pockets where the
objects can fall onto the batteries or into the system.
Tools must have insulated handles and must be insulated so that they do not short
battery terminals. Do not allow a tool to short a battery terminal to another battery
terminal or to the cabinet at any time. Do not lay tools or metal parts on top of the
batteries, and do not lay them where they could fall onto the batteries or into the
cabinet.
Install the batteries as shown on the battery-wiring diagram provided with the system.
When connecting cables, never allow a cable to short across a battery’s terminals, the
string of batteries, or to the cabinet.
Align the cables on the battery terminals so that the cable lug does not contact any part
of the cabinet even if the battery is moved. Keep the cable away from any sharp metal
edges.
CAUTION
Install the battery cables so the system doors cannot pinch them.
If you are replacing batteries or repairing battery connections, follow the procedure in
the system user’s Guide to shut down your system and remove both AC and DC input
power.

114061H System Installation Manual
16
Before Installing the Batteries
Tools
CAUTION
Always use insulated tools when you work with batteries. Always torque connections to
the manufacturer’s recommendations.
When you work with system batteries, you need the following tools. The tools must
be insulated so they do not short battery terminals to the cabinet. Wear the safety
equipment required by local code whenever the doors are open and whenever you
are working on batteries. Other tools may be necessary for optional batteries.
•Digital volt-ohm meter
•Conductive grease or petroleum jelly
•7/16” socket wrench
•Brush (to apply grease or petroleum jelly to terminals)
•3” extension socket
•Safety equipment required by local codes
•Ratchet
•Torque wrench calibrated in inch-pounds or Newton-meters
•Wire brush
•Safety glasses with side shields
•Electrical tape
Battery Voltage (vdc)
Models 1.5k 2.25k 3.0k 3.75k 5.0k 6.0k 8.0k 10.0k 12.5k 16.7k
Battery Volts for 90
Minute Systems
48v 72v 96v 120v 144v 180v 240v 144v 180v 240v
Battery Volts for
120 Minute
Systems
72v 96v 120v 144v 180v 240v 144v 180v 240v 240v
Battery Cable Sizing
The battery cable or wire used is No. 6 AWG (13.30 mm2) for all applications:
DC Disconnect
Systems have a Main Battery Fuse (F1) inside the cabinet; this fuse lets you remove DC
power from the batteries. Systems (10 KW – 16.7KW) have a fuse in line with the positive
cable leaving each battery string.
Installing and Connecting the Batteries
Battery Wiring Diagram
You should have received a battery-wiring diagram with your system. This battery-wiring
diagram shows how you should install the batteries, make terminal, and fuse connections. Use
the diagram as you follow the steps below.

114061H System Installation Manual
17
Location
The system batteries belong inside the unit. Before you start installing the batteries, you must
install the system in its permanent location. If you have not already done this, see “Location
Guidelines” on page 6 to choose a location.
CAUTION
To prevent damage to your equipment, do not move the system after the batteries are
installed.
To make sure a location is acceptable for the system, review the requirements in Chapter 3.
Electronics Cabinet Battery Block Connections
Do not connect any battery cables at this time. In the following procedure, you should
only make connections to the electronics cabinet’s battery block. Use the battery-wiring
diagram shipped with the system as you follow these steps.
1. Find the positive battery cable that connects to the battery block. At the bare
end of the cable, strip off 0.5” (1.3 cm) of insulation. Connect the cable to the
battery block. Tighten the connection as shown on the battery-wiring diagram.
2. Find the negative battery cable that connects to the battery block. At the bare
end of the cable, strip off 0.5” (1.3 cm) of insulation. Connect the cable to the
battery block. Tighten the connection as shown on the battery-wiring diagram.
Insulate the other end of the cable.
3. If your unit has only has one battery string, go on to the Arranging the Batteries
section.
Repeat step 1 and 2 for units with 2 strings (10 kW, 12.5 kW, and 16.7 kW
systems).
Arranging the Batteries
NOTE As you arrange the batteries, you must be wearing the required safety
equipment.
Arrange the batteries in the cabinet only as shown in the battery-wiring diagram. This
arrangement is designed to maximize airflow around the batteries. The cabinets are
designed so that battery cases should never touch. Air should be free to circulate. Clean
the entire surface of all battery terminals with the wire brush before you install the
batteries to create good contact points.
Load the batteries into the system. Starting with the bottom shelf, load one shelf at a
time.
CAUTION
Never install the batteries in an airtight enclosure.
Connecting the Cables Between Batteries
When you make battery terminal connections, use the torque wrench to tighten the
battery terminal connections securely. You can find out what torque value to use by
finding the battery number on the front of the battery. Then, use Table 6.1 to find the
torque value for that battery.

114061H System Installation Manual
18
Table 6.1 Battery Torque
Battery Type Torque
BAT-CG12105 or SL-12105
Torque to 120 in lbs. (13.6 Nm)
BAT-CG12105A or SL-12105M
Torque to 120 in lbs. (13.6 Nm)
BAT-CG12105B
Torque to 55 in lbs. (6.5 Nm)
BAT-CG12105E or 12AVR100-3ET
Torque to 100 in lbs. (11.3 Nm)
BAT-CG12105G
Torque to 100 in lbs. (11.3 Nm)
BAT-CG12105H or FT12-105
Torque to 110 in lbs. (12.4 Nm)
Now, follow these steps to connect the cables:
1. Using the battery-wiring diagram, determine which batteries belong to each
battery string.
NOTE: For standard 90-minute runtimes, 1.5 kW, 2.25 kW, 3.0 kW, 3.75 kW, 5.0 kW,
6.0 kW and 8.0 kW models have only one battery string. 10.0 kW, 12.5 kW, and
16.7 kW models have two battery strings.
For 120-minute runtimes, 8.0KW model has two battery strings.
2. Clean the cable connectors with the wire brush before you make the battery
connections.
NOTE As you carry out the following step, use these guidelines:
If you are using conductive grease, apply a thin coating of high-temperature
conductive grease on each post and every cable connector before you assemble
and torque the connection to slow corrosion.
If you use nonconductive grease like petroleum jelly, do not apply any grease
before you make the connections and torque them. Instead, make the connection
first; then, torque it to the value shown in Table 6.1. After you make the connection,
apply a coating of the nonconductive grease to the hardware at the battery
terminals.
3. In each battery string, connect the battery cables between the batteries as
shown in the battery-wiring diagram (positive terminal to negative terminal).
Torque the connections to the value shown for your battery in Table 6.1.
4. Connect the battery cables from one shelf to the next as shown on the battery-
wiring diagram.
5. Connect the fuse block to the positive of the battery as shown on the battery-
wiring diagram.
CAUTION
Hazardous voltage is present! System batteries are high current sources. These
batteries can produce dangerous voltages, extremely high currents, and a risk of
electric shock.

114061H System Installation Manual
19
6. Install only the battery fuses (10.0KW – 16.7KW). Next, use the voltmeter to
check the DC voltage between the positive (+) position on the battery block
inside the electronics cabinet and the unconnected battery negative terminal.
This voltage should be approximately the battery voltage record on the unit ID
label. If it is greater than + or – 5% Vdc, review the battery wiring diagram.
Correct any wiring errors and recheck the DC voltage; do not go on until your
measurement is within + or – 5% Vdc. If the measurement is too high and you
cannot find the cause of the problem, call SERVICE.
CAUTION
If you do not verify that voltage and current direction are correct, the equipment may
fail.
Connecting the Negative Battery Cable(s) to the Battery String(s)
Remove the insulation from the cable that was put on in step 2 of “Electronics
cabinet battery block connections”. Connect the cable to the battery (-) negative.
Repeat this step for systems with 2 strings.
Replacing the Batteries
CAUTION
A battery can present a risk of electrical shock and high short circuit current. A qualified
electrician familiar with battery systems should service the batteries.
Review all the safety instructions at the beginning of this chapter before you replace any
batteries.
Use the Same Quantity and Type of Battery
CAUTION
You must use the same quantity and type of battery. Substituting batteries not supplied
by manufacturer voids the UL (CUL) listing and may cause equipment damage.
To ensure continued superior performance of your system and to maintain proper charger
operation, you must replace the batteries in the system with the same number of batteries.
These batteries must be the same types as the original batteries. The replacement batteries
should have the same voltage and ampere-hour rating as the original batteries.
Handle Used Batteries with Care!
Assume that old batteries are fully charged. Use the same precautions you would use when
handling a new battery. Do not short battery terminals or the battery string with a cable or tool
when you disconnect the batteries! Batteries contain lead. Please dispose of old batteries
properly.
This manual suits for next models
21
Table of contents
Other MYERS Industrial Electrical manuals
Popular Industrial Electrical manuals by other brands

Murata
Murata GRT188R61E105KE13 Series Reference sheet

Murata
Murata GRM0335C1H6R1CA01 Series Reference sheet

Murata
Murata GQM1885C1H100JB01 Series Reference sheet

Eaton
Eaton MSFA-PI Series Instruction leaflet

ION Optix
ION Optix C-Pace EP Manual for installation

Siemens
Siemens 38-3AH3-GTD instruction manual

COMEXIO
COMEXIO IO-Server manual

Schrack
Schrack LSZ00113 operating instructions

Murata
Murata GRM0335C1E6R2BA01 Series Reference sheet

Siemens
Siemens SIRIUS 3RV19 Series Original operating instructions

Murata
Murata GRM21BR71E474KA01 Series Reference sheet

Murata
Murata GRM033R60G474ME90 Series Reference sheet