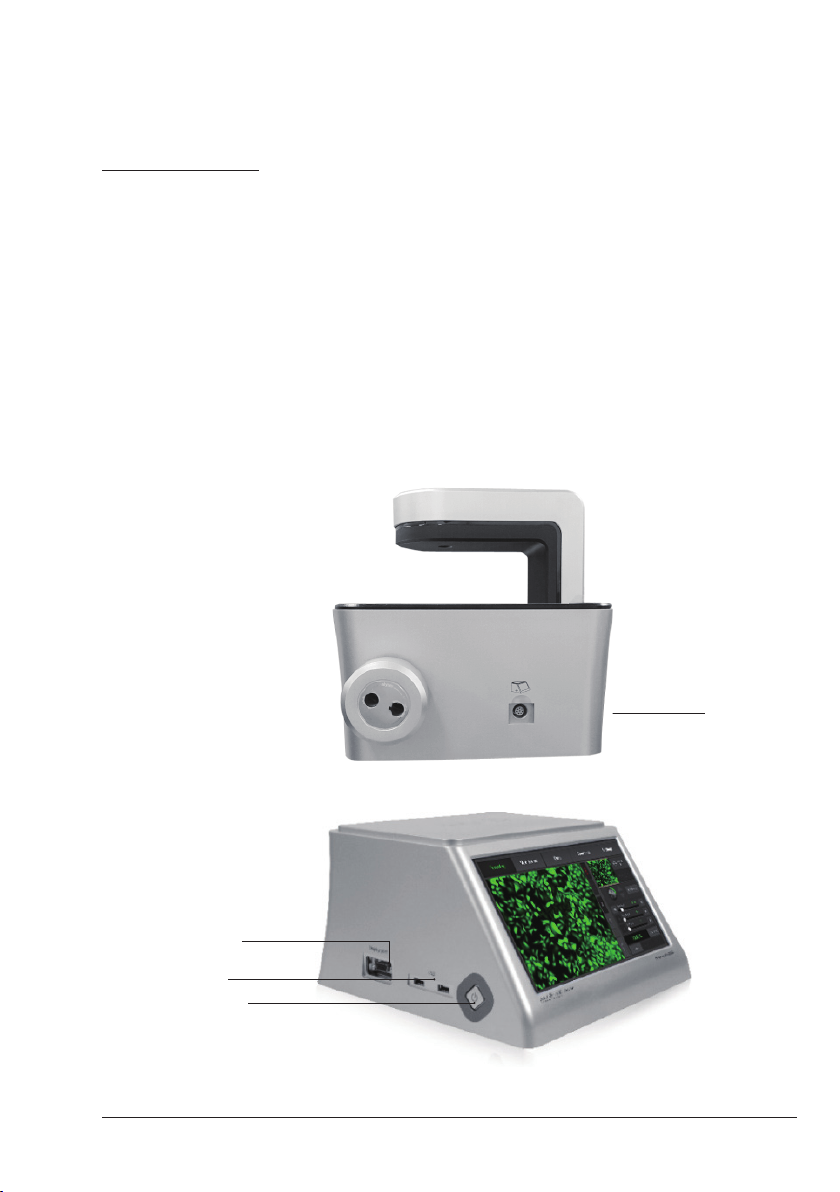
NanoEnTek JuLI FL User manual

Fluorescence Cell History Recorder
User
Manual
FL
NanoEnTek Inc. (HQ)
12F, 5, Digital-ro 26-gil, Guro-gu, Seoul, 08389, Korea
Tel. +82-2-6220-7940
Fax. +82-2-6220-7721
NanoEnTek USA Inc.
5627 Stoneridge Drive Suite 304, Pleasanton, CA 94588, USA
Tel : +1-925-225-0108, +1-888-988-0108(Toll free)
Fax : +1-925-225-0109
Email
Website
www.nanoentek.com
NESMU-JUF-001E (V.1.0)
FL

Product components
Product overview
Installation
Description
Operation
Focusing
Adjust the focus
Auto focus
ROI Auto focus
Confluence
Bright image capture
Fluorescence image capture
Merged image capture
Monitoring
Data
Open data
Screenshot
Save to USB
Rename
Delete
Counting
Sample-preparation
Auto focus
Bright counting
Fluorescence counting
Save to USB
Settings
Set up parameter
Control LED power
Setup date & time
Set up dilution factor
Set up image format
Update software & firmware
Check the disk space
PC software
Introduction
Installation
Function guide
Home
Open data
Dual project creation
Export data
Confluence
Edit movie file
Recount bright data
Recount fluorescence data
Dual view
Cleaning & Maintenance
Troubleshooting
Warranty
Safety precautions
Product specifications
Ordering information
Technical support
4
5
6 - 7
8 - 13
14 - 61
14 - 22
14 - 15
16
17
18-19
20
21
22
23 - 26
27 - 33
27 - 28
29
30
31
32 - 33
34 - 41
34
35
36 - 37
38 - 40
41
42 - 46
42
43
43
43 - 44
44
45
46
47 - 63
47
47 - 48
49
50
50 - 52
53
54
55
56
57 - 58
59 - 61
62 - 63
64
65 - 66
67
68 - 69
70
71
72
Table of contents
JuLITM FL, Fluorescence Cell History Recorder ©2013 NanoEnTek Inc. 3

Counting slide holder
1 EA
Product components
JuLI™ FL is shipped with the following components.
Please check all components listed below when an instrument was delivered.
If any item is missing or damaged, contact your local distributor or e-mail
· Model JULI-FGSC or JULI-FRSC <Scope unit> are only used in conjunction with the JULI-BFST <Station unit>.
Scope unit
JULI-FGSC or JULI-FRSC
1 EA
USB drive
4 GB
1 EA
Station unit
JULI-BFST
1 EA
User manual
1 EA
Power cord
4 pcs/set, for U.S./Canada/
Taiwan/Japan, Europe or UK
1 SET
Quick manual
1 EA
Connection cable
3 M
1 EA
Cell counting slide
(with 1.5 mL of trypan blue (0.4%))
1 Box
Cat No. JULI-BRS50
4

Product overview
The JuLI™ FL uses states-of-the-art optics to get live-cell images from various cell
culture dishes and can perform cell-based assays, including cell counting, cell viability,
and quantitative analysis of GFP/RFP expression. It is able to detect the quantified
cell confluence results with low variation and make a growth curve using image based
analysis.
JuLI™ FL is able to capture sequential time-lapse images which can be converted to
movie files (.avi) automatically. The compact design allows you to install the system
in your cell-culture incubator easily. It can be used to compare the control and the
experimental samples using the dual systems (*optional) concurrently.
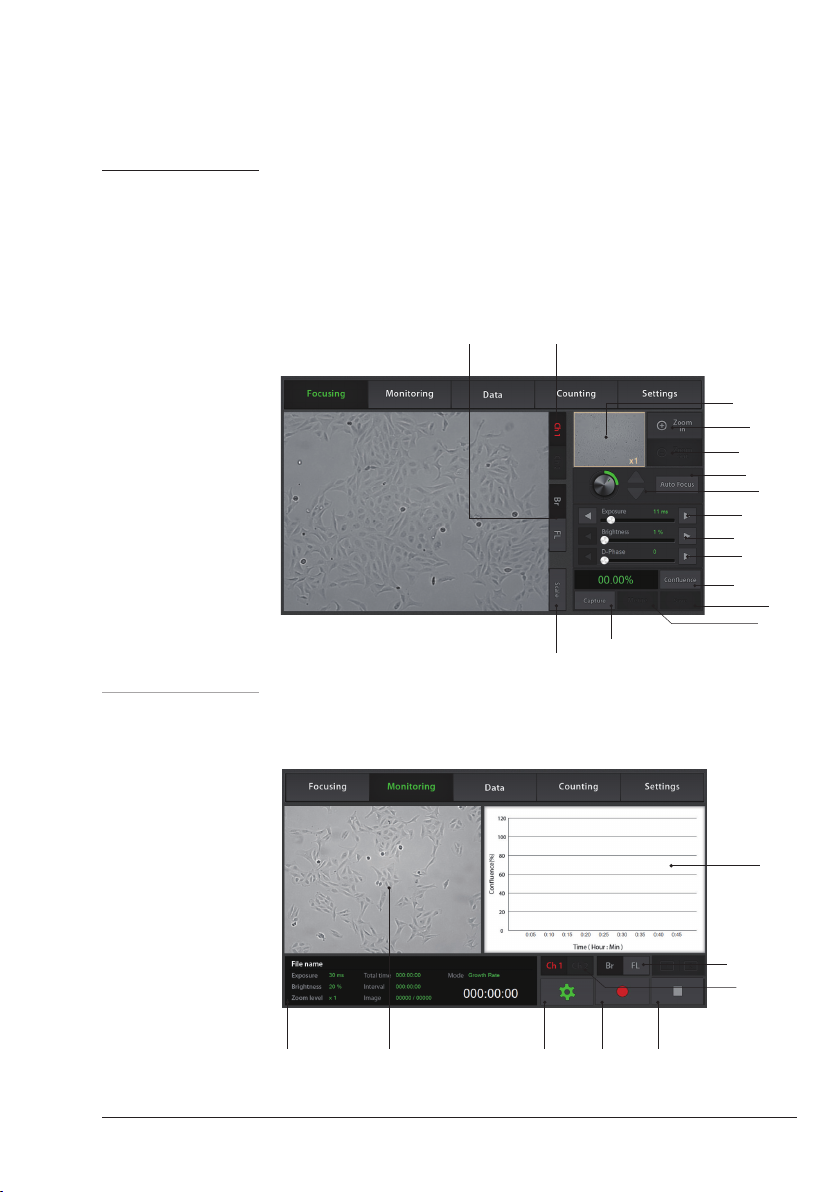
Features of JuLI™ FL,
Fluorescence live cell movie analyzer:
Versatility
• Time-lapse image capturing & making a movie
• Cell counting and viability
• GFP or RFP expression level checking
• Dual system available for comparative cell analysis (*optional)
Accuracy
• Automated confluence detection & growth curve
• Semi auto-focusing with low variations
Ease of use
• Intuitive graphic user interface & LCD touch screen
• Compact size optimized for an cell culture incubator
• Simple steps for the system setups and the operations
• No calibration & maintenance required
JuLITM FL, Fluorescence Cell History Recorder ©2013 NanoEnTek Inc. 5

Installation
Installing
JuLI™ FL
Live-cell images from various cell culture dishes are directly
captured in a cell culture incubator.
This compact design allows an instrument to be installed in
an incubator, and prevents the contamination by maintaining
a sterile environment. Also, the intuitive graphic user interface
provides quick and convenient use in a cell culture incubator
while capturing time-lapse imaging.
IMPORTANT
JuLI
™
FL is optimized into standard size of cell culture incubator.
It is recommend that the temperature should be stabilized in case of a small size incubator
before using the instrument.
Avoid exposing JuLI™ FL to UV light.
UV light may degrade components, including plastics. Damage from UV exposure is not
covered under the manufacturer’s warranty.
Always wipe surfaces with ethanol-soaked paper towels.
Do not directly spray ethanol anywhere on JuLI™ FL.
Dimensions of Scope unit
Width
Depth
Height
Weight
Size
300 mm
190 mm
188 mm
4.5 kg
Station unit
6

1. Place the instrument on a flat, dry, and level surface after
unpacking the instrument. Allow at least 10 cm (4 inches) of free
space at the back of JuLI™ FL for the proper ventilation and the
prevention of overheating of electronic components.
2. Plug the supplied power cord into the station unit of JuLI™ FL.
3. Connect a scope unit to a station unit using the supplied
connection cable.
(*For dual monitoring, the 2nd scope unit also should be connected to the station
unit.)
4. Plug the power cord into the electrical outlet. Be sure to only
use the power cord supplied with the instrument. Powering the
instrument with an unapproved power cord may damage the
instrument.
5. When JuLI™ FL is ready to use, start JuLI™ FL by turning
the ON/OFF switch on and pressing the Power button on the
station unit.
Installation
Installing
JuLI™ FL
2. 3. 3.
IMPORTANT
Connect to the 2nd scope unit after connecting to the 1st scope unit completely.
JuLITM FL, Fluorescence Cell History Recorder ©2013 NanoEnTek Inc. 7

Description
Front view <Scope unit>
Focus knob
: is used to adjust the image quality to obtain better cell images.
Stage
: place sample here.
LED
: JULI-FLG04 : Green, Bright
: JULI-FLR04 : Red, Bright
<Station unit>
LCD touch screen
: Contains buttons for necessary functions and displays the images.
LED
Stage
< Scope unit >
< Station unit >
Neck
Focus knob
LCD
touch screen
8

Description
Side view <Scope unit>
Connection port
: connects scope unit with station unit.
<Station unit>
Power button
: turn an instrument on and off by pressing the Power button.
USB Port
: Connect a USB drive to save and transport images to PC.
Display port (CRT port)
: connect to external monitor. (resolution: 1366 X 768 pixels)
: make sure to turn off an instrument before connecting.
< Scope unit >
< Station unit >
Connection port
USB port
Display port
Power button
JuLITM FL, Fluorescence Cell History Recorder ©2013 NanoEnTek Inc. 9

Description
Rear view <Scope unit>
Fan
: is machinery cooling system.
<Station unit>
Power inlet
: connects JuLI™FL to an electrical outlet using the supplied
power cord and the appropriate plug (based on the electrical outlet
configuration in your country).
On/off switch
: is main power switch. It is not necessary to use the on/off switch for
day-to-day operation of the instrument.
Connection port
: connects the scope unit with the station unit.
< Scope unit >
< Station unit >
Fan
Power inlet
On/off switch
Connection port
10

The user interface of JuLI™ FL, a fluorescence live cell movie
analyzer, provides new tools to expand cellular research through
proprietary software. Insightful data can be acquired, such as
proliferation assays.
Focusing menu
Monitoring menu
Description
User
interface
Focusing menu
User
interface
Monitoring menu
Zoom in
Navigation
Zoom out
Focus
interface
Exposure
D-phase
Auto focus
Brightness
Save
Scale bar
Capture
Confluence
Merge
Graph
Br/FL mode
Scope unit
channel
Monitoring
setting
Monitoring data
infomation
Monitoring
movie
Rec. button Stop button
Scope unit channelBr/FL mode
JuLITM FL, Fluorescence Cell History Recorder ©2013 NanoEnTek Inc. 11

Data menu
Settings menu
Description
User
interface
Data menu
User
interface
Settings menu Scope unit
channel
Sensitivity
& Background level
Dilution
factor
Image
format
S/W
version
F/W
version OS
version
Disk space Date & Time
information
LED
power
Monitoring data information Zoom bar Screen
shot
Delete
button
Save to
USB
button
Multi select
button
Rename
button
Monitoring movie
Graph
Data list
12

Description
User
interface
Counting menu
Counting menu is a JuLI™ FL Counting software which can be
used with various cell types giving the accurate and fast counting
results in both the bright and the fluorescence modes.
1. Bright counting : to check for the cell viability by trypan blue
staining method.
2. Fluorescence counting : to check for the rate of the
fluorescence expression to the whole cells.
Counting menu
Features of JuLI™ FL Counting S/W:
Applicable for broad range of cell sizes and types:
Provides data on cell size and is compatible with a wide variety of eukaryotic cells
without the need for any special changes between large or small sizes.
Measures cell measurement ranging from 1 × 10⁴to 1 × 10⁷cells/mL, optimal
measurement range from 1 × 10⁵to 4 × 10⁶cells/mL, and cells with sizes ranging
from 5 µm to 60 µm.
Innovative Auto focusing technology:
Allows to get the optimized focus without variation of manual focus.
Accurate and fast counting result:
Provides counting result without focus variation and regardless of clumped cells in
less than 10 seconds
(Guaranteed the results and counting time using Auto focus function.).
Exposure
bar
Brightness
bar
Br/FL mode
Scope unit
channel
Zoom in/out
Graph
Setting bar of
min. & max.
cell size
Counting
result
Auto focusing
Focus
interface
Bright
counting button
Fluorescence
counting button
Save to
USB button
JuLITM FL, Fluorescence Cell History Recorder ©2013 NanoEnTek Inc. 13

1. Press the Power button to start JuLI™ FL.
The main screen will be displayed.
2. Place the sample on the stage.
3. Check the channel by pressing the Channel tab if the 2nd
scope is connected. Select the Bright or the Fluorescence mode.
4. To adjust illumination intensity, use the Exposure and
Brightness bar on the touch screen.
Touch the arrow button (◀|▶) for more
minute adjustment.
5. If necessary, use the Zoom in button
to magnify the desired region.
(» The scale of enlargement can be checked by
pressing Scale button.)
6. Tap a point on the navigation window or drag preview window
to move the viewing region.
Operation
Focusing
Adjust the focus
14

7. While viewing cells, adjust the focus using the Focus knob or
Focus interface.
Operation
Focusing
Adjust the focus
· Type of the focus interface would be switched by tapping the circle point.
· Coarse focus is a larger knob which moves up or down rapidly to get
the sample into coarse focus. Fine focus is a smaller knob which moves
short distances slowly and is used to get the sample in sharp focus.
The images below show the reference images to adjust focus.
< coarse focus interface >
Good setting Exposure 4
Brightness 1
Normal setting Exposure 6
Brightness 3
Bad setting Exposure 6
Brightness 5
< fine focus interface >
Du-145 / Parameter A
JuLITM FL, Fluorescence Cell History Recorder ©2013 NanoEnTek Inc. 15

1. Adjust the focus of JuLI™ FL (Refer to page 14 - 15)
2. After adjusting focus, press the Auto focus button to get more
accurate focus without individual variations
· The Auto focus is the auto-focusing function which automatically senses the focus
optimized for the analysis software of the JuLI™ FL
Operation
Focusing
Auto focus
x1
IMPORTANT
It is strongly recommended to use Auto focus function after adjusting a focus. If not, it might
be the cause of, incorrect counting results or viability
16

1. Adjust the focus of JuLI™ FL (Refer to page 14 - 15)
2. Touch the region of interest cell by hand on the screen
· The ROI Auto focus is the auto-focusing function which automatically
senses the focus optimized for the analysis software of the JuLI™ FL
Operation
Focusing
ROI Auto focus
x1
IMPORTANT
It is strongly recommended to use ROI Auto focus function after adjusting a focus. If not, it might
be the cause of, incorrect counting results or viability
JuLITM FL, Fluorescence Cell History Recorder ©2013 NanoEnTek Inc. 17

x1
x1
Operation
Focusing
Confluence
(Bright mode only)
1. Adjust the focus of JuLI™ FL (Refer to page 14-15).
2. Press the Confluence button (Bright mode only).
3. Value of confluence would be shown.
· If the value of confluence should be more accurate, try again after adjusting
parameters in the Setting menu (Refer to page 40).
The parameter is the recommended values for corresponding to cell line.
The default value is A.
· To recalculate, press the Confluence button after pressing Preview button first.
4. If necessary, press the Save button to save the captured
image. Type the file name in the blank.
18

5. Check the confirmation message ‘Capture complete’.
Saved data can be checked in the Data menu (Refer to page 27).
Operation
Focusing
Confluence
(Bright mode only)
The images below show the guidelines for the focus to obtain an
accurate cell confluence. (Bright mode only)
Du-145 / Parameter A
Good setting
Exposure 4
Brightness 1
Normal setting
Exposure 6
Brightness 3
Bad setting
Exposure 6
Brightness 5
Confluence 35.11%
Confluence 36.22%
Confluence 43.03%
JuLITM FL, Fluorescence Cell History Recorder ©2013 NanoEnTek Inc. 19

1. Adjust the focus of JuLI™ FL (Refer to page 14-15).
2. Press the Br button and the Capture button to acquire an image.
· Press the Preview button to recapture if necessary.
3. If necessary, press the Save button to save the captured
image. Type the file name in the blank.
4. Check the confirmation message ‘Capture complete’. Press
the OK button.
5. Saved data can be checked in Data menu (Refer to page 27).
Operation
Focusing
Bright image
capture
x1
x1
20

1. Adjust the focus (Refer to page 14-15).
2. Press the FL button and the Capture button to acquire an image.
· Press the Preview button to recapture if necessary.
3. If necessary, press the Save button to save the captured
image. Type the file name in the blank.
4. Check confirmation message ‘Capture complete’. Press the
OK button.
5. The saved data can be checked in Data menu (Refer to page 27).
Operation
Focusing
Fluorescence
image capture
x1
x1
JuLITM FL, Fluorescence Cell History Recorder ©2013 NanoEnTek Inc. 21
Table of contents
Other NanoEnTek Voice Recorder manuals