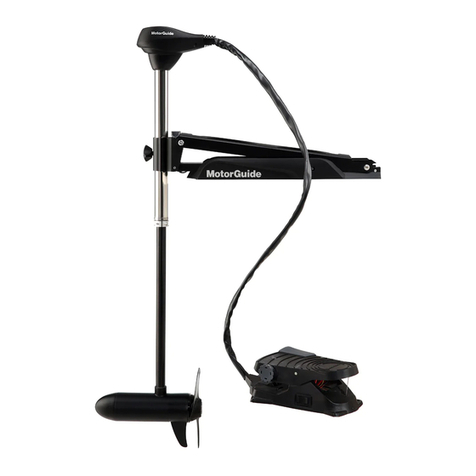
Nash BoatLife 45lb User manual

USER MANUAL
ELECTRIC ENGINES
45lb
65lb
Boatlife Electric Engines Instructions.indd 1Boatlife Electric Engines Instructions.indd 1 04/10/2022 10:0204/10/2022 10:02

2
DEPTH ADJUSTMENT
The depth of the propeller can be adjusted up and down by loosening the
depth collar tension knob (Fig. C) located on the column. Set the motor to
the desired depth then re-tighten the tension knob securely.
STEERING TENSION ADJUSTMENT
To adjust the steering resistance of your motor, simply tighten or loosen the
tension knob on the side of the mounting bracket.
ON/OFF SPEED CONTROL
Speeds can be selected by turning the handle clockwise for forward
speeds or anti-clockwise for reverse speeds. To disengage the propeller
centre the handle between forward and reverse speeds.
ADJUSTING THE CONTROLLER HEAD
Loosen the handwheel at the base of the controller head. This will allow
the head to move up to 45 degrees either up or down depending on the
steering position required.
ASSEMBLING THE PROPELLER
1. Place the Prop Aligner Pin (1) into the small hole of the prop bolt.
2. Place the propeller (2) onto the bolt making sure to align the pin with
the groove in the propeller.
3. Screw Prop Nut (3) on and tighten securely by holding the propeller
with your hand whilst tightening the nut with the Propeller Wrench
(Fig. D)
REPLACING THE PROPELLER
WARNING: Always ensure the battery is disconnected before replacing the
propeller.
1. Hold the blade and loosen the nut using the Propeller Wrench (Fig. D).
2. Remove the nut and propeller.
3. If propeller is stuck, hold one blade by hand and tap on the back side
of the other blade with a hard blunt object.
(EN) Congratulations purchasing a Nash Boat Life Electric Engine.
Register your engine to benet from an extended 24 month warranty
here: https://register.nashtackle.co.uk
NOTE: For registration you will be required to upload a photo or
scanned copy of your proof of purchase. The serial number is found
on the engine.
LOOSEN
45˚
LOOSEN
45˚
FIG A FIG B FIG C
WARNING: Always ensure the battery is disconnected until the engine is in the correct
position and ready to use.
FITTING THE ENGINE
Attach the engine to the stern of the boat via the mounting bracket. Make sure to tighten both mounting bolts securely (Fig. A). To adjust the angle of
the motor, hold the motor head with one hand and depress the positioning pin with your other hand. Press and hold the pin until the desired angle has
been reached. Release the pin and check the mechanism engages securely (Fig. B)
Caution: When adjusting the tilt angle of the motor, never put your hands between the shaft and the hull of the boat. This may cause injury. When
mounting or detaching the motor, make sure that the battery is rst disconnected.
1
2
3
Boatlife Electric Engines Instructions.indd 2Boatlife Electric Engines Instructions.indd 2 04/10/2022 10:0204/10/2022 10:02

3
4. If necessary, repeat the procedure for the other blade until the propeller comes off.
5. If propeller pin is bent, replace it. Align pin (Fig. E) when retting propeller and tighten nut securely.
Caution: Do not strike a bent propeller pin with a hammer to remove it, damage may occur that would not be covered by your warranty.
BATTERIES AND CHARGING
The recommended battery is a 12 volt deep cycle marine leisure battery.
WARNING: Be sure that all switches are in the OFF position before connecting the battery to the engine
MAINTENANCE
WARNING: Always ensure the battery is disconnected before any inspection, cleaning or maintenance of your engine.
• Clean behind propeller after every use. Check for shing line, vegetation or debris.
• Lubricate the mount and column every 2 weeks, apply a few drops of light machine oil at pivotal points.
• Clean electrical connections every month, inspect for loose or corroded terminals and frayed wires.
• Clean terminals with a wire brush and replace any frayed wires.
• Lack of maintenance may cause excessive heat and loss of power.
• Check all nuts, bolts and screws regularly, and physically check all hardware for tightness and security.
• Be sure to choose a well ventilated and dry location when storing the motor for long periods.
• Never leave the motor outside, as this may cause damaged to the magnet of the driving unit.
TROUBLESHOOTING
Loss of Power
• Propeller may be fouled.
• Ensure battery is disconnected.
• Remove propeller, clean and replace.
• Battery connections may be corroded. Clean with a wire brush and reconnect.
• Battery has low voltage. Recharge and check for bad cell.
• Water in lower unit will cause the lubricant to thicken and slow the motor.
Motor drains battery
• Line behind propeller.
• Ensure battery is disconnected.
• Remove propeller and check for line or weeds.
• Short or bad connection in wiring. Check wires in top housing.
• Battery has bad cell or has lost signicant capacity due to extensive use.
Motor makes excessive noise or vibration
• Propeller fouled.
• Ensure battery is disconnected.
• Remove propeller, clean and replace.
• Check to see if propeller is secure. Check propeller nut and tighten if required.
• Bent armature. Remove propeller, set a medium speed and watch armature for wobble.
• Turn propeller by hand. It should turn freely with a slight magnet drag.
FIG D FIG E
Boatlife Electric Engines Instructions.indd 3Boatlife Electric Engines Instructions.indd 3 04/10/2022 10:0204/10/2022 10:02

4
Motor is hard to steer
• Loosen the knob on the side of the mounting bracket, then re-adjust and apply some lubricant.
If after the usual checks the problem persists, do not open the motor as your warranty will be void.
If you have a problem with your engine that is covered by the warranty you should proceed as follows:
1. Contact your place of purchase and explain the problem.
2. The retailer will need to contact [email protected] with a photograph and explanation of the problem along with proof of purchase.
3. We will conrm if the problem is covered by the warranty.
4. Once conrmed the retailer needs to send a courier return request to Support Department and we will arrange collection of the engine.
5. We will then review the engine and arrange repair or replacement accordingly.
WARRANTY TERMS
The warranty does not extend to wearing parts, e.g. graphite brushes or shearing pins. The warranty is limited to non-commercial use of the motor and
does not apply in the case of user error, accidents, improper repair or modication.
Customer Responsibilities
The warranty on the motor does not cover items that have been subjected to operator abuse or negligence. To
receive full benet from the warranty, the operator must maintain the motor as instructed in this manual.
3
4
5
6
2
7
8
10
13
11
9
1
12
1. Top Cover
2. PCB
3. Handle Assembly
4. Bottom Cover
5. Shaft
6. Depth Collar
7. Mounting Bracket
8. Motor
9. Prop Aligner Pin
10. Prop
11. Prop Nut
12. Battery Cable
13. Anode
Boatlife Electric Engines Instructions.indd 4Boatlife Electric Engines Instructions.indd 4 04/10/2022 10:0204/10/2022 10:02

5
(FR)
RÉGLAGE DE LA PROFONDEUR
La profondeur de l’hélice peut être ajustée vers le haut et vers le bas en
desserrant le bouton de tension du collier de profondeur (Fig. C) situé
sur la colonne. Réglez le moteur à la profondeur désirée, puis resserrez
fermement le bouton de tension.
RÉGLAGE DE LA TENSION DE LA DIRECTION
Pour régler la souplesse dans la direction de votre moteur, serrez ou
desserrez simplement le bouton de tension sur le côté du support de
montage.
MODE MARCHE/ARRÊT ET CONTRÔLE DE LA VITESSE
Faites varier la vitesse en tournant la poignée dans le sens des aiguilles
d’une montre pour les vitesses avant ou dans le sens inverse pour les
vitesses arrière. Pour stopper l’hélice, centrez la poignée entre les vitesses
avant et arrière.
RÉGLAGE DE LA TÊTE DE CONTRÔLE
1. Placez la goupille d’alignement (1) dans le petit trou du boulon
d’hélice.
2. Placer l’hélice (2) sur le boulon en veillant à aligner la goupille avec la
rainure de l’hélice.
3. Vissez l’écrou d’hélice (3) et serrez fermement en tenant l’hélice avec
votre main tout en serrant l’écrou avec la clé à hélice (Fig. D)
REMPLACEMENT DE L’HÉLICE
ATTENTION: Veillez toujours à ce que la batterie soit débranchée avant de
remplacer l’hélice.
1. Tenez la lame et desserrez l’écrou à l’aide de la clé à hélice (Fig. D).
2. Retirez l’écrou et l’hélice.
3. Si l’hélice est coincée, tenez fermement une pale avec une main et
tapez sur le dos de l’autre pale avec un objet contondant.
4. Au besoin, recommencez jusqu’à ce que l’hélice se détache.
5. Si l’axe d’hélice est tordu, remplacez-le. Alignez la goupille (Fig. E)
lors du remontage de l’hélice et serrez bien l’écrou.
Félicitations pour votre achat d’un moteur électrique Nash Boat Life.
Enregistrez votre moteur pour bénécier d’une extension de garantie
de 24 mois ici: https://register.nashtackle.co.uk
NOTE: Pour vous inscrire, vous devrez télécharger une photo ou une
copie scannée de votre preuve d’achat. Le numéro de série se trouve
sur le support moteur.
45˚
DESSERRER
45˚
FIG A FIG B FIG C
ATTENTION: Assurez-vous toujours que la batterie est débranchée jusqu’à ce que le
moteur soit dans la bonne position et prêt à l’emploi.
MONTAGE DU MOTEUR
Fixez le moteur à la poupe du bateau via le support de montage. Assurez-vous de bien serrer les deux boulons de montage (Fig. A). Pour régler l’angle
du moteur, tenez la tête de celui-ci d’une main et appuyez sur la goupille de positionnement de l’autre main. Maintenez-la enfoncée jusqu’à atteindre
l’angle souhaité. Relâchez la goupille et vériez que le mécanisme s’enclenche correctement (Fig. B)
Mise en garde: Lors du réglage de l’angle d’inclinaison du moteur, ne placez jamais vos mains entre l’arbre et la coque du bateau, vous risqueriez de
vous blesser. Lors du montage ou du démontage du moteur, assurez-vous d’avoir bien débranché la batterie.
1
2
3
DESSERRER
Boatlife Electric Engines Instructions.indd 5Boatlife Electric Engines Instructions.indd 5 04/10/2022 10:0204/10/2022 10:02

6
FIG D FIG E
Mise en garde: Ne jamais utiliser un marteau pour retirer un axe d’hélice tordu car vous risqueriez de créer des dommage non pris en charge par la
garantie.
BATTERIE
La Il est recommandé d’utiliser une batterie marine à cycles lents d’une puissance de 12 volts.
ATTENTION: Assurez-vous que tous les interrupteurs sont en position OFF avant de connecter la batterie au moteur.
MAINTENANCE
ATTENTION: Assurez-vous toujours que la batterie est débranchée avant toute inspection, nettoyage ou entretien de votre moteur.
• Nettoyez l’arrière de l’hélice après chaque utilisation. Vériez la présence de morceaux de ls, d’herbe ou de débris divers.
• Lubriez le support et la colonne toutes les 2 semaines en appliquant quelques gouttes d’une huile adaptée à la mécanique.
• Nettoyez les connexions électriques tous les mois en inspectant les bornes desserrées et les ls en mauvais état.
• Nettoyez les bornes avec une brosse métallique et remplacez les ls abîmés.
• Le manque d’entretien peut provoquer une surchauffe du moteur ainsi qu’une importante perte de puissance.
• Contrôlez régulièrement tous les écrous, boulons et vis et vériez l’étanchéité et la sécurité de tout le matériel.
• Assurez-vous de choisir un endroit bien aéré et sec lorsque vous entreposez le moteur pendant de longues périodes.
• Ne laissez jamais le moteur à l’extérieur, cela pourrait endommager l’aimant de l’unité d’entraînement.
DÉPANNAGE
Perte de puissance
• L’hélice peut être encrassée.
• Assurez-vous que la batterie est débranchée.
• Retirez l’hélice, nettoyez-la et replacez-la.
• Les connexions de la batterie peuvent être oxydées. Nettoyer avec une brosse métallique et reconnecter.
• La batterie a une faible tension. Rechargez et vériez qu’il n’y a pas de cosse défectueuse.
• De l’eau inltrée dans l’unité inférieure fera épaissir le lubriant et ralentira le moteur.
Le moteur décharge la batterie
• Du l s’est logé derrière l’hélice.
• Assurez-vous que la batterie est débranchée.
• Retirez l’hélice et vériez qu’elle n’est pas gênée par du l ou des herbes.
• Court-circuit ou mauvaise connexion dans le câblage. Vériez les ls dans le boîtier supérieur.
• Une cosse est défectueuse ou la batterie a perdu de la puissance en raison d’une utilisation intensive.
Le moteur fait beaucoup de bruit ou d’importantes vibrations
• Hélice encrassée.
• Assurez-vous que la batterie est débranchée.
• Retirez l’hélice, nettoyez-la et replacez-la.
• Vériez si l’hélice est sécurisée et la resserrer si nécessaire.
• Armature pliée. Retirez l’hélice, réglez une vitesse moyenne et surveillez l’armature an de voir si elle vacille.
• Tourner l’hélice à la main. Elle devrait tourner librement avec une légère résistance de l’aimant.
Boatlife Electric Engines Instructions.indd 6Boatlife Electric Engines Instructions.indd 6 04/10/2022 10:0204/10/2022 10:02

7
3
4
5
6
2
7
8
10
13
11
9
1
12
Le moteur est difcile à diriger
• Desserrez le bouton sur le côté du support de montage, puis réajustez et appliquez un peu de lubriant.
Si après les vérications d’usage le problème persiste, n’ouvrez pas le moteur car cela annulerait votre garantie..
Si vous avez un problème avec votre moteur qui est couvert par la garantie, merci de procéder comme suit:
1. Contactez votre revendeur et expliquez le problème.
2. Le détaillant devra contacter [email protected] avec une photo et un descriptif du problème ainsi qu’une preuve d’achat.
3. Nous conrmerons si le problème est couvert par la garantie.
4. Une fois conrmé, le revendeur doit envoyer une demande de retour par mail au service d’assistance et nous organiserons le renvoi du moteur.
5. Nous examinerons ensuite le moteur et assurerons les réparations ou le remplacement en conséquence.
CONDITIONS DE GARANTIE
La garantie ne couvre pas l’usure des pièces comme, par exemple, les brosses en graphite ou les goupilles de cisaillement. La garantie est limitée à
une utilisation non commerciale du moteur et ne s’applique pas en cas d’erreur de l’utilisateur, d’accident, de réparations ou de modications inappro-
priées.
Responsabilités du client
La garantie du moteur ne couvre pas les éléments soumis à un abus ou à une négligence de la part de
l’utilisateur. Pour bénécier pleinement de la garantie, l’utilisateur doit entretenir le moteur conformément aux
instructions de ce manuel.
1. Couvercle supérieur
2. PCB
3. Assemblage de la poignée
4. Couvercle inférieur
5. Arbre
6. Collier de profondeur
7. Support de montage
8. Moteur
9. Goupille d’alignement
de l’hélice
10. Hélice
11. Écrou d’hélice
12. Câble de batterie
13. Anode
Boatlife Electric Engines Instructions.indd 7Boatlife Electric Engines Instructions.indd 7 04/10/2022 10:0204/10/2022 10:02

8
(DE)
TIEFENVERSTELLUNG
Die Tiefe des Propellers kann durch Lösen der Schraube des Spannknop-
fes (Abb. C) an der Hauptstange nach oben und unten verschoben werden.
Stellen sie den Motor auf die gewünschte Tiefe ein und xieren sie den
Spannknopf wieder an der Hauptstange.
ANPASSUNG DES LENKWIEDERSTANDES
Um den Lenkwiderstand ihres Motors einzustellen, ziehen sie einfach den
Spannknopf an der Seite der Montagehalterung fest oder lockern sie ihn.
EIN/AUS SPEED CONTROL
Die Geschwindigkeiten können ausgewählt werden, indem der Griff
im Uhrzeigersinn für Vorwärtsgeschwindigkeiten oder gegen den
Uhrzeigersinn für Rückwärtsgeschwindigkeiten gedreht wird. Um den
Antrieb abzudrehen, wird der Griff in die Off-/Null-Stellung zwischen Vor-
wärts- und Rückwärtsgang gebracht.
EINSTELLEN DES STEUERKOPFES
Lösen sie die Fixierschraube an der Basis des Steuerkopfes. Dadurch kann
man den Kopf je nach erforderlicher Lenkposition um bis zu 45 Grad nach
oben oder unten bewegen.
MONTAGE DES PROPELLERS
1. Setzen sie den Propeller Aligner Bolzen (1) in das kleine Loch der
Propellerachse ein.
2. Setzen sie den Propeller (2) auf die Antriebsachse und stellen sie sich-
er, dass der Bolzen mit der Nut im Propeller ausgerichtet ist.
3. Setzen sie die Propeller Mutter an (3) und ziehen diese fest, indem sie
den Propeller mit der Hand halten, während Sie die Mutter mit dem
Propellerschlüssel festziehen (Abb. D)
ERSETZEN DES PROPELLERS
WARNUNG: Stellen sie immer sicher, dass der Motor von der Batterie
getrennt ist, bevor sie den Propeller austauschen.
Herzlichen Glückwunsch zum Kauf eines Nash Boat Life
Elektromotors. Registrieren sie ihren Motor hier, um von einer
erweiterten 24-monatigen Garantie zu protieren:
https://register.nashtackle.co.uk
HINWEIS: Für die Registrierung müssen sie ein Foto oder eine
gescannte Kopie ihres Kaufbelegs hochladen. Die Seriennummer
bendet sich auf der Motorhalterung.
LÖSEN
45˚
LÖSEN
45˚
Abb A Abb B Abb C
WARNUNG: Stellen sie sicher, dass die Batterie nicht angeschlossen ist, bis sich der
Motor in der richtigen Position bendet und einsatzbereit ist.
ANPASSUNG DES MOTORS
Befestigen sie den Motor mittels der Montagehalterung am Heck des Bootes. Achten sie darauf, beide Befestigungsschrauben festzuziehen (Abb. A).
Um den Winkel des Motors einzustellen, halten sie den Motorkopf mit einer Hand und drücken sie den Positionierungshebel mit der anderen Hand.
Halten sie den Hebel gedrückt, bis der gewünschte Winkel erreicht ist. Lösen sie den Hebel und überprüfen sie, ob der Mechanismus sicher einger-
astet ist (Abb. B)
Achtung: Wenn sie den Neigungswinkel des Motors einstellen, legen sie niemals ihre Hände zwischen die Montagehalterung und den Rumpf des
Bootes. Dies kann zu Verletzungen führen. Stellen sie beim Montieren oder Abnehmen des Motors sicher, dass die Batterie nicht angeschlossen ist.
1
2
3
Boatlife Electric Engines Instructions.indd 8Boatlife Electric Engines Instructions.indd 8 04/10/2022 10:0204/10/2022 10:02

9
Halten sie den alten Propeller fest und lösen sie die Mutter mit dem Propellerschlüssel (Abb. D).
4. Entfernen sie die Mutter und den Propeller.
5. Der Propeller ist xiert, halten sie eine Propellerschaufel mit der Hand fest und klopfen sie mit einem harten, stumpfen Gegenstand auf die Rück-
seite der anderen Propellerschaufel.
6. Falls erforderlich, wiederholen sie den Vorgang mit der anderen Propellerschaufel, bis sich der Propeller löst.
7. Wenn der Propellerbolzen verbogen ist, ersetzen sie ihn. Richten sie den Bolzen (Abb. E) beim Umbau des Propellers aus und ziehen die Mutter
fest.
Achtung: Schlagen sie nicht mit einem Hammer auf einen verbogenen Propellerbolzen um ihn zu entfernen, da Schäden auftreten könnten, die nicht
von ihrer Garantie abgedeckt wären.
BATTERIEN
Die empfohlene Batterie ist eine 12Volt Deep Cycle Marine Freizeitbatterie.
WARNUNG: Stellen sie sicher, dass sich alle Schalter in der OFF Position benden, bevor sie die Batterie an den Motor anschließen.
INSTANDHALTUNG
WARNUNG: Stellen sie immer sicher, dass die Batterie vor jeder Inspektion, Reinigung oder Wartung ihres Motors nicht angeschlossen ist.
• Reinigen sie den Propeller nach jedem Gebrauch. Überprüfen sie ihn auf Angelschnur, Vegetation oder Treibgut.
• Schmieren sie die Halterung und die Achse alle 2 Wochen, tragen sie ein paar Tropfen leichtes Maschinenöl an den Dreh- und Angelpunkten auf.
• Reinigen sie die elektrischen Verbindungen jeden Monat, prüfen sie auf lose oder korrodierte Klemmen und ausgefranste Drähte.
• Reinigen sie die Klemmen mit einer Drahtbürste und ersetzen sie ausgefranste Drähte.
• Mangelnde Wartung kann zu übermäßiger Hitze und Stromausfall führen.
• Überprüfen sie regelmäßig alle Muttern, Bolzen und Schrauben und überprüfen sie jede Hardware physisch auf Dichtheit und Sicherheit.
• Achten sie darauf, einen gut belüfteten und trockenen Ort zu wählen, wenn sie den Motor für längere Zeit lagern.
• Lassen sie den Motor niemals draußen, da dies zu einer Beschädigung des Magneten der Antriebseinheit führen kann.
FEHLERBEHEBUNG
Stromausfall
• Propeller kann verschmutzt sein.
• Stellen sie sicher, dass die Batterie nicht angeschlossen ist .
• Propeller entfernen, reinigen und ersetzen.
• Batterieanschlüsse können korrodiert sein. Mit einer Drahtbürste reinigen und wieder anschließen.
• Batterie hat Niederspannung. Auaden oder prüfen ob die Batterie beschädigt ist.
• Wasser in der unteren Einheit führt dazu, dass der Schmierstoff verdickt und den Motor verlangsamt.
Motor entleert Batterie
• Schnur im Propeller.
• Stellen sie sicher, dass die Batterie nicht angeschlossen ist.
• Entfernen sie den Propeller und suchen sie nach Schnur oder Kraut.
• Kurze oder schlechte Verbindung in der Verkabelung. Überprüfen sie die Drähte im oberen Gehäuse.
• Die Batterie hat eine schlechte Zelle oder hat aufgrund umfangreicher Nutzung erheblich Kapazität verloren.
Motor macht übermäßige Geräusche oder Vibrationen
• Propeller verschmutzt.
• Stellen sie sicher, dass die Batterie nicht angeschlossen ist.
• Propeller entfernen, reinigen oder ersetzen.
• Überprüfen sie, ob der Propeller gesichert ist. Überprüfen sie die Propellermutter und ziehen sie diese bei Bedarf fest.
Abb D Abb E
Boatlife Electric Engines Instructions.indd 9Boatlife Electric Engines Instructions.indd 9 04/10/2022 10:0204/10/2022 10:02

10
3
4
5
6
2
7
8
10
13
11
9
1
12
• Gebogene Armatur. Entfernen sie den Propeller, stellen sie eine mittlere Geschwindigkeit ein und beobachten sie die Achse ob eine exzentrische
Rotation vorliegt.
• Drehen sie den Propeller von Hand. Er sollte sich mit einem leichten Magnetwiderstand frei drehen.
Motor ist schwer zu lenken
• Lösen sie den Knopf an der Seite der Montagehalterung, stellen sie ihn neu ein und tragen sie etwas Schmiermittel auf.
Wenn das Problem nach den üblichen Überprüfungen weiterhin besteht, öffnen sie den Motor nicht, da ihre Garantie erlöschen kann.
Wenn sie ein Problem mit ihrem Motor haben, welches von der Garantie abgedeckt ist, sollten sie wie folgt
vorgehen:
1. Wenden sie sich an ihren Einkaufsort und erklären sie das Problem.
2. Der Händler muss [email protected] mit einem Foto und einer Erklärung des Problems sowie einem Kaufbeleg kontaktieren.
3. Wir werden bestätigen, ob das Problem durch die Garantie abgedeckt ist.
4. Nach der Bestätigung muss der Händler eine Kurier-Rücksendeanfrage an die Support-Abteilung senden und wir werden die Abholung des Mo-
tors arrangieren.
5. Wir werden dann den Motor überprüfen und eine entsprechende Reparatur oder einen Austausch veranlassen.
GARANTIEBEDINGUNGEN
Die Garantie erstreckt sich nicht auf Verschleißteile, z.B.
Graphitbürsten oder Scherstifte. Die Garantie beschränkt
sich auf die nicht kommerzielle Nutzung des Motors und gilt
nicht im Falle von Benutzerfehlern, Unfällen, unsachgemäßen
Reparaturen oder Modikationen.
Verantwortlichkeiten des Kunden
Die Garantie für den Motor deckt keine Artikel ab,
die dem Missbrauch oder der Fahrlässigkeit des
Bedieners ausgesetzt waren. Um den vollen
Nutzen aus der Garantie zu ziehen,
muss der Bediener den Motor wie
in diesem Handbuch beschrieben
warten.
1. Obere Abdeckung
2. Platine
3. Griffmontage
4. Untere Abdeckung
5. Hauptstange
6. Spannknopf
7. Montagehalterung
8. Motor
9. Propeller Aligner Bolzen
10. Propeller
11. Propellermutter
12. Batteriekabel
13. Achse
Boatlife Electric Engines Instructions.indd 10Boatlife Electric Engines Instructions.indd 10 04/10/2022 10:0204/10/2022 10:02
11
(NL)
DIEPGANG AANPASSEN
De diepte van de propeller kan vergroot of verkleind worden door de posi-
tie van de diepte postitioneringsring (Fig. C) op de schacht aan te passen.
Draai de schroef los, pas aan naar de gewenste diepte en draai de schroef
terug goed vast.
AANPASSEN VAN DE STUURDRUK
Om de stuurdruk aan te passen, draai je eenvoudig de drukschroef op de
montagebeugel losser of vaster.
AAN/UIT + SNELHEID AANPASSEN
De snelheid wordt aangepast door in wijzerzin aan het handvat te
draaien om vooruit te varen en tegen wijzerzin om achteruit te varen.
Om de propeller te doen stoppen zet je het handvat centraal tussen
voorwaarts en achterwaarts varen.
POSITIE VAN DE KOP WIJZIGEN
Draai het handwiel onder de kop los. Hierdoor kan de kop 45 graden
omhoog of omlaag bewegen afhankelijk van de gewenste positie.
DE PROPELLER MONTEREN
1. Plaats de Prop Aligner Pin (1) in het smalle gat van de propeller as.
2. Plaats de propeller (2) op de as en zorg ervoor dat de Prop Aligner
Pin mooi uitgelijnd is met de groef in de propeller.
3. Schroef de Prop Nut (3) erop en zet goed vast door de propeller
met je hand tegen te houden terwijl je de Prop Nut vastzet met de
Propeller Wrench (Fig. D)
VERVANGEN VAN DE PROPELLER
WAARSCHUWING: Zorg er steeds voor dat de batterij losgekoppeld is
voor je de propeller vervangt.
1. Houd de schoep vast en draai de Prop Nut los met de Propeller
Wrench (Fig. D).
2. Verwijder de Prop Nut en de propeller.
Gefeliciteerd met de aankoop van een Nash Boat Life Electric Engine.
Registreer je motor en geniet van een tot 24 maanden verlengde
garantie via deze link: https://register.nashtackle.co.uk
OPGELET: Om te registreren zal je een foto of scan van je aankoop-
bewijs nodig hebben. Het serienummer vind je terug op de bevestig-
ing van de motor.
LOOSEN
45˚
LOOSEN
45˚
FIG A FIG B FIG C
WAARSCHUWING: Zorg er steeds voor dat de batterij niet aangesloten is tot de motor
zich in de correcte positie bevindt en klaar is voor gebruik.
DE MOTOR MONTEREN
Bevestig de motor op de spiegel van de boot met de montagebeugel. Zorg ervoor dat je beide schroeven goed vastzet (Fig. A). Om de hoek van de
motor te wijzigen, houd je de kop van de motor met een hand vast en druk je de knop van de positioneringstang met je andere hand in. Houd de knop
ingedrukt tot je de gewenste positie bereikt. Laat de knop los en kijk of de positioneringstang goed vast geklikt is (Fig. B).
Opgelet: Steek nooit je handen tussen de schacht en de spiegel van de boot, wanneer je de hoek van de motor aanpast. Dit kan blessures veroorzak-
en. Wanneer je de motor monteert of demonteert, zorg er dan steeds voor dat de batterij losgekoppeld is.
1
2
3
Boatlife Electric Engines Instructions.indd 11Boatlife Electric Engines Instructions.indd 11 04/10/2022 10:0204/10/2022 10:02

12
3. Als de propeller vastzit, hou je met een hand een schoep vast en klop je met een hard, stomp voorwerp op de achterkant van de andere schoep.
4. Herhaal indien nodig deze procedure en wissel telekns van schoep tot de propeller loskomt.
5. Als de Prop Aligner Pin geplooid is, vervang je die. Lijn de Prop Alinger Pin (Fig. E) mooi uit met de gleuf binnenin de propeller wanneer je deze
terug monteert en zet de Prop Nut goed vast.
Opgelet: Sla nooit met een hamer op een gebogen Prop Alinger Pin om deze te verwijderen. Hierdoor kan schade optreden die niet gedekt wordt door
jouw garantie. .
BATTERIJEN
De aanbevolen batterij is een 12 Volt deep cycle marine/leisure batterij.
WAARSCHUWING: Zorg ervoor dat de motor niet in voor- of achteruit staat als je de batterij aansluit.
ONDERHOUD
WAARSCHUWING: Zorg er steeds voor dat de batterij is losgekoppeld voor elke inspectie, reiniging of onderhoud van je motor.
• Maak na elk gebruik de achterkant van de propeller schoon. Kijk of er geen vislijn, planten of vuil tussen zit.
• Smeer de montage schroeven en as om de twee weken. Breng enkele druppels lichte machine olie aan op bewegende punten.
• Maak de elektrische contacten elke maand schoon. Kijk na op losse of verroeste contacten en gerafelde kabels.
• Maak contacten schoon met een staalborstel en vervang gerafelde kabels.
• Gebrek aan onderhoud kan overdreven hitte en verlies van kracht veroorzaken.
• Kijk alle bouten en schroeven regelmatig na en let erop dat alle onderdelen nog goed en veilig vastzitten.
• Kies zeker een goed geventileerde en droge locatie om je motor voor een lange periode op te bergen.
• Laat de motor nooit voor een lange periode buiten liggen, omdat dit schade aan de magneet binnenin de motor kan veroorzaken.
PROBLEMEN OPLOSSEN
Verlies van kracht
• Propeller kan vervuild zijn.
• Zorg ervoor dat de batterij losgekoppeld is.
• Verwijder de propeller, maak schoon en monteer opnieuw.
• De contacten kunnen verroest zijn. Maak schoon met een staalborstel en sluit de contacten weer aan.
• De batterij kan leeg zijn. Kijk of ze niet stuk is en laadt ze terug op.
• Water in de onderkant kan het smeermiddel dikker maken en de motor vertragen.
De motor trekt de batterij leeg
• Lijn achter de propeller.
• Zorg ervoor dat de batterij losgekoppeld is.
• Verwijder de propeller, maak schoon en monteer opnieuw.
• Kortsluiting of slecht contact van de bekabeling. Check de kabels onder de kap.
• Batterij is defect of is leeggeraakt door intensief gebruik.
Motor maakt overdreven lawaai of trilt
• Propeller kan vervuild zijn.
• Zorg ervoor dat de batterij losgekoppeld is.
• Verwijder de propeller, maak schoon en monteer opnieuw.
• Check of de propeller goed vastzit. Check de Propeller Nut en draai vaster indien nodig.
• Gebogen as. Verwijder de propeller, zet de motor op gemiddelde snelheid en bekijk of de as recht draait.
• Draai met je hand aan de propeller. Die zou moeten vrij ronddraaien met een lichte spanning door de magneet.
FIG D FIG E
Boatlife Electric Engines Instructions.indd 12Boatlife Electric Engines Instructions.indd 12 04/10/2022 10:0304/10/2022 10:03

13
3
4
5
6
2
7
8
10
13
11
9
1
12
Motor is moeilijk te besturen
• Draai de knop aan de zijkant van de montagebeugel los. Pas daarna de druk terug aan en breng wat smeermiddel aan.
Mocht het probleem nog voortduren na alle normale controles, open dan de motor niet want je garantie zal vervallen.
Als je een probleem hebt met je motor dat gedekt wordt door de garantie, ga dan als volgt te werk:
1. Neem contact op met de winkel waar je de motor aankocht en leg het probleem uit.
2. De winkelier zal hierna contact moeten opnemen met [email protected] en zal foto’s en een aankoopbewijs doorsturen en het probleem
uitleggen.
3. We zullen bevestigen of het probleem gedekt wordt door de garantie.
4. Eens bevestigd zullen we je motor laten oppikken door een courier.
5. Daarna geven we de motor een review en zorgen voor de herstelling of vervanging.
WARRANTY TERMS
De garantie geldt niet voor onderdelen die verslijten zoals graet borstels of breekpennen. De garantie is beperkt tot niet-commercieel gebruik van de
motor en geldt niet voor fout gebruik, ongelukken, onjuiste herstellingen en aanpassingen.
Klantverantwoordelijkheid
De garantie dekt geen misbruik of verwaarlozing van de gebruiker. Om volledige dekking
van de garantie te genieten, moet de gebruiker de motor
onderhouden volgens de instructies in deze handleiding
1. Kapplaat
2. Printplaat
3. Handvat montage
4. Bodemplaat
5. Schacht
6. Diepte positioneringsring
7. Montagebeugel
8. Motor
9. Prop Aligner Pin
10. Propeller
11. Prop Nut
12. Batterijkabel
13. Anode
Boatlife Electric Engines Instructions.indd 13Boatlife Electric Engines Instructions.indd 13 04/10/2022 10:0304/10/2022 10:03

14
(IT)
REGOLAZIONE DELLA PROFONDITA’
La profondità dell’elica può essere regolata su e giù allentando la man-
opola di tensione del collare di profondità (Fig. C) situata sulla colonna.
Impostate il motore alla profondità desiderata, quindi serrate la manopola
di tensione saldamente.
REGOLAZIONE DELLA TENSIONE DELLO STERZO
Per aggiustare la tensione dello sterzo del vostro motore, semplicemente
stringete o allentate la manopola di tensione posta sul lato della staffa di
montaggio.
CONTROLLO VELOCITA’ ON/OFF
La velocità può essere selezionata girando in senso orario la manopola per
la marcia avanti e in senso antiorario per la retromarcia. Per fermare l’elica
portate la manopola nella zona centrale tra le marce avanti e la retromarcia.
REGOLAZIONE DELLA TESTA DEL CONTROLLER
Allentate il volante alla base della testa del controller. Ciò vi permetterà
di muovere la testa verso l’alto o il basso no a 45 ° a seconda della po-
sizione di guida richiesta.
MONTAGGIO DELL’ELICA
1. Posizionate il perno di allineamento dell’elica (1) nell’apposito foro del
bullone della stessa.
2. Posizionate l’elica (2) sul bullone assicurandovi di allineare il perno
con la scalanatura nell’elica.
3. Avvitate il dado dell’elica (3) e serrate saldamente tenendo l’elica con
una mano mentre stringete il dado con l’apposita chiave (Fig. D)
SOSTITUZIONE DELL’ELICA
ATTENZIONE: Assicuratevi sempre che la batteria sia disconnessa quando
sostituite l’elica.
1. Tenete le pale e allentate i dadi usando l’apposita chiave (Fig. D).
2. Rimuovete il dado e quindi l’elica.
Congratulazioni per l’acquisto del Nash Boat Life Electric Engine
(Motore elettrico Nash boat life). Registra il tuo acquisto per usufruire
dell’estensione della garanzia a 24 mesi al seguente link:
https://register.nashtackle.co.uk
NOTA: Per la registrazione sarà richiesto di caricare una foto o uno
scan della copia dello scontrino. Il numero seriale si trova nel supporto
del motore.
45˚
ALLENTARE
ALLENTARE
45˚
FIG A FIG B FIG C
ATTENZIONE: Assicuratevi sempre che la batteria sia disconnessa no al momento in
cui il motore non è nella corretta posizione e pronto all’uso.
MONTAGGIO DEL MOTORE
Collegate il motore alla poppa della barca attraverso la staffa di montaggio. Fate attenzione che entrambi i bulloni siano ben serrati (Fig. A). Per
aggiustare l’angolo del motore, tenete la testa del motore con una mano e con l’altra premete il perno di posizionamento. Premete e rilasciate il
perno no a che non avete raggiunto l’angolo desiderato. Rilasciate il perno e assicuratevi che il meccanismo sia innestato saldamente. (Fig. B)
Attenzione: Quando aggiustate l’angolo di azione del motore, non portate mai le vostre mani tra l’albero e lo scafo della barca. Questo potrebbe
causarvi infortuni. Quando montate e smontate il motore, assicuratevi sempre che la batteria sia disconnessa.
1
2
3
Boatlife Electric Engines Instructions.indd 14Boatlife Electric Engines Instructions.indd 14 04/10/2022 10:0304/10/2022 10:03

15
3. Se l’elica oppone resistenza, tenete una pala con una mano mentre con l’altra esercitate pressione con un oggetto pesante sulle restanti pale.
4. Se necessario, ripetete la procedura per tutte le pale no a che l’elica non sarà libera.
5. Se il perno dell’elica è danneggiato, sostituitelo. Allineate il perno (Fig. E) durante il montaggio dell’elica e quindi serrate il dado accuratamente.
Attenzione: Non forzate il perno dell’elica con un martello per rimuoverlo, l’eventuale danno potrebbe non essere coperto dalla vostra garanzia.
BATTERIE
La batteria consigliata è una batteria marina a ciclo profondo da 12 volt.
ATTENZIONE: Fate attenzione che tutti i comandi siano in OFF (spenti) prima di collegare la batteria al motore.
CONSERVAZIONE
ATTENZIONE: Assicuratevi sempre che la batteria sia disconnessa prima di ogni ispezione, pulizia o controllo del vostro motore.
• Pulite l’elica dopo ogni utilizzo. Controllate l’eventuale presenza di lenze, detriti o alghe.
• Lubricate il supporto e l’albero ogni 2 settimane applicando alcune gocce di olio lubricante per macchine nei punti cardine.
• Pulite le connessioni elettriche ogni mese, ispezionate eventuali li rovinati, corrosi o slacciati.
• Pulite i terminali elettrici con una spazzola metallica e sostituite gli eventuali li rovinati.
• La mancanza di controllo e manutenzione potrebbe causare surriscaldamento e perdite di potenza.
• Controllate tutti i dadi, bulloni e viti regolarmente, e controllate sempre tutte le parti di serraggio di tenute e sicurezza.
• Assicuratevi di scegliere un luogo ben ventilato e asciutto dove conservare il vostro motore per lunghi periodi.
• Non lasciate il motore all’esterno, questo potrebbe causare danni alle parti magnetiche dell’unita di guida.
RISOLUZIONE DEI PROBLEMI
Perdite di potenza
• L’elica potrebbe essere sporca.
• Assicuratevi che la batteria sia disconnessa.
• Rimuovete l’elica, pulitela e sostituitela.
• Le connessioni della batteria potrebbero essere corrose. Pulitele con una spazzola metallica e riconnettetele.
• La batteria ha una bassa tensione. Ricaricatela e controllate eventuali cellule della stessa danneggiate.
• L’acqua nell’unità inferiore causa l’addensamento del lubricante e il rallentamento del motore.
Il motore scarica la batteria
• Controllate non ci siano lenze incastrate dentro l’elica.
• Assicuratevi la batteria sia disconnessa.
• Rimuovete l’elica e controllate la presenza di eventuale sporcizia o vegetazione.
• Cortocircuiti o collegamenti dei cablaggi difettosi. Controllate i cavi nell’alloggiamento superiore.
• La batteria ha cellule rovinate o ha perso signicativa potenza a causa dell’eccessivo utilizzo.
Il motore emette rumori o vibrazioni
• Elica sporca.
• Assicuratevi la batteria sia disconnessa.
• Rimuovete l’elica, pulite e sostituitela.
• Controllate che l’elica sia ben serrata. Controllate i dadi di bloccaggio e serrateli nuovamente se necessario.
• Perno piegato. Rimuovete l’elica, impostate una velocità media e controllatene l’oscillazione.
• Girate l’elica con una mano. Dovrebbe ruotare liberamente con una minima resistenza del magnete.
FIG D FIG E
Boatlife Electric Engines Instructions.indd 15Boatlife Electric Engines Instructions.indd 15 04/10/2022 10:0304/10/2022 10:03

16
3
4
5
6
2
7
8
10
13
11
9
1
12
Il motore è difcile da manovrare
• Allentare la manopola sul lato della staffa di montaggio, quindi regolatela nuovamente e applicate un po’ di lubricante.
Se dopo i classici controlli il problema persiste, non aprite il motore afnché la garanzia sia invalidata.
Se avete qualche problema con il vostro motore che è coperto da garanzia procedete come sotto riportato:
1. Contattate il negozio di acquisto e spiegate il problema.
2. Il negoziante dovrà contattare il supporto Nash alla seguente mail: [email protected] o tramite il proprio agente di zona, inviando una
fotograa e una spiegazione del problema con lo scontrino d’acquisto.
3. Vi confermeremo se il problema è coperto da garanzia.
4. Una volta confermato il negoziante dovrà preparare il motore per il nostro dipartimento di Supporto e noi organizzeremo il ritiro.
5. Ci occuperemo dell’analisi del motore per ripararlo o sostituire i pezzi danneggiati.
TERMINI DI GARANZIA
La garanzia non si estende alle parti soggette ad usura, es. spazzole di grate o perni. La garanzia si applica solamente all’uso non commerciale del
motore e non si applica in caso di errori dell’utente, incidenti, riparazioni o modiche improprie.
Responsabilità del consumatore
La garanzia del motore non copre il prodotto che è stato soggetto di modiche o negligenze da parte
dell’utilizzatore. Per ricevere la massima copertura dalla garanzia,
l’utilizzatore deve mantenere il motore secondo
le istruzioni di questo manuale.
1. Copertura superiore
2. PCB
3. Maniglia d’assemblaggio
4. Coperchio inferiore
5. Albero
6. Collare di profondità
7. Staffa di montaggio
8. Motore
9. Perno di allineamento dell’elica
10. Puntello
11. Dado dell’elica
12. Cavo della batteria
13. Anodo
Boatlife Electric Engines Instructions.indd 16Boatlife Electric Engines Instructions.indd 16 04/10/2022 10:0304/10/2022 10:03

17
(PL)
REGULACJA GŁĘBOKOŚCI WIRNIKA
Głębokość zanurzenia wirnika można regulować w górę i w dół, luzując
pokrętło kołnierza głębokości (rys. C) znajdujące się na kolumnie silnika.
Ustaw silnik na pożądaną głębokość, a następnie dokręć mocno pokrętło
kołnierza głębokości.
REGULACJA OPORU STEROWANIA
Aby wyregulować opór sterowania silnikiem, po prostu dokręć lub poluzuj
pokrętło napinające z tyłu uchwytu montażowego.
KONTROLA PRĘDKOŚCI WŁ./WYŁ.
Poziom prędkości można wybrać, obracając uchwyt zgodnie z ruchem
wskazówek zegara dla prędkości do przodu lub przeciwnie do ruchu
wskazówek zegara dla prędkości wstecznych. Aby wyłączyć pracę wirnika,
wyśrodkuj uchwyt pomiędzy biegami do przodu i do tyłu.
REGULACJA GŁOWICY STERUJĄCEJ
Poluzuj pokrętło u podstawy głowicy sterującej. Umożliwi to ruch
elementu do 45 stopni w górę lub w dół, w zależności od wymaganej
pozycji sterowania. Dokręć pokrętło.
MONTAŻ WIRNIKA
1. Umieść kołek centrujący (1) w małym otworze wewnątrz śruby
napędowej.
2. Umieść wirnik (2) na śrubie, upewniając się, że kołek centrujący jest
ułożony równo względem wyżłobienia w wirniku.
3. Nałóż, a następnie dokręć nakrętkę (3) za pomocą klucza śruby
napędowej, jednocześnie przytrzymując wirnik ręką (rys. D).
WYMIANA WIRNIKA
OSTRZEŻENIE: Przed wymianą wirnika upewnij się, że akumulator jest
odłączony.
1. Przytrzymaj wirnik i poluzuj nakrętkę za pomocą klucza do śruby
napędowej (rys. D).
Gratulujemy zakupu silnika elektrycznego Nash Boat Life Electric Engine.
Zarejestruj swój silnik, aby skorzystać z przedłużonej 24-miesięcznej
gwarancji. Link do rejestracji: https://register.nashtackle.co.uk
UWAGA: W celu rejestracji należy przesłać zdjęcie lub skan dowodu
zakupu. Numer seryjny urządzenia znajduje się na silniku.
45˚
POLUZOWAĆ
45˚
RYS. A RYS. B RYS. C
OSTRZEŻENIE: Zawsze upewniaj się, że akumulator pozostaje odłączony, dopóki
silnik nie będzie znajdować się w odpowiedniej pozycji i będzie gotowy do użycia.
MONTAŻ SILNIKA
Przymocuj silnik do rufy (pawęży) łodzi za pomocą uchwytu montażowego. Upewnij się, że obie śruby mocujące są mocno dokręcone (rys. A). Aby
wyregulować kąt silnika, przytrzymaj jedną ręką kolumnę silnika, a drugą wciśnij zatrzask blokady pozycjonującej. Naciśnij i przytrzymaj zatrzask
do momentu ustawienia pożądanego kąta nachylenia silnika. Następnie zwolnij zatrzask blokady pozycjonującej i sprawdź, czy mechanizm jest
prawidłowo zazębiony (rys. B).
Uwaga: Podczas regulacji kąta pochylenia silnika nigdy nie wkładaj rąk między kolumnę, a pawęż łodzi. Może to spowodować obrażenia. Podczas
montażu lub demontażu silnika upewnij się, że akumulator pozostaje odłączony.
1
2
3
POLUZOWAĆ
Boatlife Electric Engines Instructions.indd 17Boatlife Electric Engines Instructions.indd 17 04/10/2022 10:0304/10/2022 10:03

18
2. Ściągnij nakrętkę, a następnie wirnik.
3. Jeśli wirnik się zaklinował, przytrzymaj jedną łopatkę ręką i postukaj w tylną stronę drugiej łopatki twardym, tępym przedmiotem.
4. W razie potrzeby powtarzaj procedurę do skutku.
5. Jeśli kołek centrujący śruby napędowej jest wygięty, wymień go. Wyrównaj go (Rys. E) podczas ponownego montażu wirnika na śrubie
napędowej i mocno dokręć nakrętkę.
UWAGA: Nie uderzaj młotkiem w wygięty kołek centrujący śruby napędowej, aby go wyjąć. Może dojść do jego uszkodzenia, które nie jest objęte
gwarancją.
AKUMULATORY
Zalecamy użycie 12-woltowego akumulatora przeznaczonego do pracy w trybie głębokiego rozładowania.
OSTRZEŻENIE: Przed podłączeniem silnika do akumulatora upewnij się, że wszystkie przełączniki są w pozycji OFF.
KONSERWACJA
OSTRZEŻENIE: Zawsze upewnij się, że akumulator jest odłączony przed jakąkolwiek inspekcją, czyszczeniem lub konserwacją silnika.
• Wyczyść wirnik po każdym użyciu. Upewnij się, że w wirniku nie ma żyłki, pozostałości roślin, śmieci.
• Nasmaruj uchwyt montażowy i kolumnę silnika co 2 tygodnie. Nałóż kilka kropli lekkiego oleju maszynowego w kluczowych punktach.
• Co miesiąc wyczyść połączenia elektryczne. Sprawdzać, czy nie ma luźnych lub skorodowanych zacisków i postrzępionych przewodów.
• Oczyść zaciski szczotką drucianą i wymień wszelkie postrzępione przewody.
• Brak konserwacji może spowodować nadmierne ciepło i utratę mocy.
• Regularnie sprawdzaj wszystkie nakrętki, śruby i wkręty oraz zycznie sprawdzaj cały sprzęt pod kątem dokręcenia elementów i zabezpieczenia.
• Podczas przechowywania silnika przez długi czas należy wybrać dobrze wentylowane i suche miejsce.
• Nigdy nie pozostawiaj silnika na zewnątrz, ponieważ może to spowodować uszkodzenie magnesu jednostki napędowej.
ROZWIĄZYWANIE PROBLEMÓW
Utrata mocy
• Wirnik może być zabrudzony.
• Upewnij się, że akumulator jest odłączony.
• Zdejmij wirnik, wyczyść i zamontuj go ponownie.
• Klemy podłączeniowe mogą być skorodowane. Wyczyść je szczotką drucianą i podłącz ponownie.
• Akumulator ma niskie napięcie. Naładuj go i sprawdź, czy nie ma uszkodzonych ogniw.
• Woda w dolnej części napędu spowoduje gęstnienie smaru i spowolni pracę silnika.
Silnik rozładowuje akumulator
• Żyłka wciągnięta w wirnik.
• Upewnij się, że akumulator jest odłączony.
• Zdejmij wirnik i sprawdź, czy nie ma wkręconych żyłek lub roślinności.
• Krótkie lub złe połączenie kabli. Sprawdź przewody w górnej obudowie.
• Bateria ma zużyte ogniwa lub straciła znaczną pojemność z powodu intensywnego użytkowania.
Silnik wytwarza nadmierny hałas lub wibracje
• Wirnik może być zabrudzony
• Upewnij się, że akumulator jest odłączony.
• Zdejmij wirnik, wyczyść i zamontuj go ponownie.
• Sprawdź, czy wirnik jest zamocowany poprawnie. Sprawdź nakrętkę śruby napędowej i dokręć w razie potrzeby.
• Wygięta obudowa. Zdejmij wirnik, ustaw średnią prędkość i obserwuj, czy obudowa trzęsie się lub buja.
• Ręcznie obróć wirnik. Powinien obracać się swobodnie z delikatnym oporem.
RYS. D RYS. E
Boatlife Electric Engines Instructions.indd 18Boatlife Electric Engines Instructions.indd 18 04/10/2022 10:0304/10/2022 10:03

19
3
4
5
6
2
7
8
10
13
11
9
1
12
Silnik jest trudny do sterowania
• Poluzuj pokrętło z tyłu uchwytu montażowego, a następnie wyreguluj i nałóż trochę smaru.
Jeśli po zwykłych kontrolach problem będzie się powtarzał, nie otwieraj silnika, ponieważ Twoja gwarancja zostanie unieważniona!
Jeśli masz problem z silnikiem objętym gwarancją, postępuj w następujący sposób:
1. Skontaktuj się z miejscem zakupu i wyjaśnij problem.
2. Sprzedawca powinien skontaktować się z [email protected] załączając zdjęcia oraz opis problemu wraz z dowodem zakupu.
3. Sprawdzimy, czy problem jest objęty gwarancją.
4. Po potwierdzeniu sprzedawca musi wysłać prośbę o zwrot do Działu Wsparcia, a my zorganizujemy odbiór silnika.
5. Następnie dokonamy przeglądu silnika i odpowiednio zorganizujemy jego naprawę lub wymianę.
WARUNKI GWARANCJI
Gwarancja nie obejmuje części zużywających się na skutek użytkowania. Gwarancja jest ograniczona do niekomercyjnego użytkowania silnika i nie ma
zastosowania w przypadku błędu użytkownika, wypadku, nieprawidłowej naprawy lub modykacji.
Obowiązki klienta
Gwarancja nie obejmuje elementów, które były przedmiotem nadużyć lub zaniedbań operatora. Aby w pełni
skorzystać z gwarancji, operator musi konserwować silnik zgodnie z zaleceniami zawartymi w niniejszej
instrukcji.
1. Osłona górna
2. Sterownik obwodu
elektrycznego
3. Mocowanie uchwytu
4. Osłona dolna
5. Kolumna silnika
6. Kołnierz głębokości
7. Uchwyt silnika
8. Silnik
9. Kołek centrujący
10. Wirnik
11. Nakrętka wirnika
12. Przewody zasilające
13. Anoda
Boatlife Electric Engines Instructions.indd 19Boatlife Electric Engines Instructions.indd 19 04/10/2022 10:0304/10/2022 10:03

20
(CZ)
NASTAVENÍ PONORU
Hloubku ponoření vrtule lze nastavit povolením aretačního šroubu (obr.
C), který je umístěn na tyči elektromotoru nad zavěšením. Po nastavení
hloubky ponoru vrtule elektromotoru utáhněte zpět aretační šroub.
NASTAVENÍ ŘÍZENÍ
Chcete-li upravit odpor řízení vašeho elektromotoru, jednoduše utáhněte
nebo povolte utahovací šroub na straně pod zavěšením.
OVLÁDÁNÍ RYCHLOSTI
Rychlosti lze zvolit otočením rukojeti ve směru hodinových ručiček pro
rychlost vpřed nebo proti směru hodinových ručiček pro rychlost vzad.
NASTAVENÍ SKLONU HLAVY ELEKTROMOTORU
Povolte kolečko na straně pod hlavou elektromotoru, které vám poté
umožní nastavení sklonu až o 45 stupňů.
MONTÁŽ VRTULE
1. Vložte čep (1) do hřídele motoru.
2. Nasuňte vrtuli (2) na hřídel motoru a ujistěte se, že čep zapadl
do vrtule.
3. Našroubujte matici (3) k zajištění vrtule (obr. D)
VÝMĚNA VRTULE
VÁROVÁNÍ: Před instalací vrtule se ujistěte, že je elektromotor odpojený
od baterie!
1. Držte vrtuli a uvolněte matici pomocí klíče (obr. D).
2. Odstraňte matici a vrtuli.
3. Pokud je vrtule zaseknutá, držte jeden list rukou a tvrdým tupým před-
mětem poklepejte na zadní stranu druhého listu.
4. V případě potřeby opakujte postup na dalším listu vrtule, dokud se
vrtule neuvolní.
5. Pokud je čep vrtule ohnutý, vyměňte jej. Při zpětné montáži vrtule
vyrovnejte čep. (obr. E)
Gratulujeme k zakoupení elektromotoru Nash Boat Life Electric
Engine. Zaregistrujte si svůj elektromotor na webu: https://register.
nashtackle.co.uk a prodlužte si záruku o další 2 roky.
POZNÁMKA: Při registraci budete vyzváni k nahrátí fotograe nebo
oskenované kopie vašeho dokladu o nákupu. Sériové číslo naleznete na
elektromotoru.
45˚
UVOLNĚTE
UVOLNĚTE
45˚
OBR A OBR B OBR C
VAROVÁNÍ: Při manipulaci s elektromotorem dbejte opatrnosti a vždy mějte motor
odpojen od baterie.
MONTÁŽ MOTORU
Připevněte elektromotor k zádi lodi pomocí montážního držáku. Ujistěte se, že jsou oba upevňovací šrouby pevně utaženy (obr. A). Chcete-li nastavit
úhel motoru, držte hlavu motoru jednou rukou a druhou rukou stiskněte polohovací páčku. Stiskněte a podržte polohovací páčku, dokud nedosáhnete
požadovaného úhlu. Zkontrolujte, zda mechanismus po nastavení zapadl do drážky. (obr. B)
Upozornění: Při nastavování úhlu náklonu elektromotoru nikdy nevkládejte ruce mezi tyč motoru a trup lodi. To může způsobit zranění. Při montáži
nebo demontáži elektromotoru se ujistěte, že je nejprve odpojena baterie..
1
2
3
Boatlife Electric Engines Instructions.indd 20Boatlife Electric Engines Instructions.indd 20 04/10/2022 10:0304/10/2022 10:03
This manual suits for next models
1
Table of contents
Languages:
Popular Outboard Motor manuals by other brands

SLEIPNER MOTOR AS
SLEIPNER MOTOR AS SXP35 installation guide

Side-Power
Side-Power SEP 80/185 T Installation & user guide

Yamaha
Yamaha F50C owner's manual

Yamaha
Yamaha F9.9F owner's manual

SLEIPNER MOTOR AS
SLEIPNER MOTOR AS SIDE-POWER SEP 240 TC Installation and user manual

Mercury
Mercury Optimax 135 user manual