6 EXPLODED VIEW & REPLACEMENT PARTS LIST
6.1. EXPLODED VIEW for ES8016
6.2. REPLACEMENT PARTS LIST for ES8016
NOTE:
*A=available as an optional accessory
*B=only available as set
*C=available individually
Ref. No. Part No. Part Name & Description Remarks Per Unit
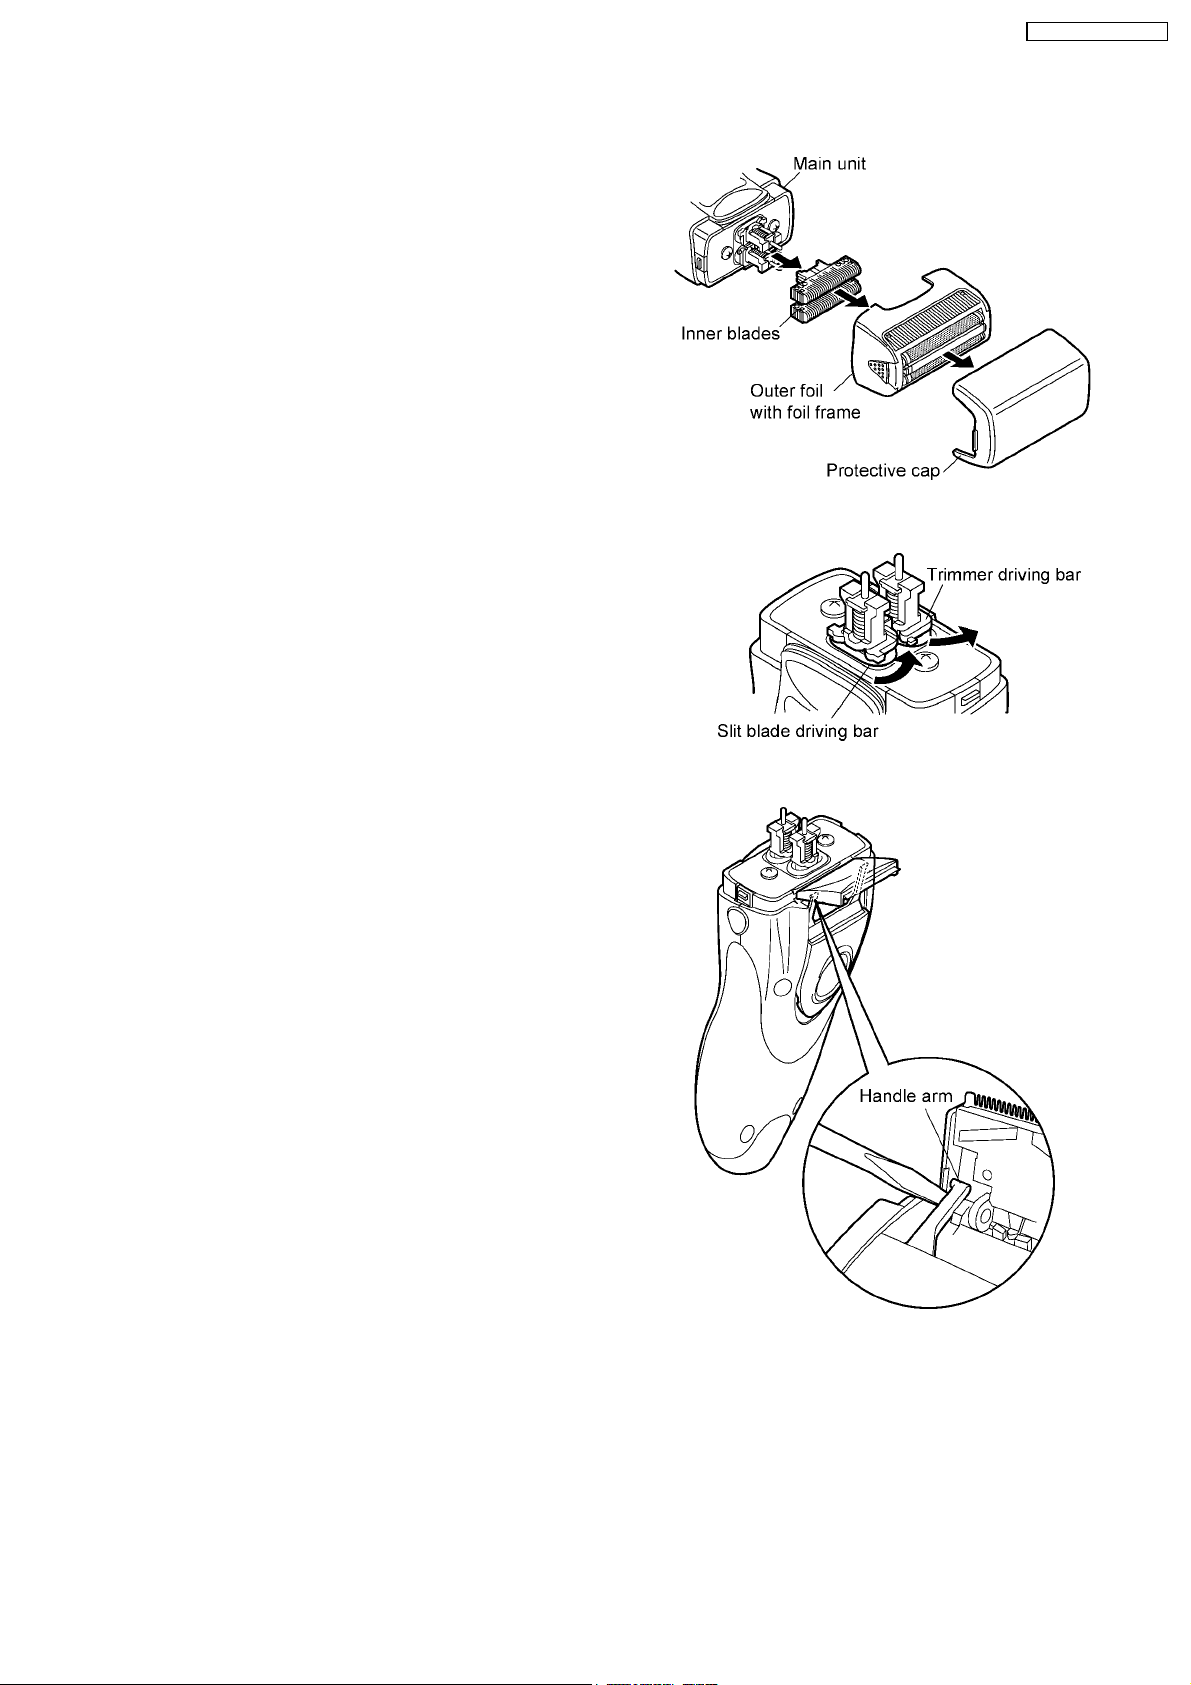
1WES8017X7159 PROTECTIVE CAP 1
2WES9077E SYSTEM OUTER FOIL 1
3WES8016S0047 OUTER FOIL FRAME 1
4WES9074E INNER BLADE *B (2PCS/PK) 2
5WES5405L6007 SCREW *C 2
6WES8016L0207 RETAINING PLATE W/RUBBER 1
7WES8016A3777 SCREW CAP (BOTTOM) *B (2PCS/PK) BLUE 2
8WES8016L9017 P TIGHT SCREW *C M2*13.5 4
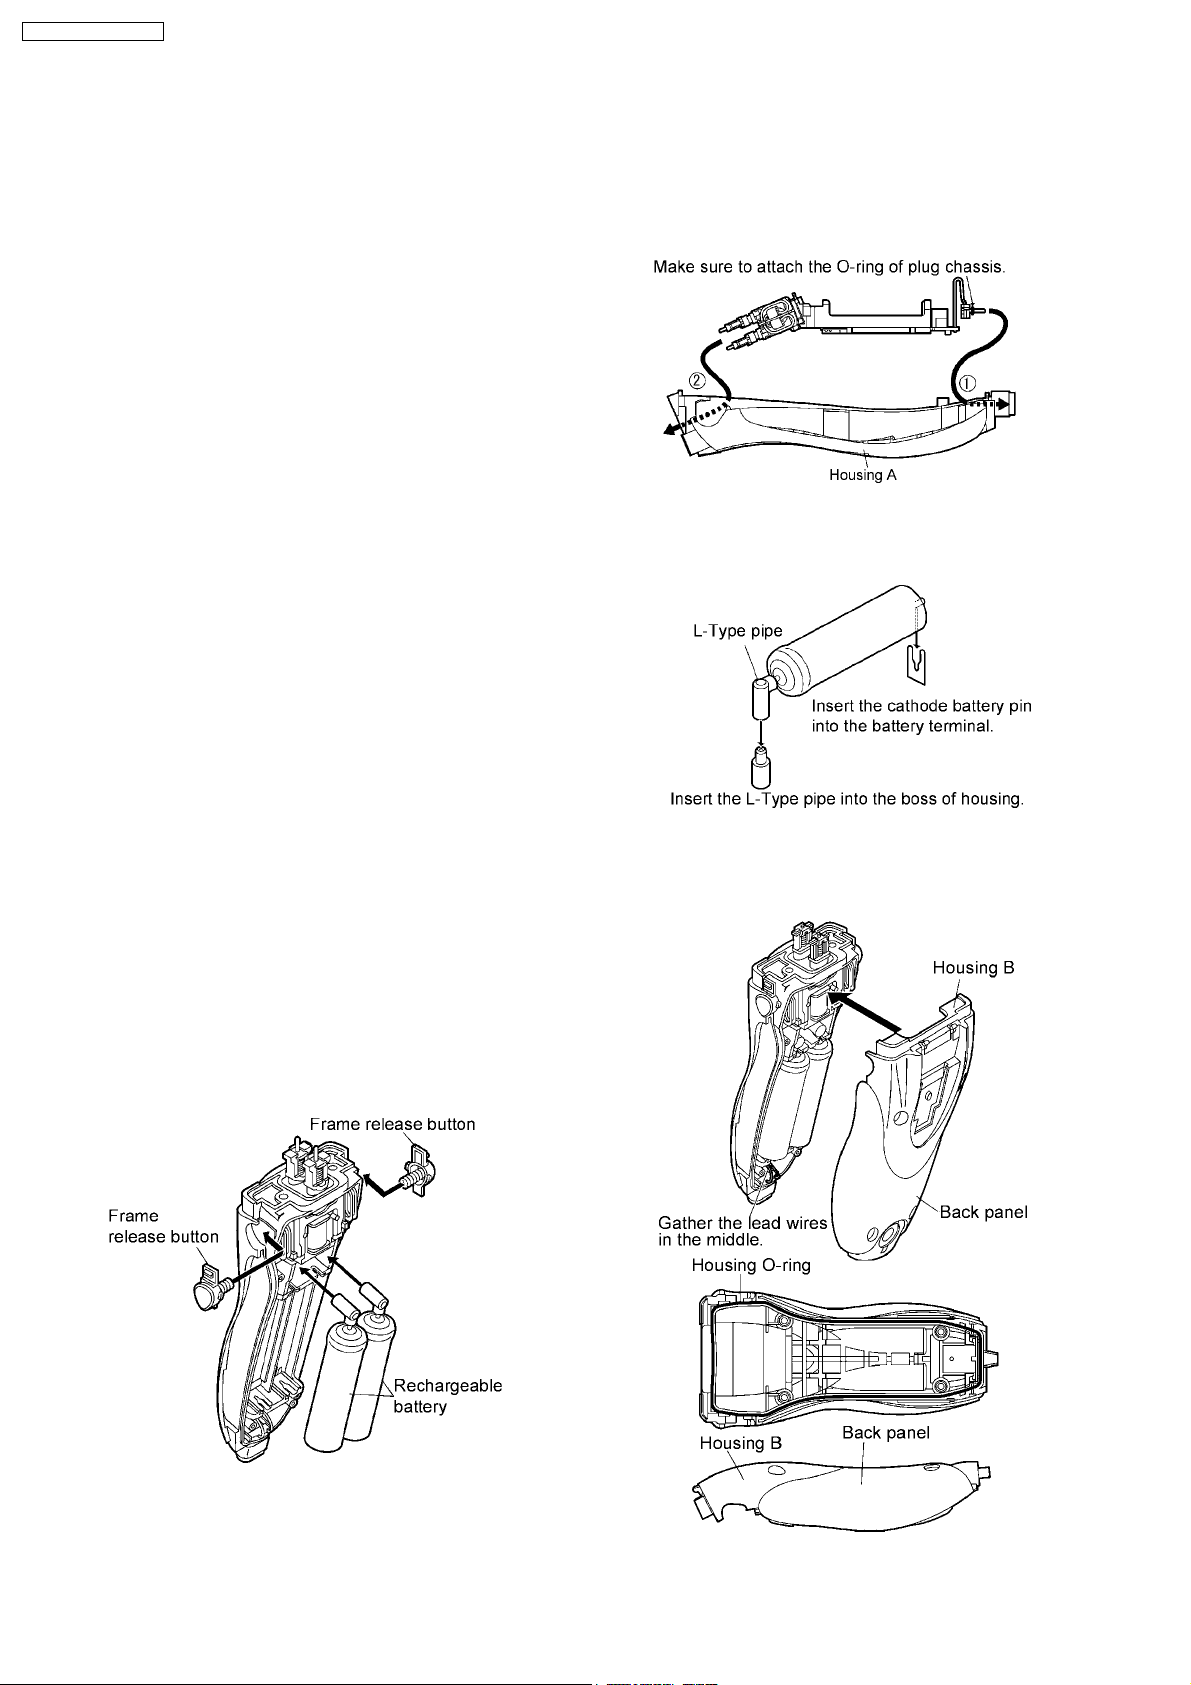
9WES8016L0967 O-RING *B (4PCS/PK) 4
10 WES8016H3767 SCREW CAP (UPPER) *B (2PCS/PK) GRAY 2
11 WES8017A1508 TRIMMER BLUE 1
12 WES8016S3068 HOUSING B 1
13 WES8016L1087 TRIMMER DRIVING BAR 1
14 WES8016L1077 SLIT BLADE DRIVING BAR 1
15 WES8016L0337 L-TYPE PIPE *B (2PCS/PK) 2
16 WES8017L2508 RECHARGEABLE BATTERY *B (2PCS/PK) NI-MH TYPE 2
17 WES8016L1008 LINEAR MOTOR ASSEMBLY 1
18 WES8016S3058 HOUSING A 1
18 WES8016S3059 HOUSING A only for KOREA 1
19 WES8016A3267 FRAME RELEASE BUTTON *B (2PCS/PK) BLUE 2
20 WES8016L0187 BUTTON SPRING *B (2PCS/PK) 2
21 WES8016A3128 BOTTOM COVER BLUE 1
21 WES8016A3129 BOTTOM COVER only for TAIWAN BLUE 1
22 WES8016L9267 TAPPING SCREW K2-5 1
23 WES8016S3038 BODY BLOCK 1
23 WES8016S3039 BODY BLOCK only for TAIWAN 1
23 WES8016S3031 BODY BLOCK only for KOREA 1
24 WES8017K7663 POWER CORD C-2 PLUG 1
24 WES8017K7662 POWER CORD A-2 PLUG 1
24 WES8016K7671 POWER CORD KOREAN PLUG 1
25 WES8023A7008 SOFT CASE 1
26 WES861B7057 CLEANING BRUSH 1
-WES8016S8008 INDIVIDUAL BOX 1
-WES8016S8009 INDIVIDUAL BOX only for KOREA 1
-WES8017N8100 OPERATING INSTRUCTIONS 1
10
ES8016-A3 / ES8017-A3