Getting Started
• Never remove the grilles except for maintenance.
• Always charge battery to its maximum before using the SEASCOOTER™. After charging is complete the
battery will continue to emit gas. Wait at least 30 minutes after charging before removing the battery from
the charger or placing the battery into the battery housing. Failure to do so could result in an explosion.
• The Seascooter™ is not a personal floatation device - always wear a Approved Personal Flotation
Device / Approved Life-Preserver when using the Seascooter™ for snorkeling.
• ALWAYS keep the SEASCOOTER™ out of direct sunlight when not in use. HEAT KILLS BATTERIES
AND IT MAY EXPLODE OR LEAK.
• When using the SEASCOOTER™ for SCUBA-DIVING, ascents and descents should be made in
accordance with recognized diving practices.
• The SEASCOOTER™ should only be used for SCUBA-DIVING by qualified divers.
• Never open the Cover of the SEASCOOTER™ in the water.
• When not in use, always turn the Master Switch to the off position.
• Do not use the SEASCOOTER™ MARINE 200 below the recommended maximum depth of 20m/65ft.
• Do not use the SEASCOOTER™ MARINE 250 / MARINE 280 / MARINE 300 below the recommended
maximum depth of 30m/100ft.
• ALWAYS remove the battery from the unit when not in use.
• DO NOT store the battery in the unit
• In different waters (seawater, lake, pool) and conditions such as currents, temperature and pressure can
affect the buoyancy of the unit which may cause the unit to sink if accidentally released.
• DO NOT release or leave the Seascooter in the water. Always take the unit out of water when not in use.
- The Seascooter shall not be used in reverse direction.
- Adequate lighting shall be used when using the Seascooter in dark waters and during night diving.
- Do not use the unit if it is damaged in any way.
- When using the Seascooter for scuba diving, ascents and descents should be made in accordance with
recognized diving practices.
- Due to safety considerations those who have not obtained a C-Card(attesting to completion of training)
from an entity providing diving instruction must not under any circumstances use this product for diving.
- Keep the manual since it contains important information.
When you buy the
SEASCOOTER™
the battery is
disconnected and needs to be charged. Follow the Battery
Instruction on pages 12 to 15 and charging instructions on
pages 16 to 19.
Using the SEASCOOTER™for swimming and snorkeling.
When swimming or snorkeling the
SEASCOOTER™
should
be kept positively buoyant - this is done by simply making
sure the Buoyancy Chamber is empty and fitted inside the
Nose Cone.
To use the SEASCOOTER™for swimming or snorkeling
follow these instructions.
1.Charge the battery and install just before use.
2.Make sure that Vent Plug is closed.
3.Replace the Buoyancy Control Chamber.
4.Place the SEASCOOTER™ into the water so the Handle,
Outer Nose Cone and Nozzle fill with water.
CRUSHING HAZARD:
The following action during assembly, disassembly, and
transportation of the Seascooter may incur crushing hazards
to your fingers or toes:
-Closing the nose cone latches
-Putting on the nose cone housing
-Placing the battery into the Seascooter
-Accidental dropping of the Seascooter or battery
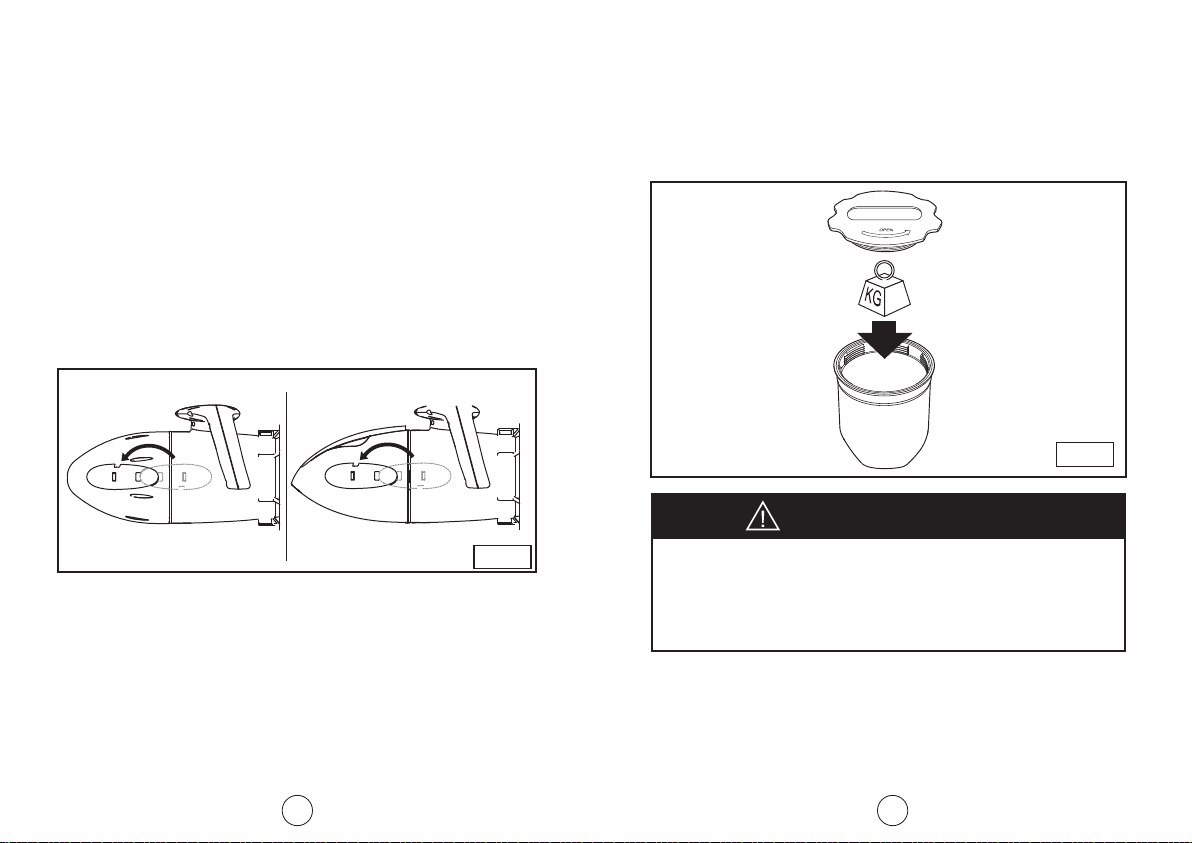
5.When ready to set off, turn the Master Switch to the
On position shown in figure 3.
6.For US version: Pull and hold the Trigger(s) to start the
Propeller.
For EU version (MARINE 250 / MARINE 280 /
MARINE 300 Only):
Pull and hold both Triggers to start the Propeller.
(There is a short delay before the Propeller begins to rotate).
7. To stop the Propeller, simply release the Triggers.
8. Always turn the Master Switch off when out of the water.
9.
Proper posture when using the SEASCOOTER™ is important
to achieve the maximum speed - see figure 4 for the correct
position of the SEASCOOTER™when using it.
6 7
CAUTION