manuals.online logo
Brands
  1. Home
  2. •
  3. Brands
  4. •
  5. Navigator Stove Works
  6. •
  7. Stove
  8. •
  9. Navigator Stove Works HALIBUT User manual

Navigator Stove Works HALIBUT User manual

Navigator Stove Works, LLC.
www.marinestove.com
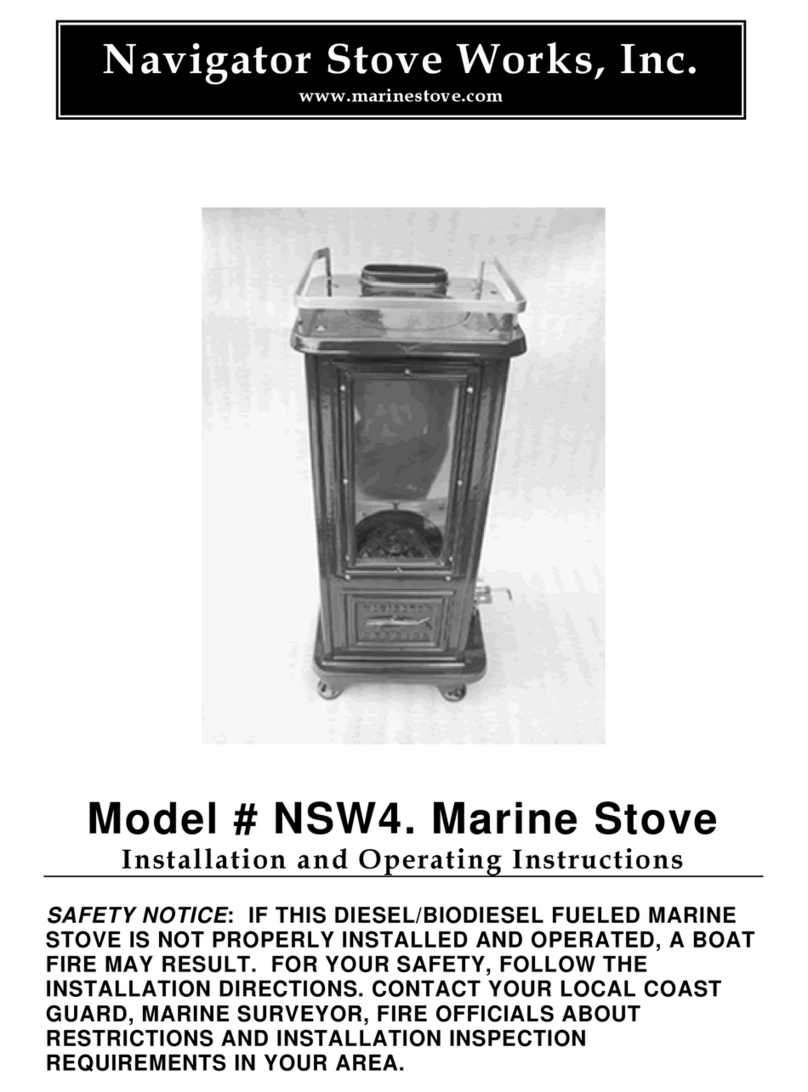
HALIBUT
Marine Stove
Installation and Operating Instructions
SAFETY NOTICE: IF THIS SOLID FUEL MARINE STOVE IS NOT PROPERLY
INSTALLED AND OPERATED, A BOAT FIRE MAY RESULT. FOR YOUR
SAFETY, FOLLOW THE INSTALLATION DIRECTIONS. CONTACT YOUR
LOCAL COAST GUARD, MARINE SURVEYOR, OR FIRE OFFICIALS ABOUT
RESTRICTIONS AND INSTALLATION INSPECTION REQUIREMENTS IN
YOUR AREA.
All manuals and user guides at all-guides.com
all-guides.com
TABLE OF CONTENTS
GENERAL INFORMATION
MARINE INSTALLATION
1. POSSIBLE HAZARDS TO AVOID WHEN USING THE HALIBUT.
2. INSTALLATION & SAFETY NOTICE
3. OPERATION
4. MAINTENANCE
WARNING
DO NOT LEAVE THIS STOVE
UNATTENDED WHILE IN OPERATION
SAFE OPERATION OF THIS
MARINESTOVE IS THE PRODUCT
OF TWO FACTORS:
A CAREFULLY TENDED FIRE AND
PROPER INSTALLATION
General Information
This owner’s manual describes the installation and operation of Navigator’s
HALIBUT Marine Stove for wood & coal. This model is not an EPA certified
residential wood heater. It is EPA exempt and falls under EPA’s 2015 “camp
stove” category. This marine stove may be installed within a boat or temporary
structure for portable and temporary use while hunting, camping, fishing or
other outdoor recreation.
2
All manuals and user guides at all-guides.com
Codes and Regulations compiled from the following sources serve as the basis
for the instructions contained in this document:
ABYC “A-7” *1
NFPA “302” *2
NFPA “211” *3
40 CFR 60 - AAA *4
CAN/CSA B365-M91 *5
(See Appendix for Details)
This wood heater needs periodic inspection and repair for proper
operation. It is against federal regulations to operate this wood heater in
a manner inconsistent with operating instructions in this manual.
When installing, operating, and maintaining your HALIBUT, follow the
guidelines given in these instructions. Save these instructions and make them
available to anyone using the stove.
Please contact your insurance representative, marine surveyor, US & CDN
Coast Guard, or local fire officials to determine what regulations apply in
your area.
MARINE INSTALLATION
1. Possible Hazards to Avoid
Any use of fire in a boat represents a certain danger. With intense overfiring,
temperatures on the surface of the HALIBUT can exceed 1000°F. (536°C).
Comply with the following guidelines:
•Never install a HALIBUT in a boat that is powered by a gasoline engine.
•Never over fire the stove. If any part of the stove or chimney glows, you are
over firing, and a boat fire or serious damage to the stove or chimney could
result. Immediately close down the air controls if you notice this condition.
•Teach children that the stove is hot and must not be touched.
•Never use gasoline, or gasoline-type lantern fuel, kerosene, diesel, charcoal
lighter fluid or similar liquids to start or “freshen up” a fire in the stove. They
can ignite with explosive force, causing bodily injury or death. Keep all such
liquids far away from the stove while it is in use.
•Never use the stove if there are combustible vapours in the boat. The vapours
from certain cleaning fluids, adhesives, and polyurethane paints are a few
examples of combustible vapours. Remember that operating a solid-fuel fired
marine stove is a source of “open flame”.
•Keep combustible materials far away from the stove.
3
All manuals and user guides at all-guides.com
•A vent system or other means shall be provided to allow the discharge from
the boat of hydrogen gas released by the battery. Battery boxes with a cover
that forms a pocket over the battery shall be vented.
•Do not locate traditional marine oil lamps directly over the stove. Oil spillage
onto a hot stove will cause a fire.
•Do not dry clothes over the stove, since they could fall and ignite.
•Fabrics located above and within 39” of the stove used for decorative or other
purposes shall be flame resistant in accordance with NFPA 701, Standard
methods of fire tests for flame-resistant textiles & films.
•To prevent injury, do not allow anyone to use this stove who is unfamiliar with
the correct operation of the stove.
•Avoid creating a “Low Pressure” condition in the space where the stove is
operating, such as by operating an exhaust fan. A low pressure condition could
cause poisonous gasses to be drawn out of the stove and into the room. Carbon
monoxide is toxic, so please follow the guidelines in this manual to avoid
smoke “roll out” from the burn chamber. You can prevent a low pressure
condition by providing adequate outside combustion air within 24 inches of the
stove. Keep a port, hatch, or window open while operating the stove!
Install a carbon monoxide monitoring device and maintain it as directed by
the manufacturer.
•If for some reason smoke “rolls out” of the stove, it might activate a smoke
alarm or carbon monoxide detector.
•To avoid smoke or flame spillage, open the air adjuster and the stove pipe
damper before opening the door to fill the stove with fuel.
•Never operate the stove if it is damaged, missing parts, or has been modified
in any way.
•Do not burn synthetic fire place logs in the stove. Use only natural wood or
coal or hardwood charcoal.
•To prevent spontaneous combustion, coal & charcoal shall be kept dry and
stored in a closed, dry metal container.
•Always use protective gloves when adding fuel to the fire.
•Do not operate the stove during severe storm conditions at sea. Stow cook
surface cover plates, air adjuster and handles.
2. Installation
SAFETY NOTICE: IF THIS SOLID FUEL MARINE COOK STOVE
IS NOT PROPERLY INSTALLED AND OPERATED, A BOAT FIRE
4
All manuals and user guides at all-guides.com
MAY RESULT. FOR YOUR SAFETY, FOLLOW THE
INSTALLATION DIRECTIONS. CONTACT YOUR LOCAL COAST
GUARD, MARINE SURVEYOR OR FIRE OFFICIALS ABOUT
RESTRICTIONS AND INSTALLATION INSPECTION
REQUIREMENTS IN YOUR AREA.
Please read this entire manual before you install and use your new stove.
Failure to follow instructions may result in property damage, bodily injury, or
even death.
We recommend that you have your HALIBUT Installed by a
professional installer of solid-fuel marine stoves.
Remove Stove From Crate
CAUTION
Two people are required to uncrate & position the 175 Lb. stove
Please do not try to do it alone. Your back will thank you.
When removing the stove, Do not lift the stove by it’s bronze “sea rail.”
This part is only designed for keeping cook pots in place while at sea. Lift the
stove free from the crate by grasping the outer-most edges of it’s cast iron top.
During the installation process please remember that the stove is cast iron
and not steel. Cast iron unlike steel will crack rather than bend when
subjected to excessive force. The fasteners which have been used to
assemble the stove have only been tightened to roughly ¼ turn past “finger
tight”.
DO NOT OVER TORQUE:
LEG SET SCREWS.
4 WINGNUTS on the underside of stove that terminate the long body
bolts.
SEA RAIL CORNERPOST fasteners.
OVEN CLEAN OUT PLATE screws (if fitted for).
TURNBUCKLE ATTACHMENT points on left & right sides.
Carefully remove the legs, cover plates, shaker grate handle and cover plate
handle from inside the fire box or oven.
Installing the Legs. Using a thin pad to cushion the stove, carefully tip it
45 degrees onto its front edge. Pay attention to the firebox liners as they are
simply held by gravity and will fall out of place if turned upside down. Install
rear legs first. Each leg has a dovetail slot and fits into its corresponding
“dimple numbered” slot. A mirror could help to identify which leg goes
5
All manuals and user guides at all-guides.com
where. Tighten the set screw to fix its position.
Changing the WOOD and COAL front firebox liner plates. The stove is
delivered with the wood liner in place. To switch over to the horizontal bar
liner for coal burning, reach your hand inside the firebox through the 6”
coverplate opening. The wood liner slides UP, and then to the rear. Remove
liner through coverplate opening. Generally, coal loads through the top of the
stove and wood through the upper firebox ROBAX glass door.
Place the two circular cover plates in their places on the cook surface.
Planning the Installation....
If you are considering installing a HALIBUT in a vessel which has a
previously installed stove hearth and/or chimney pipe, it is critical that you
have the existing components inspected for safety.
Safe stove installation involves several aspects: (A) the chimney pipe / deck
iron combination. (B) protecting combustible materials in the vicinity of the
stove. (C) securing the stove. Each of these aspects is equally important for
a safe and secure installation. Consult with a Marine Surveyor.
A. Chimney Pipe
The chimney pipe should be of 4” Dia. stainless steel with a minimum
thickness of 26 gauge. Secure sections of pipe together with three sheet
metal screws per joint to insure that the sections will not separate.
NOTE: At the stove to pipe connection, the pipe is hand formed to fit OVER
the stove’s cast collar.
Single-wall smoke pipe and stacks shall have a minimum clearance of 9
inches (23 cm.) from combustible materials including painted materials
or shall be separated by fire resistant thermal insulation that is acceptable to
the authority having jurisdiction. NFPA Standards #302 / 211
Consult with a Marine Surveyor to determine the protection system best
suited for your installation if you cannot maintain the minimum 9” clearance.
This system will commonly consist of a layered panel, made from 20 Ga.
sheet stainless and 5/8” non asbestos mineral board, spaced 1” from the
combustible surface to which it is attached.
*Exception: at decks equipped with a water iron. (NFPA 302, 6 - 3.3)
Water Deck Iron
6
All manuals and user guides at all-guides.com
all-guides.com
Either a bronze or a cast iron “water deck iron” shall be used. This traditional
fitting contains water in a trough which surrounds and cools the chimney pipe
as it passes through the deck. Follow manufacturer’s installation & operation
instructions when installing this hardware. Keep the trough filled with water
while operating the stove.
A flue damper shall be installed in the pipe no less than 21” above the cook
surface of the stove. The damper is a critical component which will enable
the user to control the stove’s draft. Do not install a HALIBUT without a
damper.
Flue Pipe Draft Damper
Do not use aluminum or galvanized pipe as chimney pipe. These
materials cannot withstand the operating temperatures of a fire and can give off
toxic fumes when heated. Round stove pipe must be hand formed to an oval
shape which will then slide onto the stove’s oval flue collar.
The connection between the 4” chimney pipe and the stove’s oval flue collar
shall be sealed with stove cement or a piece of stove gasket material. Design
the piping so that no more than a total of two 90 degree bends are utilized.
Horizontal runs shall rise at 1/4 inch per foot.
Chimney piping may not be run through a closet, locker or other concealed
space. Always connect this stove to a chimney and vent to the outside of the
vessel. Install a Smoke Head which is designed to minimize water entry, spark
emission and backdraft. In very bad weather do not operate the stove. Safely
stow the smoke head and install a deck plug which will effectively seal the deck
iron‘s opening in the event of the vessel overturning.
Smoke Head
Additionally, install a UL listed spark arrester if the smoke head you have
chosen does not incorporate one into it’s design.
Do not position the deck iron / smoke head combination within 20” of deck
mounted fuel refill fittings or fuel tank vents. Position the smoke head to
7
All manuals and user guides at all-guides.com
minimize exhaust re-entry into the boat.
B. Clearances to Combustibles
Floor Protection....
The HALIBUT shall be mounted on a non-combustible base (preferably a
composite panel of 20Ga. stainless steel and non-asbestos mineral board).
As well as being non-combustible, the base must have a minimum R-Value
(thermal resistance) of R2.
For example, 1/2” of Micore 300 mineral board has an R-Value of 1.09.
A minimum clearance of 1”- 25mm shall be maintained between the composite
panel and the “decking” to which it shall be securely fastened. Mounting
hardware which extends from the panel into combustibles may be used only at
the lateral extremities of the panel. Mounting hardware must allow full
ventilation of the air space between the “deck” and the composite panel.
The non-combustible base, or “deck protector panel”, shall extend out from the
sides and back of the stove to exactly 1” from all adjacent vertical surfaces
surrounding the stove. (i.e., walls, bulkheads, hull, cabinetry, furnishings which
will normally be protected by an engineered protection system. See Diagram
#3).
The “deck protector panel” shall extend out from the front of the stove a
distance equal to the dimension of the underlying platform.
Floor protection shall also be used under the stove pipe and must extend 2”
beyond either side of the pipe.
CAUTION: First install a non-combustible stove base and/or wall shielding to
provide a safe under-layment for ceramic tile. Tile must not be used as the sole
form of thermal protection due to its ability to conduct significant heat to
combustible materials to which it may be directly attached. Ceramic tile shall be
incorporated into a hearth design only as a decorative surface treatment.
Plastics, fiberglass reinforced plastics, wood, or paper products are combustible
and must not be used.
Clearances to Adjacent Combustible Materials....
Three basic requirements determine the clearance values necessary for the
stove’s installation. Failure to follow these requirements may result in property
damage, bodily injury, or even death.
RULE 1. Exposed materials and finishes within 24” (61Cm) of heat generating
surfaces of the stove shall have a “flame spread index” of not more than 75
as determined in accordance with NFPA 255, Standard Method of Test of
Surface Burning Characteristics of Building Materials.
8
All manuals and user guides at all-guides.com
RULE 2. The sides, back, and front surfaces of the HALIBUT shall have a
minimum clearance of 9” (23Cm) from the exposed combustible
materials and finishes which shall meet the requirements of RULE 1, or
shall be separated by an engineered protection system acceptable to the
authority having jurisdiction. Engineered systems installed for the protection
of combustible material shall reduce the temperature of such materials to
90°F (50°C) rise above ambient. System design shall be based on applicable
heat transfer principles, taking into account the geometry of the system, the
heat loss characteristics of the structure behind the combustible material,
and the possible abnormal operating conditions of the heat-producing
sources.
RULE 3. Minimum clearance to combustible ceilings or materials above the
cook surface of the HALIBUT shall be 36” (92Cm), or shall be separated by an
engineered protection system acceptable to the authority having jurisdiction.
Engineered systems installed for the protection of combustible material shall
reduce the temperature of such materials to 90°F (50°C) rise above ambient.
System design shall be based on applicable heat transfer principles, taking into
account the geometry of the system, the heat loss characteristics of the
structure behind the combustible material, and the possible abnormal operating
conditions of the heat producing sources.
Marine installations will normally require considerable heat-shielding due
to the fact that most boatbuilding materials or finishes located within 9” of
the sides and back of the stove will not have the required rating of FSI 75
or less.
Common Bldg. Materials & Flame Spread Indices:
White Oak 100
Douglas Fir 83 - 100
Eastern White Pine 85
Southern Yellow Pine 130 - 195
Western Spruce 100
1/2” Exterior Douglas Fir Plywood130- 150
3/4” Birch Plywood (veneer core) 114
1/2” Particleboard 156
1/4” Lauan Plywood 150
3/8” FRP (polyester & glass fiber) 200+
Micore 300 Mineral Fiber Board 25
Manufactured by US Gypsum, Inc.
http://www.gypsumsolutions.com/htmlID/micore.asp
Insulation material used as part of a clearance reduction system shall also have
a thermal conductivity (K-Value) of 1.0 (Btu-in.) / (ft 2 -hr-°F) or less.
Insulation board shall be formed of noncombustible material. For example,
Micore 300 has a K-value of .458.
Also see for further information:
http://hearth.com/articles/64_0_1_0_M1.html
9
All manuals and user guides at all-guides.com
Please Remember....
A combustible is anything that can burn. In the case of stove installations, these
materials may not be plainly visible. Consult your local fire officials if you are
unsure about the combustible nature of a material in the vicinity of your planned
stove installation. Fire resistant materials are difficult to ignite but they will
burn!
Diagrams #1 & #2 give the required clearances that must be maintained from
unprotected combustible materials or finishes.
Diagram #3 illustrates an example of an engineered protection system that
would be used to shield combustible materials.
Consult with your local Marine Surveyor to determine suitable design
parameters for your particular vessel
10
All manuals and user guides at all-guides.com
11
All manuals and user guides at all-guides.com
all-guides.com
DIAGRAM #3.
Shield Construction Specifications:
1) Minimum space between shield and combustibles: 1” - 25 mm
2) Minimum clearance along the bottom of shield: 1” - 25 mm
3) Maximum clearance along the bottom of shield: 3” - 75 mm
4) Minimum clearance along the top of shield at ceiling: 3” - 75 mm
5) Edge clearance for ceiling shields: 3” - 75 mm
6) Adhesives used in shield construction must not ignite or
lose adhesive qualities at temperatures likely to be encountered.
7) Mounting hardware must allow full vertical ventilation.
8) Mounting hardware must not be located closer than 200 mm (8 in.)
from the vertical centre line of the appliance.
9) Mounting hardware which extends from the shield surface into
combustibles may be used only at the lateral extremities of the shield.
NOTE: Workshops which fabricate stainless restaurant equipment are great
(cost effective) sources for stainless shielding materials. Make plywood
templates of the required shields and have your local supplier quote a price.
Consider hiding the mineral board edges by bending-over the edges of the
12
All manuals and user guides at all-guides.com
metal by 1/2”. Doing so will require minimal welding at each of the four
corners which these shops are normally set up to do. Also, consider orienting
the surface texture, or grain of the metal either all horizontal, or all vertical
(if you care). This method of dealing with the shielding issue has yielded
high quality results which would have been hard to match otherwise.
C. Securing the Stove....
The stove’s legs have holes which shall allow you to safely anchor it in
place. We suggest that you use 1/4” stainless steel bolts with oversize
washers, lock washers, and all-metal locking nuts. Do not use plain screws
as they might not hold the stove in place during a violent storm. Attach the
stove to its base before installing the smoke piping. Carefully observe the
required clearances to combustibles.
Installing Turnbuckle Hold Downs.
In order to reduce stress on the leg hold down fasteners & to assure that the
stove does not move aboard a rocking boat, install two ¼” clevis pin size
turnbuckles. Centered within the compass roses on the L& R stove sides are
the attachment points. Tighten body of turnbuckle until slack is removed
between stove and platform mounted eye. DO NOT OVERTIGHTEN. Pin to
pin about 9” is required.
3. Operation.
Before building a fire in your new stove, please read the following section
carefully.
Mount the supplied “Warning” plaque in the vicinity of the stove such
that it is clearly visible while operating the stove.
Make sure the stainless ash pan is installed behind the lower firebox door.
This stove is designed to burn natural wood, hardwood charcoal and coal.
Higher efficiencies and lower emissions generally result when burning air-
dried seasoned hardwoods, as compared to softwoods or to green or freshly-
cut Hardwoods.
Do not burn:
•Treated or Painted Wood
•Garbage
•Chemical Chimney Cleaners
•Cardboard
•Colored Paper
•Solvents
•Any synthetic fuel or logs that have
not been approved for wood stoves.
Burning treated wood, garbage, solvents, colored paper, chemical chimney
13
All manuals and user guides at all-guides.com
cleaners, or trash may result in the release of toxic fumes. Never use
gasoline, gasoline-type lantern fuel, kerosene, charcoal lighter fluid, or
similar liquids to start or "freshen up" a fire in this heater.
Keep all such liquids far away from the heater while
it is in use.
Wood & Coal Storage.
To prevent spontaneous combustion, coal shall be kept dry and stored in a
closed, dry metal container.
When storing wood, it should be covered and stored off the ground to protect
it from the elements. Make certain that the wood-pile has good air circulation
through it in order to promote drying to aid in the seasoning process.
To obtain the best performance from your stove, we recommend using
seasoned hardwood that has been dried and stored under cover for at least
one year. Burning unseasoned or wet wood causes the rapid development of
creosote and reduces the heat value of the wood being burned.
Creosote and Soot Formation and the Need for Removal.
When wood is burned slowly, it produces tar and other organic vapors which
combine with expelled moisture to form creosote. These creosote vapors
condense in the relatively cool chimney flue of a slow burning fire. The
creosote that accumulates in the flue is highly flammable and is the fuel of
chimney fires. To prevent a chimney fire, the creosote needs to be removed
by sweeping the chimney and flue connector. The frequency of sweeping will
depend on how you operate your stove, but it is important to inspect the flue
after every two weeks of use. An accumulation of 1/4" or more on the sides
of the flue or connector is considered hazardous and should be removed.
In the event that creosote in your chimney ignites, the resulting fire is often
accompanied by a roaring noise and a crackling sound as flakes of burned
creosote break loose. If you suspect you are having a chimney fire,
immediately close the draft damper and sliding air control, making sure the
stove door is closed. Call the “fire department” and get everyone safely out
of the boat.
Trying to extinguish the fire in the stove will not help. In fact it can make the
matter worse by allowing oxygen through the door, which then supports the
fire in the chimney. When the roaring and crackling has stopped, you should
resist the temptation to open the door and look at the fire. The fire may have
suffocated, but could rekindle when you open the door. After a chimney fire,
do not use your stove until the chimney and the flue connector has been
cleaned and inspected to ensure that no damage has been sustained.
Breaking in Your Stove
A cast iron stove should be "broken in" gradually. Five consecutive small
fires must be built in the stove prior to operating the stove continuously.
Each fire should be a little larger than the preview one, and the last fire
14
All manuals and user guides at all-guides.com
should be a full-sized load. Allow the stove to cool completely between fires.
Controls
To open the two fire box or oven doors, firmly raise the latch and pull the
door toward you. To shut the door, raise the latch, push the door closed, and
lower the latch. Make sure the door catch is securely engaged.
Air Controls
1. The disc style air control is located in the lower firebox door.
Open = Clockwise / Close = Counter clockwise.
Turning the control clockwise opens the air control and increases the heat
output; turning it counter clockwise closes the control and decreases the
heat output.
Turn the control fully open when first starting or reviving a fire, or when
maximum heat is required.
2. Using the “START OUT / OVEN IN” slider.
Upon lighting the stove, you will want to pull OUT the stainless slider just
above the oven door. This will allow a direct updraft through the stove and
will bypass the circular flamepath that is used to heat all sides of the oven
when baking.
3. The stove pipe draft damper shall be located approximately 21” above the
stove top in the chimney pipe. Do not install a HALIBUT without a draft
damper.
Turning the handle parallel to the pipe increases the stove’s draft and
turning it perpendicular decreases the draft. Always fully open the
damper when starting or before refueling a fire.
You will determine the best settings for your particular needs as you gain
experience with your stove.
Building a Fire
A good fire will efficiently utilize your fuel keep emissions and creosote to an
absolute minimum, require less work, and be very predictable. Make sure the
air control is fully open. Open the front door and cover the bottom of the
stove with tightly crumpled newspaper. Criss-cross a generous double
handful of dry kindling, such as split pieces of scrap lumber on top of the
paper. If you don't have scrap lumber, split some of your best dry wood down
to finger-sized pieces and use that. Place three or four 1 " - 2" split pieces
of dry wood on top of the kindling. Light the paper evenly across the door.
Continue to add 1" - 2" pieces of split dry wood until a healthy bed of glowing
coals has formed. You can now add three or four small-to-medium pieces of
wood. Allow this wood to burn for several minutes. Once you are sure the
15
All manuals and user guides at all-guides.com
wood is burning well, adjust the air controls to your desired heat output
level.
If the fire dies out, the cause is most likely an insufficient bed of coals,
reducing the air supply too soon, or using wood that is either too large or not
dry enough.
The use of coal will generally require a wood fire initially to get the
coal to burn.
HOT WHILE IN OPERATION. KEEP CHILDREN, CLOTHING,
AND FURNITURE AWAY. DO NOT STORE FUEL WITHIN THE
CLEARANCES LISTED PREVIOUSLY.
Reloading
Reload the stove while it is still hot and there are plenty of hot coals to ignite
the fresh fuel load. It is a good idea to include a smaller piece or two of
wood at the base of the new load to help the stove recover more quickly to
its operating temperature.
Reloading Procedure
•Always wear gloves when tending the stove.
•Turn the air control open to the full open position.
•Open the pipe damper to the full open position.
•Pull out the Start Out – Oven In Slider to take the stove out of “baking
mode” and put it into “start mode”.
•Wait a few seconds and open the door.
•Use a stove shovel or similar tool to break up any remaining charcoal.
•Load the fuel (smaller pieces first).
•Close the door.
•Wait 5 -10 minutes and adjust the air controls to desired setting.
Note: If the charcoal bed present at reloading time is relatively deep (1"-2")
and your wood is well seasoned, it is possible to add the fresh fuel load,
close the door and reset the air control for the desired heat output within 5
minutes.
Ash Removal
Firebox Ash Removal. This will be required every day or two during normal
operation, and is most easily done when the fire has burned down to coals.
When removing the ash pan from a stove that is in operation, close and latch
the door before taking the ashes outside for safe disposal. It is always a
good idea to wear heavy protective gloves while removing and disposing of
the ashes from your stove.
Ashes should be placed in a metal container used exclusively for ashes,
16
All manuals and user guides at all-guides.com
all-guides.com
with a tight fitting lid. The closed container of ashes should be placed
outdoors, well away from all combustible materials, pending final disposal.
The ashes should be kept in the closed container until all cinders have
thoroughly cooled.
Oven Ash Clean Out. The plate in the bottom of the oven can be removed.
Please remove any ash that has built up in the chamber below the oven box.
Accumulation will reduce the flow through the stove while in “oven mode” and
this will increase the time it takes to get the oven up to temperature.
Cleaning the top of the oven is also a good idea. Inspecting through the
small stove top coverplate will let you get a better view. Keep the tang on the
bottom of the small coverplate towards the front of the stove and out of the
way of the slider.
OVERFIRING WILL RESULT IF THE STOVE IS OPERATED WITH THE
DOOR OPEN AND THE PIPE DAMPER IN THE FULLY OPEN
POSITION.
This could cause damage to the stove, void the warranty or lead to a boat
fire.
WARNING:
OPERATE THE HALIBUT ONLY WITH THE DOOR FULLY
CLOSED. KEEP THE DOOR FULLY CLOSED EXCEPT WHEN
LOADING FUEL OR REMOVING ASHES. A PARTIALLY
OPEN DOOR MAY ALSO RESULT IN OVERFIRING.
4. Maintenance
General
Clean the stove’s porcelain surface with a soft cloth and soap to remove any
accumulations of dirt. Do not use any abrasive cleansers or aggressive
scrubbing pads that might scratch the porcelain. Clean the stove when it
is cool to the touch.
Or, apply as necessary, black stove polish or high temperature paint to a
plain iron stove to keep it rust free. By polishing your stove just prior to a
period of non-use, you will decrease the chances of your stove rusting while
you’re away!
Also, make sure that water will not find its way down the chimney pipe.
Remove the smoke head and cap the deck iron. Water sitting in the stove can
rust-out the bottom of the stove.
At least once a year, perform a routine maintenance check. A good time to
do this is when you are cleaning the chimney and smoke head. You should
clean the chimney pipe whenever accumulations of soot and creosote
17
All manuals and user guides at all-guides.com
reach 1/4” thick, which may be several times a year, depending on how the
stove is operated.
1. Thoroughly clean the entire stove. Brush all ash and soot out of the stove.
It is better to brush out the ash and soot than to vacuum it out because soot
particles are small enough to pass through most vacuum bags. Keep a small
wire brush handy to remove any accumulated soot off of the inside of the
door.
2. In a dark room, use a strong light to inspect the stove inside and out for
cracks or leaks at corners and joints. Cracked parts should be replaced.
WARNING:
IF THIS SOLID FUEL STOVE IS NOT PROPERLY
MAINTAINED, A CHIMNEY FIRE MAY RESULT. FOR YOUR
SAFETY, FOLLOW THE MAINTENANCE DIRECTIONS AND
CLEAN YOUR CHIMNEY FREQUENTLY.
Appendix
*1 ABYC “A-7”
American Boat & Yacht Council Inc.
“A-7” Liquid and Solid Fuel Boat Heating Systems.
*2 NFPA “302”
National Fire Prevention Association
302, Fire Protection Standard for
Pleasure and Commercial Motor Craft 1998 Edition.
*3 NFPA “211”
National Fire Prevention Association
211, Standard for Chimneys, Fireplaces, Vents, and Solid Fuel-Burning Appliances 2000
Edition.
*4 40 CFR 60 - Subpart AAA
Code of Federal Regulations (USA)
Title 40, Volume 6, Part 60 Revised as of July 1, 1999
Standards of Performance for New Residential Wood Heaters.
*5 CAN/CSA B365-M91
Canadian Standards Association Installation Code for Solid Fuel Burning Appliances.
18
All manuals and user guides at all-guides.com
HALIBUT / Limited Warranty
Navigator Stove Works, LLC.warrants to the original retail purchaser, that this
HALIBUT Stove will be free of defects in material and workmanship for a period of
FIVE YEARS from the date of purchase on the terms and conditions set forth herein will
repair or replace, at its sole option, any part or stove found to be defective. The customer
must, at his/her own expense, arrange to deliver or ship the stove or part to NSW and
arrange for pickup or delivery of the stove or part after the repairs have been made. If
upon inspection, the damage is found to be the fault of the manufacturer the repair or
replacement will be made. Any HALIBUT or part thereof that is repaired or replaced
during the limited warranty period will be warranted for a period to not exceed the
remaining term of the original limited warranty or six (6) months, which ever is longer.
This warranty is not transferable and is extended only to, and is solely for the benefit of,
the original retail purchaser of the stove. Please retain your dated sales receipt in your
records as proof of purchase.
NOTE: The warranties are void if the stove is used to burn materials not outlined in the
user manual. Void as well if the stove is not operated according to the owner’s manual.
Exclusions & Limitations
This warranty does not cover the following:
Damage due to external causes, not attributable to manufacture or material defect.
Repair or replacements of parts which are subject to normal wear and tear during the
warranty period or to parts that may require replacement in connection with normal
maintenance.
Damage due to incorrect installations not in conformity with installation instructions,
local coast guard regulations, ABYC recommendations, NFPA Regulations.
Damage due to overfiring; causing any part to glow red. Overfiring can be identified by
warped plates, or by bubbling, cracking and discoloration of the enamel finish.
Damage caused by unauthorized modification, use or repair.
Damage made while the stove is in transit is not covered by this warranty but is subject
to claim against the common carrier (do not operate the stove as this may negate the
ability to process the claim with the carrier)
NSW offers no warranty on chipping of enamel surfaces.
Inspect your HALIBUT prior to accepting it from shipper for any damage to the enamel.
IN NO EVENT SHALL Navigator Stove Works,LLC. BE LIABLE FOR SPECIAL
INCIDENTAL OR CONSEQUENTIAL DAMAGES. ALL IMPLIED WARRANTIES,
INCLUDING THE IMPLIED WARRANTIES OF MERCHANTABILITY AND FITNESS
FOR A PARTICULAR PURPOSE, OR OTHERWISE, ARE LIMITED IN DURATION TO
THE LENGTH OF THIS WRITTEN WARRANTY. NO ORAL OR OTHER WRITTEN
WARRANTY IS ENFORCEABLE.
If you believe that your stove is defective, you should contact NSW, who will process a
warranty claim. This warranty is given by Navigator Stove Works, LLC 509 Double Hill
Road Eastsound, WA 98245
The customer agrees that Navigator Stove Works, LLC. will not be liable for any
consequential and/or incidental damages arising from any cause associated with the goods
or services purchased from Navigator Stove Works, LLC.
19
All manuals and user guides at all-guides.com

Other Navigator Stove Works Stove manuals

Navigator Stove Works NSW4 User manual

Navigator Stove Works

Navigator Stove Works NSW4 User manual

Navigator Stove Works NSW4 User manual

Navigator Stove Works

Navigator Stove Works NSW4 User manual

Popular Stove manuals by other brands

Clas Ohlson BDZ.180-A manual

Clas Ohlson

Clas Ohlson BDZ.180-A manual

Behringer iAXE393 user manual

Behringer

Behringer iAXE393 user manual

Intertek 25-CAB80 manual

Intertek

Intertek 25-CAB80 manual

Bubble CORNER OIL STOVE User instructions

Bubble

Bubble CORNER OIL STOVE User instructions

Nordica PLASMA 80:26 Instructions for installation, use and maintenance

Nordica

Nordica PLASMA 80:26 Instructions for installation, use and maintenance

Lopi Berkshire MV owner's manual

Lopi

Lopi Berkshire MV owner's manual

Drolet DB04800 installation manual

Drolet

Drolet DB04800 installation manual

redpod FIRST 6 kW instruction manual

redpod

redpod FIRST 6 kW instruction manual

Arada Lagom user guide

Arada

Arada Lagom user guide

Stratford EcoBoiler BK068 Operating & installation manual

Stratford

Stratford EcoBoiler BK068 Operating & installation manual

Extraflame NORIS user manual

Extraflame

Extraflame NORIS user manual

Pacific energy Fusion Installation and operating instructions

Pacific energy

Pacific energy Fusion Installation and operating instructions

KFD STO MAX 7 3F Installation and operation manual

KFD

KFD STO MAX 7 3F Installation and operation manual

Dovre 325MF Installation instructions and operating manual

Dovre

Dovre 325MF Installation instructions and operating manual

Infiniton HCT-200 user manual

Infiniton

Infiniton HCT-200 user manual

Harman Absolute43-C owner's manual

Harman

Harman Absolute43-C owner's manual

Ackerman K1 instruction manual

Ackerman

Ackerman K1 instruction manual

Plamen Glas Franklin Installation and operating instructions

Plamen

Plamen Glas Franklin Installation and operating instructions

manuals.online logo
manuals.online logoBrands
  • About & Mission
  • Contact us
  • Privacy Policy
  • Terms and Conditions

Copyright 2025 Manuals.Online. All Rights Reserved.