10
Original operation manual, edition 1/2020 Translation of the original operation manual from polish language
This manual should be treated as an integral part of the device. It should be stored in the place provided for it so that it is
easily accessible. Remember to pass on the operation manual to a new owner or user if the device is resold or transferred to
another person.
TABLE OF CONTENTS:
Table of contents 10
Technical data 11
Description of graphic pages and pictograms 11
Safety rules for machines and devices with internal combustion engine 12
General safety regulations 12
Detailed safety regulations 14
Safety and producer’s liability 17
Residual risk 17
Usage 17
Additional information for the user 17
Preparing for work 17
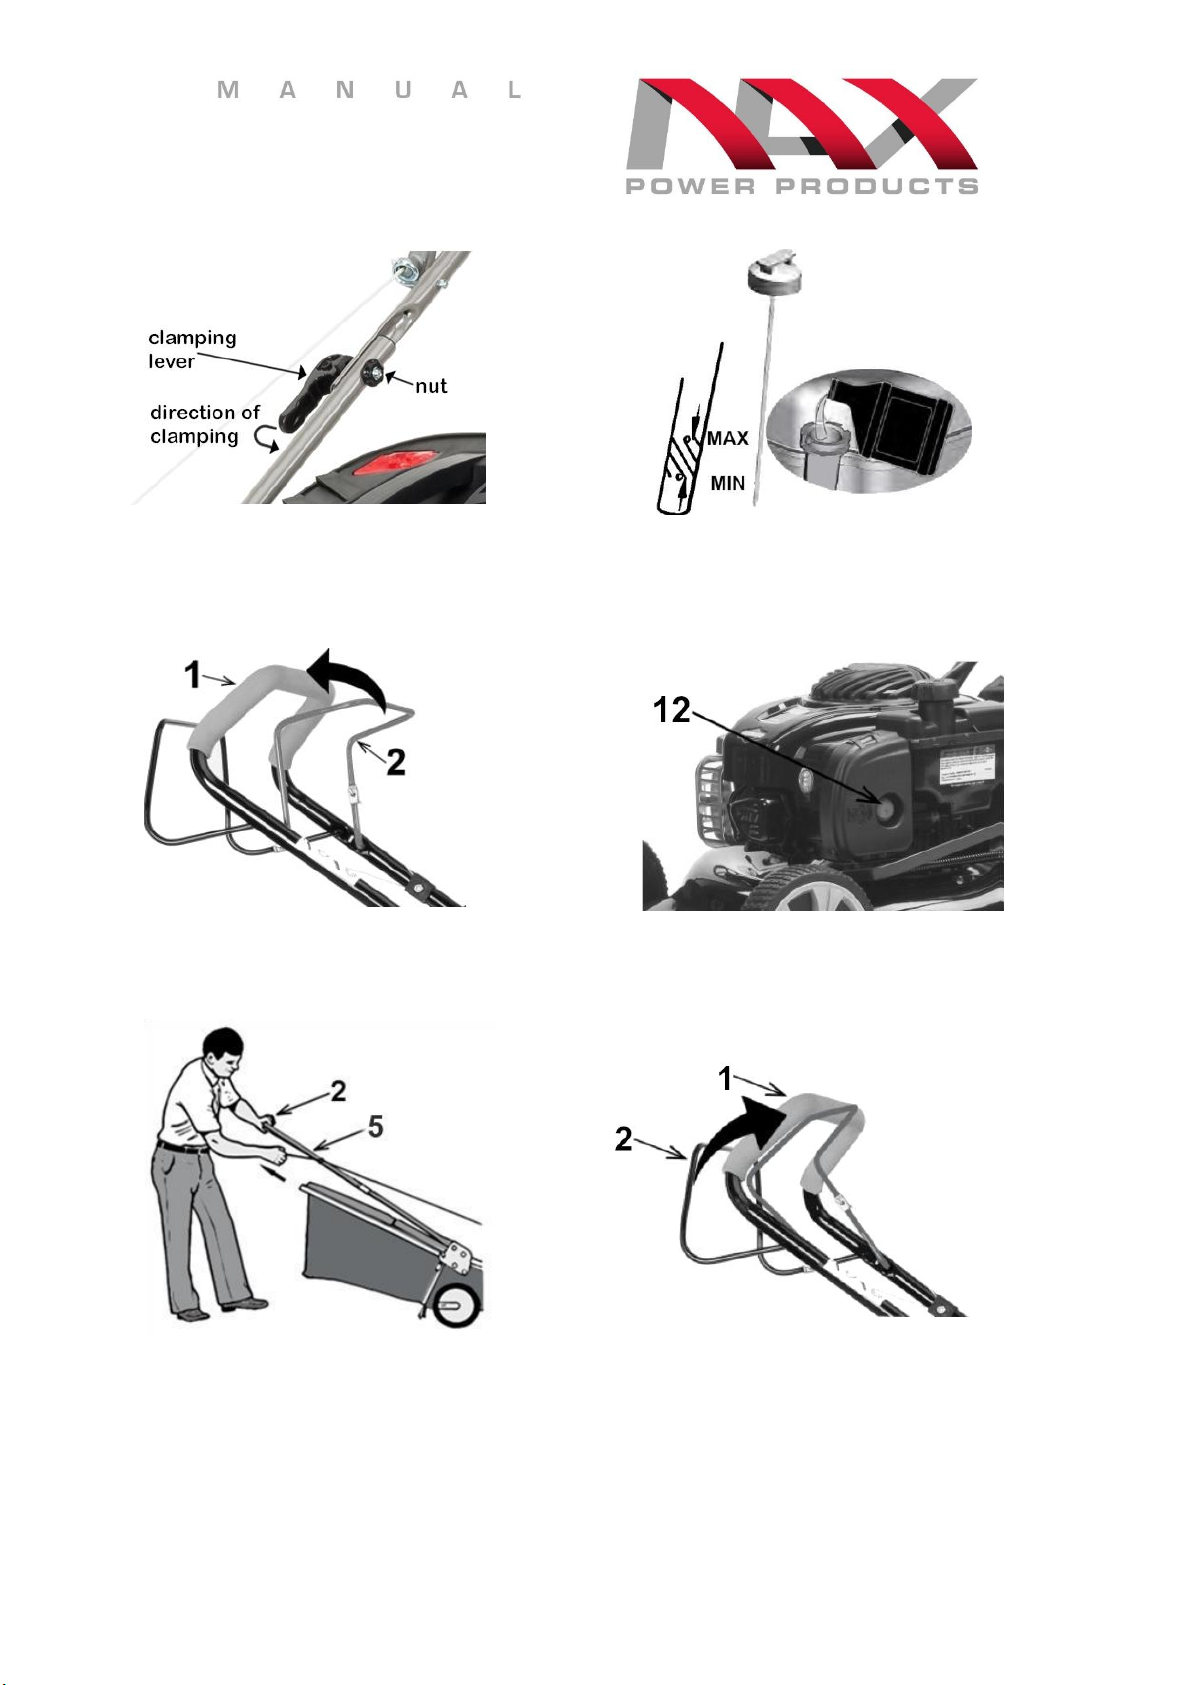
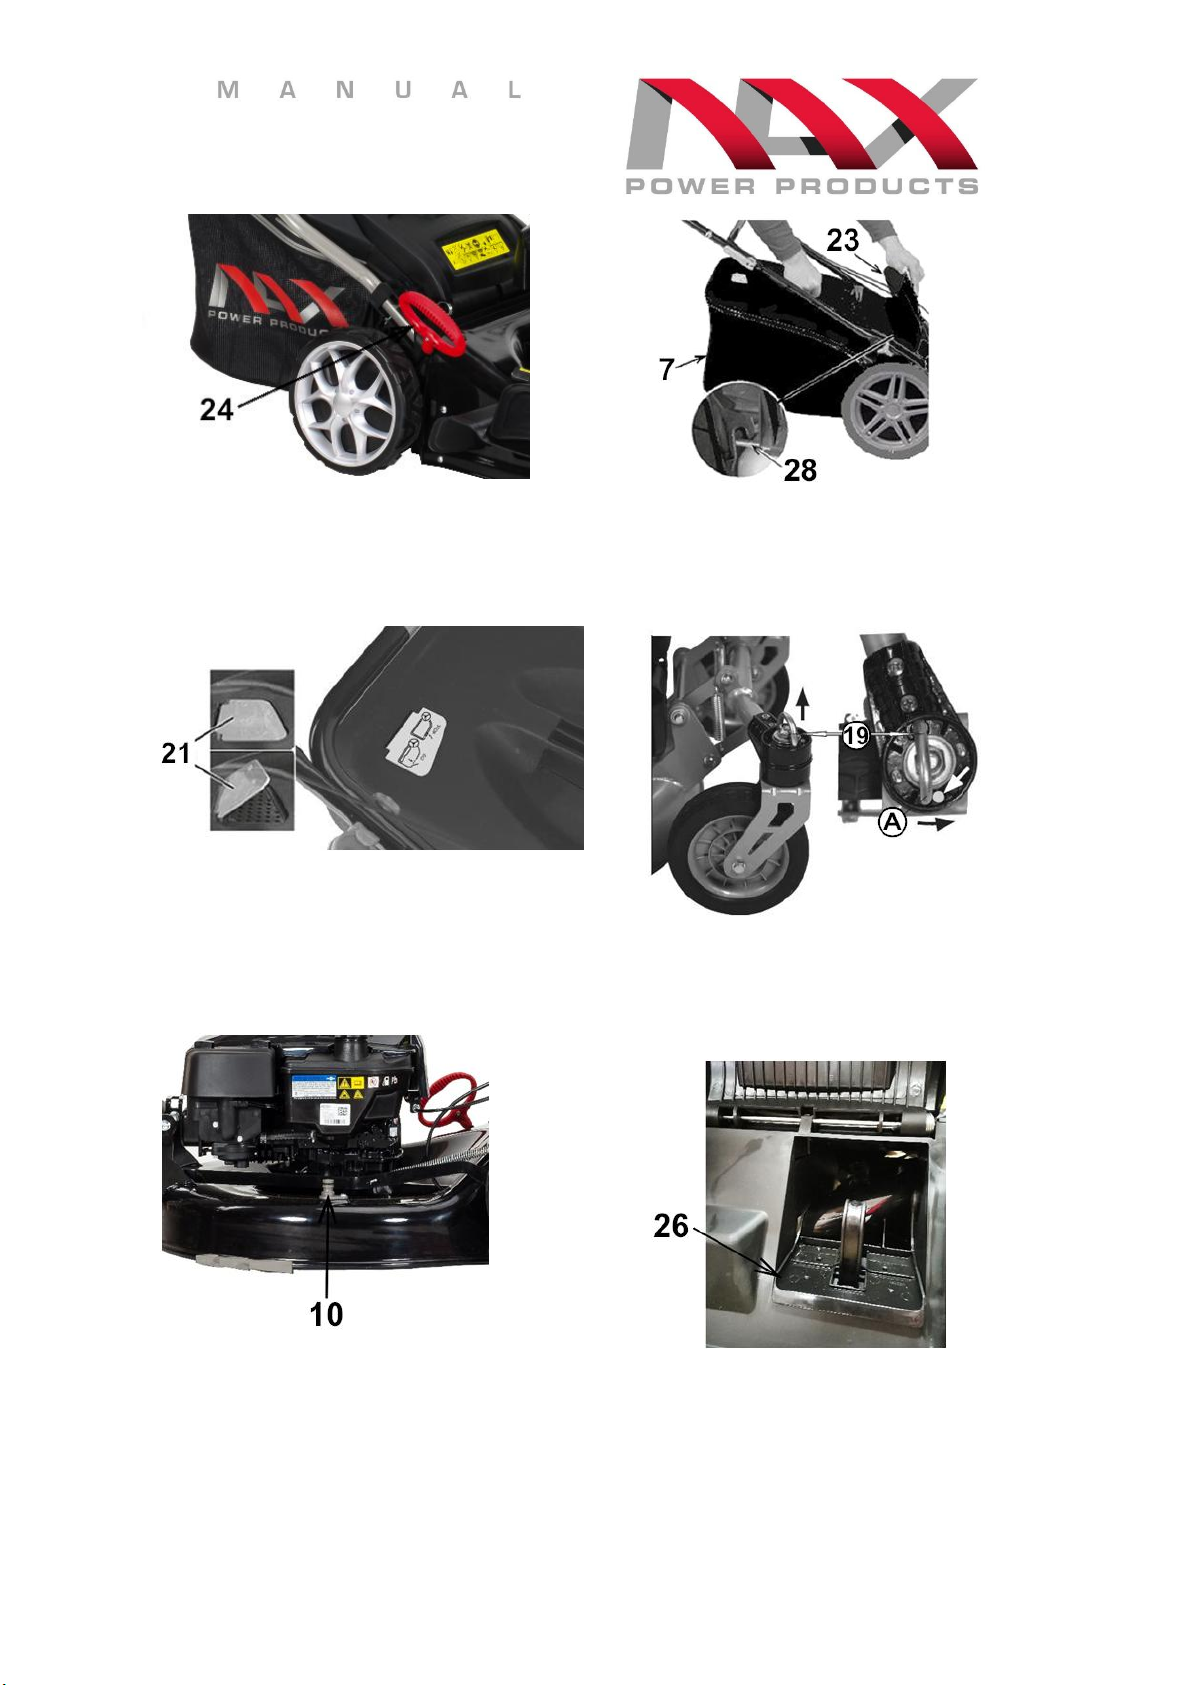
Construction of a lawn mower 18
Operation 19
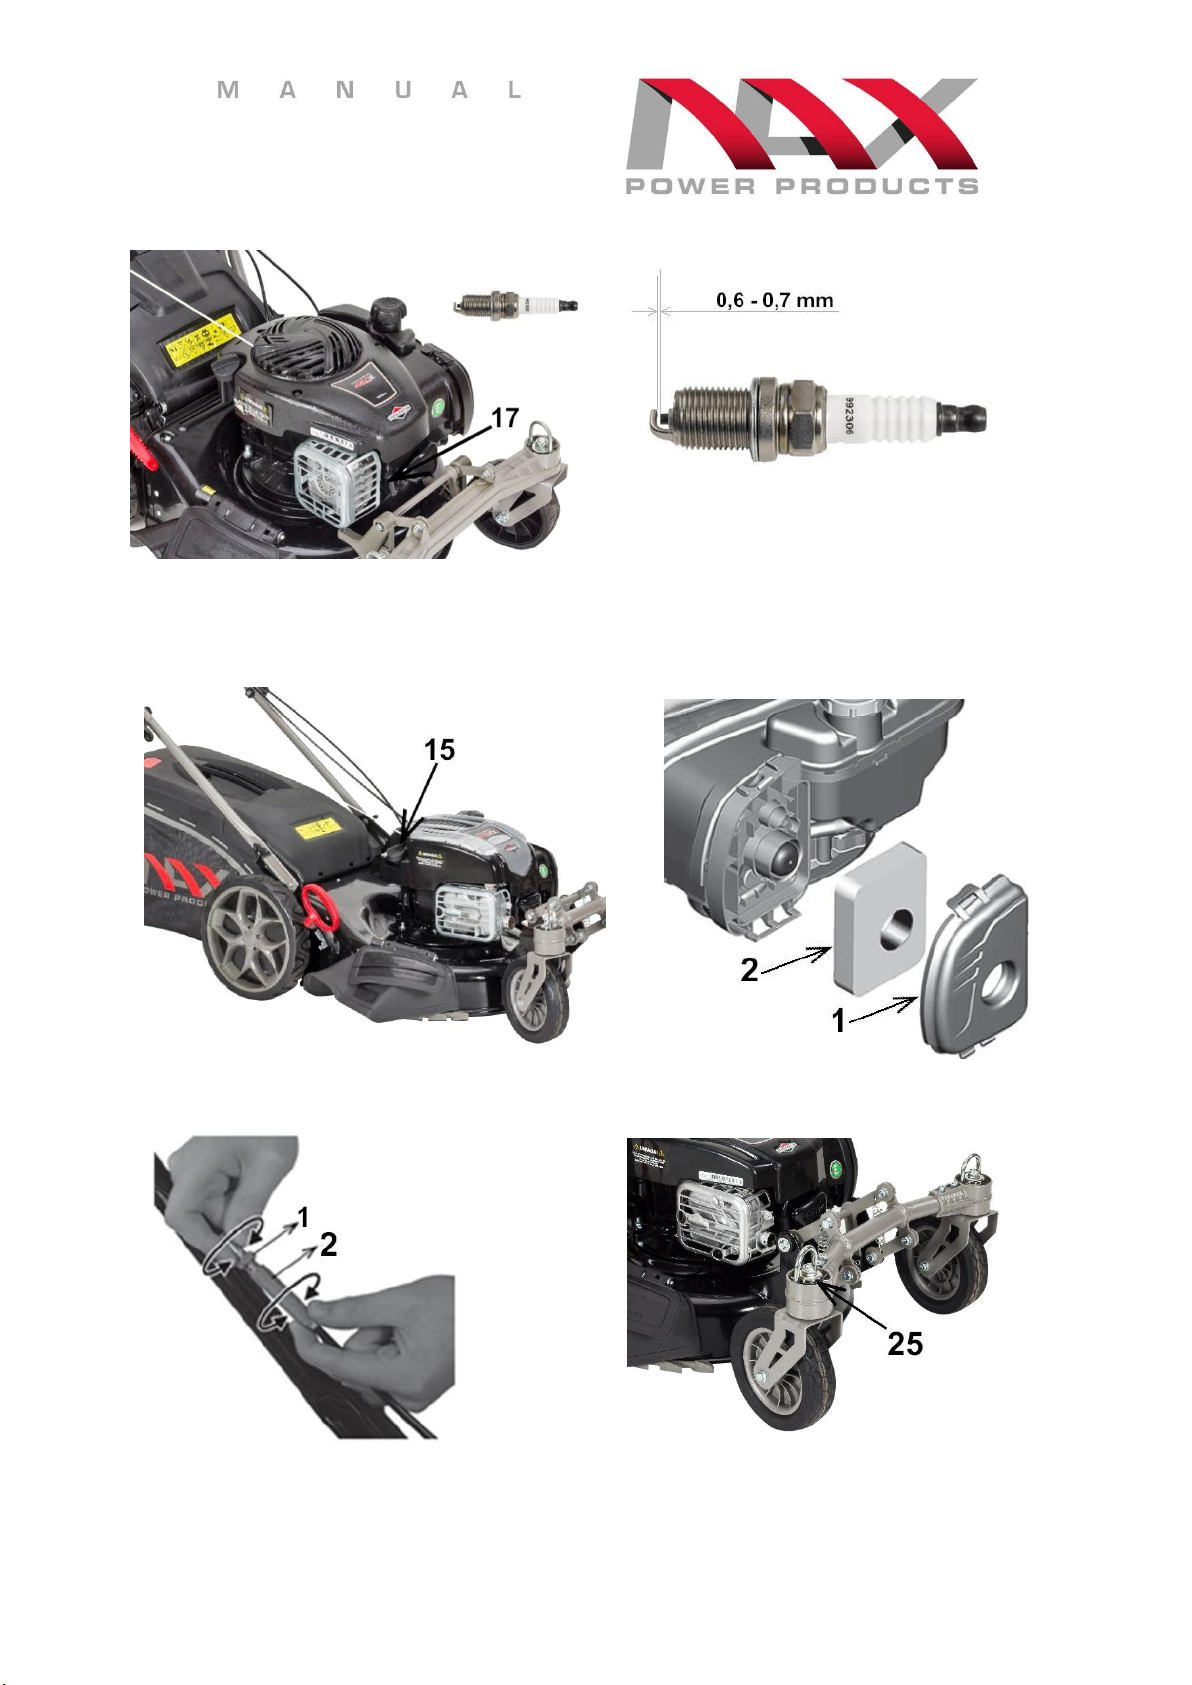
Maintenance 21
Transportation 23
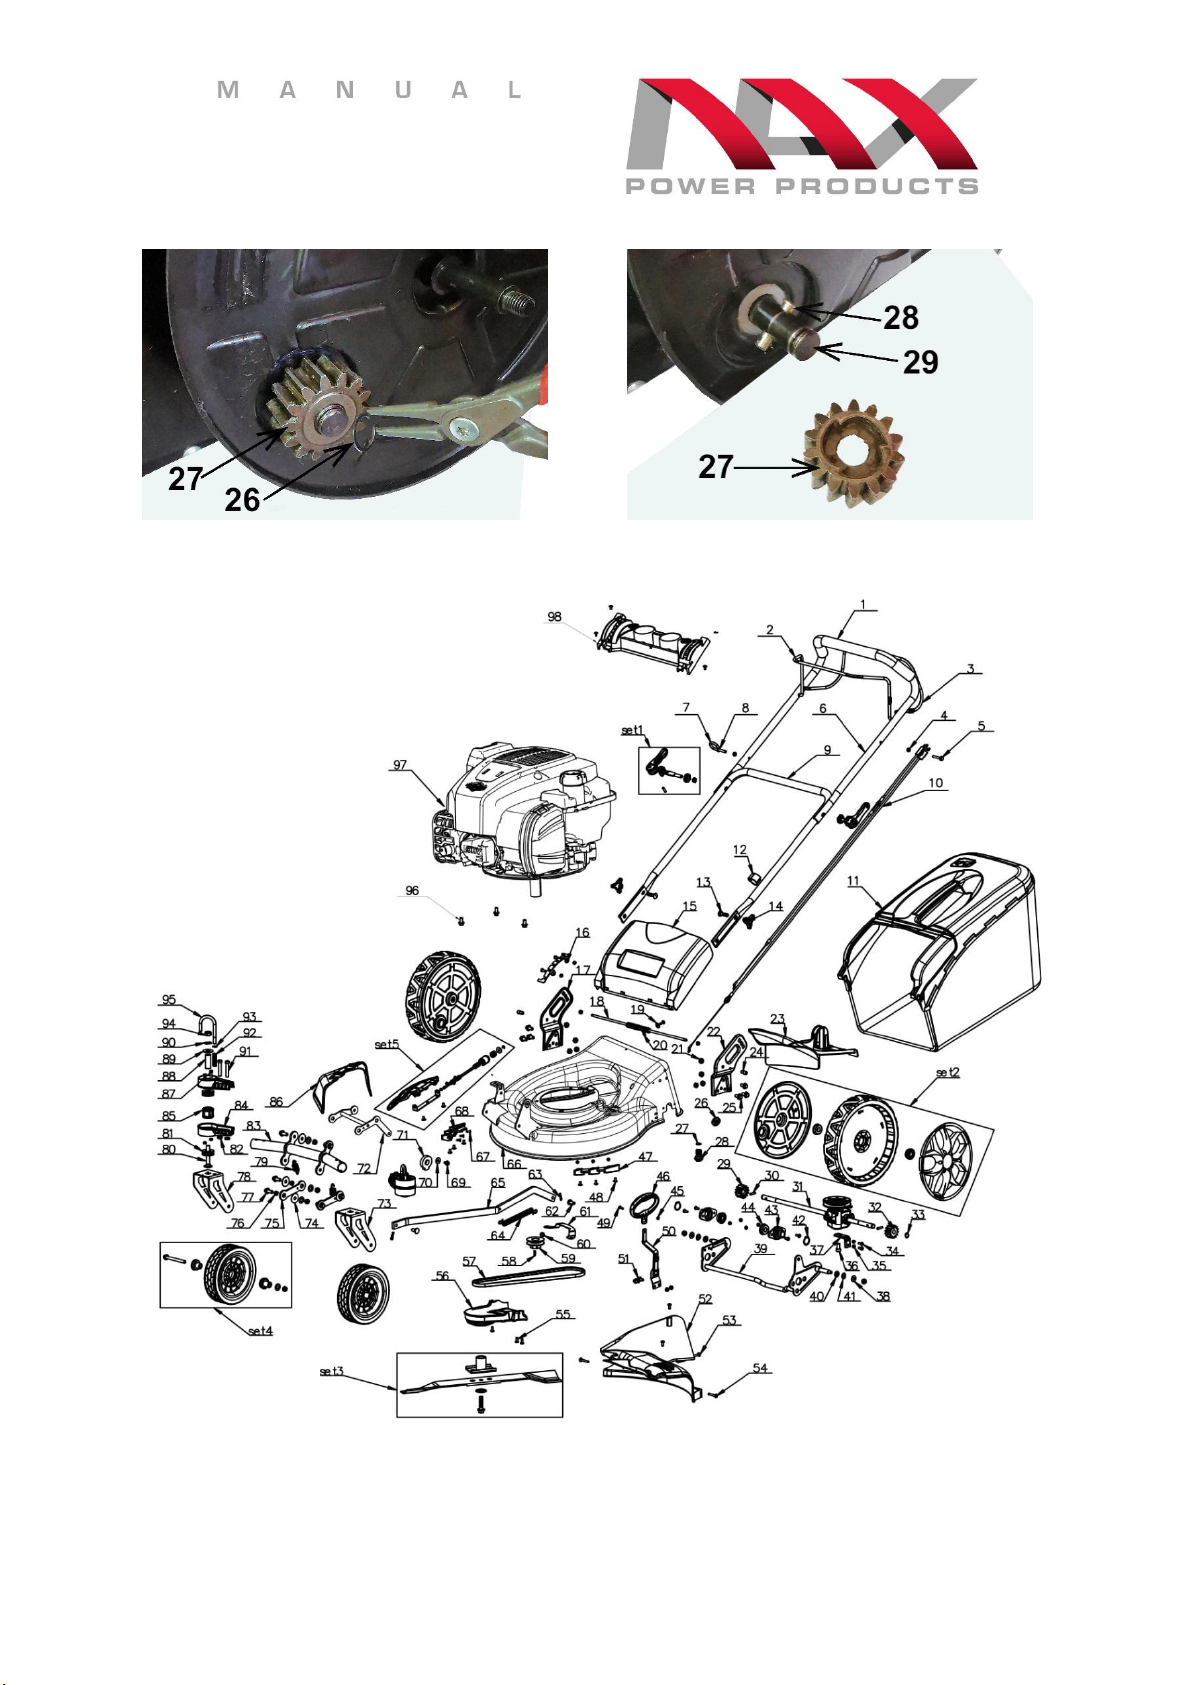
Device assembly diagrams 23
Problems review and diagnosis 24
Warranty and service 25
Declaration of conformity 26
Notes 27
Warranty conditions 30
Warranty Card 31