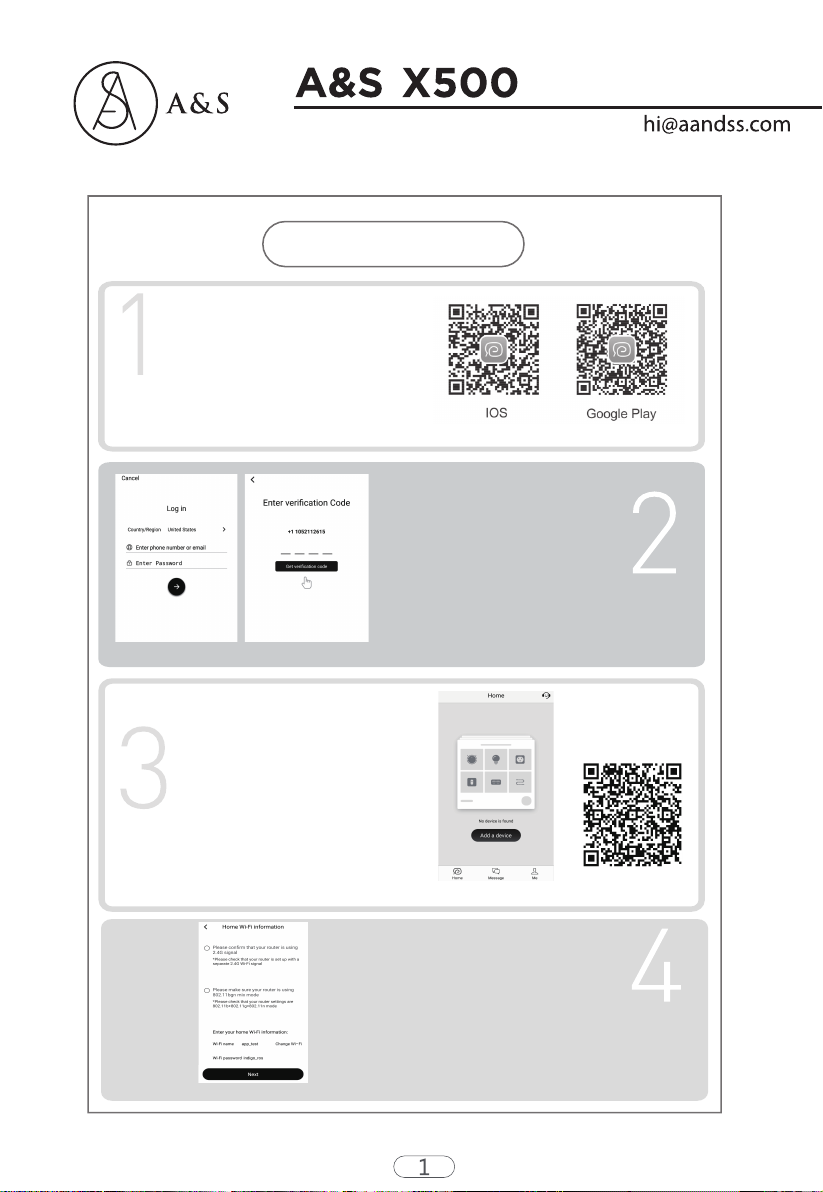
Wi-Fi Setup Instructions
In the "Device status" interface as Figure 8 & Figure
9,display working status,the real-time mapping,
cleaning time and other information,easily to switch
multiple cleaning mode.
Figure 6 Figure 7
Figure 8
Figure 10 Figure 11
Charging(desktop charging)
Current status
Charging(desktop charging)
Current status
Figure 9
Do as Figure 6,restart the device,press and hold for 3-5
seconds until the machine beeps.The Wi-Fi indicator flashes
and voice prompts "Connecting network",which means the
device enters configuration mode,click "Quick mode" to enter
the "Connect to the device" interface. Depending on the signal
strength of the Wi-Fi, it may take few seconds or more.
a. If connection successfully,enter the Home interface as show
in Figure 7,click the device icon to enter "Device status"
interface or long press the device icon to enter "Setting"
interface for setting Remark or Schedule or Manage or
Third-party connection or other operations.
b. If connection unsuccessfully,please confirm whether the
Wi-Fi password is entered correctly,confirm whether your home
router wireless network frequency is 2.4G.
How to control your device with Authorized
Smart Speaker (Google home,Alexa,Siri)?
Please select "Third-party connection" in the
"Setting" interface as shown in Figure 10,then
select the desired speaker in Figure 11 and
follow the detailed instructions to set up.
Wi-Fi Setup Instructions