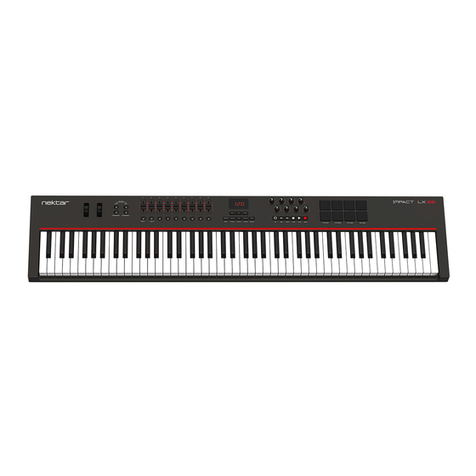
Nektar Impact LX49 User manual

www.nektartech.com Nektar Impact LX49, LX61 & LX88 User Guide
User Guide
www.nektartech.com

2Nektar Impact LX49, LX61 & LX88 User Guide www.nektartech.com
Index
Introduction 4
Box Content
Impact LX Features
Minimum System Requirements
Getting Started 5
Connection and Power
Nektar DAW integration
Register for Updates
Installing and Setting Up Studio One Artist 6
Installation
Studio One Pro
Studio One and Impact LX Working Together 7
All Working Fine?
Transport?
Studio One Mixer Control 8
Open/close the Studio One Mixer Window
Channel Volume & Pan
Mute & Solo
Bank Over (1-8), (9-16) etc
Master Volume
Studio One Instrument Control 9-10
First-time Setup
Open/close the Instrument Window
Changing Patches and Controlling an Instrument
Viewing Assigned Controls
Customizing Plug-in Mapping
Navigating Insert Plug-ins
Studio One Drum Instrument 11
“Learning” Studio One Impact Sounds to the Pads
Mixing Studio One Impact Drum Sounds
Keyboard, Octave and Transpose 12
Octave Shift
Program, MIDI Channel and Preset Control with the Octave Buttons
Transpose, Program, MIDI Channel and Preset Control with the Transpose Buttons
Layer & Split (Impact LX88 only) 13
Layer
Split
Setting Octave and MIDI Channel using the Transpose Buttons
Sending MIDI Program Messages
Wheels and Foot Switch 14
Pitch Bend and Modulation Wheels
Foot Switch
Switching Wheels and Foot Switch On/Off for Layer/Split (LX88 only)
Controlling MIDI Software 15-16
Mixer, Instrument and Presets
Global Controls
Function Buttons 17
Shift/Mute
Snapshot
Null
Pad Learn

www.nektartech.com Nektar Impact LX49, LX61 & LX88 User Guide 3
Index
Pads 18
Pad Maps
Pad Learn
Programming MIDI Messages to Pads
Pad Velocity Curves
Pad Maps Default Settings 19
Setup Menu 20
Assigning Controls to MIDI Messages 21-23
Control Assign
MIDI Channel Assign
Assignment Types
Data 1 and Data 2 Values
Drawbar (on/off)
Save Presets and Pad Maps
Load a Preset
Global Functions and Options 24-27
Global MIDI Channel
Setting the Layer & Split MIDI Channels (LX88 only)
Keyboard Velocity Curves
Pads Velocity Curves
Panic
Program
Sending Program Messages via Layer & Split (LX88 only)
Bank LSB
Bank MSB
Sending Bank LSB/MSB Messages via Layer & Split (LX88 only)
Memory Dump
MIDI Out from USB (LX88 only)
USB Port Setup
Setting the Virtual USB Port for Layer & Split (LX88 only)
User Presets 1-5 Default Settings 28-32
Factory Restore 33
CALIFORNIA PROP65 WARNING: This product contains chemicals known to the State of California to cause cancer and birth defects or other reproductive harm.
For more information: www.nektartech.com/prop65
Dispose of product securely, avoiding exposure to food sources and ground water. Only use the product in accordance with the instructions.
Note: This equipment has been tested and found to comply with the limits for a Class B digital device, pursuant to part 15 of the FCC Rules. These limits are designed
to provide reasonable protection against harmful interference in a residential installation. This equipment generates, uses and can radiate radio frequency energy and,
if not installed and used in accordance with the instructions, may cause harmful interference to radio communications. However, there is no guarantee that interfer-
ence will not occur in a particular installation. If this equipment does cause harmful interference to radio or television reception, which can be determined by turning
the equipment off and on, the user is encouraged to try to correct the interference by one or more of the following measures:
—Reorient or relocate the receiving antenna.
—Increase the separation between the equipment and receiver.
—Connect the equipment into an outlet on a circuit different from that to which the receiver is connected.
—Consult the dealer or an experienced radio/TV technician for help.
Impact firmware, software and documentation are the property of Nektar Technology, Inc and subject to a License Agreement.
© 2014 Nektar Technology, Inc. All specifications subject to change without notice. Nektar is a trademark of Nektar Technology, Inc.
Studio One is a trademark of PreSonus Software, Ltd., registered in the U.S. and other countries
Impact LX49, LX61 & LX88

4Nektar Impact LX49, LX61 & LX88 User Guide www.nektartech.com
Introduction
Thank you for buying our Impact LX controller keyboard from Nektar Technology.
The Impact LX controllers are available in 25, 49, 61 and 88 note versions and come with setup software for many of the
most popular DAWs. This means that for supported DAWs, the setup work has largely been done and you can focus on
expanding your creative horizon with your new controller. The Nektar DAW support adds functionality that makes the user
experience more transparent when you combine the power of your computer with Nektar Impact LX. Throughout this guide
we refer to Impact LX where the text is applicable to LX49, LX61 and LX88. The models operate largely identically, except
where indicated in this manual.
You also get a full version of Presonus Studio One Artist 2.6 software which of course feature Impact LX integration.
In addition, the Impact LX range allow for complete user configurable MIDI control so if you prefer to create your own setups,
you can do that too. We hope you will enjoy playing, using and being creative with Impact LX as much as we have enjoyed
creating it.
Box Content
Your Impact LX box contains the following items:
The Impact LX Controller keyboard
Printed Guide
A standard USB cable
DVD containing DAW installation files and full version of Presonus Studio One Artist.
If any of the items above are missing, please let us know via email: stuffmissing@nektartech.com
Impact LX Features
Minimum System Requirements
As a USB class compliant device, Impact LX can be used from Windows XP or higher and any version of Mac OS X.
The DAW integration files can be installed on Windows Vista/7/8 or higher and Mac OS X 10.7 or higher.
The included Studio One Artist minimum system requirements are listed below.
49, 61 or 88-note full-sized velocity sensitive keys
8 velocity sensitive MIDI pads
9 MIDI assignable faders
9 MIDI assignable buttons
8 MIDI assignable controller pots
6 transport buttons
Assignable Pitch Bend and Modulation Wheels
Octave up/down buttons (LX49 & LX61 only)
Transpose up/down buttons
Mixer, Instrument and Preset selection buttons
5 Function buttons including Mute, Snapshot, Null,
Pad Learn and Setup
5 User configurable presets
2 read-only presets (Mixer/Instrument)
4 pad map presets
Shift functions for Nektar DAW integration
3 character, 7 segment LED display
USB port (back) and USB bus powered
Power on/off switch (back)
1/4” jack Foot Switch socket (Back)
Connect to iPad via Apple USB Camera Connection Kit
Nektar DAW support integration
PreSonus Studio One Artist 2.6 included
Semi-weighted keybed (LX88 only)
Layer and Split buttons (LX88 only)
MIDI out (LX88 only)
DC socket (LX88 only)
Mac
Mac® OS X 10.7.2 or later
Intel® Core™ Duo processor (Intel Core 2 Duo or Core
i3 or better recommended)
2 GB RAM (4 GB or more recommended)
Windows
Windows® 7 x64/x86 SP1, Windows 8 x64/x86
Intel Core Duo or AMD Athlon™ X2 processor (Intel
Core 2 Duo or AMD Athlon X4 or better recommended)
2 GB RAM (4 GB or more recommended)
Mac and Windows systems
Internet connection (not required on machine where
Studio One is installed but needed for activation)
DVD-ROM drive
Monitor with 1280x768 resolution
20 GB hard-drive space

www.nektartech.com Nektar Impact LX49, LX61 & LX88 User Guide 5
Getting Started
Connection and Power
The Impact LX is USB Class compliant. This means there is no driver to install to get the keyboard set up with your computer.
Impact LX uses the built-in USB MIDI driver which is already part of your operating system on Windows and
OS X.
This makes the first steps simple:
Locate the included USB cable and plug one end in to your computer and the other in to your Impact LX
If you want to connect a foot switch to control sustain, plug it in to the 1/4” jack socket on the back of the keyboard
Set the power switch on the back of the unit to On
Your computer will now spend a few moments identifying the Impact LX and subsequently you will be able to set it up for
your DAW.
LX88: An optional 9V 600mA DC power supply can be connected to the DC power socket on the back of the LX88, if you plan
to use the keyboard without a computer.
Nektar DAW Integration
If your DAW is supported with Nektar DAW integration software, locate the “Impact LX DAW Integration” folder and run the
installer you will find in that directory.
In the same directory there is a “Documentation” folder. Open it and locate the PDF file that’s applicable to your DAW. Follow
the instructions in the PDF for any additional setup as well as learn how the integration works.
Since the initial release of Impact LX there have already been several updates to Nektar DAW integration files. If you want to
make sure you have the latest installer, register your product and download the files by following the link at the bottom of the
page.
Register for Updates
You do not need to register your Impact LX in order to get up and running, however there are several benefits to registering:
Notification of new updates to your Impact LX DAW integration
PDF download of this manual as well as the latest DAW integration files
Access to our email technical support
Warranty service
The first step is to create a user account with us, which you can do here:
www.nektartech.com/registration

6Nektar Impact LX49, LX61 & LX88 User Guide www.nektartech.com
Installing and Setting Up Studio One Artist
The included PreSonus Studio One Artist for OSX and Windows is a powerful and complete DAW that allows you to get started
straight away with your Impact LX, even if you don’t have any other music software.
Installation
The Studio One Artist 2.6 installer can be located on the included DVD and the product key on the white DVD sleeve.
Your Presonus Studio One Artist license is subject to PreSonus’s standard End User License Agreement (EULA) which must be
accepted upon installation. In addition, Studio One Artist requires a personal product registration through the internet and a
computer matching the minimum requirements of the software.
Here are the steps you need to go through to set up Studio One Artist with
the Impact LX:
Locate the Studio One Artist installer on the included DVD
Follow the onscreen instructions to activate, create a user account
and complete installation
Locate the “Impact LX DAW Integration” folder on the included
DVD or download it from “My Downloads” on www.nektartech.com
after registering your product
Run the “DAW Integration Installer” in that folder and follow the
on-screen instructions, selecting Studio One as your DAW.
Booting up Studio One Artist you will see an initial setup screen
similar to image 1. Click on “Configure External Devices…”,
highlighted in the red box in image 1
Next you will see the Options menu. Click on “External Devices”.
The options window should now look like image 2
If your Studio One program already show 2 Impact LX devices,
you may be ready to go. Use the following steps for troubleshoot-
ing. If only 1 Impact LX device shows up, you’ll need to complete
the following steps.
Select the Nektar Impact LX device and click “Edit”
In the resulting pop-up window make sure that all the MIDI chan-
nels 1-16 are highlighted in light blue. If they are not light blue,
click the “All” button, just above the indicators. The window
should now look like image 3
Click “Ok” to close the window
Back in the “Options” window, click “Add” to open the “Add
Device” Window
Locate the Nektar folder, click the expand arrow and the click on
the Impact LX Control option.
In the “Receive From” field select Port 2 or MIDIIN2. The window
should now look like image 4
Click “OK” to exit the “Add Device” menu and “OK” again to exit
the “Options” menu
Studio One Artist is now set up to work with your Impact LX.
Studio One Pro
If you are an existing user of Studio One Producer or Professional, the
process is the same.
Image
1
Image
2
Image
3
Image
4

www.nektartech.com Nektar Impact LX49, LX61 & LX88 User Guide 7
Studio One Artist and Impact LX Working Together
Presonus Studio One Artist comes with it’s own documentation which cover all its functionality and powerful features. It’s a
good idea to read and reference the documentation regularly to get the most out of your Studio One Artist product.
But before you dive in to the Studio One Artist documentation, lets go through a few basics here first and in particular cover
how Studio One Artist and Impact LX work together.
All Working Fine?
First make sure that everything is set up correctly.
From the Studio One Artist Start-up window, click on “Create a new Song” on the right hand side
You should now be looking at the main Studio One Artist arrange and browser window on your computer screen.
Press a few keys on the Impact LX keyboard. As you press them, the orange arrow next to the MIDI icon in the
bottom left corner of the window should light up. If it doesn’t, you should go back and recheck your setup.
Next press the [Play] button on the Impact LX transport. Studio One Artist should start to play. Press
[Stop] to stop playback
Create a few audio tracks in Studio One Artist via the Track menu.
Press the [Mixer] button and with the audio tracks created, move the faders on Impact LX starting with number 1 and
up. Each of the audio tracks volume indicators should change as you move their corresponding faders.
Next press the buttons below the faders. This should activate mute for each of the corresponding tracks.
If every thing at this point is working correctly, you are ready to learn more about how Impact LX works with Studio One
Artist. If you are not getting the results described, please check your installation one more time as well as the Nektar support
tab on our website www.nektartech.com
Transport
The transport buttons give access to activate or deactivate the following transport functions: Cycle (loop), Rewind (in 1 bar
decrements), Forward (in 1 bar increments), Stop, Play, Record.
In addition the buttons double up with functionality that’s accessed by holding down the [Shift] button. The chart below tells
you what each button and button combination does and how they behave.
Key Combination Description
[Cycle] Switch the loop/cycle between the Left and Right locators on/off
[Rewind] Rewinds in steps of 1 bar. Press and hold for fast rewind
[Forward] Forward in steps of 1 bar. Press and hold for fast forward
[Stop] Stop playback. Press twice to goto zero
[Play] Activate play
[Record] Activate record. Press again to deactivate record but continue play
[Shift]+[Cycle] Goto Left locator
[Shift]+[Rewind] Set Left locator at current song position
[Shift]+[Forward] Set Right locator at current song position
[Shift]+[Stop] Undo last changes. To undo while in record, press [Record] first to deactivate, then
undo to remove your recording.
[Shift]+[Play] Switch the Click/metronome on/off
[Shift]+[Record] (Mode) Quantize selected part or notes. To quantize while in record, press [Record] first to
deactivate, then press Mode to quantize your recording

8Nektar Impact LX49, LX61 & LX88 User Guide www.nektartech.com
Studio One Mixer Control
To control the Studio One mixer, press the [Mixer] button to select the mixer preset. The display’s left dot is illuminated while
the preset is selected and the Studio One mixer is being controlled.
Open/Close the Studio One Mixer Window
If the Studio One mixer is not in view you can press [Shift]+[Mixer] to bring it in to view. Press the same button combination
again to close the mixer window. While the Mixer preset is selected, your Impact LX continues to control the Studio One
mixer, even if the mixer window is closed.
Channel Volume & Pan
With the mixer preset active, moving faders 1-8 will control the first 8 mixer channels in the Studio One Mixer. The 8 pots
control pan for each or the corresponding channels.
Fader 9 controls the channel corresponding to the currently selected track so as you change tracks, you can quickly change
volume as you are working. If you have 15 tracks in your song and the currently selected track is 12, that would result in
faders 1-8 controlling mixer channel volume 1-8 and fader 9 controlling channel volume 12.
Mute & Solo
Fader buttons 1-8 control mute for each of the tracks the faders are assigned to control. If you prefer to solo tracks, you can
press and hold fader button 9 while pressing fader buttons 1-8. The 8 buttons will now control solo for their corresponding
tracks.
Banks Over (1-8), (9-16) etc
If your song contains more than 8 mixer channels you can bank over so the faders 1-8 control the next group of 8 channels.
To do this, press [Shift]+[Bank>] (the second fader button). The faders, pots and fader buttons are now assigned to control
channels 9-16. Push the same key combination again to control 17-24 etc.
To go back you press [Shift]+[<Bank]
One disadvantage is that Studio One does not give you any visual indication which group of 8 channels you are currently
controlling. The safest way to work with the Studio One mixer is to keep a group of 8 channels that you want regular mixer
control over, as the first a tracks in your song and then use fader 9 as you navigate through tracks to adjust volume for all
other channels.
Master Volume
You can control the Master Volume fader of the Studio One mixer by pressing [Fader button 9) and then move fader 9 while
the button is pressed.
Upon release of the button, fader 9 will revert to control the current channel volume.

www.nektartech.com Nektar Impact LX49, LX61 & LX88 User Guide 9
Studio One Instrument Control
Press the [Inst] button to select the Instrument preset. The display’s center dot is illuminated while the preset is selected.
To control an instrument you must however be on an instrument track. To create one, first click on “Instruments” in the
Studio One browser home window. The click on Mojito and drag it in to the Studio One arrangement window.
An instrument track has now been created and the monophonic synth Mojito is visible on your computer display. You can
create instrument tracks for any of the other Studio One instruments using the same method.
First-time Setup
If this is the first time you are using Impact LX with Studio One, please check that the control surface selected to control
instruments is “Impact LX Control”.
On Mojito (or any other plugin) make sure the GUI button for the
control is orange as shown in the image on the right
Next click on the arrow to the left of the orange GUI button for a list of
your control surface options
Select “Impact LX Control” as show in the image on the right
Once done, you should not have to worry about this again unless your setup
changes.
Open/close the Instrument Window
When you are on an instrument track, you can press [Shift]+[Inst.] to bring the instrument GUI window in to view. Press the
same button combination again to close the instrument window.
Impact LX’s Instrument preset will control the parameters in the plug-in window that’s in focus. You can read more about how
this works in the Studio One Reference Manual, Chapter 11.5: Global and Focus Mapping. To find this document go to the
“Help” menu.
Changing Patches and Controlling an Instrument
You can step through instrument patches and control essential instrument parameters from Impact LX which makes it easy to
change and tweak sounds while you play. Here is how to do that:
Create or select an instrument track in Studio One
Make sure the instrument GUI window is in focus. If not, press [Shift]+[Inst.] on Impact LX
Change instrument patch by pressing [Shift]+[Patch>] to go to the next patch or [Shift]+[<Patch] to go to the previous
patch
Each of Impact LX’s controls are pre-mapped to Studio One’s built-in instruments with envelopes typically mapped on the
faders and controls that have the biggest impact on sound are mapped to the pots such as Cutoff, Resonance, Filter Env etc.
Happy tweaking.

10 Nektar Impact LX49, LX61 & LX88 User Guide www.nektartech.com
Viewing Assigned Controls
The Studio One Focus window will show you what’s assigned to each of instrument presets controls. If you have space on
your computer screen this can be a good window to keep in view.
There are a few ways to open the Focus window. The below image shows 2 different ways:
1) After moving an Impact LX control you will see the control in the window to the left of the tool box. Double click on the
“Impact LX Control” surface as indicated by the red box to open the Focus window
2) In any plug-in window, double click on the “Impact LX Control” surface as indicated by the second red box in the Mojito
window. This will open the Focus window
The Focus window will show you the name of each parameter assigned to Impact LX’s Instrument preset controls at any one
time and their current value.
Customizing Plug-in Mapping
If you want to make changes to plug-in mapping you can do that right within Studio One. Read the Studio One Reference
Manual’s chapter 11 for additional information and instructions about how to do this.
Navigating Insert Plug-ins
If you have effect plug-ins assigned to an instrument track, you can not only control them, but also navigate between every
plug-in in the insert chain.
First press [Shift]+[Fader button 6] to bring the Insert Effects window in to view. Remember, the plug-in in focus is the one
you control and it’s parameters will be visible in the Focus window.
With multiple effect plug-ins inserted on a track, press [Shift]+[Fader button 7] to go to previous insert and [Shift]+[Fader
button 8] to go to next insert (see image below).
When you are done controlling insert effects, close the window by pressing [Shift]+[Fader button 6].

www.nektartech.com Nektar Impact LX49, LX61 & LX88 User Guide 11
Studio One Impact Drum Instrument
The Studio One Impact (no relation, really) Drum instrument can be played from the Impact LX keyboard or 8 pads.
Operating the drum instrument works the same way as any other instrument and using the Pad maps 1+2 you are able to
play drum sounds straight away. However you will notice that that the first pad on Studio One Impact is assigned to the MIDI
note B0. Pad map 1 starts at C1 so neither Pad map 1 or 2 will by default allow you to play this pad.
In addition, you may prefer to create a setup where the 8 pads play a specific selection of any of Studio One Impacts 16 pad
sounds. Thankfully there is a learn function for that.
“Learning” Studio One Impact Sounds to the Pads
It’s easy to change a pad note assignments using the Pad Learn function. It works as follows:
1. Press the function button labeled [Pad Learn]. The display will now blink, showing P1 (pad 1) as the default selected pad.
2. Hit the pad you want to assign a new note value to. The display blinks and updates to show the number of the pad you
selected.
3. Press the key on the keyboard that plays the Studio One Impact sound you want to assign to the pad. You can keep
playing notes on the keyboard until you have found the note you want.
4. When you are done, press [Pad Learn] to exit and start playing your pads with the new assignment.
You can keep repeating steps 2. and 3. until you have created a complete Pad Map. The settings are stored over power
cycling so you will not lose them as you power down your system. However it’s a good idea to save setups that you may want
to have access to regularly in the future to one of the 4 pad map locations in Impact LX. To learn how to do that, go to the
“Setup Menu” section in this manual.
Mixing Studio One Impact Drum Sounds
Studio One Impact has a lot of controls but perhaps most important is the ability to create a good mix of the 16 drum sounds.
To help make that process easier, the default parameters assigned to Impact LX’s controls are volume. To mix the 16 sounds
you can therefore use the faders 1-8 to control volume for pads 1-8 and the pots 1-8 to control volume for pads 9-16.

12 Nektar Impact LX49, LX61 & LX88 User Guide www.nektartech.com
Keyboard, Octave and Transpose
The Impact LX keyboard is velocity sensitive so you can play the instrument expressively. There are 5 different velocity
curves to choose from, each with varying dynamics. In addition, there are 3 fixed velocity settings.
We recommend you spend a little time playing with the default velocity curve and then determine if you need more or less
sensitivity. You can learn more about velocity curves and how to select them on page 24.
Octave Shift (not applicable to LX88)
To the left of the keyboard you find the Octave and Transpose shift buttons.
With each press the left Octave button will shift the keyboard down one
octave.
The right Octave button will similarly shift the keyboard up 1 octave at a time,
when pressed.
The maximum you can shift the LX keyboard is 3 octaves down and 4 octaves up
and the LX61 can be shifted 3 octaves up. This covers the entire MIDI keyboard
range of 127 notes.
Program, MIDI Channel and Preset Control with
the Octave Buttons (not applicable to LX88)
The Octave buttons can also be used to send out MIDI program messages, change
the Global MIDI channel or select the Impact LX’s control presets. To change the
buttons function:
Press the two Octave buttons simultaneously.
The display will now show the current assignment abbreviation for a little over 1 second.
Press the Octave up or down button to step through the options.
Below is the list of the functions that the Octave buttons can be assigned to control. The Display column shows the text
abbreviation for each function as they appear on the Impact LX display. The function remains assigned to the buttons until
another function is selected. After power cycling the default function is selected.
Transpose, Program, MIDI Channel and Preset Control with the Transpose
Buttons
The Transpose buttons work in an similar way to the Octave buttons with the following function options:
Display Function Value range
trA Transpose the keyboard up or down -/+ 12 semi tones
Oct Shift Octave up/down (Impact LX88 only) -/+ 2
PrG Sends out MIDI program change messages 0-127
GCh Change the Global MIDI Channel 1 to 16
PrE Select any of the 5 control presets 1 to 5
Display Function Value range
Oct Shift Octave up/down -3 / +4
PrG Sends out MIDI program change messages 0-127
GCh Change the Global MIDI Channel 1 to 16
PrE Select any of the 5 control presets 1 to 5

www.nektartech.com Nektar Impact LX49, LX61 & LX88 User Guide 13
Layer & Split (Impact LX88 only)
The Impact LX88 can send MIDI notes on a layer and split zone providing a total of 3 zones that each can send on a different
MIDI channel. If you own a multitimbral sound module, multiple synths or operate a multitimbral software instrument you will
be able to take advantage of these features.
Layer
The layer zone is on if the layer button is illuminated. By default the layer MIDI channel is set to 2. The global MIDI channel is
set to 1 by default so each key press will now send two MIDI notes: One on channel 1 and another on channel 2.
Split
The split zone is on if the split button is illuminated. By default the split point is set to F#2 (the 3rd F# from the left of the
keyboard) and the split zone is therefore the keys below F#2. The default MIDI channel for the split zone is 3.
If layer is still on, you will be sending one MIDI note on channel 3 when playing the keys below F#2 and two MIDI notes on
channel 1 and 2 when you play the notes from F#2 and up.
Setting the Split point
To change the split point, press and hold the Layer and Split buttons. Next select the new split point by pressing the
corresponding key on the keyboard. Release the Layer and Split buttons and the new split point is set.
Setting Octave and MIDI Channel with Transpose Buttons
It’s quick and easy to change layer and split settings using the configurable transpose buttons. Here is how it works:
Assign either Octave or MIDI Channel to the Transpose buttons as described on the previous page.
Press and hold the zone button (Layer or Split) while pressing the Transpose buttons to change the setting for the
function you selected.
Release the zone button when done.
If for example you assign the Transpose buttons to Octave, you are able to quickly set the octave shift value independently
for each of the layer and split zones while pressing their respective buttons. Once you release the zone button, pressing the
Transpose buttons will affect only the main keyboard zone.
Sending MIDI Program Messages
MIDI program messages can be sent via the MIDI channel set up for layer or split.
First assign Program to the Transpose buttons as described on the previous page.
Press and hold the zone button (Layer or Split) while pressing the Transpose buttons. Each press will send out a MIDI
program message on the MIDI channel assigned to the selected zone. The program number you are sending is indicated
on the display.
You can also send out a specific MIDI program change message. This is described in the Setup section.

14 Nektar Impact LX49, LX61 & LX88 User Guide www.nektartech.com
Wheels and Foot Switch
Pitch bend and Modulation Wheels
The two wheels below the Octave and Transpose buttons are typically used for Pitch bend and Modulation.
The Pitch bend wheel is spring loaded and automatically reverts to it’s center position upon release. It’s ideal to bend notes
when you are playing phrases that require this kind of articulation. The bend range is determined by the receiving instrument.
The Modulation wheel can be freely positioned and is programmed to control modulation by default.
Both the Pitch bend and the Modulation wheel are MIDI assignable with settings stored over power cycling so you don’t lose
them when you switch the unit off. Pitch bend and Modulation assignments are not part of the Impact LX presets.
Foot Switch
You can connect a foot switch pedal (optional, not included) to the 1/4” jack socket on the back of the Impact LX keyboard.
The correct polarity is automatically detected on boot-up, so if you plug in your foot switch after boot-up is complete, you
may experience the foot switch working in reverse. To correct that, do the following
Switch the Impact LX off
Make sure your foot switch is connected
Switch the Impact LX on
The polarity of the foot switch should now be automatically detected.
Switching Wheels and Foot Switch On/Off for Layer & Split (LX88 only)
Pitch bend, modulation wheel and foot switch can each be on and off for the layer, split and the regular keyboard zones.
Read the section about Setup on page 20, for further information about how to do that.

www.nektartech.com Nektar Impact LX49, LX61 & LX88 User Guide 15
Controlling MIDI Software
Impact LX has incredible flexibility when it comes to controlling a DAW or other MIDI software. There are typically 4 different
ways to set up Impact LX many controls though it’s not uncommon to use a combination of different approaches.
1. Install the included Presonus Studio One Artist software and control it from Impact LX (page 6)
2. Install the Impact DAW integration files for use with an existing DAW (must be on our supported list)
3. Set up a DAW with controller learn
4. Programming Impact LX controls for your software
1. and 2. are relatively easy to get started with so you can jump to the sections that cover each of these now if you are keen
to get going. If you plan to use your DAWs learn function or Impacts presets at a later stage, we do recommend reading
through this chapter in order to understand how Impact LX is structured. Lets start with an overview of what is stored in
memory.
Mixer, Instrument and Presets
Impact LX has 5 user configurable presets though in reality, the total amount of useable presets is 7. That’s because pressing
the Mixer or Instrument button each recall a read-only preset.
A preset contains control settings for the 9 faders, 9 fader buttons and 8 pots.
The Preset button recalls the currently selected user preset. Since any of the 5 user presets can quickly be selected using
either the Octave or Transpose buttons, this gives tremendous flexibility. Below is a list of what each of the 5 presets are
programmed to by default. Each can be programmed with your own MIDI settings which we will cover later.
Presets 1, 4 and 5 are set up to transmit on the global MIDI channel. When you change the global MIDI channel (as described
earlier, you can use the Octave and Transpose buttons to do this at any time) you therefore change the MIDI channel that
these presets transmit on. With 16 MIDI channels available it means you can create 16 unique setups and just change the
MIDI channel to switch between them.
A list of controller assignments for each of the 5 presets is available on pages 26-30.
Preset Description
1 GM Instrument preset
2 GM Mixer ch 1-8
3 GM Mixer ch 9-16
4 Learn friendly 1 (Fader buttons Toggle)
5 Learn friendly 2 (Fader buttons Trigger)

16 Nektar Impact LX49, LX61 & LX88 User Guide www.nektartech.com
Controlling MIDI Software (cont)
Global Controls
Global controls are controls that are not stored in a preset and therefore Pitch bend/Modulation wheels plus the Foot Switch
fall in this category.
The 6 transport buttons in addition, are also global controls and assignments are stored over power cycling.
As you change presets or adjust your preset controls, global controls remain unchanged. This makes sense since Transport
and keyboard controls typically are set up to do one thing specifically.

www.nektartech.com Nektar Impact LX49, LX61 & LX88 User Guide 17
Function Buttons
The second row of buttons below the display contains 5 function and menu buttons. Each work a little different so here is
an overview of what they do.
Shift/Mute
When you press and hold this button, the MIDI output from real-time controls is muted. This allows you to reposition faders
and pots without sending MIDI data.
In addition, pressing this button activates the secondary functions of buttons, screened below those buttons. So for
example, press and hold [Shift/Mute]+[Pad 4] will load Pad Map 4. Press and hold [Shift/Mute]+[Pad 2] will load Pad Map
2.
The remaining functions screen printed below the buttons are mainly used for the Impact LX DAW integration so check the
integration documentation for further information
Snapshot
Pressing [Snapshot] will send out current status of faders and pots. This can both be used as a status recall feature but
also as a fun experimental feature to change parameters without knowing for sure what will happen.
Null
Impact’s DAW integration files contain automatic catch-up or soft takeover functions that avoids parameter jumping by
delaying parameter updates until a physical control position matches the value of the parameters.
The Null function works in a similar way but does not rely on feedback from your software to achieve it. It remembers your
parameter settings when you change between presets so you catch-up parameter values or “null”.
Example:
1. Select [Preset] and make sure [Null] is set to on.
2. Set the Transpose (or Octave) buttons to change presets (as described earlier) and select Preset 1.
3. Move Fader 1 to maximum (127).
4. Select Preset 2 using the Transpose buttons.
5. Move fader 1 to minimum (000).
6. Select Preset 1 using the Transpose buttons.
7. Move Fader 1 away from it’s minimum position and notice the display reads “Up” until you reach 127.
8. Select Preset 2 and move the fader away from the maximum position. Notice the display reads ‘dn” until you reach
000.
While “up” or “dn” is displayed, no control update values are sent to your software.
The null setting is independent for each of Mixer, Inst. and Preset.
To switch the function on or off, first select [Preset] and then press [Null] until you see the status you want (on/off).
Press [Mixer] or [Inst] followed by pressing [Null] to set the setting for each of these options.
If you are using Nektar Integrated DAW support, please make sure to check the setup instructions for your DAW. Null is in
some cases required to be off because Impact LX uses a different method to avoid parameter jumping.
Pad Learn
Pad learn allows you to quickly select a pad and learn a note assignment by pressing a key on the keyboard. This is
explained in more detail in the next section about Pads.
Setup
Pressing the setup button will mute the keyboard output and instead activate the setup menus accessible via the keyboard.
Go to page 20 for more information about the setup menus.

18 Nektar Impact LX49, LX61 & LX88 User Guide www.nektartech.com
Pads
The 8 pads are velocity sensitive and programmable with either note or MIDI switch messages. This means you can use them
as regular MIDI buttons as well as to punch out your drum beats and percussive melody parts. In addition, the pads have 5
velocity curve options and 3 fixed value options you can choose between depending on what you are doing and your playing
style.
Pad Maps
You can load and save up to 4 different pad setups in 4 memory locations called Pad maps. Here is how you load pad maps:
Press and hold the [Shift/Mute] button
Press the pad that corresponds to the pad map you want to recall
The following page show the 4 pad maps default assignments. Map 1 is a chromatic scale which is continued in Map 2. If you
have drum setup that’s laid out this way (many are) you can access drums 1-8 using Map 1 and drums 9-16 using Map 2.
Pad Learn
It’s easy to change a pad note assignments using the Pad Learn function. It works as follows:
1. Press the function button labeled [Pad Learn]. The display will now blink, showing P1 (pad 1) as the default selected pad.
2. Hit the pad you want to assign a new note value to. The display blinks and updates to show the number of the pad you
selected.
3. Press the key on the keyboard that corresponds to the note you want to assign to the pad. You can keep playing notes
on the keyboard until you have found the note you want.
4. When you are done, press [Pad Learn] to exit and start playing your pads with the new assignment.
You can keep repeating steps 2. and 3. until you have created a complete Pad Map.
Programming MIDI Messages to Pads
The pads can also be used as MIDI switch buttons. To learn more, please the Setup Menu pages.
Pad Velocity Curves
You can choose between 4 velocity curves and 3 fixed velocity value options. For more information about the velocity curves
and how to choose them, read about the Setup Menu and go to page 24 for details about pad velocity curves.

www.nektartech.com Nektar Impact LX49, LX61 & LX88 User Guide 19
Pads Maps Default Settings
Map 1
Note Note No. Data 1 Data 2 Data 3 Chan
P1 C1 36 0127 0Global
P2 C#1 37 0127 0Global
P3 D1 38 0127 0Global
P4 D#1 39 0127 0Global
P5 E1 40 0127 0Global
P6 F1 41 0127 0Global
P7 F#1 42 0127 0Global
P8 G1 43 0127 0Global
Map 2
Note Note No. Data 1 Data 2 Data 3 Chan
P1 G#1 44 0127 0Global
P2 A1 45 0127 0Global
P3 A#1 46 0127 0Global
P4 B1 47 0127 0Global
P5 C2 48 0127 0Global
P6 C#2 49 0127 0Global
P7 D2 50 0127 0Global
P8 D#2 51 0127 0Global
Map 3
Note Note No. Data 1 Data 2 Data 3 Chan
P1 C3 60 0127 0Global
P2 D3 62 0127 0Global
P3 E3 64 0127 0Global
P4 F3 65 0127 0Global
P5 G3 67 0127 0Global
P6 A3 69 0127 0Global
P7 B3 71 0127 0Global
P8 C4 72 0127 0Global
Map 4
Note Note No. Data 1 Data 2 Data 3 Chan
P1 C1 36 0127 0Global
P2 D1 38 0127 0Global
P3 F#1 42 0127 0Global
P4 A#1 46 0127 0Global
P5 G1 43 0127 0Global
P6 A1 45 0127 0Global
P7 C#1 37 0127 0Global
P8 C#2 49 0127 0Global

20 Nektar Impact LX49, LX61 & LX88 User Guide www.nektartech.com
Setup Menu
The Setup menu gives access to additional functions such as control assign, load, save, selecting velocity curves and more.
To enter the menu, press the [Setup] button. This will mute the MIDI output of the keyboard and instead the keyboard now is
used to select menus.
When the Setup menu is active, the display will show {S.E.t.} with the 3 dots blinking for as long as the menu is active.
The chart below provides an overview of menus assigned to each key and what display abbreviations you see in the Impact
LX display (in parentheses), when a key is pressed.
Menu keys are the same for both Impact LX49, LX61 and LX88 but value entry using the keyboard is one octave higher on
LX61 and LX88. Refer to the screen printing on the unit to see which keys to press to enter values.
The functions are separated in two groups. The first group spanning C1-G1 covers control assignments and behavior,
including Save and Load of the 5 presets and 4 pad maps. When you press the keys in this group you first see an
abbreviation showing the function. This means you can press keys until you find exactly the menu you want without worrying
about controls changing assignments. Since this group of functions are the ones you most likely will use more regularly this
makes the menus easy to find.
The second group spanning C2-A2 covers global and setup functions. Most of the second group functions will show you their
current status when you press a key.
On the following page we cover how each of these menus work. Note the documentation assumes you have an understanding
of MIDI including how it works and behaves. If you are not familiar with MIDI, we recommend you study MIDI before making
control assignment changes to your keyboard. A good place to start is the MIDI Manufacturers Association www.midi.org
C1 C2
- +
Other manuals for Impact LX49
1
This manual suits for next models
2
Table of contents
Other Nektar Synthesizer manuals
