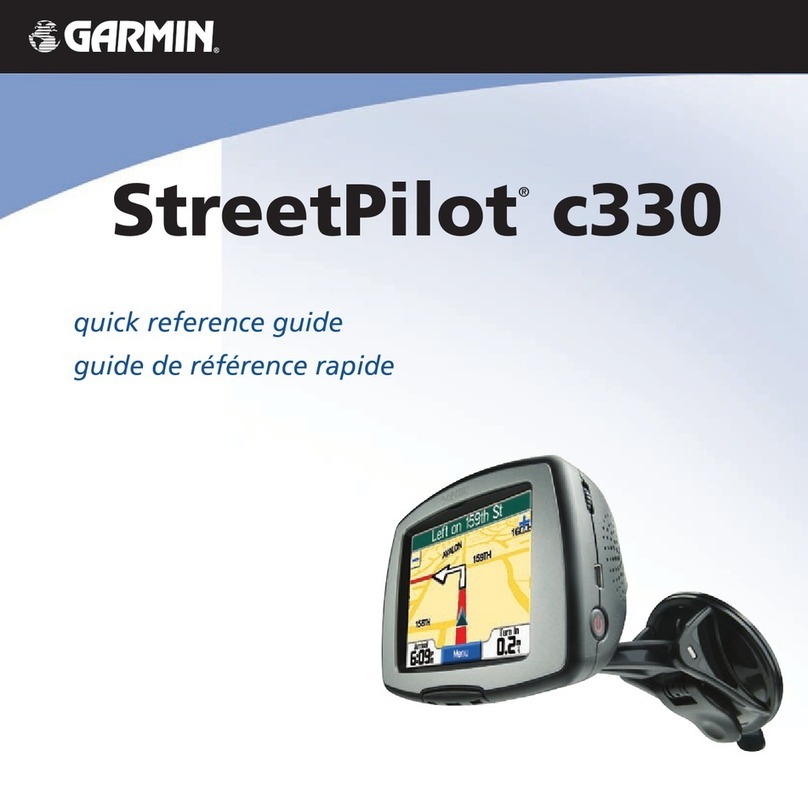
Neoline X-COP 8700s User manual

Description of connectors and keys
X-COP 8700s
1
Quick start guide
Lens Mount 1 connector
Mount 2 connector (on the bottom)
Power input
(DC12V ~ 24V)
Micro USB
(connector to update
software and database)
Loudspeaker
Sun visor
fixing hole
ON/MENU MODE
DOWN UP

Quick start guide
Method of installation
2
• Plug the power cable into the socket on the right side of the device and the adapter
into the car's cigarette lighter socket (receptacle).
• Take the windshield suction cups mount from the kit or replace the suction cups with
a 3M adhesive tape pad.
• Insert the loose end of the mount into mount 1 connector.
• Attach the device to the windshield using suction cups or the 3M adhesive tape pad.
• Fix the radar detector at the base of the windshield in a horizontal plane, since the
police radar waves fall onto this area.
• Start the car engine.
• Press ON/MENU to enter the device menu.
• Press ON/MENU or MODE and scroll through the device menu down to Flip Display.
Change No to Yes by pressing DOWN.
• Take the windshield suction cups mount from the kit or replace the suction cups with
a 3M adhesive tape pad.
• Insert the loose end of the mount into mount 2 connector.
• Attach the device to the windshield using suction cups or the 3M adhesive tape pad.
• Fix the radar detector at the base of the windshield in a horizontal plane, since the
police radar waves fall onto this area.
1. Installation on the windshield
2. Installation on the windshield: upside down installation

• Attach the magnetic mount onto a flat surface of the dashboard.
• Place X-COP 8700s into a magnetic mount.
• Fix the radar detector in a horizontal plane, since the police radar waves fall onto this
area.
• Connect X-COP 8700s to the car socket with the 12...24V power cable.
• Remove the cap from the sun visor connector.
• Take the sun visor out of the X-COP 8700s box and push it into the groove on the
front of the radar detector body with little effort.
• Connect the Fuse Cord power cable to the
connector on the right side of the device.
• Route the power cable to the fuse box.
• Connect the power cable to the fuse box in
accordance with the instructions:
- Connect the B power cable (+) to the circuit
providing stable 12V voltage.
- Connect the GND cable (-) to the vehicle
ground.
3. Installation on the dashboard
4. Installing sun visor
5. Connecting Fuse Cord
3
GND
B+ 2A
+12V

Main functions
• Press to enter the Menu.
• Hold to turn on/off.
• Press when in the Menu to switch through the settings in the Menu.
• Hold when in the Menu to save the settings and exit the Menu.
1. On/Menu Key
• Press to Adjust the volume.
• Press when in the Menu to switch between options.
• Hold UP for 1.5 seconds to add a Danger Zone
A Danger Zone is a zone that requires your special attention.
For example, a section of bumps, a school, a busy intersection, a quick hide, etc.
• Hold UP for 1.5 sec when in Danger Zone to delete this zone.
• Hold DOWN for 1.5 seconds while receiving a false signal to add a Silence Zone
A Silence Zone is a zone where broadband signals (so-called false signals) are
detected, but where there are no police radars. Such zones are found at gas stations
and shops with automatic entrance doors.
• Hold DOWN for 1.5 sec when in Silence Zone to delete this zone
• Hold UP and DOWN simultaneously for 2 seconds to enable/disable the
Z-signature filter.
Once the Z-signature filter is on, a Z icon
lights up on the display
Z-signature filter - unique technology designed by Neoline Company to reduce a
number of false alerts. Recognizes and blocks in a prompt manner false alert from
sensors of blind areas of cars with systems: «Blind Spot Monitoring», «Side Assist»,
«Blind Spot Detection» and others.
The essential difference of this technology from other signature-based technologies is
that when using the Filter Z-signature real police radars will not be blocked.
2. UP and DOWN Keys
4

5
• Press MODE to switch through City/Route/Turbo/ X-COP modes.
City - reduced distance of detecting police radar. Minimum number of false alert signals.
Highway - standard distance of detecting police radar. Average number of false alert signals.
Turbo - maximum distance of detecting police radar. Maximum number of false alert signals.
X-COP - automatic switching of frequency bands, sensitivity modes «City» / «Highway» and
filters against false alerts, depending on the speed of the car.
3. MODE key
• When in parking or moving mode, the display shows the current speed, time, Z icon
(where the Z-signature filter is on) and the current detection mode.
• Once a GPS database camera is detected, the display shows the current speed, the
distance to the camera, the allowed speed and a graphic scale showing the distance to
the camera
• Once the radar module detects a wide band signal, the display shows the current
speed, the signal range (K, M, Ka, Laser), the signal gain scale and the signal gain
digital value.
• At simultaneous detection with the radar module and the GPS database, the display
shows information from both the module and the database.
Display
Driving
In traffic
jams
Small
residential
areas
Big cities
and
highways
Highways
and
motorways
Speed, km/h
0-24
25-49
50-89
90+
Mode
City
City
Highway
Highway
ON
ON
ON
OFF
Filter
Z-signature Ka-filter
ON
ON
ON
OFF
Notification
Only display
Voice + beep
+ display
Voice + beep
+ display
Voice + beep
+ display
K
OFF
ON
ON
ON
М
OFF
ON
ON
ON
Ka
OFF
ON
ON
ON

Long range detection exd plus module
Motion Control
TM
The inner module provides the maximum distance detection of police radars in K, M and Ka bands,
especially «in the back» detection. The best performance is in combination with Turbo mode.
The unique development of Neoline Company.
Detector that responds to gestures – to disable the voice and sound warning while
approaching the police radar, it is enough for the driver to wave his hand 10-15 centimeters
from the device and the sound will be turned off. Patented technology.
EXD Plus common radar detector police radar (K, M or Ka)
“in the front”
EXD Plus common radar detector
*Possible maximum detection distance in comparison with common radar detector.
police radar (K, M or Ka)
“in the back”
+100% detection distance*
+130% detection distance*
6

K-Band Wide – 23.900 – 24.250 GHz – standard setting for detecting all police radars in K-Band.
K-Band Narrow – 24.055 – 24.190 GHz – to reduce the number of false alerts. It is
recommended to install only for users who are aware of the frequencies in which police radars
operate in their region of device use.
K-Band Super Narrow – 24.075 – 24.130 GHz – best minimization of false alerts. It is
recommended to install only for users who are aware of the frequencies in which police radars
operate in their region of device use.
K POP – 23.900 – 24.250 GHz – to detect mobile police guns in K-band which are operated in
single shot mode. If this setting is ON more false alerts signals happened.
K-Band in City – 23.900 – 24.250 GHz:
ON/OFF – in City mode, K-band can be turned off. This is necessary when driving in megacities,
in which there are no mobile radar systems, but there are numerous obstacles. By disabling the
K band in the City, you will only receive information from the GPS base.
Impulse - in the City mode, only the impulse radar signals from the signal library are detected.
This will reduce the number of false positives significantly.
M-Band – 23.900 – 24.250 GHz – a separate band for announcement of the MultaRadar CD and
CT. These radars have a unique signal structure, so a special platform is required for their
detection. For the convenience of the user, these police radars announced in special M-Band.
Ka-Band – 33.400 – 36.000 GHz – detection of police radars: Ramer, Multanova 6Fm Stalker,
Ramet, Bee III
Ka POP – 33.400 – 36.000 GHz – to detect mobile police guns in Ka-band which are operated in
single shot mode. If this setting is ON more false alerts signals happened.
Multanova 6F
Ramer
MultaRadar
Stalker
7
K-band settings

Selection of frequencies depending on the region of use of the device: World, Europe, Russia,
Baltic, CIS, Israel, USA, PRO.
Band selection
World
Europe
Russia
Baltic
CIS
Israel
USA
PRO
K
Wide
Wide
Wide
Narrow
Wide
Narrow
Wide
Ka
33.400 ~ 33.700 GHz
33.700 ~ 33.900 GHz
33.900 ~ 34.200 GHz
34.200 ~ 34.600 GHz
34.600 ~ 34.800 GHz
34.800 ~ 35.160 GHz
35.160 ~ 35.400 GHz
35.400 ~ 35.600 GHz
35.600 ~ 35.840 GHz
35.840 ~ 36.000 GHz
33.900 ~ 34.200 GHz
34.200 ~ 34.600 GHz
34.600 ~ 34.800 GHz
35.400 ~ 35.600 GHz
35.600 ~ 35.840 GHz
Off
33.400 ~ 36.000 GHz
Off
33.700 ~ 33.900 GHz
33.700 ~ 33.900 GHz
34.600 ~ 34.800 GHz
35.400 ~ 35.600 GHz
Ka-POP
On
On
Off
On
Off
On
On
K-POP
On
On
Off
Off
Off
Off
Off
M
On
On
On
On
On
On
On
When this value is selected, a detailed setting of the Ka-Band
appears:
33.400 ~ 33.700 GHz
33.700 ~ 33.900 GHz
33.900 ~ 34.200 GHz
34.200 ~ 34.600 GHz
34.600 ~ 34.800 GHz
34.800 ~ 35.160 GHz
35.160 ~ 35.400 GHz
35.400 ~ 35.600 GHz
35.600 ~ 35.840 GHz
35.840 ~ 36.000 GHz
8
Band selection

9
This function makes it possible to display the received signal intensity or a notification of
approaching a GPS point on a diode bar.
When the GPS database radar or camera is detected, the diode bar turns red once the road
section permitted speed is exceeded.
When passing a GPS point, the 4 center diodes of the diode bar flash 3 times.
Once the RD module detects a radar, the diode bar lights up red depending on the received
signal intensity:
Level 1: the bar is off
Levels 2 and 3: 2 central diodes light up
Level 4: 4 central diodes light up
Level 5: All 6 diodes light up
Depending on the type of signal detection (GPS or RD), the bar lights up in either of the
modes.
Backlight LED mode
1. GPS
2. RD
3. GPS & RD

10
You can make an accurate measurement of the acceleration of your car.
When the radar detector is on, hold ON/MENU and MODE for 1.5 seconds to enter the
X-LOGIC mode.
X-LOGIC mode only operates properly when there is X-COP 8700s–satellite connection.
When you turn on X-LOGIC, the following information will be displayed:
X-Logic
1/4 Mile
Speed
100 ~ 150 km/h
Timer (0 ~ 100 Sec)
0 ~ 60 km/h
0 ~ 100 km/h
100 ~ 200 km/h
Speed
Timer
60
100
150
200
402
Current speed
Once the car starts moving , the count begins from 0 to 99.9 seconds
When reaching a speed of 60 km/h, this block displays the time
(in seconds) spent to reach this speed.
When reaching a speed of 100 km/h, this block displays the time
(in seconds) spent to reach this speed.
When reaching a speed of 150 km/h, this block displays the time
(in seconds) spent to reach the 100 to 150 km/h speed.
When reaching a speed of 150 km/h, this block displays the time
(in seconds) spent to reach the 100 to 200 km/h speed.
When the car passes 402 meters, this block displays the time
(in seconds) spent to pass this distance.
• Once a speed of 200 km/h is reached or after 100 seconds of the measurement
(whichever comes first), the results are saved automatically, and the measurement ends.
• X-COP 8700s can save the 5 most recent speed measurements.
• The user can view the results of the measurements by pressing UP or DOWN.
• To delete the viewed speed measurement results, press ON/MENU.

11
If possible, you may send coordinates, photo and description of police camera, which is missed
And after verification this POI will be added to global GPS base.
For detailed information please download the user manual from www.neoline.com
Update using an OTG Micro USB cable and flash cards:
ATTENTION! Supported USB memory are: FAT16 or FAT32
1. Download the latest firmware version at neoline.com/update (.efm, .voi and .db files)
2. Copy the downloaded files to the flash card
3. Connect the flash card to X-COP 8700s using the supplied USB OTG cable
4. Connect X-COP 8700s to a power supply of 12 to 24 V (e.g. to a cigarette lighter socket)
5. Turn on the radar detector
6. Firmware installation begins.
7. Once the installation is ready, X-COP 8700s turns on automatically.
User POI
Firmware update

12
Exploitation conditions
• The appliance must only be used with supplied accessories. Neoline Company is not
liable for any damage caused by the use of other manufacturers’ accessories with Neoline
device.
• Radar-detector impressions may be inaccurate due to extraneous radiation. Strong
source of radiation can damage the stable work of the radar-detector.
• Device impressions may vary due to landscape features.
• Radar-detector is designed to detect only radiation sources. The manufacturer cannot
guarantee the full detection of all available radio sources due to the potential for the use
of ancillary devices.
• Radar-detector may not work properly if the front windscreen is heated by electricity.
Depending on the fact that these glasses have an integrated metal structure, this could
compromise the device’s GPS detection module.
• Satellite search time can increase depending on weather conditions, daylight time, relief
properties and car design.
• Use the device only in accordance with the stated storage and operating conditions
(indicated on the package).
• Protect the appliance from fire and water, chemically active substances (gasoline,
solvents, reagents, etc.).
• Do not disassemble or modify the device.
• Neoline Company is not responsible for the loss of data and / or damage caused directly
or indirectly by the driver or a third party due to incorrect use of the device or firmware,
incorrect installation, connection of the extraneous devices to the manufacturer’s device.
The manufacturer reserves the right to make changes to the package, technical and
software support without prior notice.
The manufacturer recommends that you comply with all laws and regulations governing
radar-detectors and shall not be responsible for the use of the equipment in contravention
of the legal provisions.
UAN Neolainas is responsible for declaring that the product X-COP 8700s complies with
the essential requirements of Directive 2014/53/EU. The full text of the declaration and
the full user guide are on the web site: www.neoline.com

Beschreibung der anschlüsse und tasten
X-COP 8700s
13
Kurzanleitung
Linse Anschlussstelle Nr. 1
Anschlussstelle Nr. 2
(von unteren Seite des Gehäuses)
Stromanschluss
(DC12V~24V)
Micro USB
(für Sofware- und
Datenbank-Update)
Lautsprecher-
Buchse
Blendschutz-
Buchse
Ein / Menü Betriebsart
Nach unten Nach oben

Installationsverfahren
14
• Stecken Sie das Netzkabel in die Buchse an der rechten Seite des Geräts und den
Adapter in die Zigarettenanzünderbuchse des Autos.
• Nehmen Sie aus dem Satz die Windschutzscheibenhalterung mit den Saugnäpfen oder
ersetzen Sie die Saugnäpfe durch ein Pad mit H-Klebeband.
• Stecken Sie das freie Ende der Halterung in den Anschluss №1.
• Befestigen Sie das Gerät mit einem Saugnapf oder einem 3M-Pad an der
Windschutzscheibe.
• Der Radar-Detektor muss an der Basis der Windschutzscheibe in einer horizontalen
Ebene befestigt werden, da die Strahlung von Polizeiradar auf diesen Bereich fällt.
• Starten Sie den Automotor.
• Drücken Sie die Taste ON / MENU, um das Gerätemenü aufzurufen.
• Drücken Sie die Taste ON / MENU oder MODE und scrollen Sie durch das Gerätemenü,
bis die Funktion „Flip Display“ angezeigt wird. Ändern Sie den Wert "Nein" in "Ja", indem
Sie die Taste "AB" drücken.
• Nehmen Sie aus dem Satz die Windschutzscheibenhalterung mit den Saugnäpfen oder
ersetzen Sie die Saugnäpfe durch ein Pad mit 3M-Klebeband.
• Stecken Sie das freie Ende der Halterung in den Halterungsanschluss Nr. 2.
• Befestigen Sie das Gerät mit einem Saugnapf oder einem 3M-Pad an der
Windschutzscheibe.
• Der Radar-Detektor muss an der Basis der Windschutzscheibe in einer horizontalen
Ebene befestigt werden, da die Strahlung von Polizeiradar auf diesen Bereich fällt.
1. Montage an der Windschutzscheibe
2. Montage auf der Windschutzscheibe umgekehrt herum

• Kleben Sie die Magnethalterung auf einer ebenen Fläche auf das Armaturenbrett.
• Stellen Sie den X-COP 8700s auf eine magnetische Halterung. Der Radar-Detektor
muss in horizontaler Ebene auf der Montierung platziert werden, da die Strahlung von
Polizeiradar auf diesen Bereich fällt.
• Stecken Sie das 12-24-V-Netzkabel in die Auto-Steckdose und in den X-COP 8700s.
• Entfernen Sie die Kappe vom Sonnenblendenanschluss.
• Nehmen Sie die Sonnenblende aus der X-COP 8700s-Verpackung und setzen Sie sie
mit geringem Aufwand in die Nut an der Vorderseite des Radar-Detektor-Gehäuses ein.
• Schließen Sie das Netzkabel des
Sicherungskabels an den Anschluss auf der
rechten Seite des Geräts an.
• Verlegen Sie das Netzkabel zum
Sicherungskasten.
• Schließen Sie das Netzkabel gemäß den
Anweisungen an den Sicherungskasten an:
- Schließen Sie das Netzkabel B (+) an den
Stromkreis an, an dem ständig +12 V
anliegen.
- Schließen Sie das GND -Kabel (-) an die
Fahrzeugmasse an.
3. Installation auf dem Armaturenbrett
4. Blendschutz installierent
5. Anschließen des Sicherungskabels
15
GND
B+ 2A
+12V

Hauptfunktionen
• Drücken Sie kurz, um das Menü aufzurufen.
• Lang drücken - ein / aus.
• Drücken Sie im Menü kurz, um zwischen den Einstellungen im Menü zu wechseln.
• Halten Sie im Menü die Taste lang gedrückt, um das Menü mit den gespeicherten
Einstellungen zu verlassen.
1. ON/MENU-Taste
• Lautstärkeregler.
• Im Menü - zwischen Optionen wechseln.
• Drücken Sie die AUF-Taste 1,5 Sekunden lang - die Gefahrenzone wird hinzugefügt
Gefahrenzone - ein Bereich, der Ihre Aufmerksamkeit erfordert. Zum Beispiel eine Reihe
liegender Polizisten, eine Schule, eine belebte Kreuzung, ein mobiler Hinterhalt usw.
• Halten Sie während Ihres Aufenthalts in der Gefahrenzone die AUF-Taste 1,5
Sekunden lang gedrückt - diese Zone wird gelöscht
• Drücken Sie die Taste "AB" 1,5 Sekunden lang, während Sie ein falsches Signal
empfangen Die Ruhezone wird hinzugefügt
Die Ruhezone ist eine Zone, in der Signale eines weiten Frequenzbereichs erkannt
werden (sogenannte Störsignale), es gibt jedoch kein Polizeiradar. Oft befinden sich
diese Bereiche an Tankstellen und Geschäften mit automatischen Türen.
• Drücken Sie während Ihres Aufenthalts in der Ruhezone 1,5 Sekunden lang die Taste
"AB" - diese Zone wird gelöscht
• Halten Sie die Tasten AUF und AB gleichzeitig 2 Sekunden lang gedrückt, um den
Z-Signaturfilter zu aktivieren / deaktivieren
Wenn Sie den Z-Signatur-Filter einschalten,
leuchtet das Z-Symbol auf dem Display auf.
Die Filter Z-Signatur ist eine einzigartige Technologie, die von der Firma Neoline
entwickelt wurde, um die Anzahl von Fehlalarmen zu reduzieren. Sie erkennt und
blockiert schnell Fehlalarme von Sensoren in Blindbereichen von Autos mit Systemen:
«Blind Spot Monitoring», «Side Assist», «Blind Spot Detection» und anderen.
Der wesentliche Unterschied dieser Technologie zu anderen signaturbasierten
Technologien besteht darin, dass bei Verwendung der Filter-Z-Signatur echte
Polizeiradargeräte nicht blockiert werden.
2. Tasten "AUF", "AB"
16

17
• Kurz drücken - Umschalten zwischen den Empfindlichkeitsmodi Stadt / Route / Turbo /
X-COP.
City – reduzierte Polizeiradar-Erkennungsabstand. Minimale Anzahl von Fehlalarmsignalen.
Highway – Standard-Erkennungsabstand des Polizeiradars. Durchschnittliche Anzahl von
Fehlalarmsignalen.
Turbo – maximale Polizeiradar-Erkennungsabstand. Maximale Anzahl von
Fehlalarmsignalen.
X-COP – automatische Umschaltung der Frequenzbänder, Empfindlichkeitsmodi «City» /
«Highway» und Filter gegen Fehlalarme, abhängig von der Geschwindigkeit des Fahrzeugs.
3. Taste "MODE"
• Während des Parkens oder der Fahrzeugbewegung zeigt das Display die aktuelle
Geschwindigkeit, die Uhrzeit, das Symbol „Z“ (wenn der Z-Signaturfilter aktiviert ist) und
den aktuellen Erkennungsmodus
• Wenn eine Kamera von der GPS-Basisstation erkannt wird, zeigt das Display die
aktuelle Geschwindigkeit, die Entfernung zur Kamera, die zulässige Geschwindigkeit und
eine grafische Skala an, die die Entfernung zur Kamera angibt
the camera
• Während der Erkennung eines Weitbereichssignals durch das Radarmodul zeigt das
Display die aktuelle Geschwindigkeit, den Bereich (K, M, Ka, Laser), den Anstieg des
Signals (Skala von 1 bis 5), neben dem die Signalleistung durch eine Ziffer dupliziert wird.
• Bei gleichzeitiger Erkennung durch das Radarmodul und die GPS-Basis zeigt das
Display Informationen vom Radarmodul und von der GPS-Basis an.
Display
Bewegung
Im Stau
In kleinen
Wohnorten
In
Großstädten
und auf der
Autobahn
Auf den
Autobahnen
und
Schnellstra-
ßen
Geschwindigkeit
km/h
0-24
25-49
50-89
90+
Mode
Stadt
Stadt
Autobahn
Autobahn
EIN
EIN
EIN
AUS
Z-Signatur-
Filter Ka-filter
ON
ON
ON
OFF
Alarm
Nur anzeigen
Stimme +
Piepton +
Anzeige
Stimme +
Piepton +
Anzeige
Stimme +
Piepton +
Anzeige
K
AUS
EIN
EIN
EIN
М
AUS
EIN
EIN
EIN
Ka
AUS
EIN
EIN
ВК
EIN

Erkennung mit hoher Reichweite EXD PLUS MODULE
Bewegungskontrolle
Das innere Modul, das die maximale Fernerkennung von Polizeiradargeräten in K-, M- und
Ka-Bändern ermöglicht, insbesondere die Erkennung "von der Rückseite". Die beste Leistung wird
im Turbo-Modus erzielt.
Eine einzigartige Entwicklung der Firma Neoline.
Detektor, der auf Gesten reagiert - um die Sprach- und Tonwarnung zu deaktivieren,
während er sich dem Polizeiradar nähert, reicht es aus, dass der Fahrer seine Hand 10-15
Zentimeter vom Gerät entfernt bewegt und der Ton ausgeschaltet wird. Patentierte
Technologie.
EXD Plus Gewöhnlicher Radar-Detektor Polizeiradar (K, M oder Ka)
„vorne“
EXD Plus Gewöhnlicher Radar-Detektor
*Maximale mögliche Detektionsabstand im Vergleich zu einem gewöhnlichen Radar-Detektor
Polizeiradar (K, M oder Ka)
„Rückseite“
+100% Detektionsabstand*
+130% Detektionsabstand*
18

K-Band Wide – 23.900 – 24.250 GHz – Standardeinstellung zur Erkennung aller
Polizeiradargeräte im K-Band.
K-Band Narrow – 24.055 – 24.190 GHz – um die Anzahl der Fehlalarme zu verringern. Es wird
empfohlen, das Gerät nur für Benutzer zu installieren, die die Frequenzen kennen, mit denen
Polizeiradargeräte in ihrer Region eingesetzt werden.
K-Band Super Narrow – 24.075 – 24.130 GHz – die beste Minimierung von Fehlalarmen. Es wird
empfohlen, das Gerät nur für Benutzer zu installieren, die die Frequenzen kennen, mit denen
Polizeiradargeräte in ihrer Region eingesetzt werden.
K POP – 23.900 – 24.250 GHz – um mobile Polizeigewehre im K-Band zu erkennen, die im
Single-Shot-Modus betrieben werden. Wenn diese Einstellung aktiviert ist, treten mehr
Fehlalarme auf.
K-Band in City – 23.900 – 24.250 GHz:
EIN / AUS - Im Modus „Stadt“ kann die Reichweite K deaktiviert werden. Dies ist erforderlich,
wenn in Großstädten gefahren wird, in denen es keine mobilen Radarkomplexe gibt, aber
zahlreiche Interferenzen auftreten. Wenn Sie die K-Reichweite in der Stadt ausschalten, erhalten
Sie nur Informationen aus der GPS-Datenbank.
Impuls - Im Modus „Stadt“ werden nur die Signale des Impulsradars erkannt, die in die
Signalbibliothek eingegeben wurden. Dadurch wird die Anzahl der Fehlalarme erheblich reduziert.
M-Band – 23.900 – 24.250 GHz – eine separate Band für Ankündigung der MultaRadar CD und
CT. Diese Radare haben eine einzigartige Signalstruktur, sodass für ihre Erkennung eine spezielle
Plattform erforderlich ist. Für Benutzer-Bequemlichkeit werden diese Polizeiradars im speziellen
M-Band angekündigt.
Ka-Band – 33.400 – 36.000 GHz – Detektion von Polizeiradargeräten: Ramer, Multanova 6Fm
Stalker, Ramet, Bee III
Ka POP – 33.400 – 36.000 GHz – um mobile Polizeigewehre im Ka-Band zu erkennen, die im
Einzelschussmodus betrieben werden. Wenn diese Einstellung aktiviert ist, treten mehr
Fehlalarme auf.
Multanova 6F
Ramer
MultaRadar
Stalker
19
Band-einstellungen

Frequenzen-Auswahl je nach Einsatzgebiet des Geräts: Welt, Europa, Russland, Baltikum,
GUS, Israel, USA, PRO.
Band-Auswahl
Welt
Europa
Russland
Baltikum
GUS
Israel
USA
PRO
K
Breit
Breit
Breit
Eng
Breit
Eng
Breit
Ka
33.400 ~ 33.700 GHz
33.700 ~ 33.900 GHz
33.900 ~ 34.200 GHz
34.200 ~ 34.600 GHz
34.600 ~ 34.800 GHz
34.800 ~ 35.160 GHz
35.160 ~ 35.400 GHz
35.400 ~ 35.600 GHz
35.600 ~ 35.840 GHz
35.840 ~ 36.000 GHz
33.900 ~ 34.200 GHz
34.200 ~ 34.600 GHz
34.600 ~ 34.800 GHz
35.400 ~ 35.600 GHz
35.600 ~ 35.840 GHz
Aus
33.400 ~ 36.000 GHz
Aus
33.700 ~ 33.900 GHz
33.700 ~ 33.900 GHz
34.600 ~ 34.800 GHz
35.400 ~ 35.600 GHz
Ka-POP
Ein
Ein
Aus
Ein
Aus
Ein
Ein
K-POP
Ein
Ein
Aus
Aus
Aus
Aus
Aus
M
Ein
Ein
Ein
Ein
Ein
Ein
Ein
Wenn dieser Wert ausgewählt ist, wird eine detaillierte Einstellung
des Ka-Bandes angezeigt:
33.400 ~ 33.700 GHz
33.700 ~ 33.900 GHz
33.900 ~ 34.200 GHz
34.200 ~ 34.600 GHz
34.600 ~ 34.800 GHz
34.800 ~ 35.160 GHz
35.160 ~ 35.400 GHz
35.400 ~ 35.600 GHz
35.600 ~ 35.840 GHz
35.840 ~ 36.000 GHz
20
Band-auswahl
Table of contents
Languages:
