Neostar KB111 User manual

Knightsbridge4‐in‐1MusicCentreKB111
CustomerHelpline08455554440
Pleasekeeptheseinstructionsinasafeplaceforfuture
reference.

1
TableofContents
IMPORTANTSAFETYINSTRUCTIONSFORAUDIOPRODUCTS...........................................................3
PRODUCTOVERVIEW........................................................................................................................5
SETUP/BASICOPERATION................................................................................................................8
REMOTECONTROL............................................................................................................................9
REMOTECONTROLBUTTONFUNCTIONS.......................................................................................10
LISTENINGTOAVINYLRECORD......................................................................................................11
LISTENINGTOTHERADIO...............................................................................................................11
LISTENINGTOACD.........................................................................................................................12
LISTENINGTOATAPE......................................................................................................................15
LISTENINGTOANEXTERNALAUDIODEVICE(AUXMODE).............................................................15
RECORDINGTOACD‐R/CD‐RW.......................................................................................................16
FINALIZEADISC...............................................................................................................................17
UNFINALIZEACD‐RW......................................................................................................................18
ERASE(CD‐RWONLY)......................................................................................................................18
ERASEALL(CD‐RWONLY)................................................................................................................19
CDCOPIER.......................................................................................................................................19
MAINTENANCE/PROPERHANDLING...............................................................................................20
TROUBLESHOOTINGGUIDE.............................................................................................................23
SPECIFICATIONS...............................................................................................................................24

2
Thelightningflashwith
arrowheadsymbol,withinan
equilateraltriangle,is
intendedtoalertusertothe
presenceofnon‐insulated
“dangerousvoltage”within
theproduct’senclosurethat
maybeofsufficient
magnitudetoconstituteriskof
electricshocktopersons.
CAUTION:TOPREVENTRISK
OFELECTRICSHOCK,DONOT
REMOVECOVER(ORBACK).
NOUSER‐SERVICEABLEPARTS
INSIDE.REFERSERVICINGTO
QUALIFIEDSERVICE
PERSONNEL.
Theexclamationmarkwithin
anequilateraltriangleis
intendedtoalertusertothe
presenceofimportant
operatingandmaintenance
(servicing)instructionsinthe
literatureaccompanyingthe
appliance.
CAUTION:
yToreducetheriskofelectricshock,donotremovecoverorback.Nouserserviceableparts
inside.Referservicingtoqualifiedservicepersonnel.Ifthisproductdevelopsapossiblefault,
contactaqualifiedservicecentre,anddonotusetheproductindefectivestate.
WARNING:
yToreducetheriskoffireorelectricshock,donotexposethisappliancetorainormoisture.
yInvisiblelaserradiationwhenopenandinterlockfailedordefeated.Avoiddirectexposureto
laserbeam.

3
IMPORTANTSAFETYINSTRUCTIONSFORAUDIOPRODUCTS
1.Read,heedandfollowallinstructionsbeforeoperation.
2.Keepthismanualinasafeplaceforfuturereference.
3.Theapparatusshouldnotbeexposedtodrippingorsplashing,andnoobjectsfilledwith
liquidssuchasvases,shallbeplacedontheapparatus.
4.Unplugthisproductfromthewalloutletbeforecleaning.Cleanonlywithadrycloth.
5.Chooseunitinstallationlocationcarefully.Avoidplacingitindirectsunlightorclosetoa
sourceofheat.Alsoavoidlocationssubjecttovibrationsandexcessivedust,coldormoisture.
Keepawayfromsourcesthathum,suchastransformersormotors.Alsotheproductshould
besituatedawayfromotherproductsthatproduceheat,suchasradiators,stovesor
amplifiers.
6.Noopenflamesources,suchaslightedcandles,shouldbeplacedontheapparatus.
7.Donotblockanyventilationopenings.Theapparatusshouldnotbesituatedonabed,sofa,
rug,orsimilarsurfacethatmayblocktheventilationopenings.Thisapparatusshouldnotbe
placedinabuilt‐ininstallation,suchasaclosedbookcaseorcabinetthatmayimpedethe
floworairthroughtheventilationopenings.Ventilationshouldnotbeimpededbycovering
theopeningswithitemssuchasnewspapers,tablecloths,curtains,etc.
8.Donotuseattachmentsnotrecommendedbytheproductmanufacturerastheymaybe
hazardous.
9.Donotplacethisproductonanunstablesurface.Theproductmayfall,
causingseriousinjurytoachildoradultandseriousdamagetotheproduct.
Useonlywithastand,bracket,ortablerecommendedbythemanufacturer,
orsoldwiththeproduct.
10.Thisproductshouldbemovedwithcaretoavoiddamageorinjury.
11.Thisproductshouldbeoperatedonlyfromthetypeofpowersourceindicatedonthemarking
label.Ifyouarenotsureofthetypeofpowersupplytoyourhome,consultyourproduct
dealerorlocalpowercompany.Forproductsintendedtooperatefrombatterypower,or
othersources,refertotheoperationinstructions.
12.Themainsplugisusedtodisconnectthedevice,andshouldremainreadilyaccessible.
13.Power‐supplycordsshouldberoutedsothattheyarenotlikelytobetrappedinanyway.
14.Duringalightningstorm,orwhenitisleftunattendedandunusedforlongperiodsoftime,
unplugtheproductfromthewalloutletanddisconnecttheantennaorcablesystem.
15.Anoutsideantennasystemshouldnotbelocatedinthevicinityofoverheadpowerlinesor
otherelectriclightorpowercircuits,orwhereitcanfallintosuchpowerlinesorcircuits.
Wheninstallinganoutsideantennasystem,extremecareshouldbetakentokeepfrom
touchingsuchpowerlinesorcircuitsascontactwiththemmightbefatal.
16.Donotoverloadwalloutletsorextensioncordsasthiscanresultinariskoffireorelectric
shock.
17.Neverpushobjectsofanykindintothisproductthroughopeningsastheymaytouch
dangerousvoltagepointsorshort‐outpartsthatcouldresultinafireorelectricshock.Never
spillliquidofanykindontheproduct.
16.Donotattempttoservicethisproductyourselfasopeningorremovingcoversmayexpose
youtodangerousvoltageorotherhazards,andinvalidateyourwarranty.

4
Unplugthisproductfromthemainssupply,call08455554440foradviceunderthefollowing
conditions:
yIfthepower‐supplycordorplugisdamaged;
yIfliquidhasspilled,orobjectshavefallenintotheproduct;
yIftheproducthasbeenexposedtorainorwater;
yIftheproductdoesnotoperatenormallybyfollowingtheoperatinginstructions;
yIftheproducthasbeendroppedordamagedinanyway,andtheproductexhibitsadistinct
changeinperformance‐thisindicatesaneedforservice;
yIfreplacementpartsarerequired;
yUponcompletionofanyserviceorrepairstothisproduct,asktheservicetechnicianto
performsafetycheckstodeterminethattheproductisinproperoperatingcondition.
CAUTION:
yUseofcontrols,adjustmentsandperformanceofproceduresotherthanthosespecified
hereinmayresultinhazardousradiationexposure.
yBesuretheservicetechnicianhasusedreplacementpartsspecifiedbythemanufactureror
havethesamecharacteristicsastheoriginalpart.Unauthorizedsubstitutionsmayresultin
fire,electricshock,orotherhazards.
yTopreventelectricshock,onlyaqualifiedelectricianshouldmakeanyrepairstothisproduct,
andasadvisedbythemanufacturer.
yInordertoshutoffthepowerofthisproductcompletely,unplugthepowercordfromthe
walloutlet.Besuretounplugtheunitifyoudonotintendtouseitforanextendedperiodof
time,suchaswhileonvacation.
yIfyouhaveanyconcerns,pleasecall08455554440foradvicefrom
ourtechnicalhelpline.

5
PRODUCTOVERVIEW
1.RECORDBUTTONPresstoenterrecordpausemodeorentercopymode.
2.ERASEBUTTONPresstoeraseorunfinalizeaCD‐RWdisc.
3.AUTO/MANUALBUTTONPresstoselectmodeoftracknumberassignmentforrecording.
4.FINALIZEBUTTONPresstofinalizeaCD‐R/CD‐RWdisc.
5.TRACKINCREMENTBUTTONDuringrecording,presstoseparatetracks.
6.LCDDISPLAY
7.TUNINGINDICATORIlluminatestoindicatethetuningstatus.
8.REMOTESENSORWhenusingtheremotecontrol,pointittowardsthissensor.
9.STOPBUTTONPresstostopplaybackorrecording.
10.FASTREWINDBUTTONInCDmode,presstoskiptotheprevioustrack.Pressandholdto
fastrewind.
11.PLAY/PAUSEBUTTONPresstostartplayback,recording,finalizingorerasing.During
playback,pressagaintopause.
12.FASTFORWARDBUTTONInCDmode,presstoskiptothenexttrack.Pressandholdtofast
forward.
13.SOURCEBUTTONS(PHONO,CD,TAPE,AM,FM,AUX)Pressthecorrespondingbuttonto
selectasource.
14.BUILT‐INSPEAKERS
15.PHONOSOCKETAcceptsheadphone/earphoneplugs.
16.RECORDLEVELKNOBInrecordpausemode,turntoadjusttherecordinglevel.
17.POWERBUTTONSwitchtoturntheunitonortostandbymode.
18.TUNINGKNOBInFM/AMmode,turntotuneinastation.
19.CDRECORDERDISCCOMPARTMENT
20.OPEN/CLOSEBUTTONInCD,PHONOorAUXmode,usetoopenandclosethedisctray.NOTE:
ThisbuttonwillnotworkinFM/AMmode.)
(FrontPanel)

6
21.VOLUMEKNOBTurntoadjustvolume.
22.AUX‐INSOCKETAccepts3.5mmAUXIN(orLINEIN)plugofanexternalsource.
23.FF/EJECTBUTTONPresshalfwaytofastforward,pressallthewaytoendtoejectthetape.
24.CASSETTEDECK
25.LINEINSOCKETSForaudiosourcewithRCAjacks,plugoneendoftheRCAcableintothese
socketsandotherintotheaudiosource.Besuretoconnectthewhiteplugtothewhitesocket
(left)andtheredplugtotheredsocket(right).
26.SPEAKEROUTSOCKETSAcceptstheRCAplugsoftheexternalspeakers.Note:Theexternal
speakersshouldbe8ohms2.5watts.(Additionalmatchingspeakersareavailableseparately–
pleasecall08455554440formoredetails.)
27.POWERCORDPlugsintoawalloutlet.
28.FMANTENNAWhiletunedtoastationinFMmode,extendthewireandrepositiontoadjust
forbestreception.
(Side Panel)
(RearPanel)

7
A.TURNTABLE
PLEASENOTE:
B.TRANSPORTSCREWBeforeusingtheunit,turnthescrewclockwiseusingacoin
orscrewdriver.
Important:Whenyoutransporttheunit,turnthescrewcounterclockwisetosecurethe
turntable.
Thesilverscrewonthebackoftheturntableisabalancerforboththeturntableaswellasforthe
tonearm.
Pleaseturnthisscrewwithacointoeitherleftorrightandtestbymovingyourtonearmtothe
middleofthespindle.Pleasenotethatthisscrewisabalancerandwillhavetobeadjusteduntil
thetonearmmovesfreelytotheendoftherecord(middleofthespindle)withoutanyresistance
beforeusingtheturntablephonograph.
C.INDICATORLIGHT
D.CUE‐LEVERUsethislevertoliftthetonearm.
E.SPEEDSELECTOR
F.TONEARMHOLDERANDTONEARMRESTReleasethetonearmfromtheholderbeforeuse.
Afteruse,remembertore‐locktheholdertoprotectthetonearm.
G.TONEARMBeforeuse,completelyloosenthetapeonthetonearmanduplifttonearm.
H.STYLUSANDPROTECTIVENEEDLECOVER
I.45RPMADAPTER
Removetheprotective
needlecoverbeforeuse.
Keepitinasafeplaceand
putitonwhentheunitis
notin use.

8
SETUP/BASICOPERATION
Setup
1.Removeanypackagingmaterialsfromtheunit.
2.Connecttheoptionalexternalspeakerstothemainunit.
3.Removetheprotectiveneedlecoverbygentlypullingtowardsfrontoftheunit,loosen
transportscrew(seepage7),andanyothertransitprotection.
4.ConnecttheACplugtothewalloutlet.
NOTE:Topreventinterference,avoidbundlingaudiosignalcablestogetherwiththeACpower
cord.
BasicOperation
1.PressthePOWERbuttontoturntheuniton.
2.Selectthesourcebybrieflypressingthecorrespondingsourcebutton(PHONO,CD,TAPE,AM,
FM,AUX).
3.RotatetheVOLUMEknobtoadjusttothedesiredsoundlevel.
ListeningthroughEarphones/Headphones(availableseparately)
Forprivatelistening,firstreducethevolumeleveltominimum.Insertyourheadphone’spluginto
thePHONESsocketthenadjustthevolumeupbyturningtheVOLUMEknob.
NOTE:Thespeakerswillautomaticallybedeactivatedwhileheadphonesarepluggedin.
CONDENSATIONWARNING:
Whentheunitismovedfromacoldtoawarmplaceorisusedafterasuddentemperature
change,thereisadangerthatwatervaporintheaircouldcondenseontheunit,preventing
properoperation.Insuchcases,leavetheunitfor1or2hoursafterpluggingitintoanACoutlet
toallowittostabilizeatthetemperatureofitssurroundings.

9
REMOTECONTROL
Whenusingtheremotecontrol,pointittowardsthefrontpaneloftheunit.
NOTES:
yEveniftheremotecontrolisoperatedwithintheeffectiverange,remotecontroloperation
maybeimpossibleifthereareanyobstaclesbetweentheunitandtheremotecontrol.
yIftheremotecontrolunitisoperatednearotherdeviceswhichgenerateinfraredrays,itmay
notfunctionproperly.Conversely,theotherdevicesmaynotfunctioncorrectly.
BatteryInstallation
1.Removethebatterycompartmentcover.
2.Insert2“AAA”batteries.
NOTE:Makesurethatthebatteriesareinsertedcorrectlysotheirpolarity(“+”and“‐“)matchthe
remotecontrolunit’smarkings.
3.Re‐fitthebatterycompartmentcover.
BatteryPrecautions
yALWAYSusebatteriesofthesametype.Nevermixdifferenttypesofbatteriestogether.
yDonotusenewandoldbatteriestogether.
yWhenusingrechargeablebatteries,refertotheprecautionsontheirlabels.
yWhentheremotecontrolunitisnottobeusedforalongtime(morethanamonth),remove
thebatteriesfromtheremotecontrolunittopreventthemfromleaking.
yDonotheatordisassemblebatteriesandneverdisposeofoldbatteriesbythrowingthemina
fire.
yDisposethedeadbatteriesaccordingtolocalenvironmentalguidelines.

10
REMOTECONTROLBUTTONFUNCTIONS
A.OPEN/CLOSEInCD,PHONOorAUXmode,usethisbutton
toopenandclosethedisctray.Thisbuttondoesnotworkin
FM/AMmode.
B.CDPresstheCDbuttontoplayaCD.
C.REPEATInCDmode,usethisbuttontoselecttherepeatmode
foraCD.
D.PROGRAMInCDmode,usethisbuttontoprogramtracks.
E.SHUFFLEInCDmode,usethisbuttonforshuffleplayback.
F.DISPLAYInCDmode,usethisbuttontochangethedisplay.
G.TRACKINCREMENTDuringrecording,usethisbuttontodivide
tracks.
H.MANUAL/AUTOINCREMENTUsethisbuttontoselectthemode
oftracknumberassignment.
I.RECORDUsethisbuttontorecordCD.
J.RECVOL+/RECVOL‐Usethisbuttontoadjusttherecordvolume.
K.FINALIZEUsethisbuttontofinalizeaCD‐R/CD‐RWdisc.
L.ERASEUsethisbuttontoeraseaCD‐RWdisc.
M.CLEARInCDmode,usethisbuttontoclearprogrammedtracks.
N.PHONOPressthePHONObuttontoplayrecords.
O.AUXPresstheAUXbuttonandselectAUXtolistentoanyexternalsourceconnected.
P.RADIO(FM/AM)PresstheFM/AMbuttontolistentotheradio.
Q.TAPEPresstheTAPEbuttontoplaycassette.
R.MUSICSKIP(/)InCDmode,usethesebuttonstoskiptracks.Holddownthesebuttons
tosearchforapartofatrack.
S.VOL+/VOL‐Usethisbuttontoadjustthevolume
T.PLAY/PAUSEUsethisbuttontoplay/pauserecording,finalizinganderasing.
U.STOPUsethisbuttontostopplaybackorrecording.

11
LISTENINGTOAVINYLRECORD
1.PressthePHONObutton.
2.Gentlyopenthedustcover.
NOTE:Becarefulnottopinchyourfingerwhen
opening/closingthetopcover.
3.Placeavinylrecordontheturntable.Whenplayinga45
RPMrecord,usetheincludedadaptor.
4.Selecttheappropriatespeed.
5.Gentlypushtonearmholdertotherighttoreleasethe
tonearm.
6.Raisethecuelevertoliftthetonearmoffthetonearmrest.
7.Movethetonearmgentlytotheedgeoftherecord(or
thestartingpointofatrack).Theturntablewillbegintoturn.
8.Gentlylowerthetonearmbyslowlyreleasingthecuelever.
9.Whenplaybackisfinished,thetonearmwillautomaticallyreturntoitsholder,andthe
indicatorlightwilllightup.Thentheturntablewillstop.Tostopplaybackmanually,slightlylift
thetonearmusingthecueleverandreturnittothetonearmholder.
Note:Itwilltakeapproximately20secondsfortonearmtoreturntoitsholderwhenplayinga
78rpmrecord.
Important:
‐Closingthetopcoverwillhelppreventdustfromsettlingontheturntable.
‐Alwaysrelockthetonearmclipbeforetransportingtheunit.
‐Donotplaceanythingontopoftheturntablecover,especiallywhileplayingarecord.
LISTENINGTOTHERADIO
1.SelectaradiostationbypressingtheAMorFMbuttonbriefly.
2.RotatetheTUNINGknobtotunetothedesiredstation.
NOTE:InFMmode,the“TUNING”indicatorindicatesthetuning
status.
Orange:receivingastereoradiobroadcast;
Green:theradiostationistunedin;
Red:thestationisnotproperlytuned.
Adjustmentforbestreception:
AMbroadcasting:Rotatetheunittofindthebestposition.
FMbroadcasting:ExtendandrepositiontheFMantennawirelocatedatthelowerbackofthe
unit.

12
LISTENINGTOACD
1.PresstheCDbutton.
2.PresstheOPEN/CLOSEbuttontoopenthetray.Loadadisc
onthetraywithlabelfacingup.
3.PresstheOPEN/CLOSEbuttonagaintoclosethetray.‘‐‐‐BUSY’
appearsonthedisplayandnobuttonworkstillitdisappears.
NOTE:Neverplacemorethanonedisconthetray.Thediscmustbeplacedinthecentreofthe
disctray.Incorrectloadeddiscsmayresultinseveredamagethatthetraywon’topen
againonceithasclosed.Donotforcethetraybyhandduringopeningandclosing
operations.
4.PressthePLAY/PAUSEbuttontostartplayingand‘►’willappearondisplay.
5.Toskiptoanext/previoustrack,brieflypresstheFF/FRbuttononceortwice.
6.YoumayalsopressFForFRbuttontofastforwardorrewindthetrack.HoldtheFForFR
buttonthenreleasethebuttonwhenadesiredpointhasbeenreached.
NOTE:Donotpushbothbuttonstogetherasthismaydamagetheunit.
Astheunitistrackingforwardorbackwardquickly,youwillhearyourselectionplayingat
adistortedspeed.Simplyreleasethedepressedbuttontocontinueplayingatanormal
speed.
7.PressPLAY/PAUSEbuttontopauseplayingand‘’willshowontheleftsideofthedisplay.
Pressthebuttonagaintoresumeplayingwhereitwaspaused.
NOTE:DonotswitchtheunitoffwhileplayingaCDasthiswilldamagetheunit.
8.PressSTOPbuttontostoptheCDplaying.
DISPLAY
EachtimetheDISPLAYbuttonispressed,thedisplaychangesasfollows:
yTrackNumber+TrackPlayTime(DefaultDisplayMode)
yTrackPlayTimeCountdown;
yCDPlayTime;
yCDPlayTimeCountdown;
REPEATPLAYBACK
PressREPEATbuttonrepeatedly,repeatmodecyclesas:repeatall,
repeat1,cancel.
yREPEATALL(RepeattheentireCD)
yREPEAT1(Repeatonetrack)
Duringplayback:
Thecurrentlyplayedtrackwillbeplayedrepeatedly.Ifyoupressskip
button(FForFR)andselectanothertrack,theselectedtrackwillbe
playedrepeatedly.
13
InStopmode:
Pressskipbutton(FForFR)toselectatrack,andpressREPEATbutton
repeatedlytoselectREPEAT1,thenpressthePLAYbuttontostart
playback.
NOTE:
yIfoneofthefollowingbuttonsispressed,repeatmodewillbecancelled:
OPEN/CLOSE,PHONO,AM,FM,AUX,TAPE
yRepeatplaybackworkswithfinalizeddisconly.
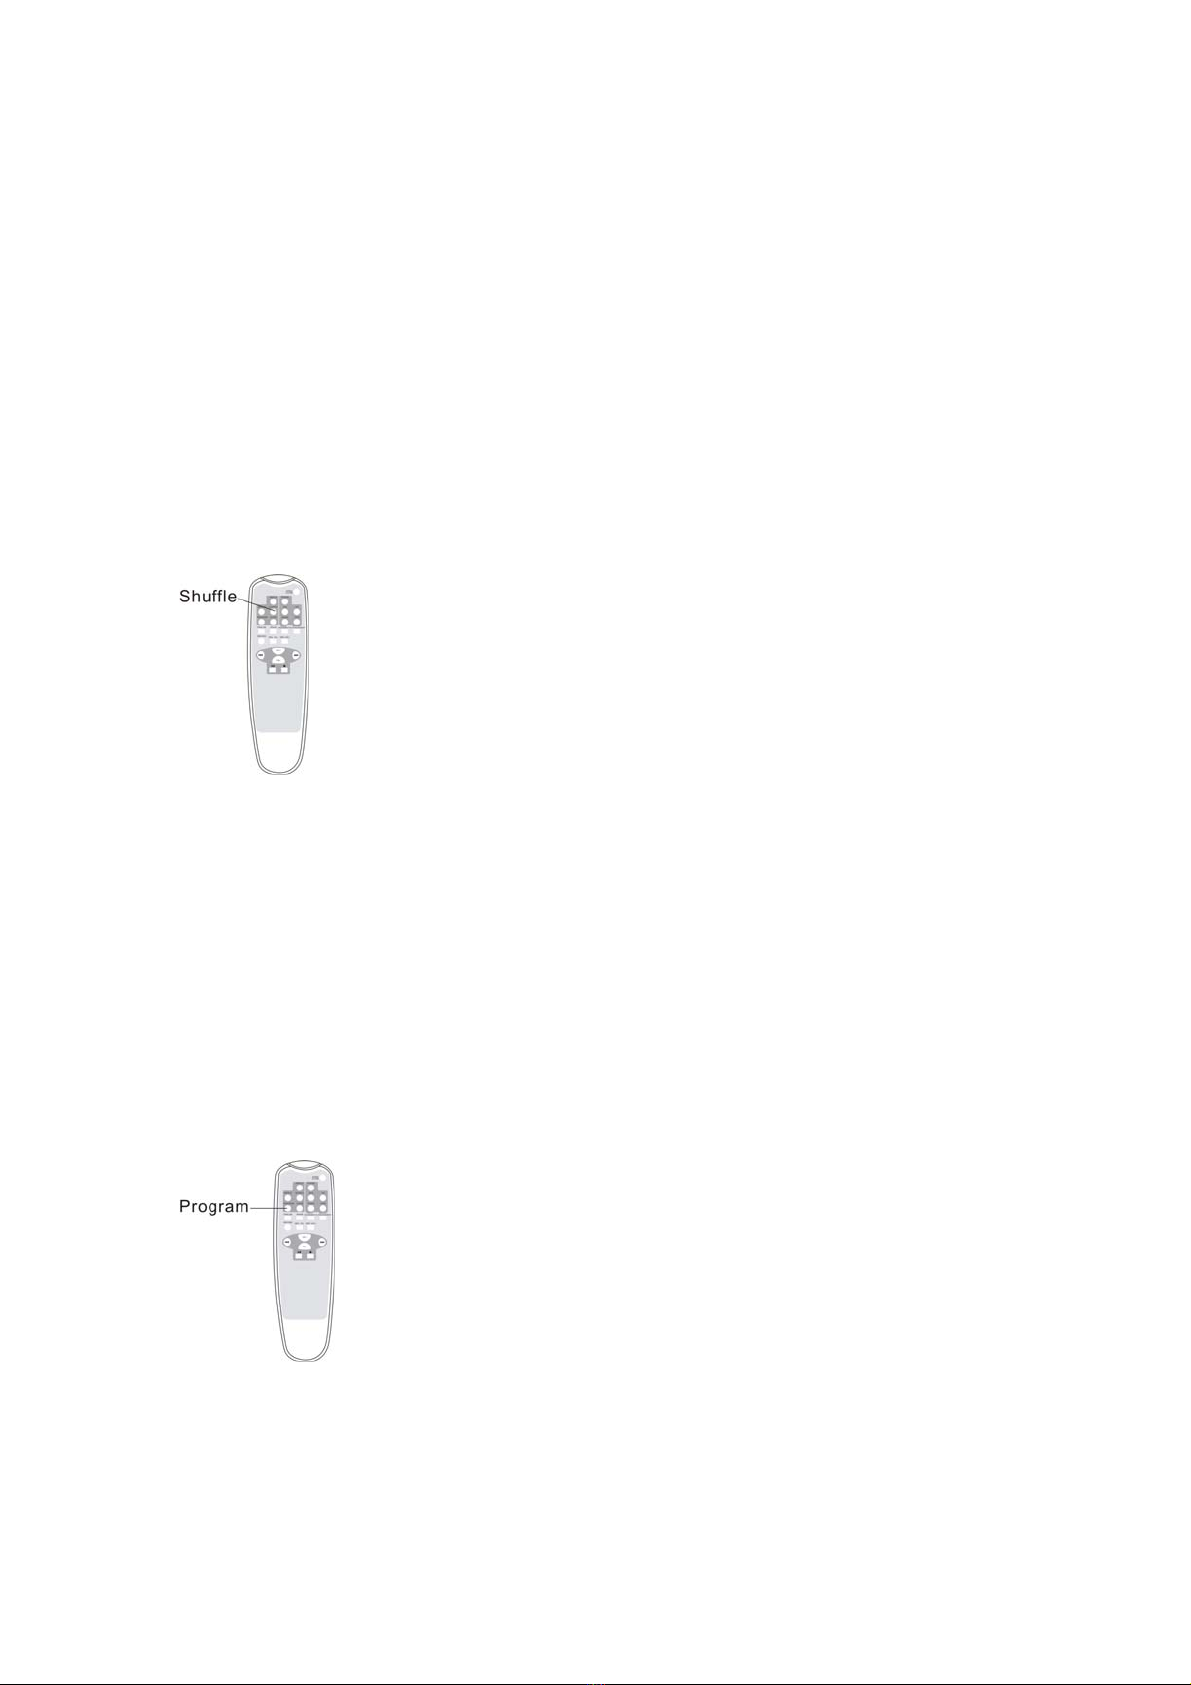
SHUFFLEPLAYBACK
ToplaythetracksonaCDinarandomsequence,pressSHUFFLEbuttonduringplayback.
NOTE:
yIfyoupressthe()buttonduringshuffle,playbackwill
randomlyselectthenexttrack.
yIfoneofthefollowingbuttonsispressed,shufflemodewillbe
cancelled:
OPEN/CLOSE,PHONO,AM,FM,AUX,TAPE
yShuffleplaybackdoesn'tworkduringprogrammedplayback.
yWhentheSHUFFLEplaybackofallthetrackshasbeenfinished,
theunitstopsandtheshuffleplaybackmodeiscancelled.
yAtrackcannotberepeatedduringshuffleplayback.
yShuffleplaybackdoesn’tworkduringprogrammedplayback.
yShuffleplaybackworkswithafinalizeddisconly.
PROGRAMMEDPLAYBACK
Upto32trackscanbeprogrammedtoplayinthedesiredorder.
NOTE:
yShuffleplaybackdoesnotworkduringprogrammedplayback.
yProgrammedplaybackworkswithfinalizeddisconly.
1.PressCDbuttontoenterCDmode.ThenloadaCD.
2.WhileCDisstopped,pressthePROGRAMbutton.
3.‘PROGRAM’indicatorblinksand‘P‐01’appearsonthedisplay.
4.Presstheskipbutton(or)toselectatrack.

14
5.PressthePROGRAMbuttonagaintosetthecurrenttrack.
6.“P‐02”isdisplayed.Repeatsteps4and5toprogramtheadditionaltracks.
7.Whentheselectionoftracknumbershasbeenfinished,pressthePLAYbutton()tostart
programplayback.
Tocanceltheprogrammode
PresstheSTOP()button.
Tochecktheprogrammedorder
Inthestopmode,presstheskipbutton(or)repeatedlytoshowthetracknumbersthat
havebeenprogrammed.
Toaddatracktotheendoftheprogram
Inthestopmode,pressthePROGRAMbutton.
Selectatracknumberbypressingskipbutton(or),andthenpressthePROGRAMbutton.
Thecurrenttrackwillbeaddedtotheendoftheprogramorder.
Todeletethelasttrackfromtheprogramorder
Inthestopmode,presstheCLEARbuttontodeletethelasttrackfrom
theprogramorder.
Tocleartheprogramorder
PressSTOPwhentheCDisalreadystopped,orpressOPEN/CLOSE,
PHONO,AM,FM,AUX.

15
LISTENINGTOATAPE
1.PresstheTAPEbutton.
2.Loadanaudiocassettetapeintotheunit(locatedattheside
oftheunit).Playbackwillautomaticallybeginifthetapeisfully
inserted.
3.PresstheCASSETTEFF/EJECTbuttonhalfwaytofastforwardthe
tape.
4.PresstheCASSETTEFF/EJECTbuttonlightlyandtheplayback
willresume.
5.PresstheCASSETTEFF/EJECTbuttoncompletelydownto
endtheplaybackandejectthetape.
LISTENINGTOANEXTERNALAUDIODEVICE(AUXMODE)
InAUX(auxiliary)mode,theunitcanplayaudiofromanexternalaudiosource,suchaspersonal
CDplayerorMP3player.
TherearetwoAUXINs(frontandrear).
yWhenconnectingadevicethathasaearphonesocket,useacablewith3.5mmplugviathe
frontAUXINsocket.
yTherearsetofAUXIN(/LINEIN)sockets(redandwhite)canbeusedwithdevicesthatuse
RCAconnections(e.g.reeltoreelplayersetc).
1.PlugtheAUXINcable(supplied)intotheAUXINsocket(onthefrontorbackoftheunit).
2.PlugtheotherendofthecableintotheheadphoneorLineOutsocketoftheexternalaudio
source.
3.PresstheAUXbutton.
4.TurnontheexternalaudiosourceandpressPLAYtostartplayingthemusic.
5.Adjustvolumelevel(ontheexternalaudiosourceandonthemainunit).
NOTE:IfboththefrontandrearAUXINsareconnectedtoAUXINcablesatthesametime,only
thefrontonewillbeactive.

16
RECORDINGTOACD‐R/CD‐RW
ABOUTCD‐RANDCD‐RWDISCS
1.RecordandEraseFeatures:
OnlyCD‐RWdiscscanberecordedanderasedmanytimes.
ACD‐Rdisccanberecordedonlyonce.Assoonastheyhavebeenrecordedorfinalized,they
cannotbeerasedorre‐recorded.However,ifspaceisavailableonthediscbeforefinalized,
additionalmaterialcanstillberecorded.
2.Compatibility
ACD‐RdisccanbeplayedonthemajorityofaudioCDplayers.
However,certainCD‐RWdiscsmaynotcompatiblewithcertainaudioCD‐players.
BEFORERECORDING
AudiofromPHONO,AUXandTAPEsourcescanberecordedontheCDrecorder.
PREPARETHEAUDIOSOURCEFORRECORDING
1.Selectthedesiredaudiorecordingsourcebypressingthecorrespondingbutton(PHONO,
AUXorTAPE).
2.Preparetheappropriateaudiosourcefornormalplay(vinylrecord,externalaudiodeviceor
cassettetape).
3.LoadarecordableCD‐RorCD‐RWdiscandclosetheCDtray.
Thedisplaywillshow‘BUSYCD’whilethediscisreading.Waituntilthereadingiscomplete
beforemovingontotothenextstep.
4.Makesure‘NOTOC’and‘CD‐R’(or‘CD‐RW’)indicatorslightonthedisplay.Otherwisethe
RECORDfunctionwillnotwork.
NOTE:‘NOTOC’isanabbreviationof‘Notableofcontents’,indicatingablankCD.
SELECTAUTO/MANUALTRACKINCREMENTMODE
PressAUTO/MANUALbuttonrepeatedlytocyclebetweenthefollowingmodes:
•AUTO:Theselectionoftracksrecordedwillmatchtheoriginalplaylistwithtrackseparation
aspertheoriginalrecording.
•MANUALTRACK:Trackswillnotbeassignedautomatically.Anewtrackwillbeassigned
wheneverTRACKINCREMENTbuttonispressedduringrecording.
Ifyoursourcetoberecordedisnotofthebestquality,itisrecommendedtousethe
“MANUALTRACK”functionforbestresults.

17
TRACKINCREMENT
AnewtrackwillbeassignedwheneverTRACKINCREMENTbuttonispressedduringrecording.
STARTRECORDING
1.Followstepsdescribedaboveon‘PREPARETHEAUDIOSOURCEFORRECORDING’.
2.PressRECORDbutton,then‘REC’andsymbol‘II’willappearonthedisplay.
NOTE:IfanAUTOTRACKmodeisselected,‘AUTOTRACK’willappearonthelowermiddleofthe
screen.
3.AdjusttherecordinglevelusingtheRECLEVELknob.Youcan
adjustonyournextrecordingiftooloudortoolow.
NOTE:YoumaytestplaytheaudiosourcetoberecordedandadjustRECLEVELknobtosetthe
recordingvolumesothatitsloudestoutputdoesnotexceedthe‘OVER’indicatoronthe
meteronthelowerrightofthedisplay.
4.PressPLAY/PAUSEbuttontostartrecording.Nowyouarerecording.
5.Whenthesongreachestheend,oryouneedtoskiptoanextsong,orflipthetape,press
PLAY/PAUSEbuttontosuspendtherecording.
NOTE:Duringrecording,youmaypressTRACKINCREMENTbuttontoendthecurrenttrackand
beginanewtrack.Thecurrenttracknumberwillbeindicatedonthedisplay.
6.Whenthenextsongisready,pressPLAY/PAUSEbuttonagaintoresumerecordingontoanew
assignedtrack.
NOTE:Youcannotrestartrecordingwhile‘BUSY’displaysonthescreen.Also,anewtrackwill
alwaysbeassignedwhenapplyingapauseorstopduringrecording.
7.Whenallrecordingisdone,pressSTOPbutton.
FINALIZEADISC
FINALIZATIONistoconvertarecordabledisctoastandardCDwhichmustcontainaTableof
Contents(TOC).
MostfinalizedCD‐R/CD‐RWdiscscanbeplayedonordinaryCDplayers.
Finalizationdoesn’tworkonradiomode.
FINALIZEINCDMODE
1.PressSTOPbutton.ThenpressCDbutton.‘BUSY’willshowonthedisplay.
2.After‘BUSY’disappearsandthenumberoftracksanddurationoftherecordedtimeonyour
CDshows,presstheSTOPbuttonthentheFINALIZEbutton.‘FINALIZE’appearsonthedisplay.
3.PressthePLAY()buttontoactivateandstartfinalizing.
4.Ifyouwishtocancelfinalizing,presstheSTOPbutton().
FINALIZEINPHONO/TAPE/AUXMODE
1.PresstheFINALIZEbutton.‘FINALIZE’appearsonthedisplay.

18
2.PressthePLAY( )buttontoactivateandstartfinalizing.
3.Ifyouwishtocancelfinalizing,presstheSTOPbutton().
NOTE:
yThedisplaywillshow‘‐‐‐BUSY’duringfinalize,waituntilthebusytextdisappearstocomplete
thefinalization.
yThefinalizetimeissubjecttothecontentsofrecord,itmaytakeafewminutesinsomecases.
yWhenfinalizationhasbeenfinished,the‘NOTOC’indicatorwillturnoffandthedisplay
returnstothetrack/timedisplay.Thendiskwillbeejected.
yDuringfinalizing,nobuttonworks.
yNeverturnthepoweroffnorunplugthepowercordduringfinalizationofadisc.
UNFINALIZEACD‐RW
WhenyouloadafinalizedCD‐RWdiscandwishtorecordadditionalmaterialsonthedisc,you
needtounfinalizethediscfirst.
NOTE:
yEraseproceduresarepossibleonlyonanon‐finalizedCD‐RWdisc.
yIfaCD‐RWdischasbeenfinalized,unfinalizeitpriortoerasure.
yOnlyCD‐RWdiscsareerasableandcanbeunfinalized.
1.PresstheCDbuttontoselectCD.
2.LoadarecordedCD‐RW.‘—BUSY’appearswhenafinalizeddiscisloaded.
3.Waituntil‘BUSY’disappearsonthedisplay,pressSTOPbutton.
4.PresstheERASEbutton,‘UNFINLZE’willappearonthedisplay.
NOTE:Ifyouwishtocancelunfinalizingatthispoint,presstheSTOPbutton().
5.Pressthe()buttontoactivateandstartunfinalizingthedisc.
6.Waittill‘NOTOCCD‐RW’appearsonthelefthandcornerofthescreen.
NOTE:Theunfinalizationtimeisdependentonthecontentsthathavebeenrecorded,andmay
takeafewminutesinsomecases.
ERASE(CD‐RWONLY)
Itispossibletoerasethelastrecordedtrackaswellasthewholedisconanon‐finalizedCD‐RW
disc.
Allerasingprocessesarepermanent–theycannotbeundone.
1.PresstheCDbuttontoselectCD.
2.LoadarecordedCD‐RW.‘—BUSY’appearswhenafinalizeddiscisloaded.
3.Waituntil‘BUSY’disappearsonthedisplay,pressSTOPbutton.

19
4.PresstheERASEbutton,‘ERASE’willappearonthedisplay.
NOTE:Ifyouwishtocancelerasingatthispoint,presstheSTOPbutton().
5.Pressthe()buttontobeginerasethelasttrack.
6.RepeattopressErasebuttontocontinueerasinganothertrack.
NOTE:
yOnanon‐finalizedCD‐RWdisc,‘ERASE’andthelasttracknumberappearonthedisplay.
yEachtimetheERASEbuttonispressed,thedisplaychangesasfollows:
‘ERASE‘andthelasttrackNo.
ERASEALL(CD‐RWONLY)
Allerasingprocessesarepermanent–theycannotbeundone.
1.Whenanon‐finalilzedCD‐RWdiscisinserted,holdtheErasebuttonuntilthedisplayshows
‘ERASEALL’.
NOTE:Ifyouwishtocanceltheerasingprocessatthispoint,presstheSTOPbutton().
2.PressthePLAYbutton()tostarterasing.
3.Displaywillshow0000000toconfirmthediscisclear.
NOTE:
yTheremainingtimefortheoperationappearsinthedisplay.Whentheoperationhasbeen
finished,thedisplayreturnstothetrack/timedisplay.
yDuringerasing,nobuttonswillwork.
yNeverturnthepoweroffnorunplugthepowercord.
yThisoperationcannotbeundone.Ifyouaregoingtoeraseatrackortracks,makesureall
thesearetracksyoureallywanttoerasebeforepressingPLAYbuttontoactivate.
yThecopyCD‐RWdiscfromotherunitonlycanbe‘ERASEALL’.
PLEASENOTE:YoucanonlyerasealltracksfromaCD‐RWdiscfinalizedonanotherunit.
CDCOPIER
CDcopiercanmemorizethewholecontentsofadisctemporarilywithintheapparatus’memory
andrecordontoanewblankrecordableCDdisc.
Thecopieddisciscompletelythesameastheoriginal.Ifyouloadapre‐recordeddisc,this
incorrect(alreadyrecorded)discwillbeejected.
1.Loadanaudiodiscwhichactsasanoriginaldiscintothedisctray.ClosetheCDtrayandpress
theRECORDbutton.
2.‘COPYCD’,‘PRESS’and‘PLAY’indicatorswillappearonthedisplayinturns.
3.PressPLAY/PAUSEbuttontostartreadingthedisc.Then‘READING’willshowonthedisplay.
4.Digitsand’PCNT’willappearonthedisplay.Waittillthedigitsturnto100.
Table of contents


