Netafim Elevate Series User manual

Elevate Series
Installation Manual
Horticulture Luminaires

© COPYRIGHT 2022, NETAFIM™
NO PARTS OF THIS PUBLICATION MAY BE REPRODUCED, STORED IN AN AUTOMATED DATA FILE OR MADE
PUBLIC IN ANY FORM OR BY ANY MEANS, WHETHER ELECTRONIC, MECHANICAL, BY PHOTOCOPYING,
RECORDING OR IN ANY OTHER MANNER WITHOUT PRIOR WRITTEN PERMISSION OF THE PUBLISHER.
ALTHOUGH NETAFIM™ TAKES THE GREATEST POSSIBLE CARE IN DESIGNING AND PRODUCING BOTH ITS
PRODUCTS AND THE ASSOCIATED DOCUMENTATION, THEY MAY STILL INCLUDE FAULTS.
NETAFIM™ WILL NOT ACCEPT RESPONSIBILITY FOR DAMAGE RESULTING FROM USE OF NETAFIM'S
PRODUCTS OR USE OF THIS MANUAL.
NETAFIM™ RESERVES THE RIGHT TO MAKE CHANGES AND IMPROVEMENTS TO ITS PRODUCTS AND/OR THE
ASSOCIATED DOCUMENTATION WITHOUT PRIOR NOTICE.
FOREIGN LANGUAGES
In the event that you are reading this manual in a language other than the English language, you
acknowledge and agree that the English language version shall prevail in case of inconsistency or
contradiction in interpretation or translation.
DISCONNECT POWER AT THE CIRCUIT BREAKER WHEN INSTALLING,
ADJUSTING or CLEANING LIGHTS
Do NOT turn on Power Until All Input & Output Cables Have Been Connected.
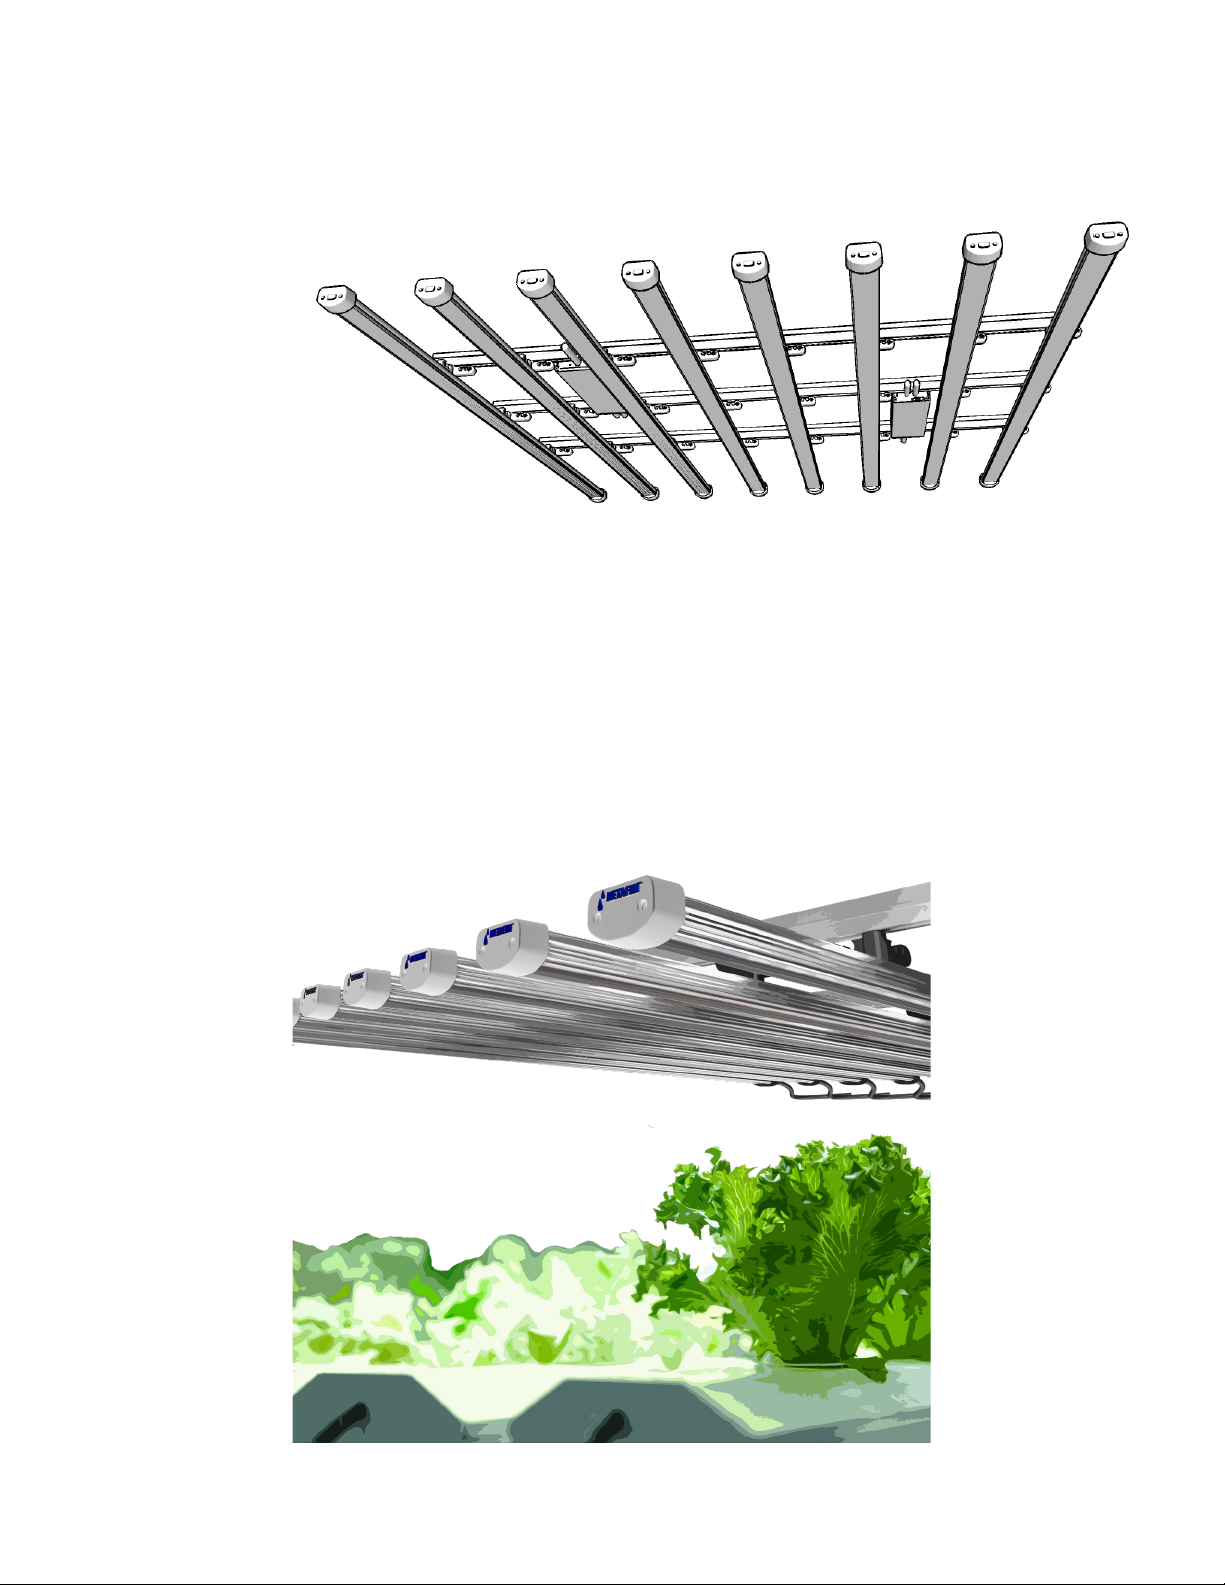
Elevate
Horticulture Luminaires
Elevate yield
and other crop
characteristics
with the
industry's highest
performing
spectrally tunable
grow light.
Specs & Recommendations
• Industrial UL Class P programmable power supplies
• Input Voltage: 90~305Vac (480Vac available – contact manufacturer)
• High Efciency Industrial LED Driver: ~ 93%
• Built-in Active PFC Function > 98% / Full load
• Dimming Function: 0.5V-10V, with Dim-to-Off capability
• Reliability Protection: OVP, SCP, OTP, and 10KV Surge Protection
• Safety Regulation: UL8750, UL8800 & EN61347, DLC
• Waterproof Rating: LED Power Supplies, Lightbars and Connectors: IP66
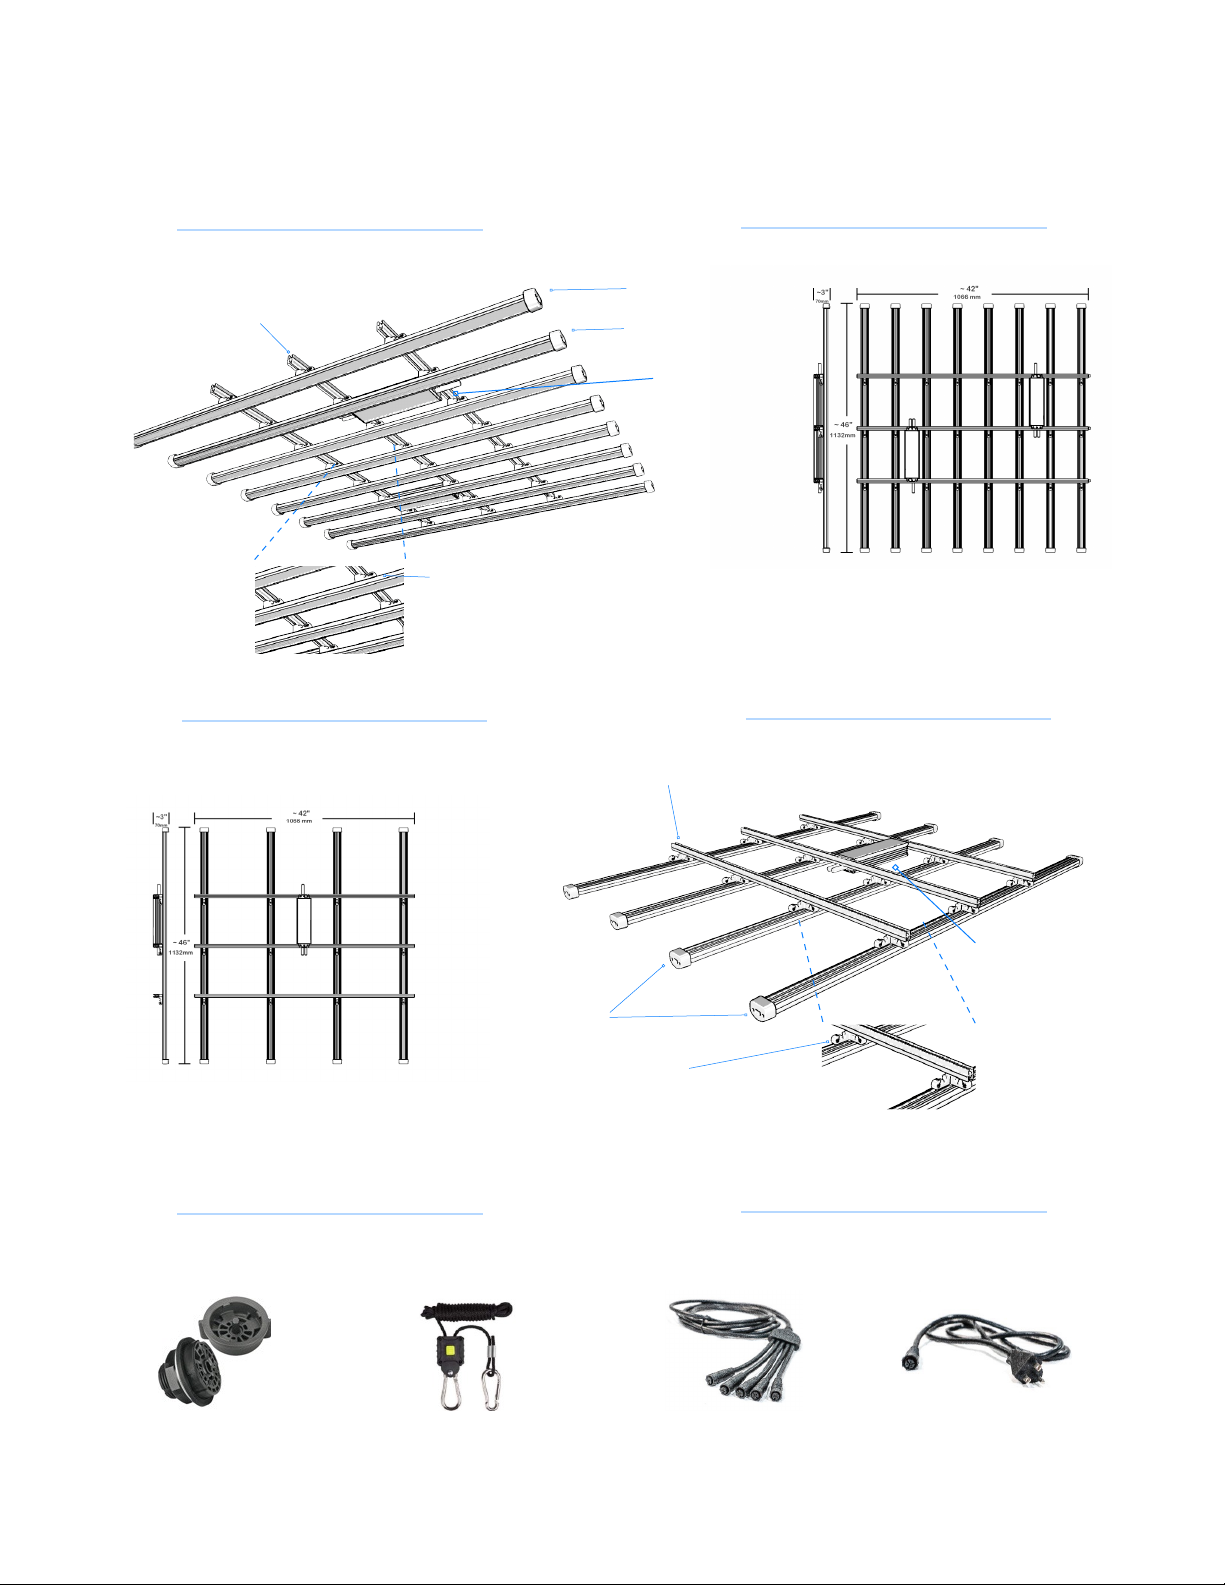
Getting Started
PARTS & ACCESSORIES
Mounting Rails (3)
T-Slot Cable
Routing Clips (24)
Lightbar A (4)
Lightbar B (4)
LED Driver Power
Supplies
DC Cable
1 -to- 5 Splitter (2)
AC Cable + Plug
NEMA 6-15P (standard)
Integrated Zhaga
Connector (2)
Fixture Mounting
Cables/Rachets (4)
Mounting Rails (3)
T-Slot Cable
Routing Clips (12)
Lightbar B (4)
LED Driver Power
Supplies
Elevate 4V
Elevate 8F
Accessories
PN: YYR2 PN: DC-5PN: ZGA1 PN: ACN6-15P

Best Practices
MOUNTING & OPERATING
1. Unpack, count, and conrm all parts per packing slip.
2. Identify and conrm main power voltage and receptacle type.
3. Ensure lightbars are mounted in the correct quantity and position on the mounting rails.
4. Connect female (output) end of DC splitters to male (input) cable of appropriate lightbars.
Preparation
Mounting of Elevate Grow Lights
1. Identify suitable structure from which to suspend Elevate lights above the grow area
2. Position and tighten four (4) eyebolts at balanced, symmetrical locations along the mounting rails (2 eyebolts per
rail)
3. Move Elevate grow light into position under the intended mounting structure with the LED light bars facing
downward --- being careful not to damage LED chips on underside of lights
4. (For Remote Mounting of Power Supplies, skip this step): Place bracket-mounted LED Power Supplies in the
center of the back side of the Elevate grow light. Allow the downward edge of the “L” bracket to set into any of the
narrow channels on the back side of the nearest light bar
5. Connect the DC output cables of the power supplies to the 1-to-5 splitter input ends
6. Connect AC input power cables to the power supply input cables
7. Connect suspension cables or yoyo ratchets (4) to eyebolts from step #2
8. Connect opposite ends of suspension cables or yoyo ratchets (4) to each respective mounting structure
9. Raise grow light into position to desired height.
IMPORTANT: Typically group every other lightbar on one splitter, such that Spectrum ‘A’ bars in positions 1, 3, 5, 7, and 9 on the
mounting rails will all connect to Power Supply ‘A’ via one of the 1-to-5 splitters; while Spectrum ‘B’ light bars in positions 2, 4, 6, 8,
and 10 will connect to the other Power Supply ‘B’ via the other 1-to-5 splitter.
Mounting of Power Supplies (Remote Option)
1. Select appropriate location for mounting of LED Driver Power Supply chassis/bracket.
2. Ensure that Power Supply DC output cable is within reach of lightbar 1-to-5 splitter cable input.
3. Afx LED Driver Power Supply chassis/bracket.
4. Attach Power Supply DC output cable to lightbar 1-to-5 splitter cable input. Connect AC input power cables to the
power supply input cables
BEST PRACTICE RECOMMENDATION:
Maintain ~6” – 14” height above canopy for owering; Maintain 12” – 30” height above canopy for vegetative stage

Operation
DIMMING & SPECTRUM TRAINING
A standard commercial 0-10V dimming control may be used to manually control the Elevate power supplies via the
Netam Power Supply purple (dim+) and gray (dim-) control leads. {Note that pending NEC wire color codes will
necessitate transition from gray to pink on the (dim-) lead.} Manual dimming controls will generally make it difcult
to identify and repeat a given dim level or spectrum mix.
Manual / 3rd Party Dimmers
Bluetooth Spectrum Control & Dimming
If your Elevate Grow Light order includes Bluetooth dimming, your LED driver power supply chassis may come pre-
wired to the Bluetooth controller. Each independent spectrum channel will include: purple (dim+) and gray (dim-)
control wire connections.
Additionally, one driver or low voltage supply will provide 12VDC+ auxiliary power to the Bluetooth controller.
TruBluTM Mesh Solutions
McWong’s TruBlu TM is a comprehensive and flexible SIGqualified Bluetooth Mesh lighting control
solution of intelligent hardware devices and commissioning tools powered by Silvair. Hardware choices
include a wide variety of occupancy and motion sensors, wireless switches, dimming power packs, and
fixture controllers to meet customers’ specific connected lighting control needs and requirements.
TruBluTM Mesh Sensors TruBluTM Mesh Controllers TruBluTM Mesh Switches
TruBluTM Commisioning Tools TruBluTM Getaway TruBluTM Integrated Fixtures

Care
CLEANING / MAINTENANCE & PRODUCT GUARANTEES
Elevate’s LED surface may be cleaned periodically as needed using one or more of the following methods:
1. Disconnect power at the circuit breaker and ensure power remains off throughout any cleaning or service
2. Compressed air may be used to clean all parts of the luminaire, including the LED face.
3. Take care to avoid scratching the surface of the LEDs.
4. Anti-scratch microber cloth may be used in case compressed air is insufcient.
5. Take care to avoid scratching the surface of the LEDs.
Care & Cleaning
Maintenance
1. Disconnect power at the circuit breaker and ensure power remains off throughout any maintenance or service.
2. To replace LED driver power supplies, ensure that the proper voltage and current ratings are maintained
3. Disconnect and remove old power supply; Follow instructions on Page 4 for Mounting of Power supply.
4. To replace LED light bars, ensure that all light bars powered by a given power supply have identical current and
voltage ratings.
Warranty / Product Guarantee
Netam, Inc. is committed to the success of our grower partners. We strive together with our customers for 100%
satisfaction. If anything in your order is wrong, we will make it right. We back this commitment with a ve-year
warranty on all Netam light bars and Power Supplies.
**Do not mix light bars of different spectra / different voltages on a shared power supply. **
**To avoid damage to light bars, ensure that all ve (5) light bars are connected to the power supply PRIOR to turning on power
to the system.**
CONTACT THE SERVICE TEAM FOR ADDITIONAL SUPPORT:
support@netamlighting.com
Type Part No. Description
Included
Elevate-8F
Included
Elevate-4V
AC Power Cabling AC4D AC Daisy Chain (4 Light)
AC Power Cabling ACWJ AC Quick Connect to Flying Leads (1 Light)
AC Power Cabling ACEX10 AC Extension (10' cable)
AC Power Cabling ACTC AC Quick Connect Tee 1 1
AC Power Cabling ACN6-15P AC Cable and Plug NEMA 6-15P 1 1
DC Control Cabling DC-5 DC 1-to-5 Splitter 2 1
DC Control Cabling DCex10 DC Extension (10' cable)
DC Control Cabling DS5 DC Daisy Chain (2-Pin) (4 Driver)
DC Control Cabling FLS Mini Quick Connect to Flying Leads 1 1
DC Control Cabling ZGA1 Integrated Zhaga Connector (for DC Control) 2 1
Mounting YYR2 Nylon mountring rope ratchets (2 pc pack) 2 2
Controls SPTRUWIFI SpecTru Spectral Sensor w/ Wi
Controls BLETDL Bluetooth Adapter for up to 40 Drivers
Controls MAN10 Rotary Manual (0-10) Dimmer
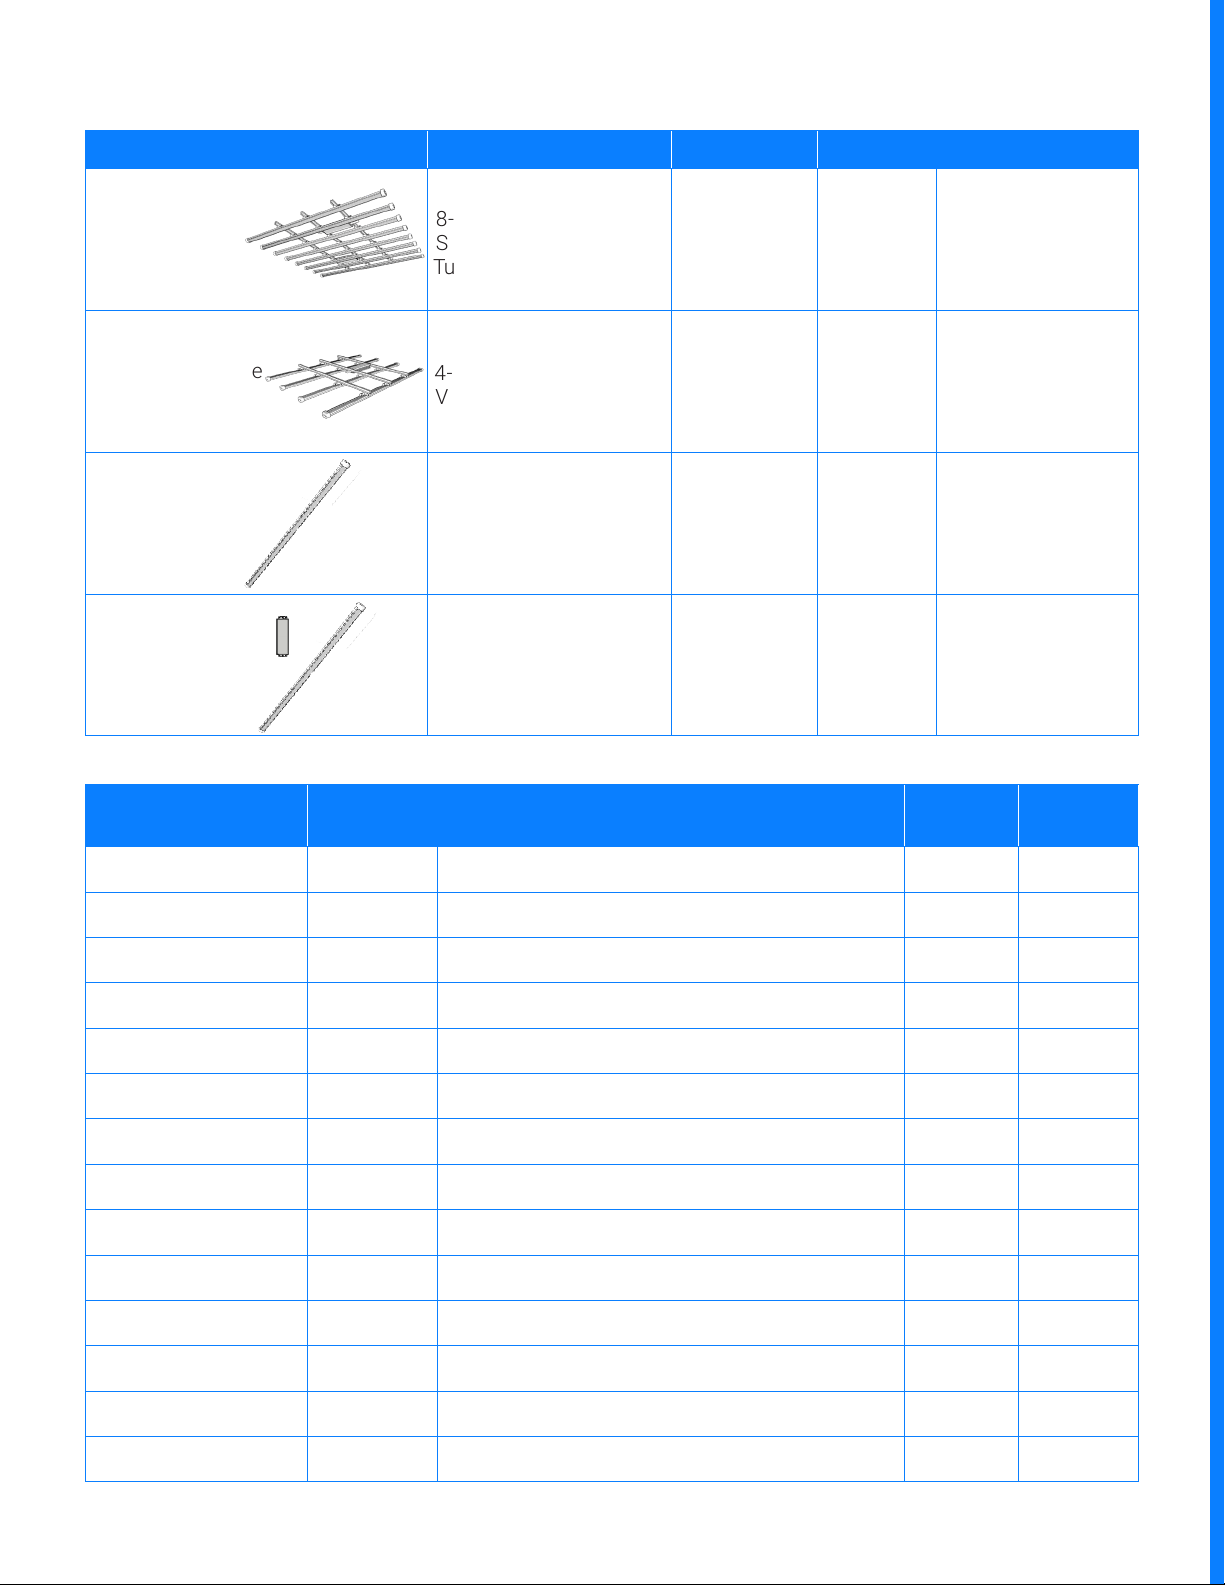
Grow Lights
Product Description Units Part No. Component Details
Vertical Flower
Grow Light
8-Bar High Performance
Spectrum
Tunable Bloom Light
16 units/pallet Elevate-8F
Fully assembled;
Ready to mount;
See included
accessories below
Vertical Vegetative
Grow Light
4-Bar High Performance
Veg Light 16 units/pallet Elevate-4V
Fully assembled;
Ready to mount;
See included
accessories below
Subcanopy
Grow Light
Subcanopy Fixture
(Single Bar Only) 8 units/count SC1
Light bar and
protective cover
only
Subcanopy
Grow Light
Subcanopy Fixture
(4 Bar w/ Driver
and cords)
16 units/pallet SC4PLUS
Order AC and DC
cables
separately
x 1
x 4
Grow Light Accessories

NETAFIM LIGHTING 04/22
Table of contents
Popular Lighting Equipment manuals by other brands


Equinox Systems
Equinox Systems EQLED203 user manual

LDR
LDR Arpa 8/22 operating instructions

Cooper Lighting
Cooper Lighting SURE-LITES CX Series installation instructions

Cooper Lighting
Cooper Lighting Halo LZE800SL Specification sheet

Chauvet Professional
Chauvet Professional Ovation F-415FC user manual

LEDone
LEDone LOD-WP-60WSADXXK-HL installation instructions


