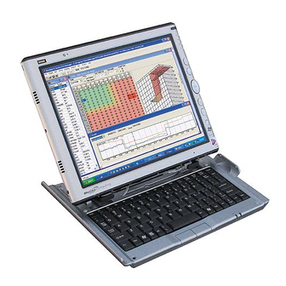
Netbook Navigator 891A-NN User manual

Nav 9
SLATE PC
User Manual
(Model #891A-NN)
©2010 Netbook Navigator

1

2
TABLE OF CONTENTS
1. Product Overview
1.1 Introduction ………………………………………. 3
1.2 Diagrams ………………………………………. 4
1.3 Contents ………………………………………. 10
2. General Usage
2.1 Basic Configuration …………………………. 11
2.2 The Touch-Screen …………………………. 12
2.3 The Virtual Keyboard …………………………. 12
2.4 Mouse Functions …………………………. 12
2.5 The Stylus .………………………… 12
3. Standard Procedures
3.1 Before Turning On …………………………. 13
3.2 Powering On and Off …………………………. 14
3.3 Display .………………………… 15
4. Settings and Security
4.1 Accessing Setup Utility …………….……………. 16
4.2 BIOS Settings Menus .…………………………. 17
5. Driver Installation and Use ……………………….. 19
6. Troubleshooting
6.1 Sound …………..…………….……………. 20
6.2 Hard Drive …………..…………….……………. 21
6.3 Display …………..…………….……………. 22
6.4 Memory …………..…………….……………. 24
I. Appendix A: Specifications ……………………….. 25
II. Appendix B: Notes from Manufacturer……….. 27
III. Technical Support …………………………………… 39

3
1 Product Overview
1.1 Introduction
Congratulations on your purchase of the NAV9 SLATE PC Tablet
Media Netbook, the ultimate combination of cutting-edge touch
screen technology and performance!
Features
Performance: The NAV9 uses one of the most advanced Intel
processors on the market today, the Intel® Atom N270 1.6GHz for
unmatched speed and reliability.
Storage: An integrated Solid State HD provides extreme durability,
shock absorption and protection for your files.
System scalability: A DDR2 RAM expansion slot allows for expanded
memory capacity as needed, giving users even greater system
performance.
Widescreen LCD display: The computer is equipped with a 8.9-inch
touch-panel screen with 1024x600 native resolution for a broad
spectrum of visual effects and colors.
Expansion: Also included are three (3) USB 2.0 expansion ports for
easy access to peripherals such as a mouse, keyboard, printer,
storage drive, DVD-Rom, etc. The built-in SD/MMC card reader
provides even more storage options.
Communication: Integrated Wi-Fi Ethernet and Bluetooth are both
included standard with the NAV9 for fast internet and device
connectivity. VGA output and wired internet adapter are also
included. 3G modem is also available (optional).
Camera: Enjoy the built-in 1.3 MegaPixel camera that can capture
photo and video in real time.

4
1.2 Diagrams
Front, Top, Bottom and Left Side
KEY:
(1) Power supply interface
(2) USB interface
(3) USB interface
(4) Microphone jack
(5) Headset interface
(6) RJ-45/VGA conversion interface
(7) Power on/off/reset button.
(8) Working status indicator light bar
(9) Built-in 1.3MP camera
(10) Display screen
(11) Speaker (voice output channels)

5
Back and Right Side
KEY:
(12) Air vent
(13) USB interface
(14) SD card / SIM card interface
Special Note: Do not apply extreme pressure to the LCD screen and do not place
sharp or heavy objects on the unprotected display, for example:
pencils, paper, etc., which would damage or scratch the LCD screen.
Do not use corrosive cleaning agents as this will damage the screen.

6
Left Side –Detailed View
DETAILS:
(1) Power supply interface: This interface is connected to
power supply port, 18.5V DC 3.5A. When connected to an
active power source, taskbar icon will notify user of active
charge and remaining battery life.
(2, 3) USB 2.0 interface: USB is the English acronym for “Universal
Serial Bus”. This is the most common port for connecting
expansion peripherals such as Mouse, Keyboard, Printer,
mp3 Player, CD/DVD, etc.
(4) Microphone jack: This interface is standard for voice input,
sound recording, and phone/video calls using optional 3G
modem.
(5) Audio output: This interface is used for sound output and
can be used with standard audio speakers, headphones, ear
buds, and more. When devices are connected to interface,
built-in speakers are automatically disabled.
(6) RJ-45/VGA conversion interface: Using the included
adapter, this interface easily allows communication with a
wired Internet connection and with VGA output devices
(monitors, projectors, etc.)

7
Right Side –Detailed View
DETAILS:
(1) Vent: This is where the heat generated from the device is
circulated out of the unit. It should not be blocked by any
outside objects while in use.
(2) USB 2.0 interface: USB is the English acronym for “Universal
Serial Bus”. This is the most common port for connecting
expansion peripherals such as Mouse, Keyboard, Printer,
mp3 Player, CD/DVD, etc.
(3) SD/MMC/SIM card interface: Use this expansion slot for
expanded storage, media and cell phone SIM card.
Special Note: Do not obstruct the vent while operating. This may lead to
overheating that may cause damage to internal components. To
ensure longevity, do not operate in harsh conditions.

8
Top Side –Detailed View
DETAILS:
(1) ON / OFF power button: When powered off, gently pressing
this button will boot the computer. This will cause the left
button Status indicator light to flash when the computer is
switched on; On the other hand, if the computer is turned
on when pressing this button, the computer will shut down
immediately.
(2) LED indicator lights: On the top left side of the computer
itself, there are two LED indicator light (LED power indicator
and communications / LED system status indicator light)
These lights provide information on the status of the
computer, such as when the hard drive is transferring data
or when the device is connected to the internet.
(3) Feet: Affixed to the back of the unit are four padded dots
to serve as a cushion between the back of the unit and hard
surfaces. These help prevent damage to the unit.

9
Bottom Side –Detailed View
DETAILS:
(1) Speaker Output: Built-in speakers provide audio output
when headphones are not plugged in. When devices are
connected to interface, built-in speakers are automatically
disabled.
(2) Vent: This is where the heat generated from the device is
circulated out of the unit. It should not be blocked by any
outside objects while in use.
(3) Feet: Affixed to the back of the unit are four padded dots
to serve as a cushion between the back of the unit and hard
surfaces. These help prevent damage to the unit.
Special Note: Do not obstruct the vent while operating. This may lead to
overheating that may cause damage to internal components. To
ensure longevity, do not operate in harsh conditions.

10
1.3 Contents
Please be careful when opening the packaging before
removing the machines and other accessories. In the event of
damage and omissions, please contact the dealer
immediately. Please retain the original packing materials in
case the need for replacement arises.
The following general components are included in the
package (for details, please refer to packing list):
1. NAV 9 SLATE PC
2. Power Adapter
3. User Manual
4. Driver installation disk
5. Battery
6. RJ-45/VGA Port Replicator
If any of these components are damaged or missing, please
contact dealer for replacement parts.

11
2 General Usage
2.1 Basic Configuration
CPU:
Intel atom N270 1.6GHz
Chipset:
Intel 945GSE+ICH7-M
LCD:
8.9" TFT LCD Touch Screen (1024×600)
Memory:
1GB DDR2 667MHz (expandable to 2GB)
Graphics:
Intel GMA950
Hard Disk:
16GB Solid State (expandable to 128GB)
Connectivity:
Built-in Wi-Fi Wireless Internet card
(802.11b/g), 10/100Mbps Wired-LAN
Internet, 3G Wireless Mobile Broadband*.
Camera:
COMS Camera 1.3 Mega-Pixel
Interfaces:
■USB 2.0 Port ×3
■RJ-45 wired-internet & VGA interface ×1
■CDMA SIM card interface ×1
■Storage expansion SD/MMC Slot ×1
■Mic input φ3.5mm / -56dB ×1
■Earphone output φ3.5mm / 40mW×2 ×1
■Power input DC18.5V/ 3.5A ×1
Size:
250mm (H) × 168mm (W) × 21.3mm (D)
Net Weight:
1.01kg
* Most versions.

12
2.2 The Touch-Screen
In most cases, using a finger to navigate the desktop is
accurate enough for most tasks. The included stylus pen can
also be used for more accurate touch navigation. The screen
can also be calibrated if any deviation arises.
2.3 The Virtual Keyboard
Windows 7’s touch keyboard
comes loaded with a rich array of features, including auto-
complete and glowing response keys. It can be activated and
hidden at any time by touching the icon on the taskbar, and
repositioned by dragging it around the screen.
2.4 Mouse Functions
To right-click using Windows 7’s multi-touch functionality,
simply hold one finger on the screen and tap the desired area
with the other. This will execute a right-click. Scrolling can be
achieved by simply swiping a finger on the scroll-bar.
2.5 The Stylus
The stylus is meant to be used for precision
clicking, such as hand-writing and drawing.
With various handwriting recognition tools, the stylus can be
used to speed up data entry, edit documents and take notes
with greater speed and accuracy.

13
3 Standard Procedures
3.1 Before Startup
This chapter will guide you to start using the computer, boot
from opening the computer, shutting down to some other
basic operations, as well as the installation of system driver
will be described one by one.
External power adapter
Computer AC power can be supplied by external or internal
battery power. When you first boot the computer, we
recommend that you use an external power supply.
Please make sure your computer is in power off state.
Put the DC power cable into the computer power interface.
AC power line will be inserted into the power adapter on one
end, and the other end into AC power socket. Then you can
start your computer.
Special Note: Please do not use a power adapter that is not designed for
this computer. The arbitrary use of other power adapters is likely to
damage the computer.
Special Note: When unplugging the power adapter, please unplug the AC
power plug from the wall first, then unplug the power supply connector on
the computer directly, otherwise adapter may damage the computer and
the impact of external voltage. Do not pull cable directly, but be cautious
when using hands to remove the plug from the wall.

14
3.2 Powering On and Shutting Down the Computer
When first powering up, please make sure your computer has
been connected to the power adapter. Press the power
button for about 1 second.
During regular operation, pressing power button will:
Result
Method
Power Off
Before powering off, be sure to follow the
operating system shutdown process, so as to
avoid data loss or file damage. If the system
locks up and does not respond to user
operations for over a minute, (including
regular shutdown), user can directly press
the power button for at least 4 seconds until
the computer shut down. Unsaved data may
be lost during shutdown.
Standby
Press and release the power button quickly
during normal operation to set the computer
to Standby (default). Use Windows’ Control
Panel to change default settings.
Hibernation
Press and release the power button quickly
during normal operation to set the computer
to Hibernate. Use Windows’ Control Panel to
change default settings.

15
3.3 Display
The product is equipped with a low-pressure resistive multi-
touch LCD that contains a thin protective layer, calibrated and
optimized for touch screen and digitizer input. The screen is
also pressure-sensitive, and can detect how hard pressure is
being applied.
Please observe the following guidelines to extend the
maximum life of the screen:
1. Set display brightness setting to minimum required for
comfortable viewing. This can be accomplished by
changing battery settings to “Power Saver” in the taskbar.
2. For convenience, the included VGA Adapter via port
replicator can be used to connect to an external display.
3. When plugged into an AC adapter, remember to power the
unit down to standby/suspend mode when not in use.
Special Note: This product complies with the following documentation:
GB4943 "the security of information technology equipment",
GB9254 "information technology equipment, radio disturbance limits and
measurement methods",
GB17625.1 "harmonic current limits for electromagnetic compatibility
launch limit (per phase input equipment ≤ 16A)"
GB/T9813 "general specification of micro-computer"

16
4 BIOS Settings and Security
NOTE: THIS SECTION IS FOR ADVANCED USERS ONLY.
4.1 Accessing the BIOS Setup Utility
In this chapter, you will learn how to enter the Basic Input
Output System (BIOS) setup process and configure a variety of
hardware control options. You will also learn how to use the
built-in security settings.
BIOS menu access requires an external USB keyboard.
Make sure the power is turned off, plug in the keyboard and
turn the power on. Hold the DEL key during startup to load
the settings menu.
The Settings Utility Program is built into the BIOS program in
the chipset of the hardware. It can perform many of the
setup and maintenance functions. It is menu-based software
that allows you to easily configure and change settings.
BIOS comes configured with default pre-loaded settings. If
you need to make any changes to the hardware, such as
upgrades or customization, you may need to modify BIOS
settings in advance.
The BIOS settings menu is a sequence of menus and sub-
menus. It also allows you to set a password to restrict access
to unauthorized users.

17
4.2 Main Menu
Boot Menu
Section
Description
System
Overview
Contains build date, version, EC ID and
BIOS ID numbers.
Processor
Contains name, speed and quantity.
System
Memory
Displays total RAM on board.
System
Time & Date
The system uses a 24-hour time mode.
If you change the system time in the
Operating System, the BIOS time will
change to match it.
Section
Description
Boot Device
Priority
Sets the order of the boot devices.
Hard Disk
Drives
Define internal SATA disks.
Removable
Drives
Define USB and MMC disks.
PXE Support
Enable or Disable (Pre-boot Execution)
USB 2.0
Controller
HiSpeed or FullSpeed

18
Security Menu
This menu allows you to set the Supervisor and User level
system access passwords.
** BE SURE TO STORE PASSWORDS IN A SAFE PLACE! **
Exit Menu
Controls
←→ Select Menu Screen
↑↓ Select Menu Item
Enter Go to Sub Menu
F1 General Help
F10 Save and Exit
ESC Exit without Saving
Section
Description
Save Changes
and Exit
Keep desired settings and restart.
Discard Changes
and Exit
Cancel settings changes and
restart.
Load Optimal
Defaults
Reset all settings to their original
values.

19
5 Driver Installation and Use
Drivers are located on included USB/DVD-Rom.
Device
Description
Chipset
Be sure to install this program in
order to ensure that the functions of
other drivers.
VGA
To ensure that the full functionality
of VGA display, allows you to
configure screen resolution.
Audio
Allows you to use and configure the
function computer's audio
LAN
Allows you to use your computer's
Ethernet networking features
Card Reader
Allows you to use and configure the
computer's functions CardReader
WLAN
Enables your computer's wireless
networking features.
Bluetooth
Enables integrated Bluetooth 2.0
module to sync with external devices.
Webcam
Needs to be installed before the "Fn
+ F12" to start, so that you are using
a computer camera function. Can
control the Bluetooth, wireless,
touchpad, camera top
OSD
Can control the Bluetooth, wireless,
touchpad, and camera.
NOTE: Windows "Automatic Update" feature protects your
computer against the latest viruses and other threats to your
computer’s security. These high-priority updates at Windows
Start Menu - All Programs - Windows Update (ensure that
your computer has an active network connection)
Table of contents
Popular Tablet manuals by other brands
Huawei
Huawei GOT-AL09 quick start guide
AVL DITEST
AVL DITEST MDS Drive 188 user manual
Fnac
Fnac 3.0 8" quick start guide

Lenovo
Lenovo IdeaTab A3000 Hardware Maintenance Manual
Beyond Screen Limited
Beyond Screen Limited Beyond Tablet Mini Edition user manual
Samsung
Samsung Galaxy Tab A SM-T380 user manual
