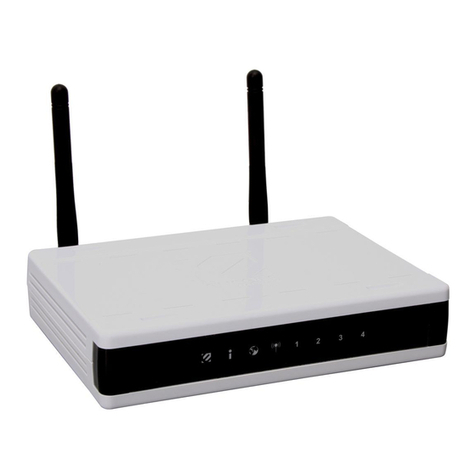
Netduma R2 User manual

Powered by
Netduma R2
User Guide


Contents
4
In The Box
Your New Hardware
Your New Software
5
6
10
11-13
14-16
For more in-depth guides, please visit: http://support.netduma.com/en/support/solutions
17
18
19
DumaOS Overview
Geo-Filter
QoS
Device Manager
Network Monitor
Other
Section 1: Netduma R2
Section 2: DumaOS
In a rush? Jump to the Quickstart Guide (pages 7-9)

Gigabit Ethernet Ports
Internet Port
Reset Button
Netduma R2 Back
4.
In the Box
Package Contents
4 Detachable Antennas
Netduma R2 Router
User Guide
1 CAT-6 Ethernet Cable
Power Adapter
Netduma R2 Front
Detachable Antennas
Power
Internet 2.4 GHz 5 GHz Port 1 Port 2 Port 3
Port 4
Multi-Core CPU
Dual Band AC1200
Power SocketUSB 3.0 Port

5.
Your New Hardware
The Netduma R2 is the first in-house
router by Netduma, designed to
eliminate lag and get you the best
connection in online games.
Netduma R2

6.
DumaOS
The future of router software starts here. DumaOS’
cutting edge technology is designed to crush your
game’s lag and give you control over your home's
connection. This guide will help you to quickly set up
DumaOS and transform your online experience.
Your New Software

7.
Quickstart Guide (1 of 3)
Step 1: Attaching Antennas
Threaded Antenna Posts
A) Screw the four antennas onto the threaded
antenna posts.
B) For the best Wi-Fi performance, position
the antennas vertically.
A) Turn off the Modem / Router provided by
your Internet Service Provider. (ISP).
B) Connect one end of the Ethernet cable into
the Internet Port of the Netduma R2, which is
located on the rear of the router.
C) Connect the other end of the Ethernet cable
to your ISP’s Modem / Router.
TIP : For the best Wi-Fi signal, position your router out in the open.
Step 2: Plugging In
Internet
Port
Modem / Router
Provided by your ISP
Netduma R2
CAT-6 Ethernet Cable

8.
Quickstart Guide (2 of 3)
TIP : For the best results, connect your game console(s) via wired Ethernet.
A) Disconnect any other wired devices that are
connected to the ISP Modem / Router (or any
other router you own) and connect them
instead to the Netduma R2.
B) At this point the only device wired to your
ISP Hub should be your Netduma R2.
A) Turn on the Modem / Router provided by
your Internet Service Provider. (ISP).
B) Connect your Netduma R2 power adapter
into the power socket of the Netduma R2, and
connect the other end into your Power Outlet.
C) Turn your power on. Both your Netduma R2
and your ISP Hub should now be on.
Step 3: Connecting Wired Devices
Modem / Router
Provided by your ISP
Netduma R2
Step 4: Powering On
Netduma R2
Power Adapter
Power Outlet

9.
Quickstart Guide (3 of 3)
TIP : To change your router Wi-Fi password, go to Network Settings > Wi-Fi
A) On your wireless laptop or PC, access your
computer’s Wi-Fi settings.
B) Search for available Wi-FI networks and
select NetdumaR2.
C) The router Password can be found on the
label on the bottom of the router.
D) If you ever factory reset your router, the
Wi-Fi password will always revert back to the
router default password.
A) Open a web browser on a PC or Laptop that is connected
to the Netduma R2 and enter 192.168.77.1 in the URL bar.
B) Log in using the username and password below:
Username: admin
Password: password
C) The Welcome Tour will now walk you through the main
features of DumaOS.
Step 5: Connecting Wireless Devices
NetdumaR2
192.168.77.1
Step 6: Accessing the Interface
SIGN IN
Username: admin
Password: password
R2 Label

10.
Introducing DumaOS
DumaOS is the world’s first Router Operating
System designed to give you every tool you
need to control your home network and fix lag
in online games.
This section of the guide will help you get the
most important features set up.
Customisable Dashboard
Pin and resize your favourite Feature Panels
to your own personlised dashboard.
Access advanced features through efficient
Submenus.
Intuitive Interface
Get straight in the game with useful Help Tips
to optimise your experience.
Access more in-depth configuration options
via the Network Settings portal.
Take Control

Geo-Filter (1 of 3)
The main cause of lag in online games such
as Call of Duty, Fortnite, Apex Legends and
FIFA is the distance from you to the host or
server of your game.
The Geo-Filter is unique because it limits the
distance of these hosts or servers. The effect
on your game will be very noticeable, with
improved response time and fairer gameplay.
Step 1: Getting Started
A) Click Add Device and select your device.
B) If a device is not listed, make sure it is
connected to the Netduma R2.
C) If your device is not a console (e.g. a PC),
select the PC game you will be playing.
Step 2: Set your Home
A) Click on the Home Pin icon on the map.
B) Click on where you are located on the world
map as accurately as you can to set this as
your home. To look closer, use the Zoom icon.
The Geo-Filter
ADD DEVICE
PlayStation
Xbox
Gaming PC
CANCEL NEXT
Unreal Engine
(Fortnite and PUBG)
CANCEL DONE
11.

Geo-Filter (2 of 3)
Step 3: Set your Radius
A) The radius blocks all hosts outside its
range. Set the radius to a size you want by
dragging the Distance slider.
B) Advanced settings such as Ping Assist can
be found in the Geo-Filter submenu.
Step 4: Start Gaming
Blocked connections outside of your radius
will appear as warning triangles (see the
Geo-Filter Legend below).
The host of your game will be the largest,
most consistently shown icon.
Geo-Filter Legend
Player Server
Blocked Server
12.
Allowed Player
Allowed Server
Denied Player
Ping Assist ServerPing Assist Player
Blocked Player

Geo-Filter (3 of 3)
Ping Graph
Ping shows the connection quality (the ping)
from you to the connection you have selected
on the map. This is measured in milliseconds.
With Auto Ping Host enabled in the Geo-filter
submenu, you can automatically ping your
game's host and unlock advanced connection
statistics e.g. Tickrate
A ping of <100ms is considered to be good for
gaming online.
Allow and Deny
Allow your device to connect with another
player or server when they are outside your
Geo-Filter radius. This can be used to play with
distant friends.
Deny your device from connecting to another
player or server when they are inside your
Geo-Filter radius. Use this to avoid nearby
laggy hosts.
Click on a connection’s icon on your Geo-filter
Map and in the Ping panel that opens, give it a
name and choose either Allow or Deny.
Allow Deny
13.

QoS (1 of 3)
QoS
When devices in your home are using all the
bandwidth, it creates congestion. This causes
lag, especially for online games.
QoS gives you the complete toolset to solve
this problem.
Step 1: Getting Started
A) Open the Anti-Bufferbloat submenu.
B) Enter the bandwidth speeds you receive
from a wired speed test on a PC or Laptop.
C) Click Always to enable Anti-Bufferbloat. If
you just want it to activate when you are
playing games, select When High Priority
Traffic Detected.
D) Lower both the Download and Upload
sliders to 70%. This prevents greedy devices
from using more than 70% of your bandwidth.
Always
When High Priority Traffic Detected
Never
Auto Anti-Bufferbloat Download
Upload
14.

QoS (2 of 3)
Bandwidth Allocation
Some devices need more bandwidth than
others, such as a PC watching Netflix.
With Bandwidth Allocation, you can control
how your bandwidth is shared across all of
your devices.
Step 2: Set your Allocation
A) Select Download on Bandwidth Allocation.
B) Drag the percentage node next to a device
to change its bandwidth allocation. By default,
any unused bandwidth is automatically given
to any other devices that need it.
Download
Upload
C) Click Update Distribution to save your
changes to Bandwidth Allocation.
D) Repeat steps Band Cfor Upload.
Click Reset Distribution if you want to reset
your Bandwidth Allocation to default.
UPDATE DISTRIBUTION RESET DISTRIBUTION
15.

QoS (3 of 3)
Traffic Prioritization
Network congestion creates a queue, which
forces games and other fast applications to
wait.
Traffic Prioritization guarantees that these
fast applications will always be placed at the
front of the queue, reducing lag.
Step 3: Set up Traffic Prioritization
A) Traffic Prioritization will detect and
prioritise a preset list of games on all devices
by default. This covers all console games and
most PC games.
B) Traffic Prioritization Information shows a
red circle when this is taking effect.
C) To add a game that has not automatically
been detected, click Add Device to add a
service to Traffic Prioritization.
D) Select a device from the Device Selector.
E) Select a service or ports to prioritize.
ADD DEVICE
PlayStation
Xbox
Gaming PC
CANCEL NEXT CANCEL DONE
Fortnite
Dota 2
Gaming Console
16.

Device Manager
Network Map
The Network Map displays your connected
devices, how they are connected and which
devices are currently offline in a simple tree.
Alternatively, enable Table Mode to view your
network in more detail. This can be found in
the Network Map submenu.
Click on a device to access its settings.
Device Settings
Rename the device by typing its name in the
Name text box. Select which type of device it
is using the Device Type drop-down menu.
Click Save to save your changes.
Click Block to prevent an unwanted device
from your network. Click Delete to remove an
offline device from your Device Tree.
SAVE BLOCK DELETE
17.
NetdumaR2
NetdumaR2

Network Monitor
Analyse Network Usage
The Network Monitor helps you to identify
who, or what, is using your network thanks to
enterprise level Deep Packet Inspection (DPI).
You can then use this information to apply the
best QoS settings.
Network Snapshot
Network Snapshot shows the bandwidth
being used by all of your devices, and is
measured in megabits per second (Mbps).
Clicking on a bar will open the Category
Breakdown.Clicking on a segment will open
the Application Breakdown.
Network Overview
The Network Overview shows your network’s
current, total bandwidth usage. This graph is
measured in megabits per second (Mbps).
18.

Other
Hybrid VPN
Hybrid VPN gives you the power to apply your VPN to any device or
application. Compatible with all OpenVPN providers.
Support
For technical support you can contact Netduma at:
http://forum.netduma.com
For more in-depth guides, please visit the knowledge base at:
http://support.netduma.com/en/support/solutions
System Information
System Information displays hardware statistics such as CPU usage,
Wi-Fi Information and installed R-apps.
Network Settings
The Network Settings portal contains UPnP, Port Forwarding, DHCP
and other essential router tools.
19.
To reboot or factory reset the router, click on the Information icon at the
top of DumaOS. Remember that your password will reset to default.

Table of contents
