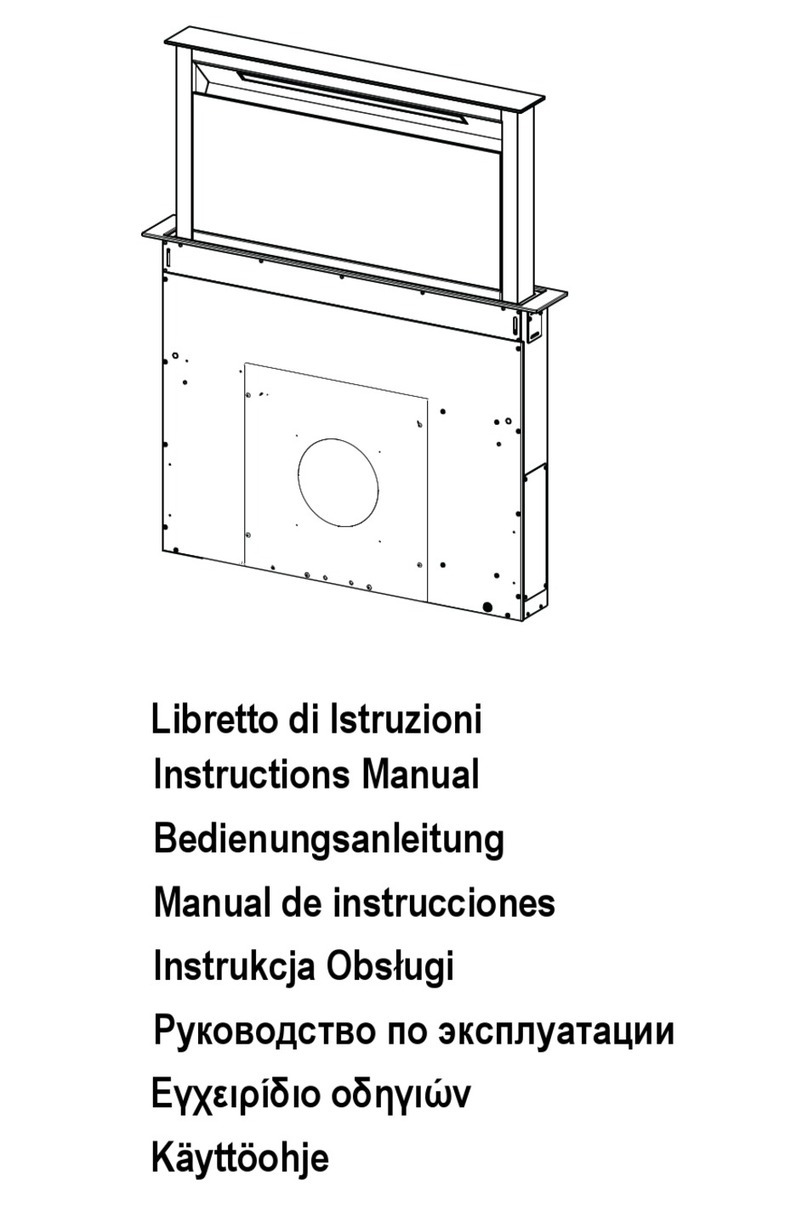
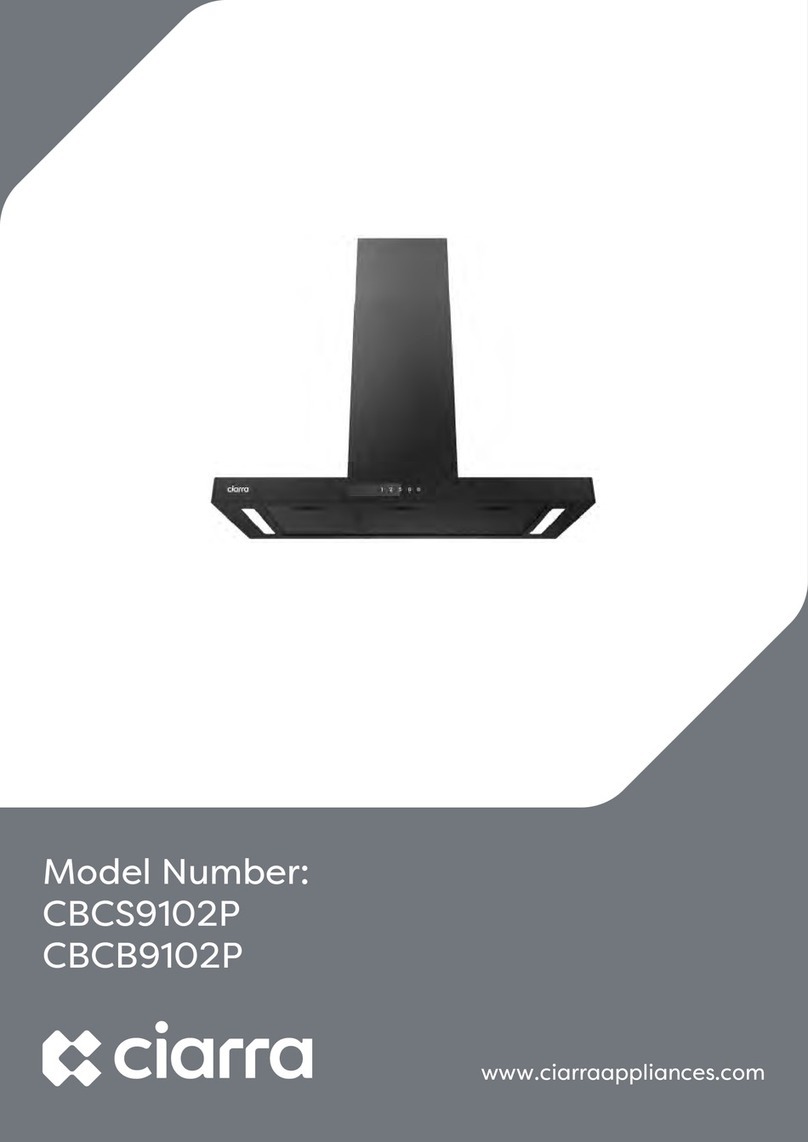
Netrauta SAV-90569 User manual

I-6009-S2
Instructions Manual
Käyttöohje

2
2
INDEX
RECOMMENDATIONS AND SUGGESTIONS..................................................................................................................... 3
CHARACTERISTICS.............................................................................................................................................................4
INSTALLATION...................................................................................................................................................................... 6
USE......................................................................................................................................................................................10
MAINTENANCE...................................................................................................................................................................11
SISÄLTÖ
OHJEET JA SUOSITUKSET...............................................................................................................................................12
MITAT JA OSAT .................................................................................................................................................................. 13
ASENNUS............................................................................................................................................................................15
KÄYTTÖ............................................................................................................................................................................... 19
HUOLTO ..............................................................................................................................................................................20
EN
FI

EN 3
3
RECOMMENDATIONS AND SUGGESTIONS
The Instructions for Use apply to several versions of this appliance. Accordingly, you may
finddescriptionsofindividualfeaturesthatdonot applyto yourspecificappliance.
INSTALLATION
• The manufacturer will not be held liable for any damages resulting from incorrect or im-
properinstallation.
• The minimum safety distance between the cooker top and the extractor hood is 650 mm
(some models can be installed at a lower height, please refer to the paragraphs on work-
ingdimensionsandinstallation).
• Check that the mains voltage corresponds to that indicated on the rating plate fixed to the
insideofthehood.
• For Class I appliances, check that the domestic power supply guarantees adequate
earthing.
Connect the extractor to the exhaust flue through a pipe of minimum diameter 125 mm.
Therouteofthefluemustbeas shortaspossible.
• Do not connect the extractor hood to exhaust ducts carrying combustion fumes (boilers,
fireplaces,etc.).
• If the extractor is used in conjunction with non-electrical appliances (e.g. gas burning appli-
ances), a sufficient degree of aeration must be guaranteed in the roomin order to prevent
the backflow of exhaust gas. The kitchen must have an opening communicating directly
with the open air in order to guarantee the entry of clean air. When the cooker hood is
used in conjunction with appliances supplied with energy other than electric, the negative
pressure in theroom must not exceed 0,04 mbar to prevent fumes being drawn back into
theroombythecookerhood.
• In the event of damage to the power cable, it must be replaced by the manufacturer or by
thetechnicalservicedepartment,inorderto preventanyrisks.
USE
• The extractor hood has been designed exclusively for domestic use to eliminate kitchen
smells.
• Neverusethehoodforpurposesotherthan forwhichithasbeendesigned.
• Neverleavehighnakedflamesunderthe hoodwhenit is inoperation.
• Adjust the flame intensity to direct it onto the bottom of the pan only, making sure that it
doesnotengulfthesides.
• Deep fat fryers must be continuously monitored during use: overheated oil can burst into
flames.
• Donotflambèundertherangehood;riskoffire
• This appliance is not intended for use by persons (including children) with reduced physi-
cal, sensory or mental capabilities, or lack of experience and knowledge, unless theyhave
been given supervision or instruction concerning use of the appliance by a person respon-
siblefortheirsafety.
• Childrenshouldbesupervisedtoensurethattheydonotplaywiththeappliance.
• “CAUTION:Accessiblepartsmaybecomehotwhenusedwithcookingappliances.”.
MAINTENANCE
• Switch off or unplug the appliance from the mains supply before carrying out any mainte-
nancework.
• Clean and/or replacetheFiltersafterthe specifiedtime period (Fire hazard).
• Clean the hood using adamp cloth and aneutral liquid detergent.
The symbol on the product or on its packaging indicates that this product may not be treated as household waste. Instead it shall be
handed over to the applicable collection point for the recycling of electrical and electronic equipment. By ensuring this product is disposed of
correctly, you will help prevent potential negative consequences for the environment and human health, which could otherwise be caused by
inappropriatewastehandlingofthisproduct.Formoredetailedinformationaboutrecyclingofthisproduct,pleasecontact yourlocalcity office,your
householdwastedisposalserviceortheshop whereyoupurchasedtheproduct.
2°

EN 4
4
CHARACTERISTICS
Dimensions
Min.
500mm
Min.
650mm

EN 5
5
Components
Ref. Q.ty Product Components
1 1 Hood Canopy complete with: Controls, Lights, Filters
21 Telescopic chimney made up of:
2.1 1 Upper chimney
2.2 1 Lower chimney
7.1 1 Telescopic frame complete with Suction fan, made up
of:
7.1a 1 Upper frame
7.1b 1 Lower frame
91 Reduction flange ø 150-120 mm
10 a 1 Damper
10 b 1 Adapting ring ø 120-125 mm
14.1 2 Air Outlet Connection Extension
15 1 Air Outlet Connector
24 1 Connection box
25 Pipe clamps (not included)
26 2 Cable clamps
27 1 Finishing plug
Ref. Q.ty Installation Components
7.3 1 Bracket for Air Outlet Connector
11 4 Wall Plugs ø 10
12c 8 Screws 2,9 x 6,5
12e 4 Screws 2,9 x 9,5
12f 2 Screws M4 x 80
12g 4 Screws M6 x 80
12h 4 Screws 5,2 x 70
12q 4 Screws 3,5 x 9,5
21 1 Drilling template
22 8 6.4 mm int. dia washers
23 4 M6 nuts
Q.ty Documentation
1Instruction booklet

EN 6
6
INSTALLATION
Drilling the Ceiling/shelf and fixing the frame
DRILLING THE CEILING/SHELF
• Use a plumb line to mark the centre of the hob on the ceiling/support shelf.
• Place the drilling template 21 provided on the ceiling/support shelf, making sure that the
template is in the correct position by lining up the axes of the template with those of the hob.
• Mark the centres of the holes in the template.
• Drill the holes at the points marked:
• For concrete ceilings, drill for plugs appropriate to the screw size.
• For hollow brick ceilings with wall thickness of 20 mm: drill ø 10 mm(immediately insert
the Dowels 11 supplied).
• For wooden beam ceilings, drill according to the wood screws used.
• For wooden shelf, drill ø 7 mm.
• For the power supply cable feed, drill ø 10 mm.
• For the air outlet (Ducted Version), drill according to the diameter of the external air ex-
haust duct connection.
• Insert two screws of the following type, crossing them and leaving 4-5 mm from the ceiling:
• For concrete ceilings, use the appropriate plugs for the screw size (not provided).
• for Cavity ceiling with inner space, with wall thickness of approx. 20 mm, Screws 12h,
supplied.
• For wooden beam ceilings, use 4 wood screws (not provided).
• For wooden shelf, use 4 screws 12g with washers 22 and nuts 23, provided.

EN 7
7
Fixing the frame
• Loosen the two screws fastening the lower chimney and re-
move this from the lower frame.
• Loosen the two screws fastening the upper chimney and re-
move this from the upper frame.
If you wish to adjust the height of the frame, proceed as follows:
• Unfasten the metric screws joining the two columns, located at
the sides of the frame.
• Adjust the frame to the height required, then refit all the screws
removed as above.
• Insert the upper chimney stack from above, and leave it run-
ning free on the frame.
• Lift up the frame, fit the frame slots onto the screws up to the
slot end positions.
• Tighten the two screws and fasten the other two screws pro-
vided with the hood.
Before tightening the screws completely it is possible to adjust
the frame by turning it. Make sure that the screws do not come
out of their seats in the slotted holes.
• The frame mountings must be secure to withstand the weight
of the hood and any stresses caused by the occasional side
thrust applied to the device.
On completion, check that the base is stable, even if the frame
is subjected to bending.
• In all cases where the ceiling is not strong enough at the sus-
pension point, the installer must provide strengthening using
suitable plates and backing pieces anchored to the structurally
sound parts.
22
11
Connections
DUCTED VERSION AIR EXHAUST SYSTEM
When installing the ducted version, connect the hood to the
chimney using a rigid pipe ø 150 or 125mm, the choice of which
is left to the installer.
To install a ø 150
• To install the dumper 10a.
• Fix the pipe in position using sufficient pipe clamps (not sup-
plied).
To install a ø 125
• To install a ø 125 mm air exhaust connection, insert the re-
ducer flange 9 on the dumper 10a.
• To install the Adapting ring 10b.
• Fix the pipe in position using sufficient pipe clamps (not sup-
plied).
• Remove any activated charcoal filters.
ø 125
25
10a
9
10b
10a
ø 150
25

EN 8
8
Air outlet – Recirculation Version
• Insert the Connector extensions 14.1 into the side of the Con-
nector 15.
• Insert the Connector 15 into the Support bracket 7.3 and fix it
with the screws.
• Fasten the Support bracket 7.3, fixing it to the upper part with
the Screws.
• Make sure that the Connector extensions outlet 14.1 is in cor-
respondence with the Chimney openings both horizontally and
vertically.
• Join the Connector 15 to the Hood canopy outlet using a rigid
or flexible pipe ø¸150 mm, selection of which is at the discre-
tion of the installation technician.
• Make sure that the Activated charcoal odour filter has been
fitted.
7.3
7.3
12c
12e
15
14.1
Flue assembly - Mounting the hood body
• Position the upper chimney section and fix the upper part to the
frame using the 2 screws 12c (2,9 x 6,5) provided.
• Similarly, position the lower chimney section and fix the
lower part to the frame using the 2 screws 12c (2,9 x 6,5) pro-
vided.
Before fixing the hood canopy to the frame:
• Screw the 2 screws 12f half way into the holes provided in the
sides of the bottom of the frame.
• Remove the grease filters from the hood canopy.
• Remove any activated charcoal filters.
• Lift the hood canopy and engage the screws 12f in the slots (A)
as far as they will go.
• Working from below, fix the hood canopy to the frame (B),
using the 4 screws 12q and 4 washers 22 provided, then tighten
all the screws securely.
12c
12c
A
B
22
12f
12q

EN 9
9
24
12e
Cmd
ELECTRICAL CONNECTION
• Connect the Hood to the Mains power sup-
ply, inserting a two-pole Switch with a con-
tact aperture of at least 3 mm.
• Remove the Metal grease filters (see par.
on “Maintenance”) and make sure that the
power supply Cable is properly inserted in
the Suction fan socket.
• Take the wires indicated in fig.1and pass
them through the slot formed on the galva-
nized diffuser support, as shown in fig.2.
• Position the finishing plug 27 over the
housing in the diffuser support, fixing it us-
ing a screw 12e (2.9 x 9.5) and applying the
2 cable clamp elements 26 as indicated in
figs. 3and 4.
• Connect the Controls Connector fig. 5.
• Store both the Connectors in the Protective
box 24 and close it with 2 Screws 12e (2.9
x 9.5), provided.
• Remove the protective film from the dou-
ble-sided adhesive on the connection box,
and fix it inside the motor compartment fig.
6.
1
2
34
5
6

EN 1
10
USE
T2
T1 L
T3
Control panel
BUTTON LED FUNCTIONS
T1 Speed On Turns the Motor on at Speed one.
Turns the Motor off.
T2 Speed On Turns the Motor on at Speed two.
T3 Speed Fixed When pressed briefly, turns the Motor on at Speed three.
Flashing Pressed for 2 Seconds.
Activates Speed four with a timer set to 10 minutes, after
which it returns to the speed that was set previously. Suitable
to deal with maximum levels of cooking fumes.
LLight Turns the Lighting System on and off.
Warning: Button T1 turns the motor off, after first passing to speed one.

EN 1
11
MAINTENANCEGrease filters
CLEANING METAL SELF- SUPPORTING GREASE FILTERS
• The filters must be cleaned every 2 months of operation, or
more frequently for particularly heavy usage, and can be
washed in a dishwasher.
• Remove the filters one at a time by pushing them towards the
back of the group and pulling down at the same time.
• Wash the filters, taking care not to bend them. Allow them to
dry before refitting.
• When refitting the filters, make sure that the handle is visible
on the outside.
Activated charcoal filter (Recirculation version)
These filters are not washable and cannot be regenerated, and
must be replaced approximately every 4 months of operation, or
more frequently with heavy usage.
REPLACING THE ACTIVATED CHARCOAL FILTER
• Remove the metal grease filters
• Remove the saturated activated charcoal filter as shown (A).
• Fit the new filters (B).
• Replace the metal grease filters.
Lighting
LIGHT REPLACEMENT
G4
20W halogen light.
• Remove the snap-on lamp cover by levering it from under the
metal ring, supporting it with one hand.
• Remove the halogen lamp from the lamp holder by pulling
gently.
• Replace the lamp with a new one of the same type, making
sure that you insert the two pins properly into the housings on
the lamp holder.
• Replace the snap-on lamp cover.

FI 1
12
OHJEET JA SUOSITUKSET
Nämä käyttöohjeet koskevat useita tuuletintyyppejä. On mahdollista, että teksti käsittelee
yksityiskohtia, jotka eivät kuulu valitsemaanne tuulettimeen.
ASENNUS
• Valmistaja ei vastaa virheellisestä tai huolimattomasta asennuksesta aiheutuvista vahin-
goista
• Pienin sallittu turvaetäisyys liesitason ja liesikuvun välillä on 650 mm (jotkut mallit voidaan
asentaa alemmas, katso mittoja ja asennusta koskevia kappaleita).
• Tarkista, että käytettävän sähköverkon jännite vastaa liesikuvun sisäpuolella olevaan
arvokilpeen merkittyä jännitettä.
• Kytke laite vain maadoitettuun pistorasiaan.
• Yhdistä liesituuletin hormiin putkella, jonka halkaisija on vähintään 125 mm. Hormiin me-
nevän putken on oltava mahdollisimman lyhyt.
• Älä yhdistä liesituuletinta savuhormiin (lämmityskattilat, tulisijat, jne.).
• Mikäli liesituuletinta käytetään muiden kuin sähkölaitteiden (esim. kaasuhella) yhteydessä, on
huolehdittava työskentelytilan riittävästä tuuletuksesta, etteivät poistettavat kaasut pääse virtaa-
maan takaisin työskentelytilaan. Keittiössä on oltava ilmanvaihtoaukko puhdasta tuloilmaa varten.
Käyttötapahtuuoikein javaarattakun tilanenimmäispaineei ylitäarvoa0,04mBar.
• Jos virtajohto vahingoittuu, sen saa vaihtaa vain valmistaja tai tekninen huoltopalvelu, näin välte-
täänkaikkiriskit.
KÄYTTÖ
• Liesituuletin on tarkoitettu vain kotitalouskäyttöön.
• Älä koskaan käytä liesituuletinta muuhun tarkoitukseen kuin, mihin se on suunniteltu.
• Älä koskaan jätä avotulta liesituulettimen alle liesituulettimen ollessa käynnissä.
• Säädä liekin teho siten, että liekki kohdistuu vain astian pohjaan eikä sen reunoille.
• Syviä paistinpannuja on paiston aikana koko ajan pidettävä silmällä, sillä ylikuumentunut
öljy voi leimahtaa tuleen.
• Lapset tai henkilöt, joita ei ole opastettu laitteen oikeaan käyttöön, eivät saa käyttää liesi-
tuuletinta.
• Liesikuvun alla ei saa valmistaa liekitettäviä ruokia: tulipalon vaara
• Laitetta eivät saa käyttää henkilöt (lapset mukaan lukien), joiden psyykkinen, aistien tai
mielen terveys on heikentynyt, tai henkilöt, joilla ei ole tarpeellista kokemusta tai taitoa,
ellei heidän turvallisuudestaan vastaava henkilö ole valmentanut heitä laitteen käyttöön tai
valvo sitä.
• Valvo, etteivät lapset pääse leikkimään laitteella.
• “HUOMIO: Kosketettavissa olevat osat voivat tulla hyvin kuumiksi jos niitä käytetään
keittolaitteiden kanssa.”
HUOLTO
• Sulje laite tai irrota sen pistoke pistorasiasta ennen hoitoa.
• Puhdista ja/tai vaihda suodattimet annetun ajan kuluttua (Tulipalovaara).
• Puhdista liesituuletin kostealla kankaalla ja miedolla, nestemäisellä pesuaineella.
Symboli , joka on merkitty tuotteeseen tai sen pakkaukseen, osoittaa, että tätä tuotetta ei
saa käsitellä talousjätteenä. Tuote on sen sijaan luovutettava sopivaan sähkö- ja elektroniikkalait-
teiden kierrätyksestä huolehtivaan keräyspisteeseen. Tämän tuotteen asianmukaisen hävittämi-
sen varmistamisella autetaan estämään sen mahdolliset ympäristöön ja terveyteen kohdistuvat
haittavaikutukset, joita voi aiheutua muussa tapauksessa tämän tuotteen epäasianmukaisesta
jätekäsittelystä. Tarkempia tietoja tämän tuotteen kierrättämisestä saa paikallisesta kunnantoi-
mistosta, talousjätehuoltopalvelusta tai liikkeestä, josta tuote on ostettu.
2°

FI 1
13
MITAT JA OSAT
Mitat
Min.
500mm
Min.
650mm

FI 1
14
Osat
Viite Lkm Tuotteen osat
1 1 Liesituulettimen runko, jossa: Kytkimet, valo, suodatti-
met
21 Teleskooppihormi, johon kuuluu:
2.1 1 Ylähormi
2.2 1 Alahormi
7.1 1 Teleskooppirunko ja imulaite, johon kuuluu:
7.1a 1 Ylärakenne
7.1b 1 Alarakenne
91 Kavennuslaippa ø 150-120 mm
10a 1 Laippa ø 150 suuntaisventtiilillä
10b 1 Suurennusrengas ø 120-125 mm
14.1 2 Ilman ulostuloliitoksen jatke
15 1 Ilman ulostuloliitos
24 1 Liitäntäkotelo
25 Kiinnittimet (ei kuulu toimitukseen)
26 2 Vedonpoistin
27 1 Peitetulppa
Viite Lkm Asennusosat
7.3 1 Ilmanvaihtoputken haarakappaleen tuki
11 4 Ruuvitulpat ø 10
12c 8 Ruuvit 2,9 x 6,5
12e 4 Ruuvit 2,9 x 9,5
12f 2 Ruuvit M4 x 80
12g 4 Ruuvit M6 x 80
12h 4 Ruuvit 5,2 x 70
12q 4 Ruuvit 3,5 x 9,5
21 1 Porausmalline
22 8 Välirenkaat ø sis. 6,4
23 4 Mutterit M6
Lkm Asiakirjat
1Käyttöohjeet

FI 1
15
ASENNUS
Katon/hyllyn poraaminen ja kehikon kiinnitys
KATON/HYLLYN PORAAMINEN
• Merkitse luotilangan avulla keittotason keskipiste kattoon/hyllyyn.
• Aseta kattoon/hyllyyn toimitettu liesituulettimen malline 21 siten, että keskipiste tulee koh-
dalleen ja että keittotason ja mallineen sivut ovat samalla kohdalla.
• Merkitse mallineen reikien keskipisteet.
• Poraa reiät seuraavalla tavalla:
• Massiivibetonikatto: käytettyjen betonimuuriankkurien mukaan.
• Tiilinen välikatto, kestävä paksuus 20 mm: ø 10 mm (laita heti paikalleen toimitetut tulpat
11).
• Puupalkkikatto: käytettyjen puuruuvien mukaan.
• Puuhylly: ø 7 mm.
• Virtajohdon aukko: ø 10 mm.
• Ilman ulostulo (Imuversio): ulkopuolisen poistoputken halkaisijan mukaan.
• Ruuvaa kaksi ruuvia vastakkaisiin kulmiin ja jätä niiden kanta noin 4 - 5mm:n etäisyydelle
seinästä:
• Massiivibetoniin, betonimuuriankkurit, eivät kuulu toimitukseen.
• Tiiliseen välikattoon, kestävä paksuus noin 20 mm, toimitetut ruuvit 12h.
• Puupalkkikattoon, puuruuvit, eivät kuulu toimitukseen.
• Puuhyllyyn, toimitetut ruuvit 12g, välirenkaat 22 ja mutterit 23.

FI 1
16
KEHIKON KIINNITYS
• Ruuvaa auki kaksi ruuvia, jotka kiinnittävät alemman hormin
ja irrota se kehikosta (alakautta).
• Ruuvaa auki kaksi ruuvia, jotka kiinnittävät ylemmän hormin
ja irrota se kehikosta (yläkautta).
Jos haluat säätää kehikon korkeutta, toimi seuraavalla tavalla:
• Ruuvaa auki kehikon reunojen metriruuvia, jotka kiinnittävät
sivupalkit toisiinsa.
• Säädä haluamasi kehikon korkeus ja ruuvaa kiinni avaamasi
ruuvit.
• Työnnä ylempi hormi paikalleen yläkautta ja anna sen olla ke-
hikon päällä vapaana.
• Nosta kehikkoa, kiinnitä aukot ruuveihin ja työnnä paikalleen.
• Kiristä kaksi ruuvia ja myös toiset kaksi toimitettua ruuvia.
Ennen ruuvien lopullista kiristämistä kehikkoa voidaan säätää
siirtämällä sitä. Varo kuitenkin, etteivät ruuvit tällöin irtoa au-
koistaan.
• Kehikon kiinnityksen tulee olla varma, siinä on otettava huo-
mioon sekä liesituulettimen paino että laitteeseen mahdollisesti
kohdistuvat sivurasitukset. Kun laite on kiinnitetty on tarkistet-
tava, että pohja on tukeva vaikka kehikko olisi taivutusjänni-
tyksen alainen.
• Mikäli katto ei ole tarpeeksi vahva kiinnityskohdassa, asenta-
jan täytyy vahvistaa sitä laatoilla ja vastalaatoilla, jotka kiinni-
tetään rakenteellisesti vahvoihin kohtiin.
22
11
Liitännät
IMUVERSION ILMAN ULOSTULO
Imuversio asennetaan liittämällä liesituuletin ilman ulostuloon
jäykällä putkella ø150 tai 120 mm, asentajan valinnan mukaan.
Putkiliitäntä ø 150
• Laita laippa 10a, ø 150, liesituulettimen rungon ulostuloon.
• Laita Suurennusrengas 10b, ø 120-125 mm
• Kiinnitä putki ohessa toimitetuilla puristimilla 25 (eivät sisälly
toimitukseen).
Putkiliitäntä ø 120
• Jos käytät putkea ø 120 mm, laita kavennuslaippa 9asentamaa-
si laippaan ø 150.
• Kiinnitä putki ohessa toimitetuilla puristimilla 25 (eivät sisälly
toimitukseen).
• Molemmissa tapauksissa mahdolliset aktiivihiilisuodattimet
täytyy poistaa.
ø 125
25
10a
9
10b
10a
ø 150
25

FI 1
17
Suodatusversion ilman ulostulo
• Työnnä liitoksen jatkeet 14.1 sivuilta liitokseen 15.
• Aseta liitos 15 tukeen 7.3 ja kiinnitä se ruuveilla.
• Kiinnitä tuki 7.3 ruuveilla yläosaan.
• Varmista, että liitoksen jatkeet 14.1 tulevat ulos hormin
aukkojen kohdalla sekä vaaka- että pystysuunnassa.
• Liitä liitos 15 liesituulettimen ulostuloon jäykällä putkella tai
letkulla, ø 150 mm, jonka valitsee asentaja.
• Varmista, että aktiivihiilihajusuodatin on paikallaan.
7.3
7.3
12c
12e
15
14.1
Hormin kokoaminen ja kiinnittäminen liesituulettimen run-
koon
• Sijoita ylempi hormi paikalleen ja kiinnitä se kehikon yläosaan
kahdella toimitetulla ruuvilla 12c (2,9x 9,5).
• Sijoita sitten alempi hormi paikalleen ja kiinnitä se kehikon
alaosaan kahdella toimitetulla ruuvilla 12c (2,9 x 9,5).
Ennen liesituulettimen rungon sijoittamista telineeseen:
• Ruuvaa 2 ruuvia 12f puoleen väliin telineen alapuolelle sivu-
asentoon 2 reikää vastaaville kohdille.
• Poista liesituulettimen rungosta rasvasuodattimet.
• Poista mahdolliset aktiivihiilihajusuodattimet.
• Nosta liesituulettimen runkoa ja aseta ruuvit 12f reikiin (kohta
A) vasteeseen asti.
• Kiinnitä liesituulettimen runko valmiiseen telineeseen (kohta
B) alapuolelta tuotetoimitukseen kuuluvilla 4 ruuvilla 12q ja 4
aluslevyllä 22 ja kiristä kaikki ruuvit loppuun asti.
12c
12c
A
B
22
12f
12q

FI 1
18
24
12e
Cmd
SÄHKÖLIITÄNTÄ
• Liitä liesituuletin sähköverkkoon kak-
sinapaisen verkkokytkimen kautta, jonka
kontaktien välit ovat ainakin 3mm.
• Poista rasvasuodattimet (katso kappaletta
“Huolto”) ja varmista, että virtajohdon liitin
on oikein imulaitteen pistorasiassa.
• Ota kuvassa 1 näkyvät johdot ja pujota ne
sinkityn ilmaritilän tuen reikään, kuten ku-
vassa 2.
• Aseta peitetulppa 27 ilmaritilän tukeen ja
kiinnitä se ruuvilla 12e (2,9 x 9,5), laita
paikoilleen 2 vedonpoistinta 26, kuten ku-
vissa 3ja 4.
• Liitä kytkimien liitin, kuva 5.
• Aseta molemmat liittimet suojakoteloon 24
ja sulje se 2 toimitetulla ruuvilla 12e (2,9 x
9,5).
• Poista liitäntäkotelon kaksipuolisen liima-
nauhan suojakalvo ja kiinnitä se moottoriti-
lan sisäpuolelle, kuva 6.
1
2
34
5
6

FI 1
19
KÄYTTÖ
T2
T1 L
T3
Käyttöpaneeli
PAINIKE MERKKIVALO TOIMINNOT
T1 Nopeus Palaa Käynnistää moottorin ensimmäisellä nopeudella.
Sammuttaa moottorin.
T2 Nopeus Palaa Käynnistää moottorin toisella nopeudella.
T3 Nopeus Kiinteä Lyhyt painallus käynnistää moottorin kolmannella nopeudella.
Vilkkuva Kun painiketta painetaan 2 sekunnin ajan.
Aktivoi neljännen nopeuden, joka toimii 10 minuuttia.
Ajastetun ajan päätyttyä nopeus palaa asetettuun arvoon.
Soveltuu käytettäväksi kun savua on paljon.
LValot Sytyttää ja sammuttaa valaistuksen.
Huomio: Painike T1 sammuttaa moottorin kulkien aina ensimmäisen nopeuden kautta.

FI 2
20
HUOLTO Rasvasuodattimet
ITSEKANNATTAVIEN METALLISTEN RASVASUODATTIMIEN PUHDISTUS
• Voidaan pestä myös astianpesukoneessa. Pesu on tarpeen noin
2 kuukauden käytön jälkeen tai useammin, jos laitetta käyte-
tään paljon.
• Irrota suodattimet yksi kerrallaan työntämällä niitä taaksepäin
ja vetämällä samalla alaspäin.
• Pese suodattimet. Vältä niiden taivuttamista. Anna suodattimi-
en kuivua ennen niiden paikalleen asettamista.
• Asenna ne paikalleen ja pidä kahva näkyvissä ulkopuolella.
Aktiivihiilisuodatin (Suodatinversio)
Suodattimia ei voi pestä eikä uudistaa, vaan ne täytyy vaihtaa
vähintään neljän kuukauden välein tai useammin, mikäli laitetta
käytetään paljon
AKTIIVIHIILISUODATTIMEN VAIHTAMINEN
• Irrota metalliset rasvasuodattimet.
• Irrota vanhat aktiivihiilisuodattimet kuten kuvassa (A).
• Asenna uudet suodattimet paikalleen kuten kuvassa (B).
• Laita metalliset rasvasuodattimet paikoilleen.
Valaistus
LAMPUNVAIHTO
G4
20 W:n halogeenilamppu
• Poista metallinen lasisuojanpidin vetäen renkaan alta ja samal-
la tukien sitä kädellä.
• Irrota lamppu lampunpitimestä.
• Vaihda lamppu uuteen samanlaiseen. Huomioi pistokkeen vir-
heetön asennus sille tarkoitetulle paikalle lampunpitimessä.
• Aseta painettava lasisuojanpidin uudelleen paikoilleen.
Table of contents
Languages:
Popular Ventilation Hood manuals by other brands

GE
GE STAINLESS STEEL PROFESSIONAL HOOD ZV30RSFSS Dimensions and specifications
CNP INDUSTRIES
CNP INDUSTRIES WindCrest PSL installation instructions

Brandt
Brandt AD1006X Guide to installation
Faber
Faber TORENTINO 90SS instruction manual
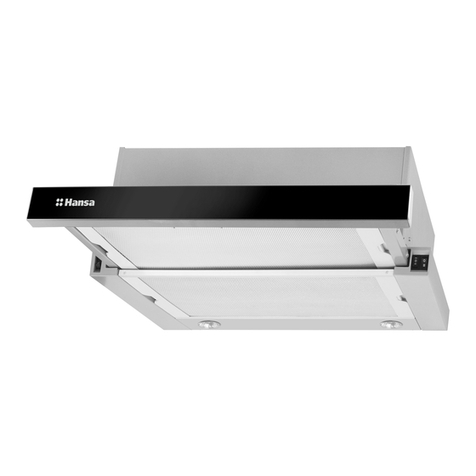
Hansa
Hansa OTS6226IH operating instructions

Jenn-Air
Jenn-Air JXI8236WS Installation Instructions and Use & Care Guide
