NetXen Intelligent NIC Quick start guide

NetXen, Inc.
Intelligent NIC™ Installation and Tuning Guide
Version 3.7
November 14, 2008
This document is applicable to releases 3.4.337
NetXen, Inc.
18922 Forge Drive
Cupertino, CA 95014-0701
Telephone: (408) 861-4500
Web Site: http://www.netxen.com

NetXen, Inc
Copyright
© Copyright 2008. NetXen, Inc. — All Rights Reserved.
Disclaimer
This is a preliminary document and is subject to change without prior notification and does
not represent a commitment on the part of NetXen, Inc. The information contained herein is
the proprietary and confidential information of NetXen or its licensors, and is supplied subject
to, and may be used only by NetXen’s customer in accordance with, a written agreement
between NetXen and its customer. Except as may be explicitly set forth in such agreement,
NetXen does not make, and expressly disclaims, any representations or warranties as to the
completeness, accuracy or usefulness of the information contained in this document.
Please contact NetXen, Inc. to obtain the latest revision of this document.
Trademarks
Intelligent NIC is a registered trademark of NetXen, Inc. NetXen and the NetXen logo are
trademarks of NetXen, Inc. Third Party brands and names are the property of their respective
owners.
Revision History
Version Date Editor Notes
3.7 11/14/08 SR Added Section 9, Teaming Driver.
Added Section 10, NIC VLAN in Windows.

Table of Contents
NetXen, Inc. i
1 Overview. . . . . . . . . . . . . . . . . . . . . . . . . . . . . . . . . . . . . . . . . . . . . . . . . . . . . . . . . 1
1.1 Related Documents. . . . . . . . . . . . . . . . . . . . . . . . . . . . . . . . . . . . . . . . . . . 1
1.2 NIC Versions. . . . . . . . . . . . . . . . . . . . . . . . . . . . . . . . . . . . . . . . . . . . . . . . 1
1.3 Currently Supported Features . . . . . . . . . . . . . . . . . . . . . . . . . . . . . . . . . . 1
2 System Requirements. . . . . . . . . . . . . . . . . . . . . . . . . . . . . . . . . . . . . . . . . . . . . . . 2
2.1 Software Release Package Contents . . . . . . . . . . . . . . . . . . . . . . . . . . . . . 2
2.2 Hardware and Software Installation Requirements. . . . . . . . . . . . . . . . . . . 2
2.2.1 Cable Specifications. . . . . . . . . . . . . . . . . . . . . . . . . . . . . . . . . . . 2
2.2.2 XFP Module . . . . . . . . . . . . . . . . . . . . . . . . . . . . . . . . . . . . . . . . . 3
2.2.3 System and Software Requirements . . . . . . . . . . . . . . . . . . . . . . 3
3 Quick-Start Installation Instructions. . . . . . . . . . . . . . . . . . . . . . . . . . . . . . . . . . . . . 4
4 Pre-Installation Guidelines . . . . . . . . . . . . . . . . . . . . . . . . . . . . . . . . . . . . . . . . . . . 7
4.1 Guidelines on Firmware Tools and Processes . . . . . . . . . . . . . . . . . . . . . . 7
4.2 Linux Guidelines . . . . . . . . . . . . . . . . . . . . . . . . . . . . . . . . . . . . . . . . . . . . . 9
4.2.1 Building the Linux Driver Source Code. . . . . . . . . . . . . . . . . . . . . 9
4.2.2 Linux NIC - GPL Inbox Kernel and Commercial Drivers. . . . . . . . 9
4.2.3 Linux LSA Driver Installation (NIC Commercial Driver Only) . . . 10
4.2.4 MSI-X Initialization and Support. . . . . . . . . . . . . . . . . . . . . . . . . 10
4.2.5 Auto-load Firmware Location . . . . . . . . . . . . . . . . . . . . . . . . . . . 12
4.2.6 Host Memory Support. . . . . . . . . . . . . . . . . . . . . . . . . . . . . . . . . 12
4.3 Windows Guidelines . . . . . . . . . . . . . . . . . . . . . . . . . . . . . . . . . . . . . . . . . 14
4.4 VMware Guidelines. . . . . . . . . . . . . . . . . . . . . . . . . . . . . . . . . . . . . . . . . . 14
5 Detailed Installation and Configuration . . . . . . . . . . . . . . . . . . . . . . . . . . . . . . . . . 16
5.1 Installing and Connecting the Intelligent NIC Adapter. . . . . . . . . . . . . . . . 16
5.2 Windows Driver Installation. . . . . . . . . . . . . . . . . . . . . . . . . . . . . . . . . . . . 18
5.2.1 NIC Driver Installation. . . . . . . . . . . . . . . . . . . . . . . . . . . . . . . . . 18
5.2.2 Configuring the Network Interface Card . . . . . . . . . . . . . . . . . . . 25
5.3 Linux Installation . . . . . . . . . . . . . . . . . . . . . . . . . . . . . . . . . . . . . . . . . . . . 28
5.3.1 Linux NIC Driver Installation (TAR format) . . . . . . . . . . . . . . . . . 28
5.3.2 Linux NIC Driver Options . . . . . . . . . . . . . . . . . . . . . . . . . . . . . . 29
5.3.3 Configuring the NIC on Linux . . . . . . . . . . . . . . . . . . . . . . . . . . . 29
5.4 Uninstalling the Software. . . . . . . . . . . . . . . . . . . . . . . . . . . . . . . . . . . . . . 30
5.4.1 Uninstalling the NIC Driver in Windows . . . . . . . . . . . . . . . . . . . 30
5.4.2 Uninstalling the NetXen NIC Driver in Linux. . . . . . . . . . . . . . . . 30
5.4.3 Uninstalling the LSA Driver in Linux. . . . . . . . . . . . . . . . . . . . . . 30
6 Firmware Updates. . . . . . . . . . . . . . . . . . . . . . . . . . . . . . . . . . . . . . . . . . . . . . . . . 31
6.1 Using the NetXen Flash Utility. . . . . . . . . . . . . . . . . . . . . . . . . . . . . . . . . . 31
6.2 Windows Firmware Update. . . . . . . . . . . . . . . . . . . . . . . . . . . . . . . . . . . . 32
6.3 Linux Firmware Updates . . . . . . . . . . . . . . . . . . . . . . . . . . . . . . . . . . . . . . 33
6.4 Updating the Flash on Multiple Standalone Cards in Windows. . . . . . . . . 33
7 Linux Sockets Acceleration (LSA). . . . . . . . . . . . . . . . . . . . . . . . . . . . . . . . . . . . . 35
7.1 LSA Driver Installation. . . . . . . . . . . . . . . . . . . . . . . . . . . . . . . . . . . . . . . . 35
7.1.1 LSA Driver Installation Prerequisites . . . . . . . . . . . . . . . . . . . . . 35
7.1.2 TAR Format . . . . . . . . . . . . . . . . . . . . . . . . . . . . . . . . . . . . . . . . 35
7.2 LSA Offload Configuration. . . . . . . . . . . . . . . . . . . . . . . . . . . . . . . . . . . . . 36
7.2.1 LSA Configuration Options. . . . . . . . . . . . . . . . . . . . . . . . . . . . . 36
7.2.2 LSA Configuration Examples . . . . . . . . . . . . . . . . . . . . . . . . . . . 36

ii NetXen, Inc.
Table of Contents
7.2.3 nxoffload Caveats. . . . . . . . . . . . . . . . . . . . . . . . . . . . . . . . . . . . 37
7.3 Running LSA. . . . . . . . . . . . . . . . . . . . . . . . . . . . . . . . . . . . . . . . . . . . . . . 37
7.4 LSA Statistics . . . . . . . . . . . . . . . . . . . . . . . . . . . . . . . . . . . . . . . . . . . . . . 37
7.4.1 Example Read Out. . . . . . . . . . . . . . . . . . . . . . . . . . . . . . . . . . . 40
8 Linux Configuration for Bonding Mode and Virtual LAN (VLAN). . . . . . . . . . . . . . 42
8.1 Linux Teaming/Bonding Mode. . . . . . . . . . . . . . . . . . . . . . . . . . . . . . . . . . 42
8.1.1 Mode 1 . . . . . . . . . . . . . . . . . . . . . . . . . . . . . . . . . . . . . . . . . . . . 42
8.1.2 Mode 0 . . . . . . . . . . . . . . . . . . . . . . . . . . . . . . . . . . . . . . . . . . . . 43
8.1.3 Bonding Driver Options . . . . . . . . . . . . . . . . . . . . . . . . . . . . . . . 44
8.1.4 Bonding Driver Parameters . . . . . . . . . . . . . . . . . . . . . . . . . . . . 44
8.2 Configuring VLAN under Linux . . . . . . . . . . . . . . . . . . . . . . . . . . . . . . . . . 45
9 Windows Teaming Driver and Virtual LAN (VLAN). . . . . . . . . . . . . . . . . . . . . . . . 46
9.1 Installation. . . . . . . . . . . . . . . . . . . . . . . . . . . . . . . . . . . . . . . . . . . . . . . . . 46
9.2 Configuration. . . . . . . . . . . . . . . . . . . . . . . . . . . . . . . . . . . . . . . . . . . . . . . 48
9.3 Fault Tolerance Options . . . . . . . . . . . . . . . . . . . . . . . . . . . . . . . . . . . . . . 54
9.4 NIC VLAN in Windows . . . . . . . . . . . . . . . . . . . . . . . . . . . . . . . . . . . . . . . 58
9.4.1 Optional Configuration on the NIC and Switch Side. . . . . . . . . . 58
9.4.2 NIC VLAN as Send Side. . . . . . . . . . . . . . . . . . . . . . . . . . . . . . . 59
9.4.3 NIC VLAN as Receive Side . . . . . . . . . . . . . . . . . . . . . . . . . . . . 60
10 Troubleshooting Guidelines . . . . . . . . . . . . . . . . . . . . . . . . . . . . . . . . . . . . . . . . . 61
10.1 Unable to Boot the Host System with the NIC Card Installed . . . . . . . . . . 61
10.2 Unable to ping the NIC Installed on the Host . . . . . . . . . . . . . . . . . . . . . . 61
10.3 Gather System Information and Check for Errors on Linux Host . . . . . . . 62
10.4 Caveats. . . . . . . . . . . . . . . . . . . . . . . . . . . . . . . . . . . . . . . . . . . . . . . . . . . 62
10.4.1 MSI-X Interrupts for Linux. . . . . . . . . . . . . . . . . . . . . . . . . . . . . . 63
10.4.2 PCI-Express Slot . . . . . . . . . . . . . . . . . . . . . . . . . . . . . . . . . . . . 63
10.5 Additional Support. . . . . . . . . . . . . . . . . . . . . . . . . . . . . . . . . . . . . . . . . . . 64
11 User Diagnostics. . . . . . . . . . . . . . . . . . . . . . . . . . . . . . . . . . . . . . . . . . . . . . . . . . 65
11.1 Windows Tests . . . . . . . . . . . . . . . . . . . . . . . . . . . . . . . . . . . . . . . . . . . . . 65
11.2 Linux Tests . . . . . . . . . . . . . . . . . . . . . . . . . . . . . . . . . . . . . . . . . . . . . . . . 66
Appendix A Tuning Guidelines . . . . . . . . . . . . . . . . . . . . . . . . . . . . . . . . . . . . . . . . . . . 68
A.1 Windows Performance Tools . . . . . . . . . . . . . . . . . . . . . . . . . . . . . . . 68
A.1.1 NTttcp (Windows) . . . . . . . . . . . . . . . . . . . . . . . . . . . . . . . . . . . . . . 68
A.1.2 nttcps and ntttcpr Command Line Options . . . . . . . . . . . . . . . . . . . 69
A.2 Windows Optimization — Tcp1323Opts . . . . . . . . . . . . . . . . . . . . . . 70
A.3 Linux Performance Tools . . . . . . . . . . . . . . . . . . . . . . . . . . . . . . . . . . 70
A.3.1 IPERF . . . . . . . . . . . . . . . . . . . . . . . . . . . . . . . . . . . . . . . . . . . . . . . 71
A.4 Linux Optimization . . . . . . . . . . . . . . . . . . . . . . . . . . . . . . . . . . . . . . . 71
Appendix B Glossary . . . . . . . . . . . . . . . . . . . . . . . . . . . . . . . . . . . . . . . . . . . . . . . . . . 72

1. Overview
NetXen, Inc. Intelligent NIC Installation and Tuning Guide 1
1 Overview
This guide describes the system requirements, installation, and setup required for the
NetXen Intelligent NIC® network interface card product release.
1.1 Related Documents
Release notes included in the software release.
Linux ‘man’ pages:
- man nx_nic
- man nx_lsa
Check NetXen web site for updates.
1.2 NIC Versions
The NIC products support Windows, Linux, and other operating systems. See the release
notes for an updated list.
1.3 Currently Supported Features
Note: Check with NetXen periodically for software updates and additional features.
Product Number Product Definition
NXB-10GSXR Single 10-GE port (optical fiber)
NXB-10CX4 Single 10-GE port (copper)
Feature Windows Linux
TCP, UDP, and IP checksum offload Yes Yes
TCP segmentation offload (TSO / LSO) Yes Yes
Interrupt coalescing Yes Yes
Interrupt distribution No Yes
VLAN Yes Yes
SNMP Ethernet MIB Yes Yes
Jumbo frames Yes Yes
Teaming and Failover Yes Yes
Linux Sockets Acceleration (LSA) N/A Yes
Receive Side Scaling (RSS) Yes Yes

2Intelligent NIC Installation and Tuning Guide NetXen, Inc.
2. System Requirements
2 System Requirements
Before installing the product, verify the minimum system configuration requirements
outlined below.
2.1 Software Release Package Contents
2.2 Hardware and Software Installation Requirements
2.2.1 Cable Specifications
Contents Format Location
Documentation Release Notes NetXen web site
NIC Linux Driver [version].tar.gz [version]/driver/nx_nic.ko or
modprobe for nx_nic
NIC Windows Driver [version].zip [version]\win2k3\x64 or
[version]\win2k3\x86
NX Intercept Driver [version].-lsa.tar.gz [version]-lsa/driver/nx_intercept.ko
or modprobe for nx_intercept
LSA Driver [version].-lsa.tar.gz [version]-lsa/driver/nx_lsa.ko or
modprobe for nx_lsa
Firmware cx4_romimage or xfp_romimage [version]\win2k3\utils
or [version]/bin
Diagnostics nxudiag [version]\win2k3\utils
or [version]/bin
Tools nxflash [version]\win2k3\utils
or [version]/bin
Table 1 NXB-10GXSR Cable Specifications — Optical1
1. Check with NetXen for information on the NXB-10GXLR long range optical cable
specifications.
Parameter Optical Core Thickness
50 μm62.5 μm
Wavelength 850 nm 850 nm
Bandwidth (min) 500 MHz 500 MHz
Operating Range 300 m 300 m
Table 2 NXB-10CX4 Cable Specifications — Copper
802.3 Physical Layout Network Type Cable Length
10GBASE-CX4 LAN 15m (max)

2. System Requirements
NetXen, Inc. Intelligent NIC Installation and Tuning Guide 3
2.2.2 XFP Module
2.2.3 System and Software Requirements
Table 3 NXB-10GXSR XFP Module Specifications
Manufacturer Name Part Number
JDS Uniphase Multi-rate 10 Gb/s Short Wave
Optical XFP Transceiver 64P0194
PicoLight Multi-rate 10 Gb/s 850 nm
Optical XFP Transceiver Module PL-XXL-SC-S45-22
Table 4 System and Software Requirements
Hardware Systems Validated
Platforms Validated OS (32bit
and x64) Firmware1
1. NIC and LSA use the same firmware.
Driver
PCIe:
(x8) Host
Memory:
Minimum
2GB
AMD, Intel Windows Server:
2003 SP2, R2
Linux Distros:
RHEL4 U3,U4
SLES9 SP3,
SLES10, RHEL5
NIC
LSA Linux:2
NIC, LSA
Windows3
NIC
2. For Linux NIC and LSA drivers, install the kernel source and header files
3. For Windows NIC, SP2 is required.

4Intelligent NIC Installation and Tuning Guide NetXen, Inc.
3. Quick-Start Installation Instructions
3 Quick-Start Installation Instructions
This section is for users already familiar with the Windows or Linux operating systems.
For more information, refer to the pre-installation guidelines in Section 4. For a detailed
description of the installation and configuration procedure, refer to Section 5.
Table 5 Quick Start Instructions — New NIC Driver Installation
NetXen NIC Hardware Windows NIC Driver1
1. Refer to Section 4.3 of this document for more information on Windows pre-installation guidelines.
Linux NIC Commercial Version Driver2
2. Refer to Section 4.2 of this document for more information on Linux pre-installation guidelines.
Pre-Installation
1. Verify the system meets the requirements
described in Section 2.
2. Power down the system.
Installing the NetXen NIC Adapter
1. Insert the NetXen NIC adapter card into an
available PCI Express slot.
2. Connect the appropriate cables to the
board.
3. Power on the system.
Note that the NIC card comes with the
firmware already installed.
Verify NIC Adapter Installation
Once the NetXen NIC adapter has been
installed, verify the installation as follows.
For Linux-based systems, execute the
following command:
lspci -vvv -d 4040
For Windows-based systems, execute the
following sequence:
1. Right-click on My Computer
2. Select Manage;
3. Select Device Manager;
4. Check under Other devices for an
unknown device;
5. Right-click and select Properties for the
unknown device;
6. Select the Details tab and look for
VEN_4040 as part of the string.
Driver Installation
1. Unzip the provided NIC driver files to a
directory.
2. From the Device Manager, scan for new
hardware.
3. When prompted to connect to Windows
Update, Click No, not at this time, then
click Next.
4. In the next window, click Install from a
list of specific location and then click
Next.
5. Select Search for the best driver in these
locations. Select Include this location in
the search.
6. Provide the path to the directory where
the driver nxp2nic.sys3is located.
NIC Card Configuration
1. Open the Network Connections window
from the Control Panel.
2. Verify that NetXen NIC adapter icon says
Connected.
If not, right-click on the NIC Adapter
icon and select Properties, then assign
the IP and subnet addresses and click OK.
3. Use the x86 directory for 32-bit operating systems, and the x64 directory for 64-bit operating systems.
Driver Installation (tar.gz)
1. Untar the file, build, install, and load the
driver:
tar xzf [version].tar.gz
cd [version]
make
make install
modprobe nx_nic
NIC Card Configuration
1. Identify the NetXen Ethernet interface:
cat /proc/net/nx_nic/dev0 | grep eth
2. Assign an IP address:
ifconfig eth[n] [IP address]

3. Quick-Start Installation Instructions
NetXen, Inc. Intelligent NIC Installation and Tuning Guide 5
If a NetXen Intelligent NIC card is already installed on the system and a driver and/or
firmware update is required, refer to the procedure in Table 6 below.
Table 6 Quick Start Instructions — Updating from an Existing Driver and Firmware
Windows Driver/Firmware Update1
1. Refer to Section 4.1 for more information on firmware tools and guidelines.
Linux Driver/Firmware Update1VMware Firmware Update2
2. Refer to Section 4.4 for more information on VMware pre-installation guidelines
Verify Link Status
1. With the existing driver and firmware
installed, verify that the interface is up
before continuing with the firmware
update.
Update to New Firmware
1. Open a Command window.
2. Go to the utils directory in the driver
package provided.
3. The following binaries are required to be
in the same directory from where the
Flash command will be executed:
nxflash.exe
xfp_romimage
cx4_romimage
4. Run the following commands:
nxflash -i NX_NIC --all3
5. Verify the firmware has been updated
using the following command.
nxflash -i NX_NIC --info
Update to the New Driver
1. Install the new driver version.
2. Verify the new driver version.
3. Reboot the system after the firmware
update.
3. Writing of the Flash is a critical operation. Please do not interrupt or reboot during this time.
Verify Link Status
1. With the existing driver and firmware
installed, verify that the interface is up
using ifconfig before continuing with the
firmware update.
Update to New Firmware
1. Run the following command from the bin
directory of the driver:
./nxflash -i eth[n] --all3
Unload and Remove the Existing
Driver
1. Unload the existing driver.
ifconfig eth[n] down
rmmod nx_nic
2. Remove the existing driver module.
rm -f /lib/modules/[kernel version]/
kernel/
drivers/net/nx_nic.ko4
Reboot the System
1. After the new firmware has been flashed
and the old firmware has been removed,
reboot the system.
Update to the New Driver
1. Update to the new driver as follows:
tar xzf [version].tar.gz
cd [version]
make
make install
modprobe nx_nic
2. Ensure that the Ethernet interface is up.
ifconfig eth[n] <ip addr> up
4. For Linux kernel 2.4, the driver will appear as a nx_nic.o file.
Firmware Update Methods
There are three ways to perform a firmware
update in VMware.
1. Using a non-virtualized Linux OS host.
2. Using a non-virtualized Windows OS
host.
3. Using the NetXen LiveCD.
For a VMware firmware update using a non-
virtualized Linux OS, first perform the steps
listed in the rightmost column of Table 5
above, “Linux NIC Driver Installation”.
Next perform the steps listed in the middle
column of Table 6, “Linux Driver/Firmware
Update”.
For a VMware firmware update using a non-
virtualized Windows OS, first perform the
steps listed in the middle column of Table 5
above, “Windows NIC Driver Installation”.
Next perform the steps listed in the leftmost
column of Table 6, “Windows Driver/
Firmware Update”.
For a firmware update using the NetXen
LiveCD, download the NetXen LiveCD5
ISO image and burn that image onto a CD
and boot the system with the CD. Use option
2 from the LiveCD menu shown below to
update the flash on the card.
NetXen LiveCD Firmware Update
Menu Options:
1. Show NetXen board information
2. Update to latest firmware on NetXen
board
3. Reboot system if firmware has been
updated
Enter here:
5. Refer to the support page on the on NetXen web site for more information on downloading the LiveCD.

6Intelligent NIC Installation and Tuning Guide NetXen, Inc.
3. Quick-Start Installation Instructions
Once the WIndows or Linux NIC installation is complete as described in the previous tables, the following
procedures in Table 7 can be used to enable the Linux LSA driver.
Table 7 Quick Start Instructions — Enabling Linux LSA Driver
Enabling Linux LSA Driver
Note: the Linux NIC driver must be installed before executing the procedure below.
1. Untar the file, build, and load the drivers.
tar xzf [version]-lsa.tar.gz
cd [version]-lsa
make
cd driver
insmod ./nx_intercept.ko
insmod ./nx_lsa.ko
2. To verify the LSA driver is operating, execute the following command:
cat /proc/net/nx_nic/lsa_1/stats
3. Example for offloading iperf.
cd ../nxoffload
./nxoffload –a –n iperf
4. To display the current offload rules execute the following:
./nxoffload -s

4. Pre-Installation Guidelines
NetXen, Inc. Intelligent NIC Installation and Tuning Guide 7
4 Pre-Installation Guidelines
This section should be read before proceeding to Section 5.
4.1 Guidelines on Firmware Tools and Processes
The following is a brief summary of guidelines on firmware tools and processes.
Do not interrupt the firmware update process.
Backup image file creation and recovery.
NIC driver required to work with the Flash tool.
Flash tool can use appropriate firmware image.
Updating the firmware if a “Failed” message appears.
Each of these guidelines is described in more detail below.
1During the firmware update process do not reboot or stop the update process.
2A backup image of the existing firmware will be created at the start of the firmware
update process. The flash utility will use the backup image to recover if required.
3The flash tool will not start the firmware update process if the NIC driver is not loaded.
4The flash tool auto-identifies the appropriate firmware image for the XFP and CX4
during updates.
5For cards with firmware older than 3.4.216 and certain cards it might be required to
specify the firmware image to use with the nxflash utility:
a. If the following failure message appears, use the steps in either b or c.
b. Run either command from Linux or Windows as shown below:
For Linux:
./nxflash -i eth[n] --all cx4_romimage --- Specify the romimage type (CX4 or XFP).
# ./nxflash -i eth2 --all
NETXEN Interface is eth2
NETXEN Port is Port 0
Verifying flash...Done.
0/9 - Init
*** Currently in Flash ***
Board Type : XGb CX4 --- Use this information for step b.
Firmware Version : 3.4.28
MAC Address 0 : 00:0E:1E:00:45:52
Serial Number : WD78MK0010
9/9 - Finished
Failed to write flash for 'nic' product

8Intelligent NIC Installation and Tuning Guide NetXen, Inc.
4. Pre-Installation Guidelines
For Windows:
nxflash.exe -i NX_NIC --all cx4_romimage --- Specify the romimage type.
With this method there will be a prompt asking for an Y(es) or N(o) to allow the
upgrading of the firmware to continue. Please press the Y key to continue.
c. Download the NetXen LiveCD ISO image and burn that image onto a CD and
boot the system with the CD. Use option 2 from the LiveCD menu shown below to
update the flash on the card. Refer to the support page on the on NetXen web site
for more information on downloading the LiveCD.
Netxen LiveCD menu screen:
NetXen LiveCD Firmware Update
Menu Options:
1. Show NetXen board information
2. Update to latest firmware on NetXen board
3. Reboot system if firmware has been updated
Enter here:

4. Pre-Installation Guidelines
NetXen, Inc. Intelligent NIC Installation and Tuning Guide 9
4.2 Linux Guidelines
The following material should be read before starting a Linux installation.
The following is a brief summary of Linux installation guidelines.
Kernel source and header packages must be installed to build the kernel driver.
Determining GPL inbox Kernel drivers.
Requirements for Linux LSA driver installation.
MSI-X initialization and support.
Location of auto-load firmware file.
Host memory support.
Each of these guidelines is described in more detail below.
4.2.1 Building the Linux Driver Source Code
Linux kernel source/headers are required to compile the drivers provided in source code
format. Some Linux OS distributions may not install the kernel source/headers by default.
But the headers can be added from the Linux OS Distribution disk using the package
manager.
4.2.2 Linux NIC - GPL Inbox Kernel and Commercial Drivers
The NetXen Linux NIC driver is available in GPL version and it is included in the Linux
kernels available from kernel.org (netxen_nic).
Note that the commercial version of the NIC driver (nx_nic) contains the most recent
release updates.
1Starting with Linux distribution SLES 10SP1 & RHEL5U1 and linux kernel version
2.6.20 and later, include the Linux GPL version of the driver module -- netxen_nic.ko
NetXen Linux GPL inbox driver
Driver name: netxen_nic.ko
Version: 3.3.25 or 3.4.2 and later
2The netxen_nic.ko driver can be identified using lsmod | grep netxen_nic
3The Linux GPL driver, netxen_nic.ko can be disabled by:
i. rmmod netxen_nic
ii. Removing or renaming the netxen_nic.ko file from /lib/modules/<uname -r>/
kernel/drivers/net/netxen directory
4The NetXen commercial driver nx_nic.ko, which is included in this release can be
enabled after the Linux GPL driver is disabled.
5The utilities provided in this release are supported ONLY for the commercial version
of the driver.

10 Intelligent NIC Installation and Tuning Guide NetXen, Inc.
4. Pre-Installation Guidelines
4.2.3 Linux LSA Driver Installation (NIC Commercial Driver Only)
1First install and load the Linux NIC driver (nx_nic.ko).
2Next install and load the LSA intercept driver (nx_intercept.ko).
3The LSA intercept driver must be running before loading and using the Linux LSA
driver (nx_lsa.ko).
4LSA is not supported under 2.4 Linux kernel and older 2.6 Linux kernels running
RHEL4 and SLES9.
5The current release supports LSA only under the Linux commercial version of the NIC
driver, not on the GPL version of the NIC driver
6The NetXen Linux LSA driver supports host system that has 32 GB or more of RAM
on Linux kernels 2.6.15 and above. Support for GFP_DMA32 is required to properly
map virtual address to the first 4 GB of physical memory. The LSA driver will report
that LSA is disabled in dmesg and LSA will not be functional.
From dmesg:
nx_tnic_adapter_init[240]: More than 32G memory on C1 card, disable LSA
4.2.4 MSI-X Initialization and Support
1For MSI-X initialization to work on the NetXen adapter, with 3.4.337 or later release
version, the 3.4.337 firmware must be flashed onto the adapter by upgrading with the
nxflash utility to this release.
Note: System reboot is required for the MSI-X to take effect when upgrading to
3.4.337 for the first time.
2Once the system has been started with firmware at 3.4.337 level or higher then MSI-X
will be initialized and for future releases a system reboot after driver update is no
longer required.

4. Pre-Installation Guidelines
NetXen, Inc. Intelligent NIC Installation and Tuning Guide 11
3If a firmware that is older than 3.4.337 has been flashed on the adapter and the driver
from this release has been loaded, then MSI will be enabled.
To verify which firmware version is loaded on the adapter and which firmware version
is being used and active, run this command:
In the above case since the version 3.4.216 firmware was on the flash of the adapter
and the adapter had booted with this older version then MSI will be enabled and not
MSI-X as shown by using "cat /proc/interrupts".
# cat /proc/interrupts
CPU0 CPU1 CPU2 CPU3
...
98: 66719219 0 74 0 PCI-MSI eth2
After upgrading the flash (please refer to the Quick Start Section of the Installation
and Tuning Guide) and rebooting the system, MSI-X has now been enabled as shown
below by running cat /proc/interrupts.
# cat /proc/interrupts
CPU0 CPU1 CPU2 CPU3
..
106: 9 0 29 0 PCI-MSI-X eth2
114: 0 0 0 0 PCI-MSI-X eth2:1
122: 0 0 0 0 PCI-MSI-X eth2:2
130: 0 0 0 0 PCI-MSI-X eth2:3
4To support RSS there are 4 MSI-X interrupts available to send interrupts to any CPU.
The current implementation will by default enable 4 MSI-X interrupts on all systems.
[3.4.33x/bin]# ./nxflash -i eth2 --info
NETXEN Interface is eth2
NETXEN Port is Port 0
Verifying flash...Done.
Board Type : XGb XFP
Board Chip Rev : C1
Serial Id : MX78MK0022
Firmware version(on Flash) : 3.4.216
Active Firmware version : 3.4.337
Driver version : 3.4.337
BIOS version : 1.0.2
MAC Addr 0 : 00:0E:1E:01:08:21
Subsystem ID : 0x00014040
PXE Status : Disabled

12 Intelligent NIC Installation and Tuning Guide NetXen, Inc.
4. Pre-Installation Guidelines
4.2.5 Auto-load Firmware Location
Firmware ROM image file, nxromimg.bin, will be placed in the /lib/firmware directory.
4.2.6 Host Memory Support
The NetXen Linux driver supports host system that has 32 GB or more of RAM by making
a change to the kernel boot setting is required. Alternatively, lowering the amount of
memory the system utilizes by either adjusting the kernel boot setting or physically
reducing the memory on the system can also work.
These 3 methods are described below:
Method 1 Change to kernel boot file to support NetXenLinux driver on host systems with
32GB or more:
For Intel based systems:
Added settings: iommu=soft swiotlb=131072
For AMD based systems:
Added settings: iommu=memaper=4
In some cases, the kernel may fail to allocate requested aperture (there will be error
messages on the system console and in the log file using the dmesg command).
When this is the case, reduce the aperture size with the following kernel command
line parameter rather than the one outlined above: iommu=memaper=3
And loading of the nx_nic driver will require either one of the following settings:
insmod nx_nic.ko rdesc_10g=16384 jumbo_desc=64
or
modprobe nx_nic rdesc_10g=16384 jumbo_desc=64
For Redhat distributions:
The /etc/grub.conf file needs to have the additions made to the boot entry.
Example modified grub.conf entry for AMD system:
title Red Hat Enterprise Linux Server (2.6.18-8.el5)
root (hd0,0)
kernel /boot/vmlinuz-2.6.18-8.el5 ro root=LABEL=/ iommu=memaper=4
initrd /boot/initrd-2.6.18-8.el5.img

4. Pre-Installation Guidelines
NetXen, Inc. Intelligent NIC Installation and Tuning Guide 13
For Suse distributions:
The /boot/grub/menu.lst file needs to have the additions made to the boot entry.
Example modified menu.lst entry for Intel system:
Method 2 Lower the amount of memory from the kernel boot file to access less than
32GB of memory.
Add a "mem=31744m" to entry for the either the grub.conf on RHEL or menu.lst on
SLES.
For Redhat distributions:
The /etc/grub.conf file needs to have the additions made to the boot entry.
Example modified grub.conf entry for AMD system:
For Suse distributions:
The /boot/grub/menu.lst file needs to have the additions made to the boot entry.
Example modified menu.lst entry for Intel system:
Method 3 Reduce the amount of memory on the system by physically removing the
DIMMs or switching to lower density DIMMs (i.e swapping 8GB DIMMs with
4GB DIMMs). Memory must be below 32GB for this to function properly.
title SLES9 SP3 x86_64 Linux(new)
kernel (hd0,1)/boot/vmlinuz root=6802 vga=0x317 selinux=0 splash=silent
resume=/dev/cciss/c0d0p1 elevator=cfq showopts iommu=soft swiotlb=131072
initrd (hd0,1)/boot/initrd
title Red Hat Enterprise Linux Server (2.6.18-8.el5)
root (hd0,0)
kernel /boot/vmlinuz-2.6.18-8.el5 mem=31744m ro root=LABEL=/
initrd /boot/initrd-2.6.18-8.el5.img
title SLES9 SP3 x86_64 Linux(new)
kernel (hd0,1)/boot/vmlinuz root=6802 vga=0x317 selinux=0 splash=silent
resume=/dev/cciss/c0d0p1 elevator=cfq showopts mem=31744m
initrd (hd0,1)/boot/initrd

14 Intelligent NIC Installation and Tuning Guide NetXen, Inc.
4. Pre-Installation Guidelines
4.3 Windows Guidelines
The following material should be read before starting a Windows installation.
The following is a brief summary of Windows installation guidelines.
Windows service pack requirement.
Windows host memory requirement.
Location of auto-load firmware file.
Each of these guidelines is described in more detail below.
1SP2 (Service Pack) Support: SP2 must be installed for the latest Windows Server
fixes.
2Host Memory Support: The current release of NetXen Windows driver supports less
than 32 GB of RAM. If the host system has 32 GB or more of RAM, reduce the host
memory to be less than 32 GB.
Under Windows, you may modify BOOT.INI file with "/maximum=31744" option, which
limits the amount of RAM to 31 GB.1
3Auto-load Firmware Location: Firmware ROM image file, nxromimg.bin, will be placed
in the C:\WINDOWS\system32\drivers directory.
4.4 VMware Guidelines
The following material should be read before starting a VMware installation.
The following is a brief summary of VMware installation guidelines.
Currently supported OS versions.
System requirements.
NetXen driver support in VMware ESX 3.5.
Verify NetXen NIC firmware version.
Each of these guidelines is described in more detail below.
1NetXen driver and firmware is supported on VMware ESX 3.5 OS release.
2System Requirements:
NetXen Driver Name -- unm_nic (Included in the ESX 3.5 OS Release)
NetXen Driver Version -- 3.4.115 (Included in the ESX 3.5 OS Release)
NetXen Firmware Version2-- 3.4.115 or later GA release versions
NetXen Firmware Update Tool -- Not included on the ESX 3.5 OS Release
Host Memory -- Supports less than 32GB of RAM for the 3.4.115
driver version1
2. Required to be flashed on the card for VMware support.

4. Pre-Installation Guidelines
NetXen, Inc. Intelligent NIC Installation and Tuning Guide 15
3The VMware ESX 3.5 OS release contains two sets of NetXen drivers.
By default the ESX server will load the vmkernel version and allows virtual machines
to utilize the driver from the virtual switch.
There is also a VMware Linux console driver version that can be used by the CLI of
the ESX server that runs under the Linux 2.4 kernel.
Both drivers are version 3.4.115 by using the steps below you can utilize the VMware
Linux console driver for the NetXen card to update the firmware.
4How to check the NetXen NIC firmware version from VMware ESX Linux console.
Log onto the VMware Linux console by pressing ALT-F1 from that server and log onto
that system as root.
a) Locate the correct vmnic number by running: ifconfig -a
Look for the 00:0E:1E that indicates this is a NetXen card's MAC address:
b) Run ethtool on this interface to get the details: ethtool -i vmnic2
Example output below:
If the firmware version is earlier than 3.4.115, refer to the right column in
Table 6 for more information on the VMware firmware update procedure.
vmnic2 Link encap:Ethernet HWaddr 00:0E:1E:01:DD:37
UP BROADCAST RUNNING MULTICAST MTU:8000 Metric:1
RX packets:283654981 errors:0 dropped:0 overruns:0 frame:0
TX packets:94696468 errors:0 dropped:0 overruns:0 carrier:0
collisions:0 txqueuelen:1000
RX bytes:1310756904 (1250.0 Mb) TX bytes:1652504917 (1575.9 Mb)
Interrupt:121
driver: unm_nic
version: 3.4.115
firmware-version: 3.4.19 -- Check here for firmware version
bus-info: 0d:00.0

16 Intelligent NIC Installation and Tuning Guide NetXen, Inc.
5. Detailed Installation and Configuration
5 Detailed Installation and Configuration
5.1 Installing and Connecting the Intelligent NIC Adapter
1Verify that the system is powered off.
2Remove the system cover.
3Locate the x8 PCIe slot if one is available.
4Once the bracket is removed, insert the adapter into the PCI Express slot1. Apply
uniform pressure on top of the board until it is firmly seated in the bus connector.
1. Due to space constraints in some systems, when installing an XFP board, it may be necessary to first remove the
XPF module from the board, insert the board into the PCI slot, then reconnect the XFP module to the board.
Identify x8 slots for
optimal performance
This manual suits for next models
2
Table of contents
Other NetXen Network Card manuals
Popular Network Card manuals by other brands

Lexmark
Lexmark N8050 user guide
Extron electronics
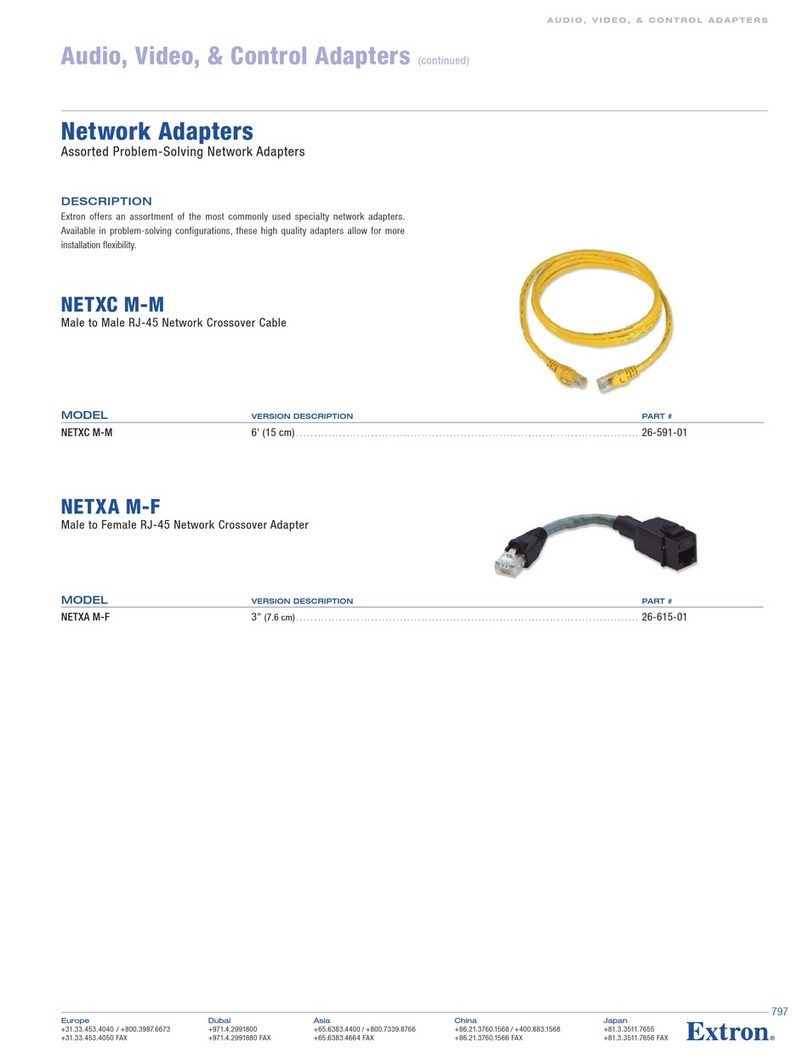
Extron electronics Network Adapters NETXA M-F Specifications
Bosch
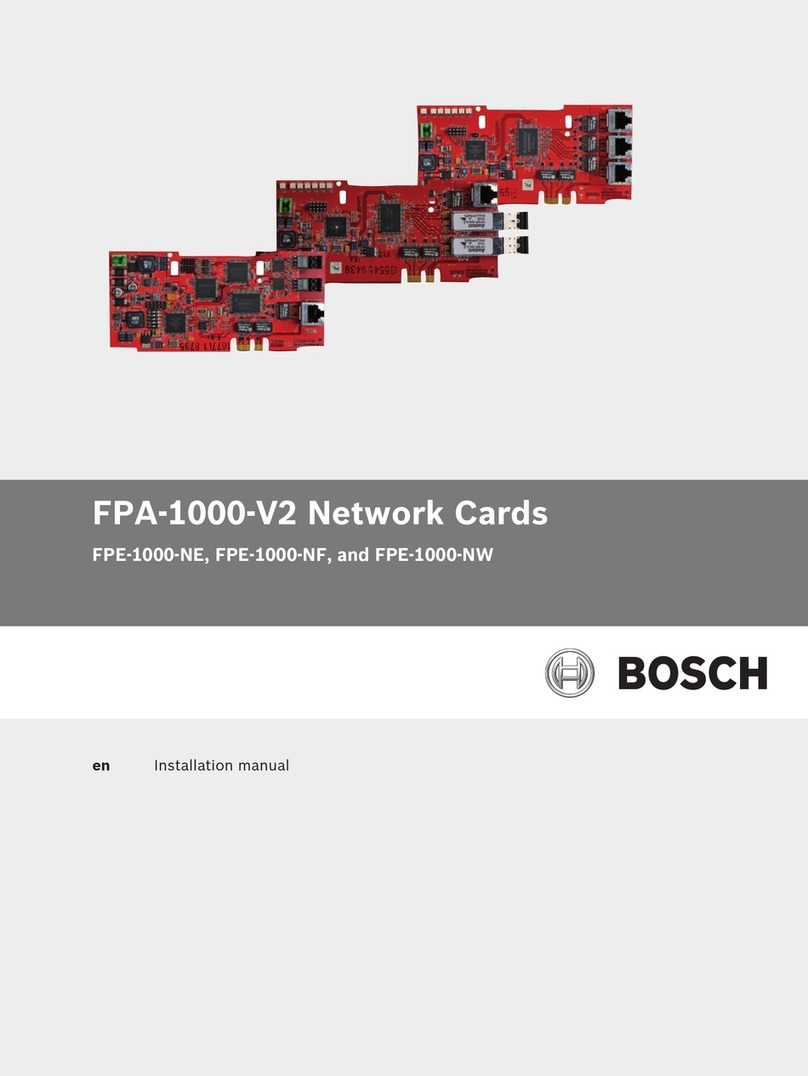
Bosch FPE-1000-NE installation manual
Airlinkplus
Airlinkplus AWLH3025 user manual
RTS
RTS Digital Matrix Intercom RVON-8 user manual
Transition Networks
Transition Networks N-FXE-xxx-01 user guide

Sierra Wireless
Sierra Wireless AirCard 550 user guide

Asus
Asus WL-160W quick start guide

Lenovo
Lenovo 30221CU - H230 CORE2DUO 500GB Desktop Notice
3Com
3Com 3CR990 quick start guide
Linksys
Linksys WGA600N - Wireless-N Gaming Adapter Bridge Quick installation guide
CNET
CNET CN40BC Frequently asked questions
