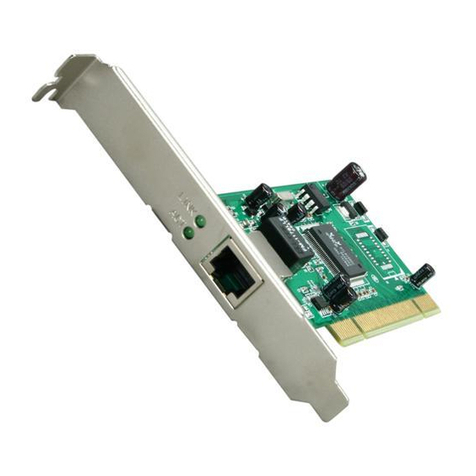
manuals.online logo
Brands
  1. Home
  2. •
  3. Brands
  4. •
  5. Allied Telesis
  6. •
  7. Network Card
  8. •
  9. Allied Telesis AT-2700 series User manual

Allied Telesis AT-2700 series User manual

SAFETY
Electrical Safety TUV-EN60950, UL1950, CSA 950
Laser EN60825
This is a “CLASS 1 LED PRODUCT”
Warning Do not stare into the Laser beam.
OPERATING TEMPERATURE
This product is designed for a maximum ambient temperature of 50 degrees C.
ALL COUNTRIES: Install product in accordance with local and National Electrical Codes.
SICHERHEIT
Elektrische Sicherheit TUV-EN60950, UL1950, CSA 950
Laser EN60825
Das ist ein “LED Produkt der Klasse 1”
WARNUNG Nicht direkt in den Strahl blicken.
BETRIEBSTEMPERATUR
Dieses Produkt wurde für den Betrieb in einer Umgebungstemperatur von nicht mehr als or 50° C entwor-
fen.
ALLE LÄNDER: Installation muß örtlichen und nationalen elektrischen Vorschriften entsprechen.
SIKKERHED
Elektrisk sikkerhed TUV-EN60950, UL1950, CSA 950
Laser EN60825
Dette er et “PRODUKT UNDER KLASSE 1 LED”
ADVARSEL Stirr ikke på strålen.
BETJENINGSTEMPERATUR
Dette apparat er konstrueret til en omgivende temperatur på maksimum 50 grader C.
ALLE LANDE: Installation af produktet skal ske i overensstemmelse med lokal og national lovgivning for
elektriske installationer.
VEILIGHEID
Electrische Veiligheid TUV-EN60950, UL1950, CSA 950
Laser EN60825
Dit is een “KLASSE 1 LED-PRODUKT”
WAARCHUWING Neit in de straal staren.
BEDRIJFSTEMPERATUUR
De omgevingstemperatuur voor dit produkt mag niet meer bedragen dan 50 graden Celsius.
ALLE LANDEN: het toestel installeren overeenkomstig de lokale en nationale elektrische voorschriften.
SÉCURITÉ
Sécurité électrique TUV-EN60950, UL1950, CSA 950
Laser EN60825
Ce matériel est un “PRODUIT À DIODE ÉLECTROLUMINESCENTE DE CLASSE 1”
ATTENTION Ne pas fixer le faisceau des yeux.
TEMPÉRATURE DE FONCTIONNEMENT
Ce matérielest capable de tolérer une température ambiante maximum de 50 degrés Celsius.
POUR TOUS PAYS : Installer le matériel conformément aux normes électriques nationales et locales.
TURVALLISUUS
Sähköturvallisuus TUV-EN60950, UL1950, CSA 950
Laser EN60825
Tämä on “ENSIMMÄISEN LUOKAN VALODIODITUOTE”
VARIOTUS Älä katso säteeseen.
KÄYTTÖLÄMPÖTILA
Tämä tuote on suunniteltu ympäröivän ilman maksimilämpötilalle 50 °C.
KAIKKI MAAT: Asenna tuote paikallisten ja kansallisten sähköturvallisuusmääräysten mukaisesti.
NORME DI SICUREZZA
Sicurezza elettrica TUV-EN60950, UL1950, CSA 950
Laser EN60825
Questo è un“PRODOTTO CON LED DI CLASSE 1”
AVERTENZA Non fissare il raggio con gli occhi.
TEMPERATURA DI FUNZIONAMENTO
Questo prodotto è concepito per una temperatura ambientale massima di 50 gradi centigradi.
TUTTI I PAESI: installare il prodotto in conformità delle vigenti normative elettriche nazionali.
SIKKERHET
Elektrisk sikkerhet TUV-EN60950, UL1950, CSA 950
Laser EN60825
Dette er et “KLASSE 1 LED PRODUKT”
ADVARSAL Stirr ikke på strålen.
DRIFTSTEMPERATUR
Dette produktet er konstruert for bruk i maksimum romtemperatur på 50 grader celsius.
ALLE LAND: Produktet må installeres i samsvar med de lokale og nasjonale elektriske koder.
SEGURANÇA
Segurança Eléctrica TUV-EN60950, UL1950, CSA 950
Laser EN60825
Este é um “PRODUTO CLASSE 1 LED”
AVISO Não olhe fixamente para o raio.
TEMPERATURA DE FUNCIONAMENTO
Este produto foi projetado para uma temperatura ambiente máxima de 50 graus centígrados.
TODOS OS PAÍSES: Instale o produto de acordo com as normas nacionais e locais para instalações
elétricas.
SEGURIDAD
Seguridad eléctrica TUV-EN60950, UL1950, CSA 950
Laser EN60825
Este es un “PRODUCTO DE DIODO LUMINISCENTE (LED) CLASE 1”
¡ADVERTENCIA! No mirat fijamente el haz.
TEMPERATURA REQUERIDA PARA LA OPERACIÓN
Este producto está diseñado para una temperatura ambiental máxima de 50 grados C.
PARA TODOS LOS PAÍSES: Monte el producto de acuerdo con los Códigos Eléctricos locales y nacionales.
2
SÄKERHET
Elsäkerhet TUV-EN60950, UL1950, CSA 950
Laser EN60825
Detta är en “KLASS 1 LYSDIODPRODUKT”
VARNING! Laserstrålning när enheten är öppen.
DRIFTSTEMPERATUR
Denna produkt är konstruerad för rumstemperatur ej överstigande 50 grader Celsius.
ALLA LÄNDER: Installera produkten i enlighet med lokala och statliga bestämmelser för elektrisk utrust-
ning.
Sources of Information
This guide gives the instructions for installation of a single AT-2700 PCI
Fast Ethernet Network Adapter Card in a Microsoft Windows environ-
ment. More information is available for other applications of the adapter
card.
•SETUP27 program—The CardAssistant diskette contains text files
with installation and configuration information for each
environment. Use the program SETUP27.EXE to find the
information you need for your situation. (To view information
files, insert the CardAssistant diskette in the floppy drive and type
a:\setup27.)
•Documentation on the Web—The Allied Telesyn website,
http://www.alliedtelesyn.com, provides a searchable instruction
guide in .pdf format for configuring and troubleshooting the
AT-2700 PCI Fast Ethernet Network Adapter Card. (Browse to the
manual list in the Technical Support section of the Allied Telesyn
website.)
If you are using the AT-2700 PCI Fast Ethernet Network Adapter Card in
a different environment refer to “Advanced Topics” on page 6 of this
guide.
Preparing for Installation
These instructions assume the computer operating system is installed
according to your computer’s documentation. For the majority of appli-
cations, installing the AT-2700 PCI Fast Ethernet Network Adapter Card
involves plugging the adapter card into a PCI slot in your computer and
installing the driver software. The driver files for the AT-2700 PCI Fast
Ethernet Network Adapter Card are found on the Allied Telesyn CardAs-
sistant diskette, which you will be prompted to insert into the floppy
drive.
Install the Adapter Card
Warning—High voltages inside the computerpresent a safety hazard.Make
sure the power is off before removing the cover. This LAN adapter card is for
use only with IBM or compatible UL-listed personal computers that have
installation instructions detailing installation of adapter card-cage accesso-
ries. Installation should be performed with precautions to prevent damage
to static-sensitive components.
Follow your computer’s instruction manual for specific information on
installing peripheral devices in your computer.
Once the adapter card is seated in a PCI slot and the computer’s cover is
back on, plug in the UTP cable, turn on the power, and reboot into
Windows.
Important cable considerations: AT-2700TX
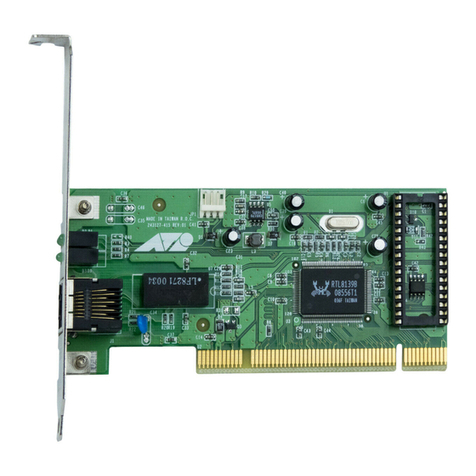
The AT-2700TX is for use with 10Base-T or 100Base-TX LAN segments,
using an 8-pin (4-pair) RJ45 jack for the network cable. Be sure that all
cabling used with the AT-2700 PCI Fast Ethernet Network Adapter Card
in a 10Base-T segment is of category 3, 4 or 5, and that all cabling used in
a 100Base-TX segment is of category 5.
3
Important cable considerations: AT-2700FX
The cable must comply with the IEEE 802.3 100Base-FX standard for
62.5/125 µm multi-mode fiber cable. The cable between the computer
and the hub must be lessthan 2000 meters long for full-duplex operation
and 412 meters long for half-duplex operation. The transmit circuit of
the adapter card is connected to the receive circuit of the hub and vice
versa.
Check your Windows version
The Allied Telesyn AT-2700 CardAssistant diskette provides drivers for
Windows 95, Windows 98, Windows NT and version 3.11 of Windows
for Workgroups. If you don’t know your Windows version, open the
Microsoft Windows System Control Panel. Under the General tab ofthe
System Properties dialog box, note your System release number. Pick the
driver you need from the following table sothat you can point Windows
to the right directory on the CardAssistant diskette during installation.
Install the Drivers
Windows 95 or Windows 98
From the Windows version table above, determine whether you need the
NDIS3 driver or the NDIS4 driver. Install the AT-2700 PCI Fast Ethernet
Network Adapter Card and start Windows. The New Hardware Found
dialog box appears, and you are prompted for the driver.
Insert the CardAssistant diskette, and direct Windows to the location of
the driver: type a:\ for the NDIS4 driver and a:\ndis3 for the NDIS3
driver.
Make sure Allied Telesyn AT-2700 PCI Fast Ethernet Network Adapter
Card appears in the driver found dialog box. Follow the Windows
instructions, supplying Windows files as needed. Windows prompts you
to restart the computer. You are ready to access your network.
Windows NT
With the AT-2700 PCI Fast Ethernet Network Adapter Card installed and
Windows NT started, you are ready to install the driver.
1. Open the add adapter dialog box as follows:
NT 4.x—double-click the Network icon in the Control panel.
Then select the Adapters tab and click the Add button.
NT 3.5x—open the Main program group by double-clicking its
icon; then double-click the Control Panel icon, double-click the
Network icon, and click Add Adapter from the Network box.
2. Insert the AT-2700 CardAssistant diskette into your floppy drive.
Choose install from manufacturer's diskette as follows:
NT 4.x—click the Have Disk button in the Select Network Adapter
pop-up window. In the text field of the dialog box, type: a:\ and
choose OK.
NT3.5x—choose <OTHER> REQUIRES DISK from Manufacturer
in the Network Adapter Card drop-down list. Then click Continue.
Operating System Release Driver Location
Windows 95 4.00.950, 4.00.950a NDIS3 a:\ndis3
4.00.950b, 4.00.950c NDIS4 a:\
Windows NT 3.5 or 3.5.1 NDIS3 a:\ndis3
4 or above NDIS4 a:\
Windows 98 All NDIS4 a:\
Windows for Workgroups 3.11 NDIS2 a:\
4
In the text field of the dialog box, type: a:\ndis3 and choose
OK.
3. Verify that Allied Telesyn AT-2700 PCI Fast Ethernet Network
Adapter Card appears in the Select OEM option dialog box and
choose OK.
4. In the Network Settings dialog box, verify that Allied Telesyn
AT-2700 PCI Fast Ethernet Network Adapter Card appears in the
Installed Adapter Cards list. If you wish, you can configure net-
work protocols you will be using for network communications.
Select the protocols used on your network, and when you are
done, click OK (Close in Windows NT 4.0).
5. From the Network Settings Change dialog box, click Restart Now.
After the Windows NT operating system shuts down, restart your
computer.
This completes the installation. You are ready to access your network.
Note—If you’re installing multiple cards on the same computer, see
CardAssistant information file for Windows NT. (To view information files,
insert the CardAssistant diskette in the diskette drive and type
a:\
setup27).
Windows for Workgroups (WFW) 3.11
With the AT-2700 PCI Fast Ethernet Network Adapter Card installed,
start Windows for Workgroups. You are ready to install the driver.
1. From the Network group in Program Manager, choose Network
Setup.
2. In the Network Setup dialog box, choose Networks.
3. In the Networks dialog box, verify that Install Microsoft Windows
Network is selected. Then choose OK.
4. In the Network Setup dialog box, choose Sharing.
5. In the Sharing dialog box, select whether to allow file and/or
printer sharing with other users.
6. In the Network Setup dialog box, choose Drivers. Then, in the Net-
work Drivers dialog box, choose Add Adapter.
7. In the Add Network Adapter dialog box, select Unlisted or Updated
Network Adapter. Then choose OK.
8. Insert the AT-2700 CardAssistant diskette into your floppy drive.
In the text box of the Install Driver dialog box, type: a:\ and
choose OK.
9. In the Network Adapters list of the Unlisted or Updated Network
Adapter dialog box, verify that AT-2700 PCI Fast Ethernet Network
Adapter Card is highlighted. Then choose OK.
10. In the Network Drivers dialog box, verify that the AT-2700 PCI Fast
Ethernet Network Adapter Card and its default protocols, Microsoft
NetBEUI and IPX/SPX Compatible Transport with NetBIOS,
appear in the Network Drivers list. Then choose Close.
11. In the Network Setup dialog box, choose OK.
12. If prompted, insert the required WFW diskette(s) into your floppy
drive and then choose OK. (WFW occasionally loses its place at
this point; if you get a message from Windows that it can’t find a
file, try inserting WFW install diskettes 7 and 8.)
13. If prompted, reinsert the CardAssistant diskette into your floppy
drive. In the text box of the Install Driver dialog box, choose OK.
14. From the Windows Setup dialog box, choose Restart Computer.
This completes the installation. You are ready to access your network.
5
The Configuration and Diagnostics Utility: SETUP27
In PCI Ethernet adapter cards, most operating parameters are under
PCI-bus control. The Allied Telesyn SETUP27 configuration and diag-
nostics program allows you to:
• View the configuration
• Run diagnostic tests on the EEPROM, on adapter card/computer
communications, and on network communications
• View context-sensitive configuration and diagnostics help
• Switch between full- and half-duplex (requires a full-duplex hub;
default is half-duplex) or force speed (default is auto detect)
• View configuration-information files about many different
network operating systems
Although not required for operation, it’s a good idea to run diagnostic
tests every time you install an adapter; first test the adapter card off the
network, then again after attaching it to the network. If you are installing
the AT-2700 PCI Fast Ethernet Network Adapter Card in a network oper-
ating system not covered in this guide, you also may wish to consult one
of the information files available through SETUP27.
To launch and run SETUP27:
1. Reboot the computer in DOS with no drivers loaded. (In Windows
9x, boot into the Command prompt only option. Press the F8 key
when the message Starting Windows 9x appears, and select Startup
Menu choice6. Command prompt only.)
2. Insert the CardAssistant diskette in the floppy drive and launch
SETUP27; type a:\setup27.
3. The opening screen displays a table of adapter cards installed in
your computer. Select the adapter card you wish to view. Select
Configuration or Diagnostics or View information from the main
menu. (To see a help screen within SETUP27, press the F1 key.)
To run the network diagnostics:
The CardAssistant Network test is a live send/receive exercise, involving
sending packets to a respondent (or more) on the network and counting
the responses. You set up at least one computer to act as responder first
then set up and start the sender. For each computer:
1. Make sure the cable is connected to the network and you get a
valid Link indication.
2. Launch SETUP27, choose an adapter card from the opening
screen, and from the main menu select Diagnostics and then select
Network test.
3. Press F5 to start the sending machine. The sender counts packets
sent and received. The number of packets received should be the
number sent times the number of respondents.
LED Status
Label Function Description
100 100 Mbps Connection established at 100 Mbps
ACT Activity Read/write activity on the segment
LNK Link pulse Link pulse detected on segment
6
Advanced Topics
Allied Telesyn supplies information files on the CardAssistant diskette
and an on-line guide on our website.
If you are installing the adapter card in one of the following situations,
you may wish to refer to this additional information for the particular
network software you are using.
Multiple card installation ✓
How to see MAC address ✓
Novell server support ✓
ODI support ✓
UNIX support ✓
Removing a driver ✓
Files needed for install listed ✓
Advanced cabling considerations ✓
Sample configuration files ✓
PCI bus considerations ✓
100 Megabit considerations ✓
Full-duplex operation ✓
ACPI/Wake on LAN ✓
To view SETUP27 topics
Insert the CardAssistant diskette in the diskette drive and type:
a:\setup27
To view the on-line guide
Point your browser to http://www.alliedtelesyn.com. The manuals are
located in the Technical Support section in .pdf format.
Troubleshooting Tips
A networked computer system is a complex combination of hardware
and software, all of which must function for data communication to
work. Although most problems occur when the adapter card is first being
installed or when someone changes something in the network, a problem
could be caused by your computer software, by cabling, or by many com-
ponents elsewhere inthe network. The following list offers some general
guidelines for troubleshooting the AT-2700 PCI Fast Ethernet Network
Adapter Card.
1. Carefully observe the behavior of the system and identify the exact
symptoms. Gather information about the system and its compo-
nents, such as device drivers, memory and extensions (e.g.,
QEMM), other peripheral adapter cards and the use of I/O ports
and IRQs. Record your interaction with the computer, noting the
conditions, your actions and the responses. Analyzing this infor-
mation will help you diagnose the cause of the failure. Experiment
with possible solutions.As you experiment, vary only one factor
at a time.
2. Substitute known good equipment to see if the problem is elimi-
nated.
3. Don’t overlook the obvious. Make sure the adapter card is seated
in the computer and the cables and connectors are securely
attached.
4. Check your computer manual for BIOS Setup instructions (some-
times called CMOS Setup). Make sure the PCI slot is enabled. In
some mixed ISA/PCI PCs you must make sure the PCI slot has a
unique interrupt request (IRQ) number assigned.
7
5. Check the LNK indicator light. If the LNK indicator does not
light, make sure the cabling is intact and connected to a function-
ing network port, and the network port speed and duplex settings
match those of the network adapter card. If the LNK indicator
lights but data transfer is slow, collision-prone, or non-existent,
verify that your cable is of Category 3, 4, or 5. Category 1 and 2
voice-grade cable will not work properly. If the cable is more or
less round in section, you probably have data grade cable, cor-
rectly paired, and no transmission problems. If, however, the cable
appears flat in cross-section (as Silver Satin telephone-type cable)
you probably have voice-grade cable and transmission problems.
If it looks like telephone cable, double-check.
6. If you are using EMM386.EXE, verify that you have version 4.49
or higher. Lower versions of EMM386 can cause a PCI machine to
lock up or reboot. Version 4.49 ships with DOS 6.22 and is avail-
able on the Microsoft forum on CompuServe.
7. If you suspect the network adapter card is not working properly,
disconnect the network cable and run CardAssistant diagnostics
after rebooting and with no drivers loaded. If CardAssistant soft-
ware does not detect the adapter card, it could mean a conflict
between the adapter card and another device, an adapter card fail-
ure, or a slot failure. You may need to reconfigure the other device
to avoid the conflict. Try installing the AT-2700 PCIFast Ethernet
Network Adapter Card in another slot, then, if necessary, in
another computer.
8. If the adapter card passes diagnostics, try reconnecting the com-
puter to the network. A failure may be caused by physical medium
connections or by corrupted network software. You can test the
connectors and cables by swapping them for known good ones.
Replace corrupted network software.
9. If, after installing and loading the driver, an error message is
returned indicating that the device could not be found, and you
have verified that the BIOS setup and/or the PCI setup procedure
for the slot in use is correct, then re-load the driver with the fol-
lowing switch in the appropriate configuration file for your driver:
BUSTYPE = PCI1
The exact format of this switch will depend upon the driver in use.
For example, for the ODI workstation driver, add this line to the
NET.CFG file in the LINK DRIVER section for the AT-2700TX
card (omit the = sign). For the NDIS 2.0 driver, add this line to the
AT-2700 section ofthe PROTOCOL.INI file.
If your computer is supported by a system administrator or network
administrator, this person can often provide the mosthelp in resolving a
problem. Allied Telesyn dealers also provide technical support for instal-
lation problems. You can contact the dealer where you bought your
AT-2700 PCI Fast Ethernet Network Adapter Card for local assistance.
Technical Support or Service
You can contact the dealer where you bought your AT-2700 PCI Fast
Ethernet Network Adapter Card for local assistance. If local help is
unable to resolve your problem, Allied Telesyn offers technical support
via fax or telephone. Refer to the http://www.alliedtelesyn.com website
for current world-wide office locations.
Copyright 1998, 1999 Allied Telesyn International, Corp.
950 Kifer Road, Sunnyvale CA 94086 USA Tel: (408) 730-0950
All rights reserved. No part of this publication may be reproduced without prior written
permission from Allied Telesyn International, Corp.
Ethernet is a registered trademark of Xerox Corporation. All other product names, company
names, logos or other designations mentioned herein are trademarks orregistered trademarks of
their respective owners.
Network
Adapter
Card
AT-2700 Series
◆
Quick Install
Guide
FOR USE WITH AT-2700TX AND AT-2700FX
PRODUCTS
PN 613-10700-00 Rev. B 8

Other manuals for AT-2700 series

1

This manual suits for next models

2

Other Allied Telesis Network Card manuals

Allied Telesis AT-2971T User manual

Allied Telesis

Allied Telesis AT-2971T User manual

Allied Telesis AT-2972T/2 User manual

Allied Telesis

Allied Telesis AT-2972T/2 User manual

Allied Telesis AT-2746FX User manual

Allied Telesis

Allied Telesis AT-2746FX User manual

Allied Telesis AT-2972SX/2 User manual

Allied Telesis

Allied Telesis AT-2972SX/2 User manual

Allied Telesis AT-AR020 PRI E1/T1 User manual

Allied Telesis

Allied Telesis AT-AR020 PRI E1/T1 User manual

Allied Telesis AT-2451 Series User manual

Allied Telesis

Allied Telesis AT-2451 Series User manual

Allied Telesis AT-AR020 PRI E1/T1 User manual

Allied Telesis

Allied Telesis AT-AR020 PRI E1/T1 User manual

Allied Telesis AT-iMG646BD-ON User manual

Allied Telesis

Allied Telesis AT-iMG646BD-ON User manual

Allied Telesis AT-2701FTX User manual

Allied Telesis

Allied Telesis AT-2701FTX User manual

Allied Telesis AT-2701FTX User manual

Allied Telesis

Allied Telesis AT-2701FTX User manual

Allied Telesis AT-2400 Series User manual

Allied Telesis

Allied Telesis AT-2400 Series User manual

Allied Telesis NetExtreme II AT-2973SX User manual

Allied Telesis

Allied Telesis NetExtreme II AT-2973SX User manual

Allied Telesis AT-2711FX User manual

Allied Telesis

Allied Telesis AT-2711FX User manual

Allied Telesis AT-2972SX User manual

Allied Telesis

Allied Telesis AT-2972SX User manual

Allied Telesis AT-2750FX/ User manual

Allied Telesis

Allied Telesis AT-2750FX/ User manual

Allied Telesis CONVERTEON AT-CM2K0S User manual

Allied Telesis

Allied Telesis CONVERTEON AT-CM2K0S User manual

Allied Telesis AT-AR027 VoIP-FXS User manual

Allied Telesis

Allied Telesis AT-AR027 VoIP-FXS User manual

Allied Telesis AT-AR040 Installation and operating manual

Allied Telesis

Allied Telesis AT-AR040 Installation and operating manual

Allied Telesis AT-2916T User manual

Allied Telesis

Allied Telesis AT-2916T User manual

Allied Telesis AT-AR020 PRI E1/T1 User manual

Allied Telesis

Allied Telesis AT-AR020 PRI E1/T1 User manual

Allied Telesis AT-ANC10S User manual

Allied Telesis

Allied Telesis AT-ANC10S User manual

Allied Telesis AT-2400 Series User manual

Allied Telesis

Allied Telesis AT-2400 Series User manual

Allied Telesis AT-24xx User manual

Allied Telesis

Allied Telesis AT-24xx User manual

Allied Telesis AT-2701FX User manual

Allied Telesis

Allied Telesis AT-2701FX User manual

Popular Network Card manuals by other brands

Linksys WGA600N - Wireless-N Gaming Adapter Bridge Quick installation guide

Linksys

Linksys WGA600N - Wireless-N Gaming Adapter Bridge Quick installation guide

Fujitsu FMC-16FX FAMILY ADA-16FX-ETHERNET user guide

Fujitsu

Fujitsu FMC-16FX FAMILY ADA-16FX-ETHERNET user guide

Belkin N1 WIRELESS NOTEBOOK CARD F5D8011 user manual

Belkin

Belkin N1 WIRELESS NOTEBOOK CARD F5D8011 user manual

Panasonic AWPB308 - LENS I/F OPTION CARD operating instructions

Panasonic

Panasonic AWPB308 - LENS I/F OPTION CARD operating instructions

3Com TokenLink 3C359B quick start

3Com

3Com TokenLink 3C359B quick start

Dialogic IP Board IPT10000C Quick install card

Dialogic

Dialogic IP Board IPT10000C Quick install card

SENAO NL-2511CD PLUS EXT2 user guide

SENAO

SENAO NL-2511CD PLUS EXT2 user guide

Palm CompactFlash 10/100 Quick installation guide

Palm

Palm CompactFlash 10/100 Quick installation guide

HP hn210p quick start guide

HP

HP hn210p quick start guide

energiya RS4+ instructions

energiya

energiya RS4+ instructions

Palm PalmConnect Read this first

Palm

Palm PalmConnect Read this first

Rosewill RC403 user manual

Rosewill

Rosewill RC403 user manual

D-Link WDA-1320 Quick install guide

D-Link

D-Link WDA-1320 Quick install guide

AVM FRITZ!Card DSL Installation and operation

AVM

AVM FRITZ!Card DSL Installation and operation

Denkovi DAEnetIP2 user manual

Denkovi

Denkovi DAEnetIP2 user manual

Linksys HomeLink HPN100 user guide

Linksys

Linksys HomeLink HPN100 user guide

Abocom Mini SDIO 802.11b/g Wireless LAN Card... Specification sheet

Abocom

Abocom Mini SDIO 802.11b/g Wireless LAN Card... Specification sheet

TRENDnet TEW-226PC Quick installation guide

TRENDnet

TRENDnet TEW-226PC Quick installation guide

manuals.online logo
manuals.online logoBrands
  • About & Mission
  • Contact us
  • Privacy Policy
  • Terms and Conditions

Copyright 2025 Manuals.Online. All Rights Reserved.