Neural DSP Quad Cortex User manual
Quad Cortex User Manual 1.4
CorOS version 1.4.0

Contents
Welcome to Quad Cortex . . . . . . . . . . . . . . .3
What is Quad Cortex? . . . . . . . . . . . . . . . . . . . . . . . . .4
Contact info . . . . . . . . . . . . . . . . . . . . . . . . . . . . . . . . .4
Overview . . . . . . . . . . . . . . . . . . . . . . . . . . . .5
Top View . . . . . . . . . . . . . . . . . . . . . . . . . . . . . . . . . . . .6
Rear View . . . . . . . . . . . . . . . . . . . . . . . . . . . . . . . . . . .6
Bottom View (Inside) . . . . . . . . . . . . . . . . . . . . . . . . .6
Setting up your Quad Cortex . . . . . . . . . . . .7
Quick Start . . . . . . . . . . . . . . . . . . . . . . . . . . . . . . . . . .8
The Grid . . . . . . . . . . . . . . . . . . . . . . . . . . . . . . . . . . .10
Settings Menu . . . . . . . . . . . . . . . . . . . . . . . . . . . . . .14
Neural DSP account . . . . . . . . . . . . . . . . . . . . . . . . .15
I/O Settings . . . . . . . . . . . . . . . . . . . . . . . . . . . . . . . .15
CPU Monitor . . . . . . . . . . . . . . . . . . . . . . . . . . . . . . . .18
Presets . . . . . . . . . . . . . . . . . . . . . . . . . . . 19
Working on The Grid . . . . . . . . . . . . . . . . . . . . . . . . .20
Clipping Alert . . . . . . . . . . . . . . . . . . . . . . . . . . . . . . .23
The Directory . . . . . . . . . . . . . . . . . . . . . . . . . . . . . . .23
Saving Presets . . . . . . . . . . . . . . . . . . . . . . . . . . . . . .25
Setlists . . . . . . . . . . . . . . . . . . . . . . . . . . . . . . . . . . . .26
Delete, Edit, Cut, Copy . . . . . . . . . . . . . . . . . . . . . . .27
Assigning Expression Pedals . . . . . . . . . . . . . . . . . .28
Expression Bypass . . . . . . . . . . . . . . . . . . . . . . . . . .29
Splitters and Mixers . . . . . . . . . . . . . . . . . . . . . . . . .32
Using External IR les . . . . . . . . . . . . . . . . . . . . . . .37
Looper X. . . . . . . . . . . . . . . . . . . . . . . . . . . . . . . . . . . .38
Device Blocks Parameters . . . . . . . . . . . . . . . . . . . .43
Modes . . . . . . . . . . . . . . . . . . . . . . . . . . . . 47
Switching Modes . . . . . . . . . . . . . . . . . . . . . . . . . . . .48
Preset Mode . . . . . . . . . . . . . . . . . . . . . . . . . . . . . . . .48
Scene Mode . . . . . . . . . . . . . . . . . . . . . . . . . . . . . . . .49
Copy & Paste Scenes . . . . . . . . . . . . . . . . . . . . . . . .50
Stomp Mode . . . . . . . . . . . . . . . . . . . . . . . . . . . . . . . .51
Gig View . . . . . . . . . . . . . . . . . . . . . . . . . . . . . . . . . . .53
Setup Examples . . . . . . . . . . . . . . . . . . . . 54
Basic Routing . . . . . . . . . . . . . . . . . . . . . . . . . . . . . . .55
FRFR/Direct . . . . . . . . . . . . . . . . . . . . . . . . . . . . . . . .56
FRFR Monitor + FRFR to Front-of-House . . . . . . . .58
Combo Amplier . . . . . . . . . . . . . . . . . . . . . . . . . . . .60
Power Amp & Cab + FRFR/Direct . . . . . . . . . . . . . .61
Four Cable Method (4cm) . . . . . . . . . . . . . . . . . . . .62
Seven Cable Method (7cm) . . . . . . . . . . . . . . . . . . .64
As FX Loop Only . . . . . . . . . . . . . . . . . . . . . . . . . . . . .66
As FX Processor (pre only) . . . . . . . . . . . . . . . . . . . .67
Using external gear (FX loop) . . . . . . . . . . . . . . . . .68
Stereo cab setup . . . . . . . . . . . . . . . . . . . . . . . . . . . .69
Guitar and vocals . . . . . . . . . . . . . . . . . . . . . . . . . . . .70
Two guitars and bass . . . . . . . . . . . . . . . . . . . . . . . .71
Neural Capture . . . . . . . . . . . . . . . . . . . . . 73
Creating a new Neural Capture . . . . . . . . . . . . . . . .74
Using a Neural Capture . . . . . . . . . . . . . . . . . . . . . . .80
Computer Integration . . . . . . . . . . . . . . . 81
USB Audio . . . . . . . . . . . . . . . . . . . . . . . . . . . . . . . . . .82
Hardware & DAW Monitoring . . . . . . . . . . . . . . . . . .82
MIDI . . . . . . . . . . . . . . . . . . . . . . . . . . . . . . 87
MIDI Settings Menu . . . . . . . . . . . . . . . . . . . . . . . . .88
Preset MIDI Out Settings . . . . . . . . . . . . . . . . . . . . .88
Incoming MIDI . . . . . . . . . . . . . . . . . . . . . . . . . . . . . .90
Incoming MIDI Reserved CC List . . . . . . . . . . . . . .92
Cortex Cloud . . . . . . . . . . . . . . . . . . . . . . . 93
Cloud Backups . . . . . . . . . . . . . . . . . . . . . . . . . . . . . .94
Adding friends . . . . . . . . . . . . . . . . . . . . . . . . . . . . . .95
Downloading items from other users . . . . . . . . . . .96
Uploading Impulse Responses . . . . . . . . . . . . . . . .97
Importing Impulse Responses . . . . . . . . . . . . . . . .99
Uploading a Preset or a Neural Capture to
Cortex Cloud . . . . . . . . . . . . . . . . . . . . . . . . . . . . . . . .99
Sharing Presets or Neural Captures . . . . . . . . . . 100
Making Presets or Neural Captures available to the
public . . . . . . . . . . . . . . . . . . . . . . . . . . . . . . . . . . . . 100
Virtual Device List . . . . . . . . . . . . . . . . . 102
F.A.Q. . . . . . . . . . . . . . . . . . . . . . . . . . . . . 112
Specications . . . . . . . . . . . . . . . . . . . . . 115
3
Welcome to Quad Cortex
When we started Quad Cortex, we had no idea what we were
getting into. Naïvete can be a good thing.
It took more time, effort, and resources than we could have
ever imagined. It forced us to level up at a dizzying pace and to
overcome countless challenges.
Quad Cortex was as much engineered as it was willed into
existence. And none of it would matter if it wasn’t for your belief in
us and what we stand for.
For that, we will be forever grateful.
Neural DSP Team.
Welcome to Quad Cortex
01
4
Welcome to Quad Cortex
Quad Cortex is the most powerful floor modeler on the planet.
With a total of 6 cores (4x SHARC®+ and 2x ARM Cortex-A5
running at 500MHz each) of dedicated DSP, this ludicrous
amount of processing capacity provides limitless sound design
possibilities. Because of that, Quad Cortex can process up to four
instruments at the same time with independent effects chains and
send them through different outputs separately.
What is Quad Cortex?
Vulgar Display of Power
Unparalleled Intuitiveness & Flexibility
Unbelievably Strong & Compact
With its massive 7” display, Quad Cortex is unbelievably easy to
use. Effortlessly create even the most complex signal paths.
This includes features like dragging-and-dropping blocks
to change the order or routing in seconds or visualizing and
controlling the settings of inputs and outputs with one swipe.
Quad Cortex comes in a gorgeous anodized aluminum unibody,
with laser engraved graphics that never fade. Our display is
armored with a chemically strengthened protective glass and a
reinforced touch sensor panel.
Using advanced mechanical design and manufacturing techniques,
we managed to not only build the most powerful floor modeler/
multi-effects processor on the planet, we also managed to pack it
all in an extremely compact format.
Dimensions:
29 x 19 x 4.9cm
Weight:
1.95kg / 4.2lbs
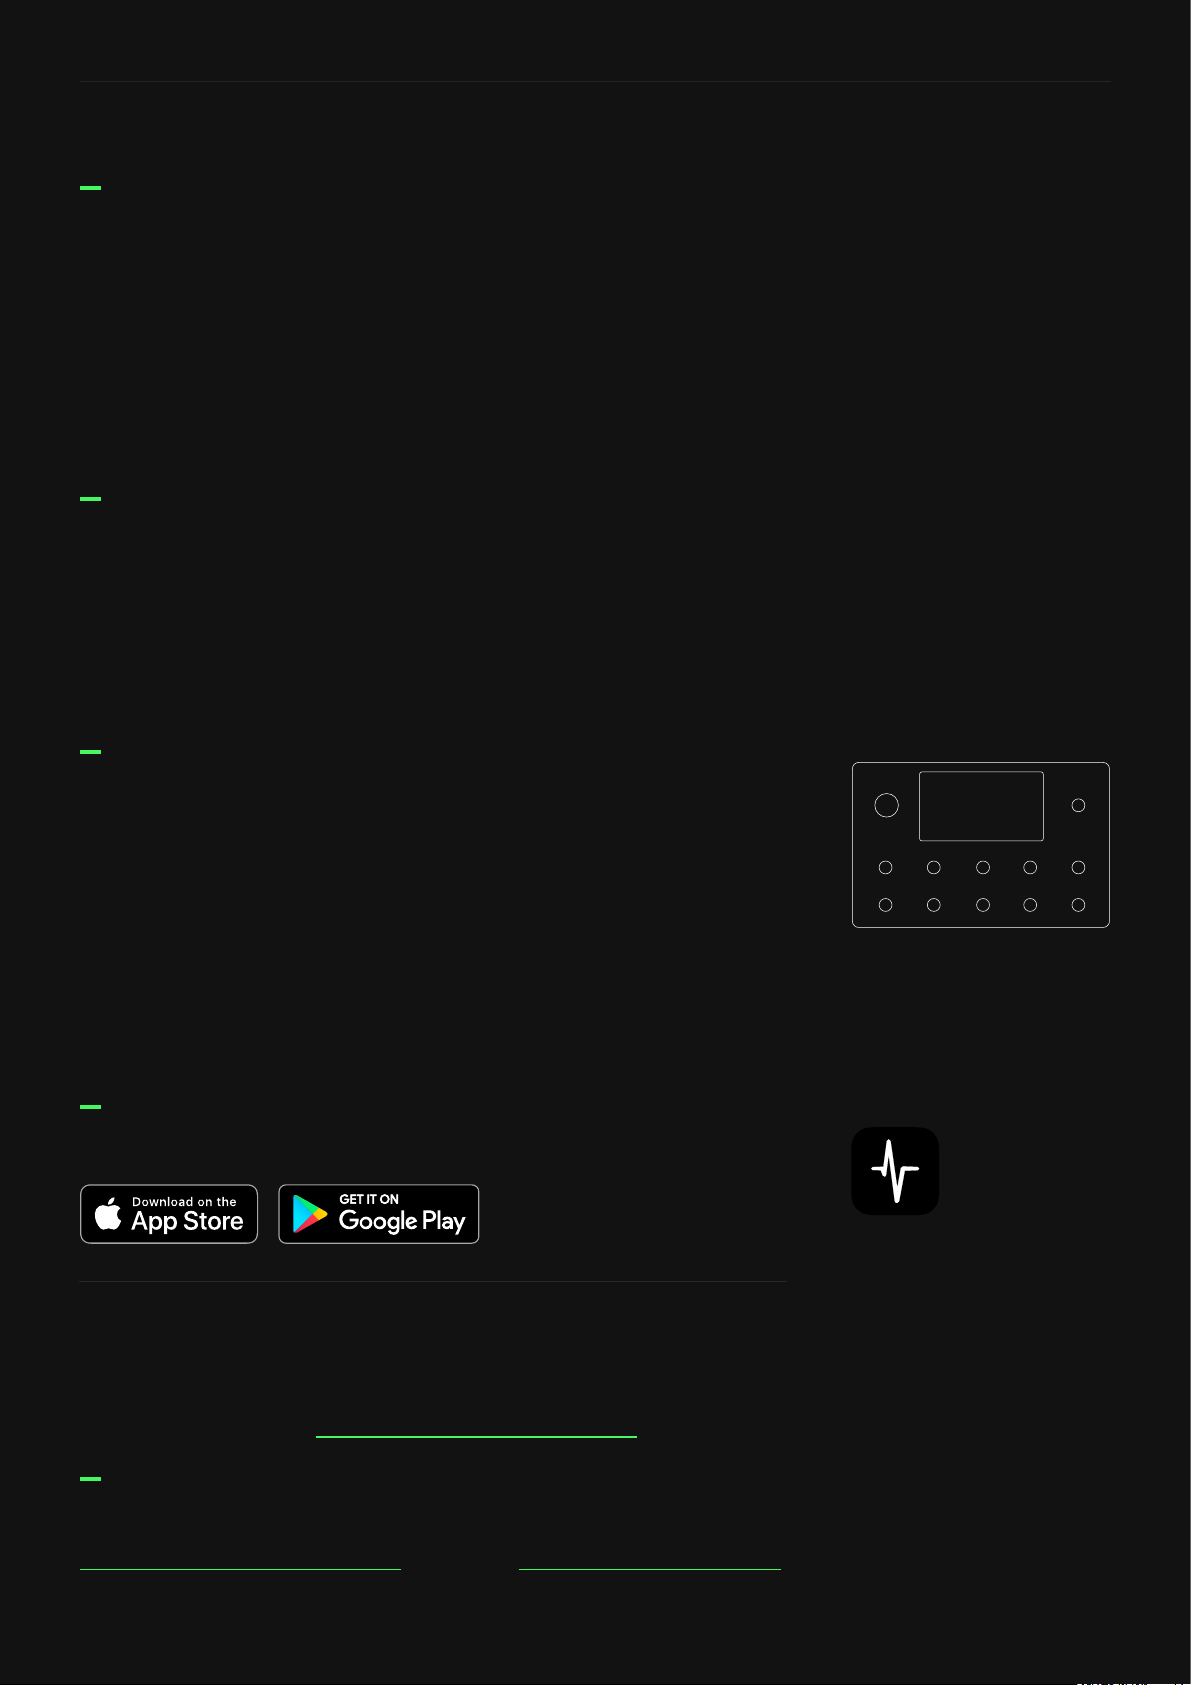
Discover Users, Presets, and Neural Captures using Cortex Mobile.
Cortex Mobile
For technical issues or any problems experienced with our
hardware, please visit cortex-support.neuraldsp.com
Contact info
For information regarding Quad Cortex service centers, please visit
cortex-support.neuraldsp.com or contact support@neuraldsp.com.
Service Centers
5
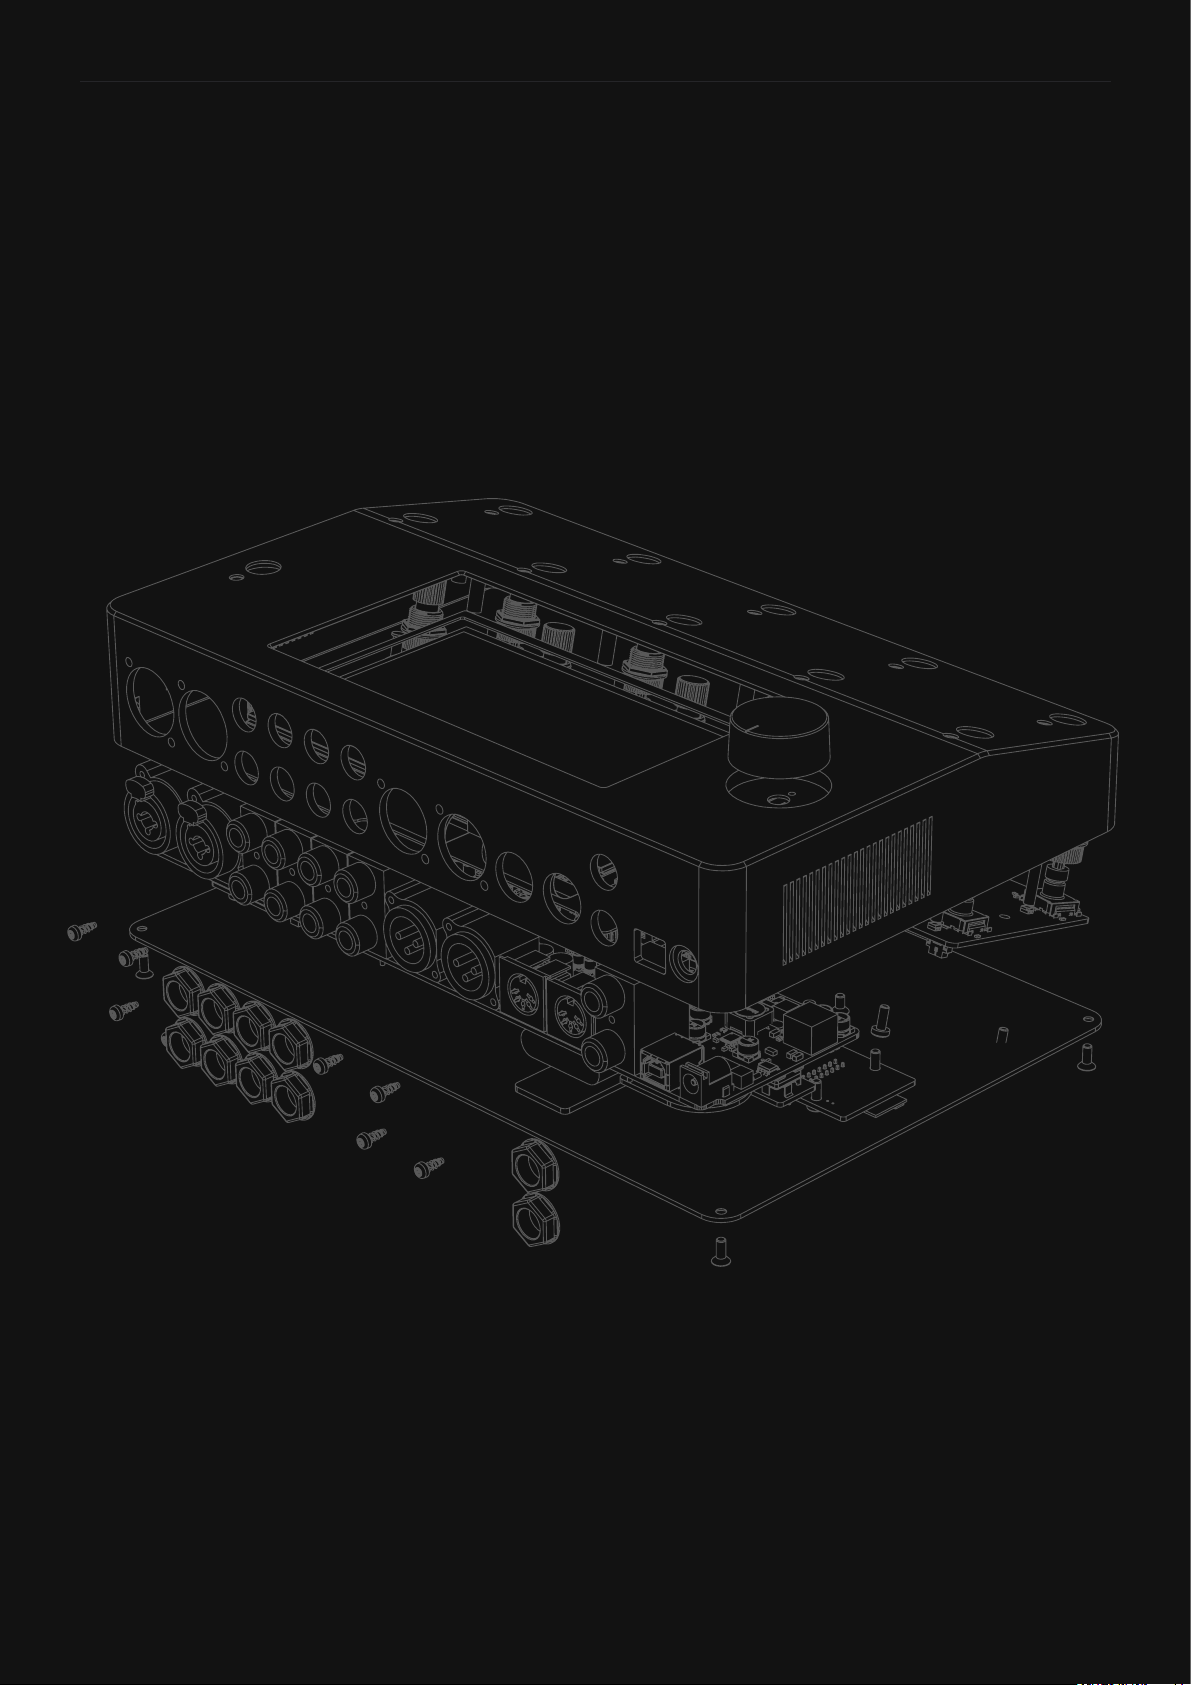
Overview
Overview
02
Quad Cortex weighs 1.95kg / 4.2lbs and its
dimensions are 29 x 19 x 4.9cm.

6
Overview
29cm
19cm
1
2
3
Bottom Dimensions:
29 x 19cm / 11.4” x 7.4”
1
2
3
IEEE 802.11 b/g/n Wi-Fi
module (2.4GHz ISM band)
4x SHARC®+ & 2x ARM
Cortex-A5 cores
USB Audio Class 2.0
Compliant
29cm
19cm
Top View Dimensions:
29 x 19cm / 11.4” x 7.4”
Power Button
7” display
Volume Wheel
11 stainless steel stomp +
rotary actuators
Chassis made of anodized
aluminum
1
2
3
4
5
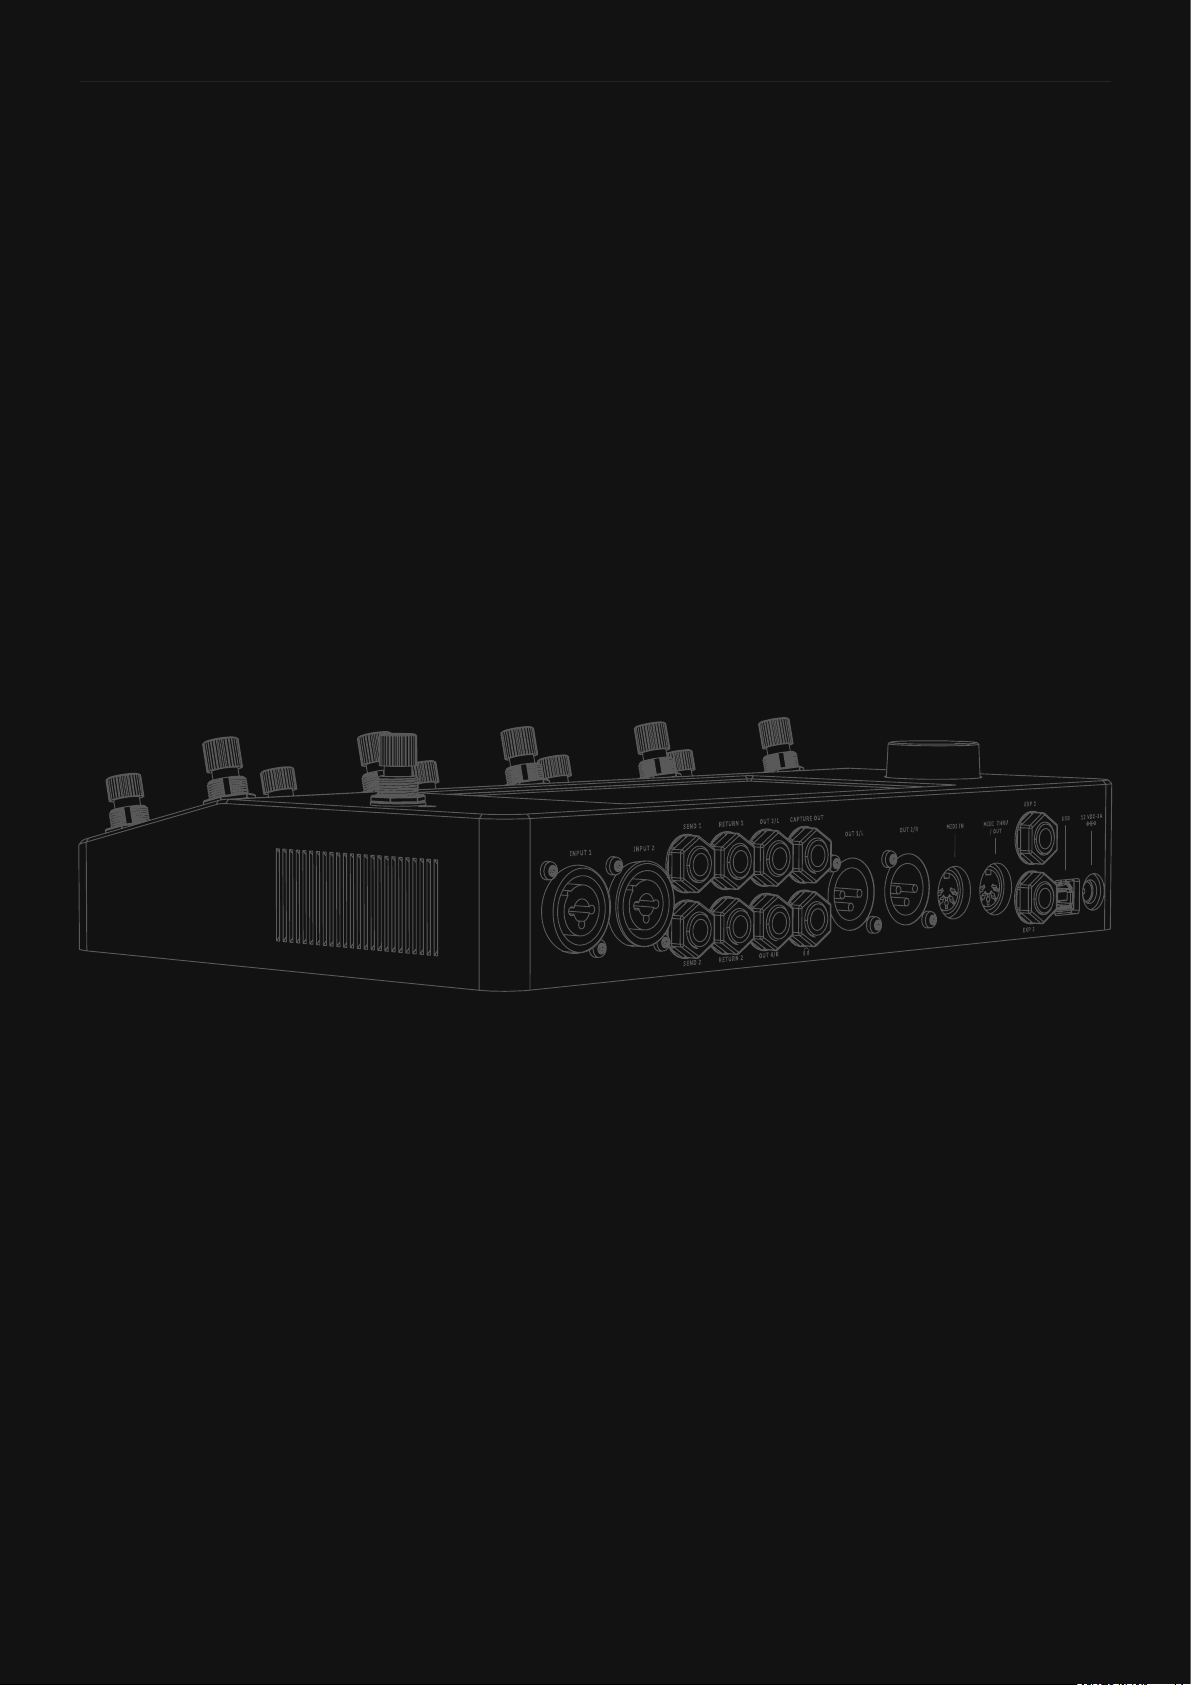
Rear View Dimensions:
29 x 4.9cm / 11.4” x 1.9”
Dual Combo Inputs: TS,
TRS, and XLR
Dual FX-loops
1/4” TRS Outputs
Capture Output
Headphones Output
XLR Outputs
MIDI In, Out/Thru
Dual Expression Inputs
USB Type-B
Power Input
(12V-3A)
1
2
3
4
5
6
7
8
9
10
1
3
4
5
2
1
2 3 4 8
9 10
5
6 7
29cm
4.9cm
Top View
Rear View
Bottom View (Inside)
7
Setting up your Quad Cortex
Setting up your Quad Cortex
03
8
Setting up your Quad Cortex
To turn the Quad Cortex on, connect the power cable to the input
on the back and wait for it to power up.
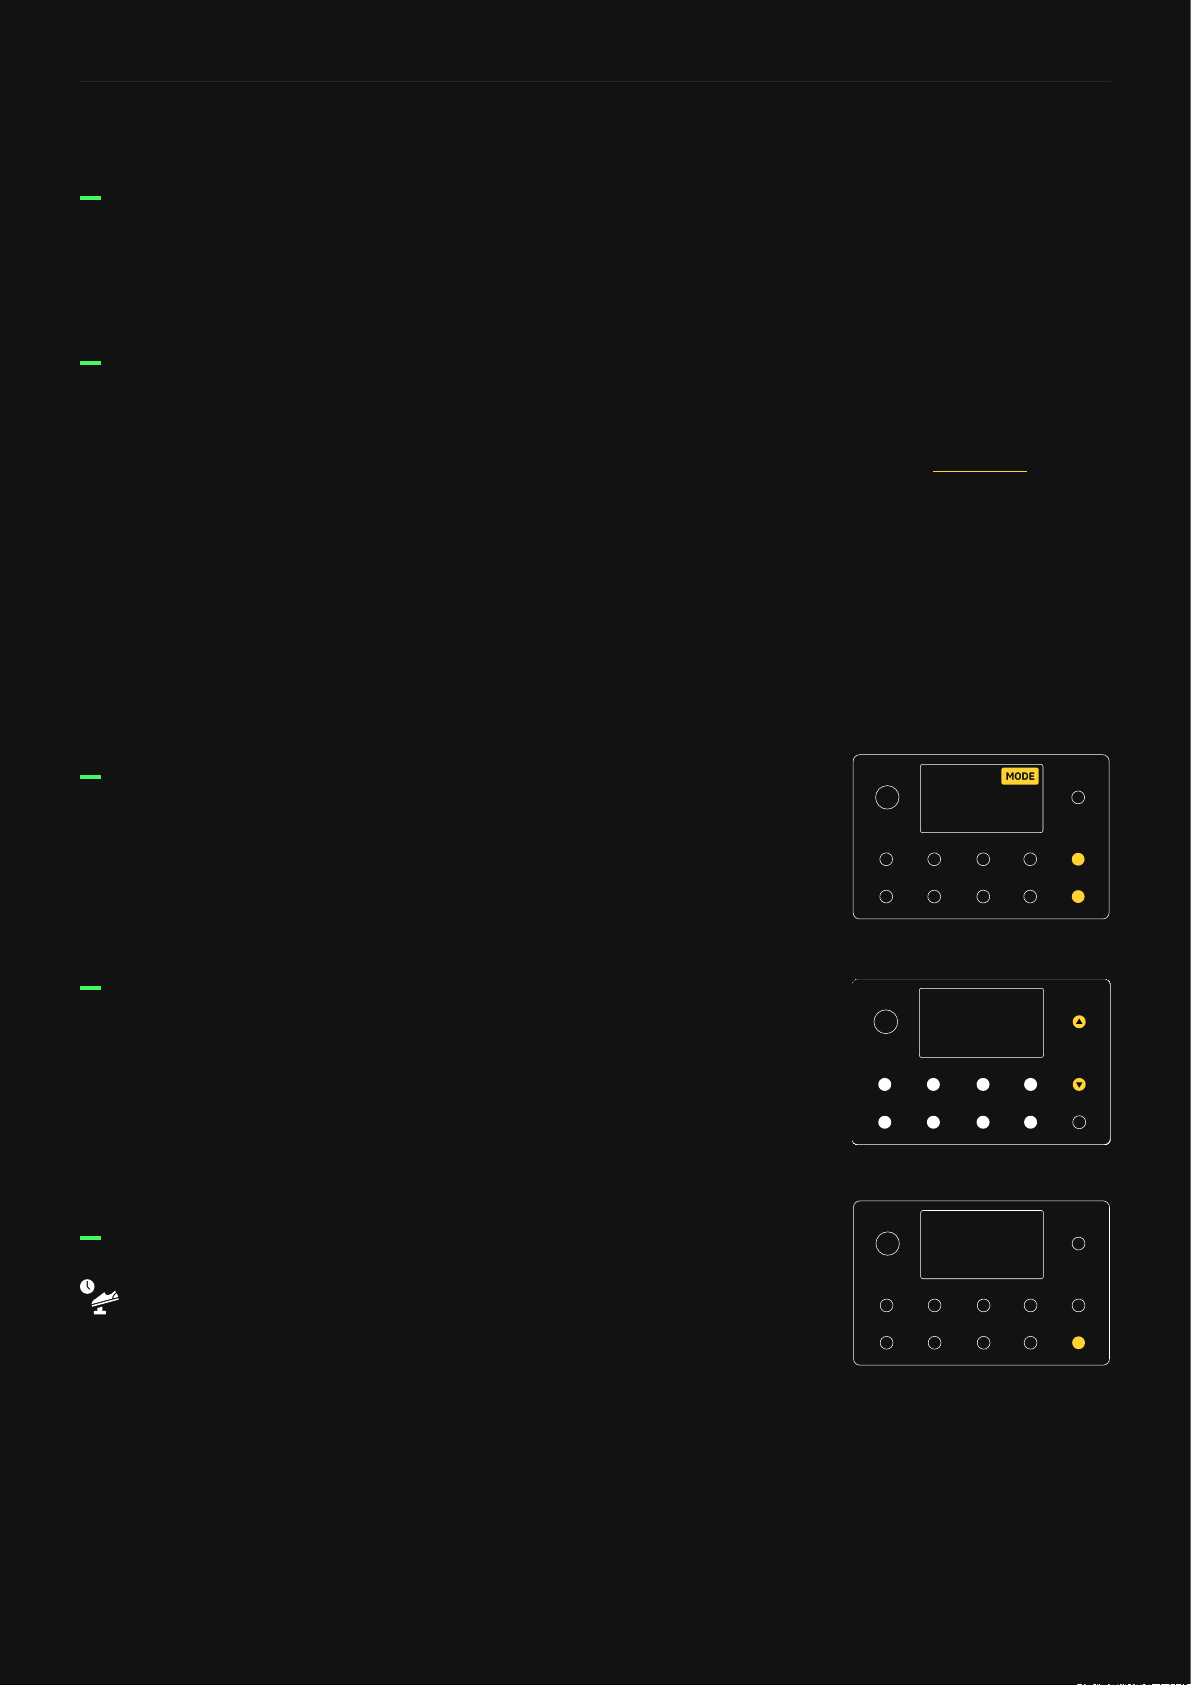
Tap the name of the mode currently active at the top-right of the
display or press the furthest-right footswitches on the bottom two
rows together.
Before connecting your instrument, make sure the volume wheel is
turned down.
Connect your instrument to Input 1.
Connect your studio monitors, PA, or FRFR cabinet to either XLR
Outs 1/2 or TRS Outs 3/4.
Alternatively, if you want to use headphones, connect them to the
Headphones output.
Quick Start
Turning on your Quad Cortex
Changing Modes
Connecting your gear
While in Preset Mode, press footswitches A-H to switch Presets.
Press the Up/Down footswitches to navigate through the Preset
banks.
Press and hold the bottom-right footswitch to activate the
Tuner.
Browsing Presets
Tuner
If you’re not sure about the
correct input/output levels,
check the I/O Settings section.

9
Setting up your Quad Cortex
Frequency Selector (Hz): Modies the tuner reference (440Hz by
default).
Input Selector: Determines which Input the tuner will listen to
(Input 1 by default).
Mute Button: Determines whether the INPUT selected is muted
or not when the Tuner is activated.
Global Tempo: The tempo is the same for each Preset/Scene
until you set a new tempo.
Scene Tempo: The tempo is tracked in each of the 8 Scenes. The
tempo set in each Scene is saved when the Preset is saved.
Preset Tempo: The tempo is saved when the Preset is saved.
Each Preset can have its own tempo.
LED Light switch: Tap to activate/deactivate the the Tempo LED
light.
Double-press the bottom-right footswitch to engage the Tap
Tempo feature. Keep pressing to modify the tempo value.
LIGHT
Off
On
Preset
Scene
Global
TYPE
110
TEMPO [BPM]
The Tempo BPM is saved when the preset is saved. Each
preset can have its own tempo BPM.
Preset tempo
Tap Tempo Done
110
Tap Tempo
It is also possible to feed both
Inputs 1/2 simultaneously to
the Tuner.
This allows for USB playback
and the Looper to continue
feeding signal to the outputs
while the tuner is being used.
LED LIGHT

10
Setting up your Quad Cortex
We call the screen where you can add blocks to build a virtual rig
“The Grid”.
The Grid has four rows of eight virtual device block spaces. Almost
all the items on the screen can be controlled by using gestures,
rotary actuators, or dedicated commands.
Gestures and Commands
PRESET
A
UnsavedA1
Out
Multi
1
In
Check the Power Functions
section for more information.
To turn Quad Cortex off, press the capacitive power button
and select You can also remove the power
cable from the back of Quad Cortex.
SHUT DOWN
Main Menu: Touch the upper-right corner of The Grid to access the
Main Menu.
Swipe down from the top of the screen to access the I/O Settings
screen.
Swipe up from the bottom of the screen to access Gig View.
The Grid
11
Setting up your Quad Cortex
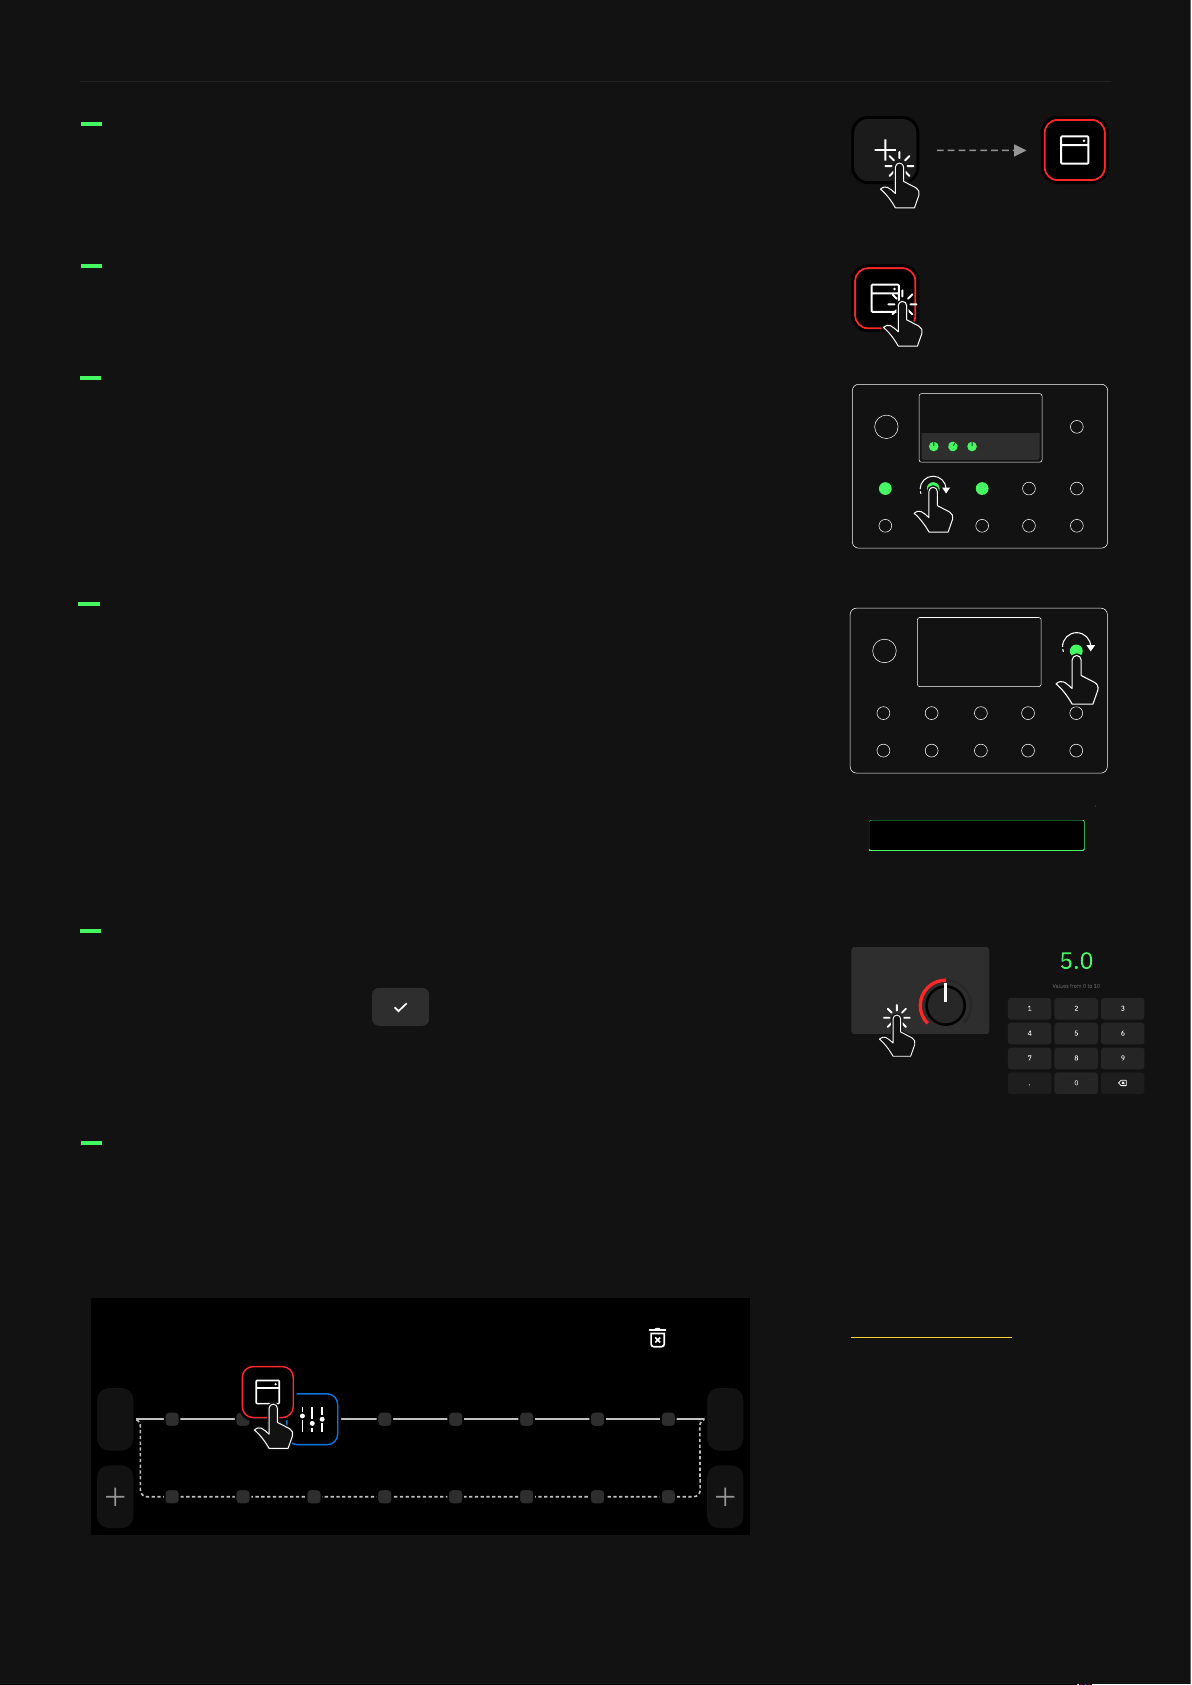
Tap on an empty space in The Grid to create a new Virtual Device
Block.
Tap on a block to access its parameters. You can either use the
touch controls on the screen or the rotary actuators to modify the
parameters.
Tap and hold a device block to drag-and-drop it to another place
on The Grid. Drag a block to the upper-right corner to remove it.
1
In
1/2
Out
Remove
New PresetA1
For more details, check the
Working on The Grid section.
Double-tap a block to bypass/activate it. x2
Tap on a parameter value to ne control. Write a value with the
numeric keyboard and tap to change it. This also works in
the I/O Settings menu.
50
GAIN
When a block menu is open, turn the top-right rotary actuator
clockwise or counterclockwise to navigate through the virtual
devices or Neural Captures within the same category without
opening the Virtual Devices Library.
Turning the top-right rotary actuator also changes the position of
the caret in any text eld.
CancelSetlist Change
My Presets / 1A
q
a
123
s
z
,
x c v
Space .
b n m
d f g h j k l
w e r t y u i o p
Save
PRESET NAME
Electric LEAD
TAG S
Plini, Lead
12
Setting up your Quad Cortex
Tap and hold on an empty space on The Grid to create a Splitter/
Mixer path.
If you move any block vertically in The Grid a Splitter/Mixer path
will be created automatically.
1/2
Out
1
In
1/2
Out
1
In
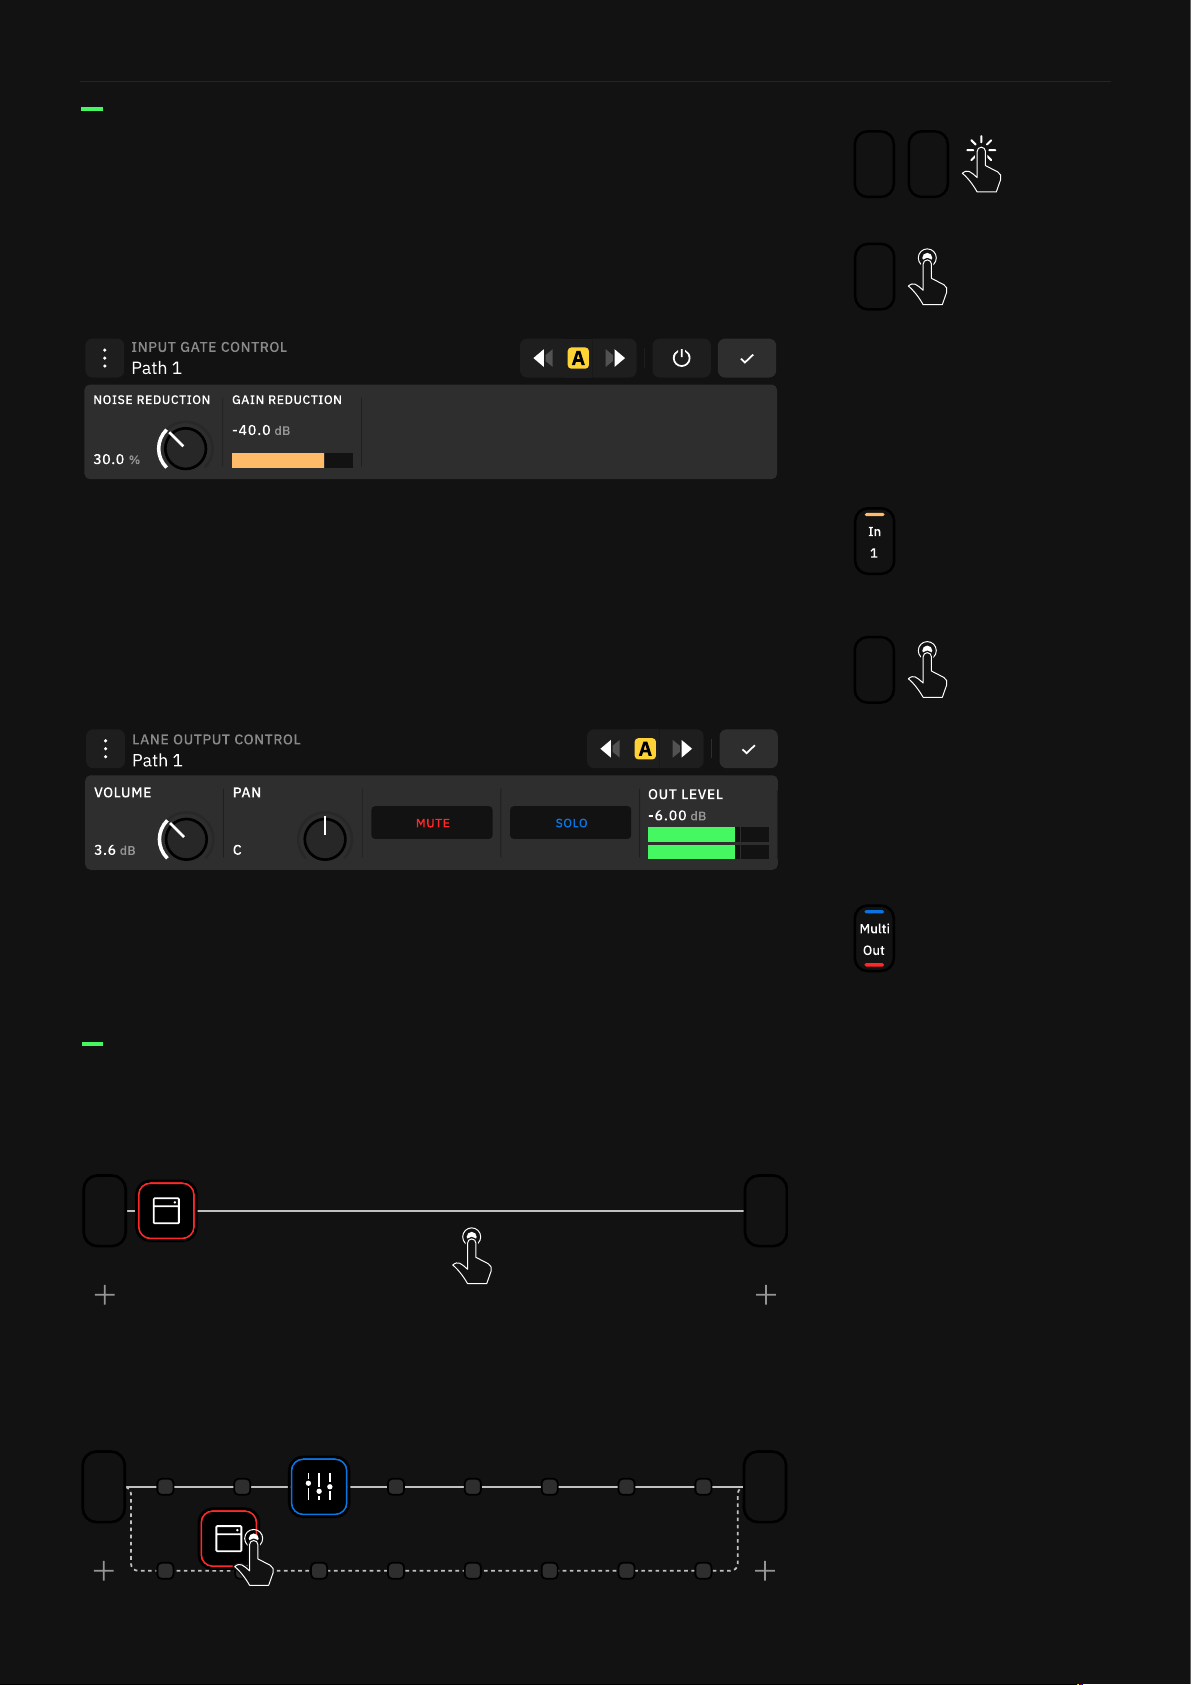
Tap on the input and output blocks to modify them. You can
create, edit, and assign them to physical or virtual I/Os. 1/2
Out
1/2
Out
1
In
These controls can be assigned to Scenes and Expression Pedals.
Color strips display on the Output block when MUTE and/or SOLO
are activated.
Tap and hold an output block to access the Lane Output Control
menu.
1
In
Tap and hold on an input block to access the Input Gate Control
menu.
These controls can be assigned to Scenes and Expression Pedals. A
color strip displays on the input block when the GAIN REDUCTION
is activated.

13
Setting up your Quad Cortex
Power Functions
Touch the power button. This will pop up a window with different
functions:
LOCK: Both touchscreen and Master Volume wheel will be locked.
While locked, a lock indicator displays at the top-right of the screen.
To unlock, press-and-hold the power button. If the Master Volume
knob is moved while locked, the volume will not change until the
knob is rst turned to reach the value set when the knob was locked.
CANCEL: Tap to close the Power Functions window.
SHUT DOWN: Quad Cortex will shut down. If you want to turn Quad
Cortex on again, press the power button.
REBOOT: Quad Cortex will reboot. Note that any unsaved changes
will be lost if you change the power state.
STANDBY: All audio outputs will disable and the screen will turn off.
Press the power button to wake Quad Cortex and re-enable audio
outputs.
Recovery Mode
CANCEL: Tap to close the Recovery Options window. Quad Cortex
will boot up.
RESET SETTINGS: Tap to restore Quad Cortex to its default settings.
User data (Preset, Captures, etc) will not be removed.
FACTORY RESET: Tap to remove all user data. Quad Cortex will be
restored to factory settings.
Press and hold the Aand H footswitches the rst 6 seconds of the
splash screen while booting to intiate the Recovery Mode.
14
Setting up your Quad Cortex
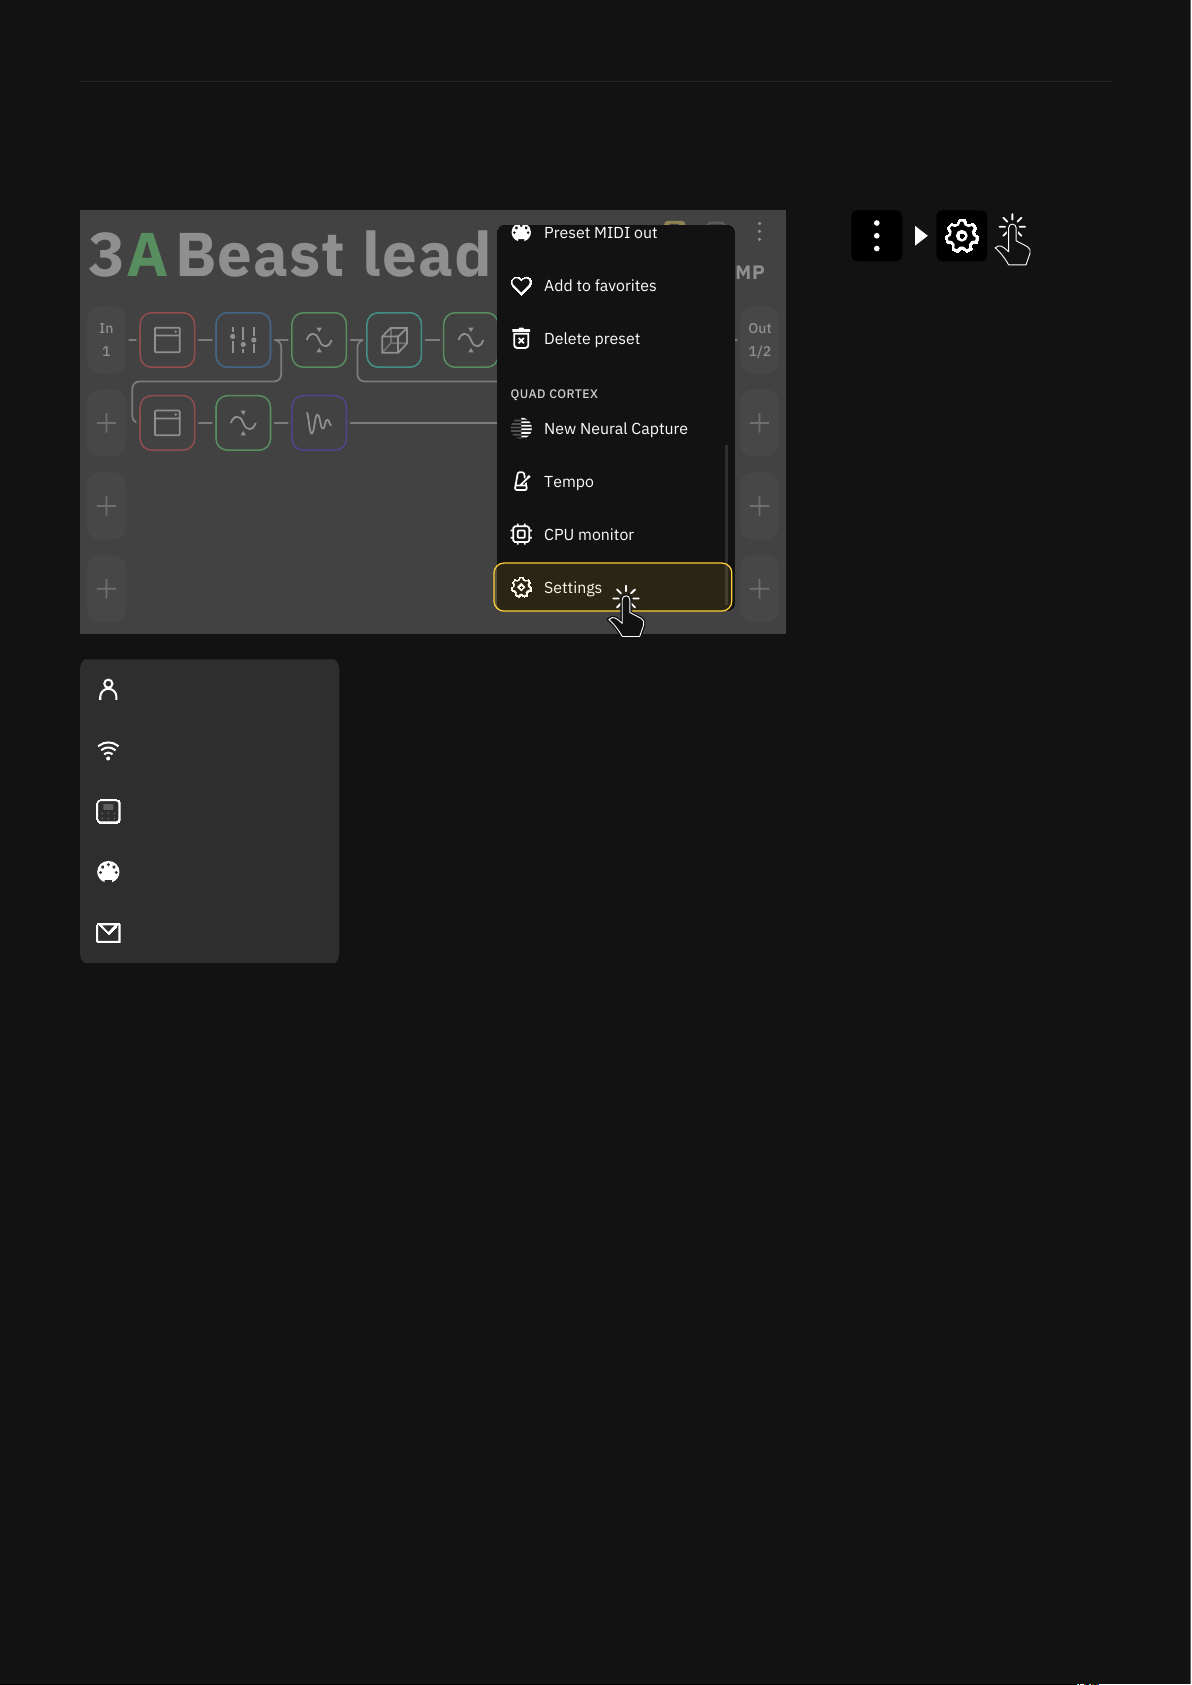
You can nd the settings in the Main Menu.
Device Options:
• Device updates: Here you can update your Quad Cortex to the latest version of CorOS. The
installation requires restarting Quad Cortex to complete.
• Disk Space: Available storage space.
• Diagnostics: DSP diagnostics and usage statistics.
• Power button sensitivity: Congures the amount of pressure needed to trigger the power
button (off, low, medium, and high).
• Brightness: Use the top-right footswitches to set the desired brightness level for the screen
and LED lights. Touchscreen controls are also allowed.
• About: Version information.
• Restart:Use this feature to restart Quad Cortex. Any unsaved changes will be lost.
• Restart Wi-Fi settings:Erases all stored Wi-Fi networks.
• Factory Reset: Use this feature to erase everything on Quad Cortex and reset to factory
settings.
MIDI settings: Enable or disable MIDI channels, MIDI Thru, or sending MIDI over USB.
Contact Us: Send diagnostic information if you encounter an issue.
Settings Menu
My Account: Here you can link your
Quad Cortex with your Neural DSP
account. You must be logged into your
Neural DSP account to sync your library,
and share or download items from
other users.
Wi-Fi: Connect to Wi-Fi in order to
access Cortex Cloud and share content.
Quad Cortex operates on the 2.4GHz
band.
My Account
Contact Us
MIDI Settings
Device Options
Wi-Fi
1/2
Out
1
In
A3
STOMP
B
Beast lead
New Neural Capture
Tempo
QUAD CORTEX
Add to favorites
Delete preset
Settings
CPU monitor
Preset MIDI out

15
Setting up your Quad Cortex
You can log in to your Neural DSP account on
your Quad Cortex.
Neural DSP account
Tap the Main Menu on The Grid. Go to Settings, My Account, and
tap the LOGIN button. Enter your credentials to log in.
Go to neuraldsp.com/register to create a new account.
We also include a QR code to access neuraldsp.com/register
faster. Open the Main Menu, tap Settings, and use your phone’s
camera to scan it.
Linking Quad Cortex with your account
Creating a new account Don’t have an account?
Register here.
LOGIN
Swipe down from the top of The Grid to access the I/O Settings
screen. Here you can visualize and control the settings of all inputs
and outputs.
Unused inputs are grey; used inputs are white. Plug something in
and see a grey input instantly change to white. Use gestures or the
rotary actuators to modify parameters.
I/O Settings
Tap an I/O port to change its
parameters.
Outputs 1/2 and 3/4 can be
paired. Tapping an output
displays the faders for both,
but the faders are unpaired.
Long-press an output to change
the pair state. This setting is
automatically saved.
MUTE

16
Setting up your Quad Cortex
IN1/IN2: Combo inputs that allow you to connect your
instruments using XLR or TS cables. TRS cables can also be used
for gear with balanced outputs.
• IN LEVEL KNOB [dB]: Sets the input gain.
• IMPEDANCE KNOB [Ω]: Sets the impedance of the Hi-Z input
from between 10K to 10M. This option is only available when
“TYPE” is set to “Instrument”.
• TYPE SWITCH: Toggle between “Mic” (XLR) and “Instrument”
(TS/TRS) inputs. If you are using a guitar or bass select
“Instrument”.
• PHANTOM 48V SWITCH: Enables Phantom Power. This option
is only available when “TYPE” is set to “Mic”.
• GROUND LIFT SWITCH: Enable to help reduce or eliminate
noise caused by ground loops in audio cables or other sources.
• IN LEVEL: Input signal meter.
Inputs
RET1/RET2: Line inputs that allow you to connect your pedals or
instruments through TRS cables.
• RET LEVEL KNOB [dB]: Sets the input gain.
• GROUND LIFT SWITCH: Enable to help reduce or eliminate
noise caused by ground loops in audio cables or other sources.
• RET LEVEL: Input signal meter.
EXP1/EXP2: Line inputs that allow you to connect your expression
pedals through TRS cables.
• POSITION: Indicates the minimum and maximum values of
your connected device. Move the expression pedal up and
down to the minimum and maximum positions to measure it.
Tap SAVE to keep your settings or tap RECALIBRATE to try
again.
The Volume Wheel controls the output level, and it affects all the
outputs. The I/O Settings output controls allow you to control the
levels of each output independently.
Outputs
OUT1/OUT2: XLR outputs that allow you to connect Quad Cortex
to stereo monitors, FRFR cabinets, PA systems, and more.
• OUT LEVEL KNOB: Sets the output level.
• GROUND LIFT SWITCH: Enable to help reduce or eliminate
noise caused by ground loops in audio cables or other sources.
• OUT LEVEL [dB]: Output signal meter.

17
Setting up your Quad Cortex
OUT3/OUT4: TRS outputs that allow you to connect Quad Cortex to stereo
monitors, FRFR cabinets, PA systems, and more.
• OUT LEVEL KNOB [dB]: Sets the output level.
• OUT LEVEL [dB]: Output signal meter.
• LIMITER [dB]: Gain reduction meter. Allows you to bring up the level
without allowing the peaks to clip the output.
• MUTE SWITCH [dB]: Tap to ativate/deactivate the Output(s).
SEND1/SEND2: TRS outputs that allow you to connect Quad Cortex to
stereo monitors, FRFR cabinets, PA systems, pedals, and more. “TRS to TS”
cables are also supported to attenuate hum.
• SEND LEVEL KNOB: Sets the output level.
• OUT LEVEL [dB]: Output signal meter.
• LIMITER [dB]: Gain reduction meter. Allows you to bring up the level without
allowing the peaks to clip the output.
HEADPHONES OUT: TRS output that allows you to connect Quad Cortex to
stereo headphones. All outputs that are being used on The Grid will display here
allowing you to customize your headphone mix.
• HP LEVEL KNOB: Sets the output level.
• OUT KNOBS: Sets the mix level of the selected output separately.
• OUT METERS [dB]: Output signal meters.
• LIMITER [dB]: Gain reduction meter. Allows you to bring up the level
without allowing the peaks to clip the output.
• MUTE SWITCH [dB]: Tap to ativate/deactivate the Output(s).
CAPTURE OUT: Dedicated output for external devices (Neural Capture only).
USB: Dedicated port for computer integration.
MIDI IN: MIDI input.
MIDI OUT: MIDI output.
• USB LEVEL KNOB: Sets the level of the audio transmission.
• HP SELECT KNOB: The headphones feed when using Quad Cortex as a USB
audio interface. It can be set to “None”, “USB 1/2”, “USB 3/4”, or “Both”.
• DRY-WET SWITCH: Swap between Clean DIs or processed signal fed into USB
Outputs 1-2 or 3-4 (Inputs 1-2 and 3-4 on your DAW).
• MIDI THRU SWITCH: Enables or disables the MIDI Thru
function.
Others

18
Setting up your Quad Cortex
IMPORTANT: Bypassing/disabling the blocks doesn’t
decrease the CPU consumption.
CPU Monitor
The CPU Monitor shows you the overall CPU usage of the current
Preset at the top-right corner of the screen. Tap the Main Menu on
The Grid and select CPU Monitor to open it.
1
Out
1
In
PRESET
A
A1Guitars Bass
3
Out
1
Ret
2
Out
2
In
PRESET58%
CPU %
Tap on the cross button to close
the CPU Monitor.
Each block lls up to represent
its influence on the CPU usage.
Quad Cortex is a DSP (Digital Signal
Processing) unit. Different virtual device blocks
require more DSP power than others.
Optimizing performance
To get the most out of Quad Cortex, it is important to understand
the following:
• The number of device blocks in a Preset has a great impact on
CPU usage.
• Rows 1-2 and Rows 3-4 on The Grid utilise different processor
cores. If all of your device blocks are placed in Rows 1 and 2,
you’re only using half of Quad Cortex’s power. For resource-
hungry Presets, try splitting your blocks across all four rows.
• The maximum load is up to 90%. Beyond that, the audio and
operating system performance may be compromised.
• Time effects like reverbs or delays have the highest CPU usage.
EQ, Compressor, Wah, and FX Loop blocks have the lowest CPU
usage.
• Some devices may use more DSP than others in the same
category. This is especially true with amp devices.
• Use Scene Mode to change parameters in devices instead of
copying devices and changing their parameters. Check the Scene Mode section
for more details.

19
Presets
Presets
04
Presets allow you to create and save custom
rigs/signal chains for later use by using device
blocks. Quad Cortex Presets are organized in
to Setlists, which can contain 32 banks of 8
Presets (256 in total). You can create up to 10
Setlists.

20
Presets
Working on The Grid
1/2
Out
1
In
PRESET
A
Unsaved
A1
Bank/Slot
Input
Blocks
Output
Blocks
Empty block
space
Splitter/Mixer
empty space
Preset name
Undo/Redo
Current Scene
Save button
Main Menu
Mode Selector
The Grid has four rows of eight device block spaces. Almost all the
items on the screen can be controlled by using gestures, rotary
actuators, or dedicated commands.
You can start building your own rigs by tapping on The Grid
to add your rst block; this will open the Device Category list.
AMP
Cabsim
Delay
Overdrive
Neural Capture
BASS
GUITAR
British 900 Lead
British 900 Clean
British Plexi 100 Bright
British 2203
British Plexi 100 Normal
British Plexi 100 Patch
Device Category Device Models
Scroll down by swiping with your nger and tap a device category
to display its devices.
Other manuals for Quad Cortex
1
Table of contents


