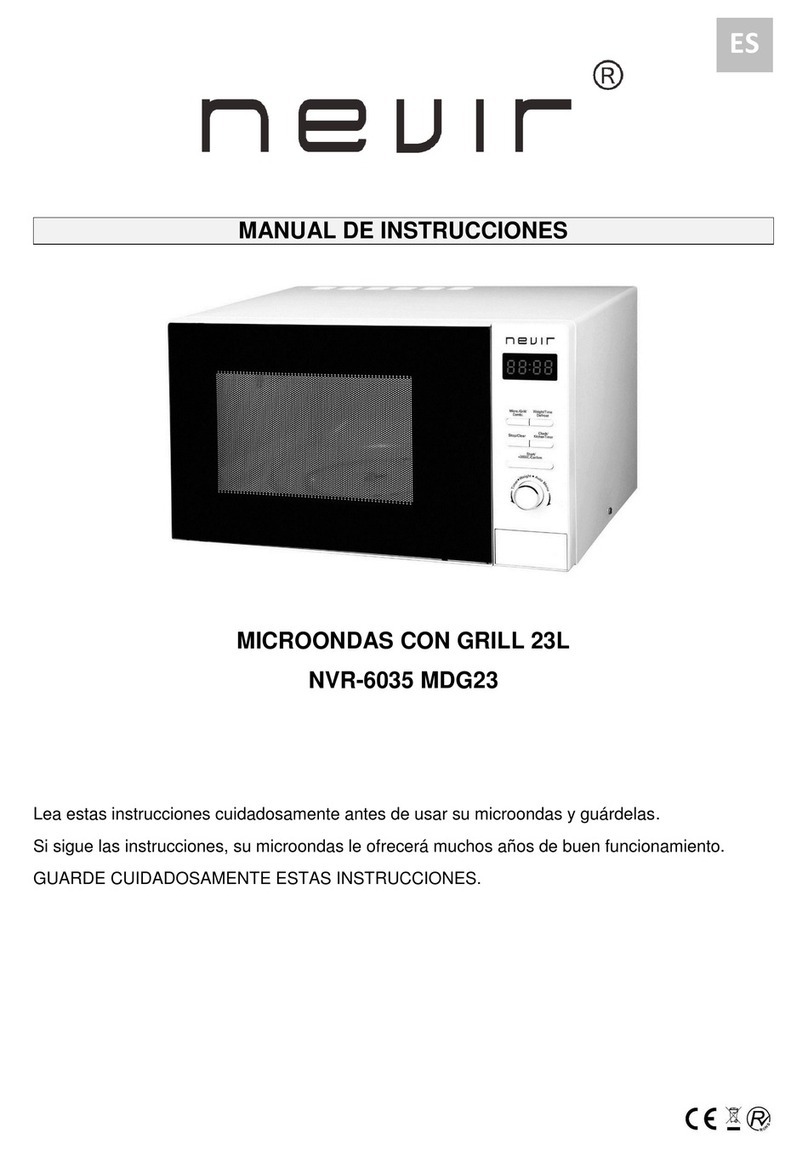
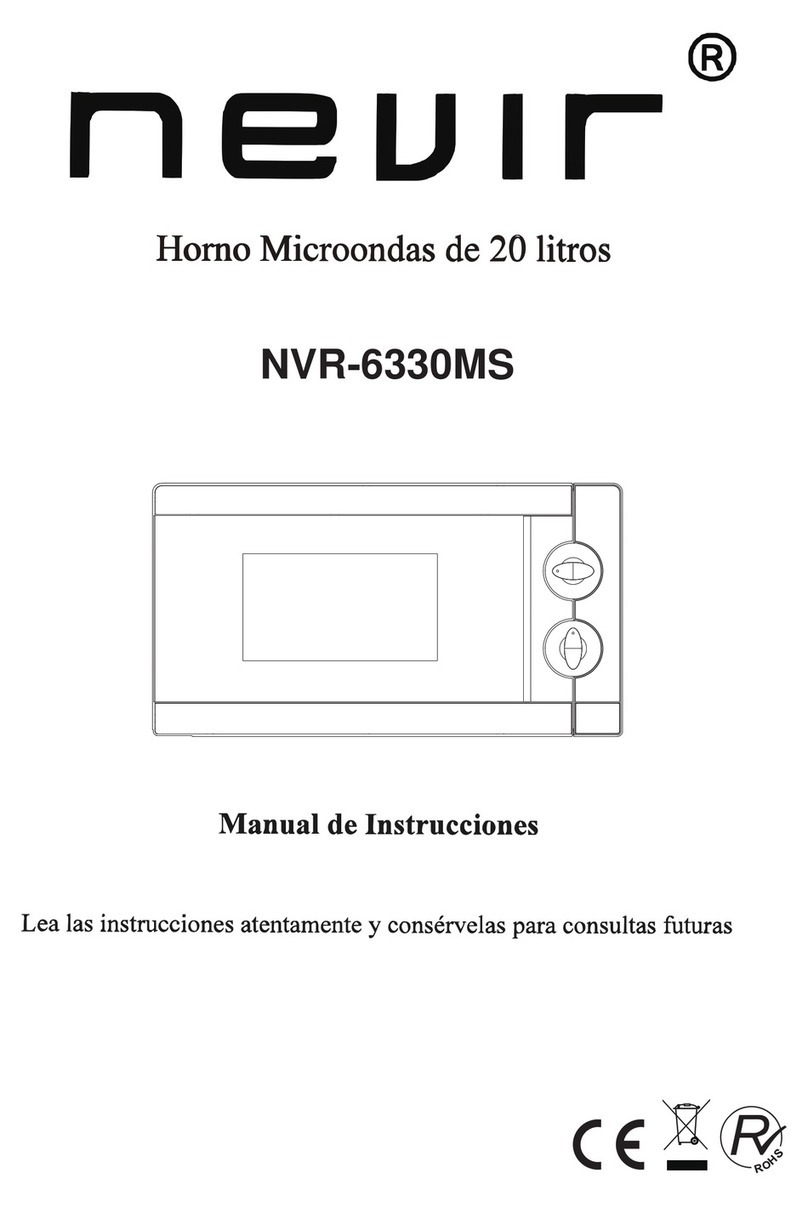
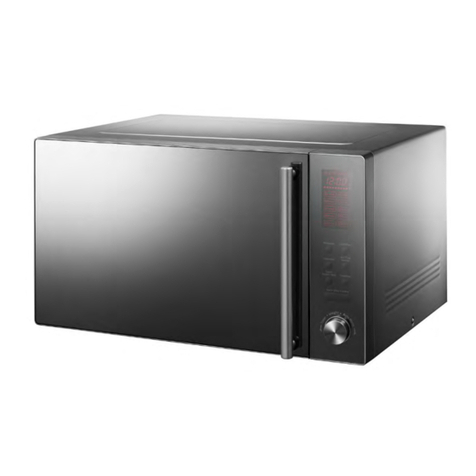
Nevir NVR-6150MDG User manual

Horno Microondas de 20 litros con Pantalla Digital y
Grill
NVR-6150MDG
Manual de Instrucciones
Lea las instrucciones atentamente y consérvelas para consultas futuras

INSTRUCCIONES DE SEGURIDAD IMPORTANTES
LÉALAS ATENTAMENTE Y CONSÉRVELAS PARA FUTURAS CONSULTAS
- AVISO: Cuando el aparato esté funcionando en modalidad de combinación, los niños deben
utilizar el horno únicamente bajo supervisión de un adulto debido a las temperaturas que se
generan. (Únicamente para el modelo con función grill)
- AVISO: Si la puerta o los sellos de la puerta están dañados, no debe utilizarse el horno hasta
que no haya sido reparado por una persona cualificada.
- AVISO: Es peligroso que una persona no cualificada lleve a cabo cualquier reparación o
servicio que implique la retirada de la cubierta que protege contra la exposición a energía
microondas.
- AVISO. No deben calentarse comidas o líquidos contenidos en recipientes sellados, ya que
éstos pueden explotar.
- AVISO: Puede permitir que los niños utilicen el horno sin supervisión únicamente cuando
hayan recibido instrucciones adecuadas sobre cómo utilizarlo de manera segura y hayan
comprendido los peligros de un uso indebido.
- El horno debe estar ventilado adecuadamente. Deje 10 cm de espacio en la parte posterior,
15 cm a ambos lados y 30 cm en la parte superior. No desmonte los patas del horno ni
bloquee sus salidas de aire.
- Utilice únicamente utensilios adecuados para hornos microondas.
- Si calienta comida en recipientes de plástico o papel, manténgase atento ya que podrían
incendiarse.
- Si saliera humo, apague o desenchufe el aparato y mantenga la puerta cerrada para sofocar
las llamas.
- Al calentar bebidas, éstas pueden llegar a hervir y derramarse por lo que debe tener cuidado
al manejar el recipiente.
- Debe removerse y agitarse el contenido de biberones o tarros de comida infantil, además de
comprobar la temperatura antes de servirlos para prevenir quemaduras.
- Los huevos con cáscara o los huevos duros no deben calentarse en el microondas, ya que
pueden explotar, incluso cuando el microondas ha acabado de calentarlos.
- Utilice únicamente jabones suaves no abrasivos o limpiadores aplicados con una esponja o
un paño suave cuando limpie la puerta, los sellos de la puerta y la cavidad del horno.
- Debe limpiar el horno de manera regular y retirando cualquier resto de comida.
- Si el horno no se mantiene limpio, puede provocar un deterioro de la superficie, lo cual
puede afectar a la vida del aparato y provocar alguna situación peligrosa.
- Si se daña el cable de alimentación, éste debe ser remplazado por el fabricante, el servicio
técnico o cualquier persona igualmente cualificada para evitar peligros.
2

ESPECIFICACIONES:
Consumo eléctrico: 230V~50Hz, 1080W
Salida: 700W
Grill: 800W
Frecuencia de funcionamiento: 2.450MHz
Medidas externas: 454 mm (Ancho) x 330 mm (Fondo) x 262 mm (Altura)
Medidas de la cavidad del horno: 315 mm (Ancho) x 296 mm (Fondo) x 211 mm (Altura)
Capacidad del horno: 20 litros
Peso sin embalar: Aproximadamente 10,5 kg
ANTES DE SOLICITAR SERVICIO TÉCNICO
1. Si el horno no funciona en absoluto, no aparece información en el visor o ésta desaparece:
a) Asegúrese de que el horno está enchufado de manera correcta y segura. Si no, desenchúfelo,
espere 10 segundos y vuélvalo a enchufar de manera segura.
b) Compruebe que no se ha fundido ningún fusible o que no ha saltado el interruptor eléctrico
automático. Si no se ha producido ninguno de estos dos hechos, compruebe el enchufe de pared con
otro aparato.
2. Si no funciona el interruptor de encendido:
a) Compruebe si está programado.
b) Asegúrese de que la puerta está correctamente cerrada con el engranaje de seguridad ajustado. De
lo contrario, la energía no fluirá en el horno.
SI NINGUNA DE ESTAS INDICACIONES SOLUCIONA LA SITUACIÓN, PÓNGASE EN
CONTACTO CON EL AGENTE DE SERVICIO TÉCNICO AUTORIZADO.
Nota:
Este aparato es para uso doméstico para calentar comida y bebidas mediante energía
electromagnética y debe utilizarse en espacios de interior.
RADIO INTERFERENCIAS
El horno microondas puede producir interferencias con la radio, la televisión o equipos similares. Si
se producen interferencias, puede eliminarlas o reducirlas mediante las siguientes acciones:
a. Limpie la puerta y la superficie de cierre del horno.
b. Coloque la radio, la televisión, etc. lo más alejadas posible del horno microondas
c. Utilice una antena para su radio instalada correctamente, televisión, etc. de manera que
reciba una buena señal.
3

INSTALACIÓN
1. Asegúrese de que todo el material de embalaje ha sido retirado del interior de la puerta.
2. Inspeccione el horno después de haberlo desembalado para comprobar que no tiene
desperfectos como:
La puerta mal alineada
La puerta dañada
Abolladuras o grietas en la ventana de la puerta y la pantalla
Abolladuras en el interior
Si son visibles algunas de estas situaciones, NO utilice el horno.
3. Este horno microondas pesa 10,5 kg por lo que debe ser colocado en una superficie
horizontal lo suficientemente resistente para aguantar este peso.
4. El horno debe colocarse alejado de fuentes de altas temperaturas o vapor.
5. NO coloque nada encima del horno.
6. Mantenga una distancia mínima de 8 cm entre el horno y las paredes a los lados y de 10 cm
con la pared trasera para asegurar una correcta ventilación.
7. NO retire la bandeja rotatoria.
8. Es necesario vigilar atentamente este aparato cuando lo utilice un niño.
AVISO – ESTE APARATO DEBE TENER TOMA DE TIERRA
1. El enchufe debe ser fácilmente accesible para el cable de alimentación.
2. Este horno requiere 1,1 kVA de entrada. Es aconsejable consultar con el servicio técnico
cuando se instale el horno.
PRECAUCIÓN: Este horno está protegido internamente por un fusible CA 250V de 8 amperios.
IMPORTANTE
Los cables del conducto principal de suministro eléctrico están coloreados siguiendo este código:
Verde y amarillo: Tierra
Azul : Neutro
Marrón : Con corriente
Es posible que los colores de los cables del conducto principal de suministro eléctrico no se
correspondan con las marcas coloreadas que identifican los terminales de su enchufe. En este
caso, actúe de la siguiente manera:
El cable de color verde y amarillo debe conectarse al terminal del enchufe marcado con la letra E
o con un símbolo de tierra de color verde o verde y amarillo.
El cable de color azul debe conectarse al terminal marcado con la letra N o de color negro.
El cable de color marrón debe conectarse al terminal marcado con la letra L o de color rojo.
4

INSTRUCCIONES DE SEGURIDAD PARA USO GENERAL
A continuación se indican ciertas normas y avisos de seguridad, comunes a otros aparatos, que
deben seguirse para asegurar un funcionamiento óptimo del horno:
1. Asegúrese de que el plato de cristal y el soporte giratorio estén correctamente colocados.
2. No utilice el horno para otros efectos que no sean preparar comida, como secar ropa, papel o
elementos no comestibles, o para esterilizar.
3. No haga funcionar el horno si está vacío, ya que podría dañarlo.
4. No utilice la cavidad del horno para almacenar nada: papeles, libros de cocina, etc.
5. No cocine alimentos que tengan membrana, tales como yemas de huevo, patatas, hígados de
pollo, etc. sin haberlos agujereado varias veces con un tenedor.
6. No introduzca ningún objeto en las aberturas de la cubierta exterior.
7. Nunca desmonte piezas del horno, tales como las patas, los enganches, tornillos, etc.
8. No cocine directamente sobre la bandeja de cristal. Coloque los alimentos en recipientes de
cocción adecuados antes de meterlos en el horno.
IMPORTANTE – UTENSILIOS DE COCINA QUE NO DEBEN UTILIZARSE EN EL
MICROONDAS
1. No utilice cazuelas de metal ni platos con asas metálicas.
2. No utilice nada que tenga bordes metálicos.
3. No utilice bolsas de plástico con cierres de alambre cubiertos de papel.
4. No utilice platos de melamina ya que contienen un material que absorbe la energía microondas.
Puede que los platos se agrieten o se chamusquen y que se reduzca la velocidad de cocción.
5. No utilice "Centura Tableware". El cristal no es apropiado para el uso en microondas. No deben
utilizarse tazas "Corelle Livingware" de asa cerrada.
6. No cocine en un recipiente con una abertura restringida tales como botellas de plástico o botellas
de aceite de ensalada porque pueden explotar si se calientan en el horno microondas.
7. No utilice termómetros cárnicos convencionales ni termómetros para golosinas. Existen
termómetros disponibles específicamente para la cocción en microondas, que son los que deben
utilizarse.
8. Deberán utilizarse sólo utensilios para microondas conforme a las instrucciones del fabricante.
9. No intente freír alimentos en aceite abundante en este horno.
10. Recuerde que un horno microondas calienta el líquido de un recipiente más que el recipiente
mismo. Por tanto, aunque la tapa de un recipiente no esté caliente al tacto al retirarlo del horno,
recuerde que el alimento/líquido emitirá la misma cantidad de vapor y/o chisporroteará cuando se
retire la tapa como en la cocina convencional.
11. Verifique siempre usted mismo la temperatura de la comida cocinada, especialmente si está
calentando o cocinando alimentos/líquidos para bebés. Es aconsejable no consumir nunca el
alimento/líquido directamente del horno, sino que debe dejarlo reposar unos minutos y revolver el
alimento/líquido para distribuir el calor uniformemente.
12. Los alimentos que contienen una mezcla de grasa y agua, (por ejemplo, caldo), deberán
permanecer de 30 a 60 segundos en el horno después de haberlo apagado. Así permite que la mezcla
se asiente y evita que burbujee al colocar una cuchara en el alimento/líquido o al añadir un cubito de
caldo.
5

13. Al preparar/cocinar el alimento/líquido, recuerde que hay ciertos alimentos, (por ejemplo, pudin
de Navidad, mermelada y carne picada), que se calientan muy rápido. Al calentar o cocinar
alimentos con un alto contenido en grasa o azúcar no utilice recipientes de plástico.
14. Es posible que los recipientes de cocina se calienten debido a la transferencia de calor del
alimento calentado. Esto ocurre especialmente cuando la envoltura de plástico ha estado cubriendo
la parte superior y las asas del recipiente. Serán necesarios unos guantes de cocina para manejar el
recipiente.
15. Para reducir el riesgo de incendio en la cavidad del horno:
a) No cocine excesivamente el alimento. Ponga especial atención al horno microondas si se ha
colocado papel, plástico u otros materiales combustibles en el interior del horno para facilitar el
cocinado.
b) Quite los cierres de alambre de las bolsas antes de colocarlas en el horno.
c) Si los materiales dentro del horno se incendian, mantenga la puerta del horno cerrada, desenchufe
el horno, o desconecte la corriente eléctrica en el panel donde se encuentran el fusible o el
interruptor automático.
DIAGRAMA DE PIEZAS
(1) Sistema de cierre de seguridad de la puerta
(2) Ventana del horno
(3) Ventilación
(4) Rodillo
(5) Bandeja de cristal
(6) Panel de control
(7) Soporte Grill
4
2
1
536
1
7
6

PANEL DE CONTROL
INSTRUCCIONES DE FUNCIONAMIENTO
1. COCCIÓN SIMPLE
Únicamente necesita pulsar “INICIO/RESTABLECER” para empezar a cocinar durante un
minuto con el 100% de la potencia de cocción. El tiempo máximo es 30 minutos. Una vez termine
la cocción sonarán cinco pitidos de aviso.
Pulse y mantenga pulsado “INICIO/RESTABLECER” durante 2 segundos para detenerlo.
(1) VISOR
(4) 10 Seg
(2) 10 Min
(3) 1 Min
(6) Inicio/Restablecer
(5) Micro/Grill
10 Min
1 Min
10 Sec
Micro/Grill
Start/Reset

2.- COCCIÓN CON MICROONDAS
(A) Método de cocción rápido
(Por ejemplo: seleccione la potencia 100% para cocinar alimentos durante 5 minutos)
a) Establezca el tiempo en “5:00”
b) Pulse el botón “INICIO/RESTABLECER”
(B) Control manual
(Por ejemplo: seleccione la potencia 70% para cocinar alimentos durante 10 minutos)
a) Pulse el botón “MICRO/GRILL” para seleccionar 70% de potencia.
b) Pulse el botón del temporizador para establecer el tiempo de cocción en “10:00”.
c) Pulse el botón “INICIO/RESTABLECER”.
Puede pulsar el botón “MICRO/GRILL” para seleccionar la potencia.
Paso Visualización Potencia del microondas
1 P10 100%
2 P7 70%
3 P5 50%
4 P3 30%
5 P1 10%
3. FUNCIÓN DE DESCONGELADO AUTOMÁTICO
Es necesario pulsar “1 m” (1,0 kg) y “10 s” (0,1 kg) según el peso de los alimentos. Se puede
seleccionar en el horno el programa de descongelado o el inicio automático de descongelado.
Por ejemplo: para descongelar 0,4 kg de alimentos congelados
1) Pulse “MICRO/GRILL para seleccionar la función de descongelado. Se visualiza “DEF”.
2) Establezca el peso “0,4 kg” pulsando los botones “1 m” y “10 s”.
3) Pulse el botón “INICIO/RESTABLECER”.
Observación: el peso máximo es 2 kg.
8

4.- GRILL/FUNCIÓN COMBINADA
Esta función tiene 4 modalidades; puede elegir su modo favorito presionando el botón
“MICRO/GRILL. (El tiempo máximo es de 60 minutos)
MODO 1: 100% Potencia de Grill; El visor mostrará “G1”
MODO 2: 50% Potencia de Grill; El visor mostrará “G2”
MODO 3: Modo Combinado I ( 55% Potencia Microondas + 45% Potencia de Grill); El visor
mostrará “C1”
MODO 4: Modo Combinado II ( 30% Potencia Microondas + 70% Potencia de Grill); El visor
mostrará “C2”
Durante el modo Grill (No incluyendo Modos combinados I Y II), el proceso se detendrá
automáticamente y sonarán dos pitidos para recordarle voltear los alimentos. Esta acción se produce
en el momento que se haya consumido la mitad del tiempo de cocinado programado. Una vez dado la
vuelta a los alimentos, cierre la puerta de la unidad y presione “INICIO/RESTABLECER para
continuar. Si no desea voltear los alimentos, la unidad continuará después de 1 minuto.
5.- INICIO/RESTABLECER
1) Con la puerta abierta
Pulse el botón “INICIO/RESTABLECER” para cancelar el programa de cocción establecido.
2) Con la puerta cerrada
Pulse el botón “INICIO/RESTABLECER” para empezar a cocinar después de establecer el
programa de cocción.
Pulse el botón “INICIO/RESTABLECER” para continuar la cocción después de una pausa.
Pulse el botón “INICIO/RESTABLECER” para detener el horno cuando esté funcionando.
6. BLOQUEO DE SEGURIDAD PARA NIÑOS
Para activar el bloqueo para niños pulse los botones “1 m” y “10 s” al mismo tiempo durante 2
segundos. Después de hacerlo, ningún botón responderá. Si pulsa de nuevo los botones “1 m” y
“10s” al mismo tiempo durante 2 segundos, se desbloqueará esta función.
9

CUIDADO DE SU HORNO MICROONDAS
1. Apague el horno y desenchúfelo de la toma de pared antes de limpiarlo.
2. Mantenga el horno siempre limpio. Si hay salpicaduras de comida o de líquido derramado
en las paredes del horno, límpielo con un paño húmedo.
No se recomienda utilizar limpiadores fuertes o abrasivos.
3. La superficie externa del horno debe limpiarse con un paño húmedo. Para evitar dañar las
piezas de funcionamiento del interior del horno, debe evitar que se filtre agua por las
aberturas de ventilación.
4. Evite que se moje el Panel de control. Límpielo con un paño suave y húmedo. No utilice
limpiadores abrasivos ni aerosoles en el Panel de control.
5. Si se acumula vapor en el interior o alrededor de la parte externa de la puerta del horno,
frótelo con un paño suave. Esto puede suceder cuando el horno funciona en condiciones de
alta humedad, pero en ningún caso indica que no esté funcionando correctamente.
6. Es necesario retirar la bandeja de cristal de vez en cuando para limpiarla. Límpiela en agua
jabonosa templada o en el lavavajillas.
7. El rodillo y la superficie de la cavidad del horno deben limpiarse con frecuencia para evitar
el exceso de ruido. Simplemente frote la superficie inferior del horno con un limpiador
suave, agua o limpiacristales y séquela. El rodillo debe lavarse con agua jabonosa no muy
fría o en el lavavajillas. El vapor de cocción se acumula por un uso frecuente, pero no afecta
a la superficie inferior ni a las ruedas del rodillo. Cuando retire el rodillo de la base de la
cavidad para su limpieza, asegúrese de volverlo a colocar en la posición correcta.
8. Elimine los olores de su horno poniendo en una taza de agua el zumo y la piel de un limón
en una taza grande apta para microondas. Caliéntela en el microondas durante 5 minutos,
frote bien el horno y séquelo con un paño suave seco.
9. Consulte con su proveedor cuando necesite sustituir la bombilla del horno.
Este aparato ha sido testado de acuerdo a las directrices vigentes de la CE, como las normas
de compatibilidad electromagnética y las directivas de bajo voltaje, y ha sido fabricado de
acuerdo a las normas de seguridad más recientes.
Sujeto a cambios técnicos sin previo aviso.
“Para dar cumplimiento a la Norma UNE EN-60335, indicamos que si el cable flexible se daña,
únicamente puede ser sustituido por un taller de reparación reconocido por el fabricante
NEVIR, S.A., ya que se necesitan herramientas especiales”
Este símbolo sobre el producto o en las instrucciones quiere decir que su
equipamiento eléctrico y electrónico debería ser depositado al final de su vida útil
por separado de la basura domestica. Hay sistemas de recogida para el reciclaje en
toda la UE. Para más información, consulte con las autoridades locales o con la
tienda donde adquirió el reproductor
10

20 Liters Electronic Microwave with Grill
NVR-6150MDG
Instruction Manual
Read the Instruction carefully and keep for Future Reference

-The temperature of accessible surfaces may be high when the appliance
is operating.
IMPORTANT SAFETY INSTRUCTIONS
READ CAREFULLY AND KEEP FOR FUTURE REFERENCE
-WARNING: when the appliance is operated in the combination mode,
children should only use the oven under adult supervision due to
the temperatures generated;
-WARNING: if the door or door seals are damaged, the oven must not be
operated until it has been repaired by a competent person;
-WARNING: it is hazardous for anyone other than a competent person to
carry out any service or repair operation that involves the removal
of a cover which gives protection against exposure to microwave
energy;
-WARNING: liquids and other foods must not be heated in sealed
containers since they are liable to explode
-WARNING: Only allow children to use the oven without supervision
when adequate instructions have been given so that the child is
able to use the oven in a safe way and understands the hazards of
improper use;
-only use utensils that are suitable for use in microwave ovens
-when heating food in plastic or paper containers, keep an eye on the
oven due to the possibility of ignition;
-if smoke is observed, switch of or unplug the appliance and keep the
door closed in order to stifle any flames;
-microwave heating of beverages can result in delayed eruptive boiling,
therefore care must be taken when handling the container;
-the contents of feeding bottles and baby food jars shall be stirred or
shaken and the temperature checked before consumption, in order to
avoid burns;
-eggs in their shell and whole hard-boiled eggs should not be heated in
microwave ovens since they may explode, even after microwave
heating has ended;
-the oven should be cleaned regularly and any food deposits removed;
-failure to maintain the oven in a clean condition could lead to
deterioration of the surface that could adversely affect the life of the
appliance and possibly result in a hazardous situation;
-if the supply cord is damaged, it must be replaced by the manufacturer,
its service agent or similarly qualified persons in order to avoid a
hazard.
12

SPECIFICATIONS
Power consumption:
Output:
Grill Heater:
Operating Frequency:
Outside Dimensions:
Oven Cavity Dimensions:
Oven Capacity:
Uncrated Weight:
230V~50Hz,1080W
700W
800W
2,450MHz
20litres
Approx. 10.5kg
BEFORE YOU CALL FOR SERVICE
1. If the oven will not perform at all, the display does not
appear or the display disappears:
a) Check to ensure that the oven is plugged in securely. If it
is not, remove the plug from the outlet, wait 10 seconds
and plug it in again securely.
b) Check the premises for a blown circuit fuse or a tripped
main circuit breaker. If these seem to be operating properly,
test the outlet with another appliance.
2. If the microwave power does not function:
a) Check to see whether the timer is set.
b) Check to make sure that the door is securely closed to
engage the safety interlocks. Otherwise, the microwave
energy will not flow into the oven.
RADIO INTERFERENCE
Microwave oven may cause interference to your radio, TV, or similar equipment. When interference occurs, it may be
eliminated or reduced by the following procedures.
a. Clean the door and sealing surface of the oven.
b. Place the radio, TV, etc. as far away from your microwave oven as possible.
c. Use a properly installed antenna for your radio, TV, etc. to get a strong signal reception.
IF NONE OF THE ABOVE RECTIFIES THE SITUATION, THEN CONTACT THE AUTHORIZED SERVICE AGENT.
Note:
The appliance is for household use for heating food and beverages using electromagnetic energy and for indoor
use only.
454mm(W) X 330mm(D) X 262mm(H)
315mm(W) X 296mm(D) X 211mm(H)
13

WARNING-THIS APPLIANCE MUST BE EARTHED.
1. The plug socket should be within easy reach
of the power cord
2. This oven requires 1.3 KVA for its input.
consultation with service engineer is
suggested when installing the oven.
CAUTION:This oven is protected internally by
IMPORTANT
The wires in this mains lead are coloured in accordance with the following code:
Green-and-yellow : Earth
Blue : Neutral
Brown : Live
As the colours of the wires in the mains leads of the appliance may not correspond with the coloured markings
identifying the terminals in your plug, proceed as follows:
The wire which is coloured green-and-yellow must be connected to the terminal in the plug which is marked with the
letter E or by the earth symbol coloured green of green-and-yellow.
The wire which is coloured blue must be connected to the terminal which is marked with the letter N or coloured black.
The wire which is coloured brown must be connected to the terminal which is marked with the letter L or coloured red.
INSTALLATION
1. Make sure all the packing materials are removed from
the inside of the door.
2. Inspect the oven after unpacking for any visual
damage such as:
Misaligned Door
Damaged Door
Dents or Holes in Door Window and Screen
Dents in Cavity
If any of the above are visible, DO NOT use the
oven.
3. This Microwave Oven weighs 10.5 kg and must be
placed on a horizontal surface strong enough to
support this weight.
4. The oven must be placed away from high temperature
and steam.
5. DO NOT place anything on top of the oven.
6. DO NOT remove the turn -table drive shaft.
7. As with any appliance, close supervision is necessary
when used by children.
DF9 8 $PS)XVH
14

SAFETY INSTRUCTIONS FOR GENERAL USE
Listed below are, as with all appliances, certain rules to follow and safeguards to assure top performance from
this oven:
1. Always have the glass tray, roller arms, coupling and roller track in place when operating the oven.
2. Do not use the oven for any reason other than food preparation, such as for drying clothes, paper, or any
other nonfood items, or for sterilizing purposes.
3. Do not operate the oven when empty. This could damage the oven.
4. Do not use the oven cavity for any type of storage,such a papers, cookbooks, etc.
5.Do not cook any food surrounded by a membrane,such as egg yolks,potatoes,chicken livers,etc without
first being pierced several times with a fork.
IMPORTANT SAFETY INSTRUCTIONS
-WARNING: When the appliance is operated in the combination mode, children should only use the oven under adult
supervision due to the temperatures generated; (Only for the model with grill function)
-WARNING: If the door or door seals are damaged, the oven must not be operated until it has been repaired by a
competent person;
-WARNING: It is hazardous for anyone other than a competent person to carry out any service or repair operation
that involves the removal of a cover which gives protection against exposure to microwave energy;
-WARNING: liquids and other foods must not be heated in sealed containers since they are liable to explode.
-WARNING: Only allow children to use the oven without supervision when adequate instructions have been given
so that the child is able to use the oven in a safe way and understands the hazards of improper use;
- The oven must have sufficient air flow.Keep 10 cm space at back;15 cm at both sides and 30cms from top of the
oven.Don't remove oven's feet, do not block air events of the oven.
- Only use utensils that are suitable for use in microwave ovens.
- When heating food in plastic or paper containers, keep an eye on the oven due to the possibility of ignition;
- If smoke is observed, switch off or unplug the appliance and keep the door closed in order to stifle any flames;
- Microwave heating of beverages can result in delayed eruptive boiling, therefore care must be taken when handling
the container;
- The contents of feeding bottles and baby food jars shall be stirred or shaken and the temperature checked before
consumption, in order to avoid burns;
- Eggs in their shell and whole hard-boiled eggs should not be heated in microwave ovens since they may explode,
even after microwave heating has ended;
- When cleaning surfaces of door, door seal, cavity of the oven, use only mild, nonabrasive soaps, or detergents
applied with a sponge or soft cloth.
- The oven should be cleaned regularly and any food deposits removed;
- Failure to maintain the oven in a clean condition could lead to deterioration of the surface that could adversely affect
the life of the appliance and possibly result in a hazardous situation;
- If the supply cord is damaged, it must be replaced by the manufacturer, its service agent or
similarly qualified persons in order to avoid a hazard.
15

6. Do not insert any object into the openings on the outer
case.
7. Do not at any time remove parts from the oven such as
the feet, coupling, screws, etc.
8. Do not cook food directly on the glass tray. Place food
in/on proper cooking utensil before placing in the oven.
9. IMPORTANT-COOKWARE NOT TO USE IN YOUR
MICROWAVE OVEN
Do not use metal pans or dishes with metal handles.
Do not use anything with metal trim.
Do not use paper covered wire twist-ties on plastic bags.
Do not use melamine dishes as they contain a material
which will absorb microwave energy. This may cause
the dishes to crack or char and will slow down the
cooking speed.
Do not use Centura Tableware. The glaze is not suitable
for microwave use. Corelle Livingware closed handle
cups should not be used.
Do not cook in a container with a restricted opening,
such as a pop bottle or salad oil bottle, as they may
explode if heated in a microwave oven.
Do not use conventional meat or candy thermometers.
There are the thermometers available specifically for
microwave cooking. These may be used.
10. Microwave utensils should be used only in
accordance with manufacturer's instructions.
11. Do not attempt to deep-fry foods in this oven.
12. Please remember that a microwave oven only
heats the liquid in a container rather than the
container itself.Therefore, even though the lid
of a container is not hot to the touch when
removed from the oven, please remember that
the food/liquid inside will be releasing the same
amount of steam and/or spitting when the lid is
removed as in conventional cooking.
13. Always test the temperature of cooked food
yourself especially if you are heating or cooking
food/liquid for babies. It is advisable never to
consume food/liquid straight from the oven but
allow it to stand for a few minutes and stir food/
liquid to distribute heat evenly.
14. Food containing a mixture of fat and water,
e.g.stock,should stand for 30-60 seconds in the
oven after it has been turned off. This is to allow
the mixture to settle and to prevent bubbling when
a spoon is placed in the food/liquid or a stock cube
is added.
15. When preparing/cooking food/liquid and remember
that there are certain foods, e.g. Christmas
puddings, jam and mincemeat, which heat up very
quickly. When heating or cooking foods with a high
fat or sugar content do not use plastic containers.
16. Cooking utensil may become hot because of heat
transferred from the heated food. This is especially
true if plastic wrap has been covering the top and
handles of the utensil. Potholders may be needed
to handle the utensil.
17.To reduce the risk of fire in the oven cavity:
(a)Do not overcook food. Carefully attend microwave
oven if paper, plastic, or other combustible materials
are placed inside the oven to facilitate cooking.
(b)Remove wire twist-ties from bags before placing
bag in oven.
(c)If materials inside the oven should ignite, keep oven
door closed, turn the oven off at the wall switch, or
shut off power at the fuse or circuit breaker panel.
FEATURE DIAGRAM
(1) Door Safety Lock System
(2) Oven Window
(3) Oven Air Vent
(4) Roller Ring
(5) Glass Tray
(6) Control Panel
(7) Grill rack
4
2
1
536
1
7
16

CONTROL PANEL
OPERATION INSTRUCTION
1.SIMPLE COOKING
You only need press "START/RESET " to start cooking for 1 min with 100% microwave powe r. Each press means
increasing one minute cooking time, the maximum time is 30 m in. After cooking finished you will sound five beeps
for remind.
Press and hold the "Start/Reset" for 2 seconds to stop.
(1) VISOR
(4) 10 Seg
(2) 10 Min
(3) 1 Min
(6) Inicio/Restablecer
(5) Micro/Grill
10 Min
1 Min
10 Sec
Micro/Grill
Start/Reset

2.MICROWAVE COOKING
(A) Fast cooking method
(For example: Select 100% power to cook foods for 5 minutes.)
a) Set the time "5:00"
b) Press "START/RESET" button
(B) Control by hand
(For example: Select 70% power to cook foods for 10 minutes)
a) Press "MICRO/GRILL" button to select 70% power.
b) Press time button to set cooking time "10:00"
c) Press "START/RESET" button.
You can press "MICRO/GRILL" button to select power.
3.AUTO DEFROST FUNCTION
You need to press "1Min" (1.0kg) and "10Sec" (0.1kg) according to the weight of the food.The oven can
select defrosting program and auto start defrosting.
For example: defrost 0.4kg frozen foods
1) Press "MICRO/GRILL" to choose defrost function, display "DEF".
2) Set weight "0.4kg" by pressing "1Min" and "10Sec" buttons.
3).Press "START/RESET" button.
Remark: the maximum weight is 2kgs.
4.GRILL/COMBINATION COOKING FUNCTION
This function has four modes, you can choose the favourite mode by pressing the "MICRO/GRILL" button.
(The maximum time is 60 minutes)
Mode 1: 100% grill power, display "G-1".
Mode 2: 50% grill power, display "G-2".
Mode 3: Combination cook I (55% micro+45% grill) display "C-1".
Mode 4: Combination cooking II (30% microwave+ 70% grill) display "C-2".
In grill operation (exclusive combination grill), the procedure will pause automatically and sound two beeps to
remind you to turn over the food at the half of cooking time. Close the oven door after you turn over the food,
then press "START/RESET", cooking will continue; If you do not want to turn over the food, the oven will
continue cooking automatically after one minute pause.
Step
1 P10 100%
70%
50%
30%
10%
P7
P5
P3
P1
2
3
4
5
Display Micro power
18

5.STARTAND RESET
1) Open door status
Press "START/RESET" button to cancel setting or cooking program.
2) Close door status
Press "START/RESET" button to start cooking after setting cooking program.
Press "START/RESET" button to continue cooking when the cooking is in pause status.
Press "START/RESET" button to stop working when the microwave oven is operating.
6.CHILDREN SAFETY LOCK
To activate the Child Lock, press "1Min" and "10Sec" buttons at the same time for 2 seconds.After that press
any button is useless. If press "1Min" and "10Sec" button at the same time for 2 seconds again it will unlock
this function.
CARE OF YOUR MICROWAVE OVEN
1.Turn the oven off and remove the power plug from the wall socket before cleaning.
2.Keep the inside of the oven clean.When food splatters or spilled liquids adhere to oven walls,wipe with a
damp cloth.The use of harsh detergent or abrasives is not recommended.
3.The outside oven surface should be cleaned with a damp cloth.To prevent damage to the operating parts
inside the oven,water should not be allowed to seep into the ventilation openings.
4.Do not allow the Control Panel to become wet. Clean with a soft, damp cloth, Do not use detergents,
abrasives or spray-on cleaners on the control Panel.
5.If steam accumulates inside or around the outside of the oven door, wipe with a soft cloth.This may occur
when the microwave oven is operated under high humidity conditions and in no way indicates malfunction
of the unit.
6.It is occasionally necessary to remove the glass tray for cleaning.Wash the tray in warm sudsy water or in
a dishwasher.
7.The roller ring and oven cavity floor should be cleaned regularly to avoid excessive noise.Simply wipe the
bottom surface of the oven with mild detergent,water or window cleaner and dry.The roller ring may be
washed in mild sudsy water or dish washer.Cooking vapour collect during repeated use but in no way
affect the bottom surface or roller ring wheels.
When removing the roller ring from cavity floor for cleaning,be sure to replace it in the proper position.
8.Remove odors from your oven by combining a cup of water with the juice and skin of one lemon in a
deep microwaveable bowl. Microwave for 5 minutes,wipe thoroughly and dry with a soft cloth.
9.When it becomes necessary to replace the oven light,please consult a dealer to have it replaced.
19

“In order to fulfill ruling UNE EN-600335, we indicate that if the flexible wire is damaged, it can only
be substituted by a technical service recognized by NEVIR, S.A., as per special tooling is required”
This symbol indicates that when the end-user wishes to discard this product, it must be
sent to separate collection facilities for recovery and recycling. By separating this products
from other household-type waste, the volume of waste sent to incinerators or land fields is
reduced and natural resources will thus be conserved.
FU2
F
FA
SWC
H
SWA
TM
FM
L
FU1
C3 L
NOISE FILTER
F1
R1
C1 L
L
L
E
N
H
SO
SWB
RY
C2
P(OUT)
N
T(IN)
R4-2
SW2
H(OUT)
RY
D_SWK3 GNDK2K4
RY
JP1-1
JP1-2
CONTROLLER
R2
D1 R3
N
RY
D2
C4
R4-1
SCHEMATIC DIAGRAM
(DOOR OPENED,COOK OFF CONDITION)
*CIRCUIT SUBJECT TO CHANGE WITHOUT NOTICE
SWA: PRIMARY INTERLOCK SWITCH
SWB: SECONDARY INTERLOCK SWITCH
SWC: THE MONITOR INTERLOCK SWITCH
L: LAMP
FM: FAN MOTOR
TM: TURNTABLE MOTOR
H: HEATER
MAGNETRON
TRANSFORMER
SH C
2D 1D
20
Table of contents
Languages:
Other Nevir Microwave Oven manuals

Nevir
Nevir NVR-6225MG User manual

Nevir
Nevir NVR-6340 MDGS User manual

Nevir
Nevir NVR-6035 MDG23 User manual

Nevir
Nevir NVR-6330MS User manual

Nevir
Nevir NVR-6307MD User manual

Nevir
Nevir NVR-6123MG User manual

Nevir
Nevir NVR-6306MGN User manual

Nevir
Nevir NVR-6137 MEDGS User manual

Nevir
Nevir NVR-6232MS User manual

Nevir
Nevir NVR-6301MG User manual

Nevir
Nevir NVR-6231 MDG25 User manual

Nevir
Nevir NVR-6230M User manual

Nevir
Nevir NVR-6300M User manual

Nevir
Nevir NVR-6305M User manual

Nevir
Nevir NVR-6334MGS User manual

Nevir
Nevir NVR-6233MGS User manual

Nevir
Nevir NVR-6229 MMDG User manual

Nevir
Nevir NVR-6320MEGS User manual

Nevir
Nevir NVR-6321MEDGS User manual

Nevir
Nevir NVR-6023 MG User manual