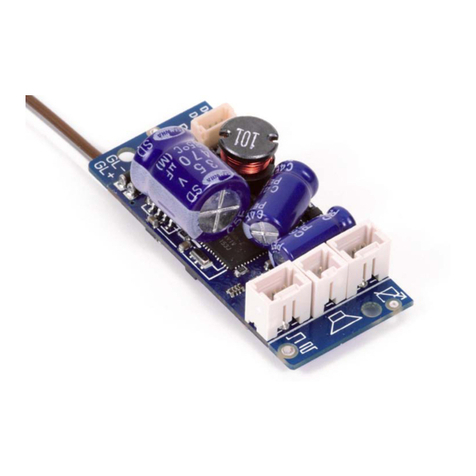
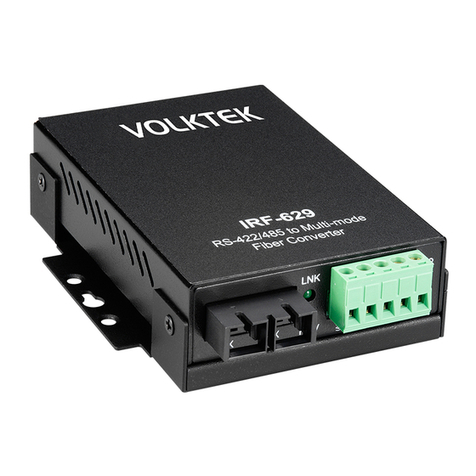
Newtons4th CAN-port User manual

CAN-port
CAN to RS232 Converter
User Manual
Version 1.0

2
Table of Contents
Table of Contents .................................................................................................. 2
About .................................................................................................................. 3
Introduction ......................................................................................................... 3
Technical Specification ........................................................................................... 4
Serial Connection (RS232) .................................................................................. 4
Serial Connection (CAN)...................................................................................... 4
Quick Start........................................................................................................... 5
Loading firmware into the CAN-port .................................................................... 5
Manual Setup of the CAN-port............................................................................ 5
Using PPA Datalogger to set up the CAN-port ....................................................... 5
Connecting to PPA Datalogger.............................................................................. 6
Adjusting the CAN-port’s settings using PPA Datalogger ........................................ 8
Setting up Multilogs for the CAN-port in PPA Datalogger ...................................... 11
Saving and Loading PCAN Setup Settings in PPA Datalogger .................................. 14
Finalising the setup with PPA Datalogger ............................................................. 16
Communications Usage........................................................................................ 17
Sending Commands to the CAN-port unit........................................................... 17
Direct Commands............................................................................................. 17
Requesting Multilog Data................................................................................... 18
Command List..................................................................................................... 19
BAUD ............................................................................................................. 20
BAUD? ............................................................................................................ 21
BITR............................................................................................................... 22
BITR? ............................................................................................................. 23
ID .................................................................................................................. 24
ID?................................................................................................................. 25
IDN? / *IDN?................................................................................................... 26
MLCOUNT........................................................................................................ 27
MLCOUNT? ...................................................................................................... 28
MLNOOLD ....................................................................................................... 29
MLNOOLD? ...................................................................................................... 30
MLREP ............................................................................................................ 31
MLREP?........................................................................................................... 32
MLREPLY ......................................................................................................... 33
MLREPLY? ....................................................................................................... 34
MLSTART ........................................................................................................ 35
MLSTOP .......................................................................................................... 36
MS ................................................................................................................. 37
MS?................................................................................................................ 38
MULTILOG....................................................................................................... 39
POWLOAD ....................................................................................................... 40
POWLOAD?...................................................................................................... 41
POWML ........................................................................................................... 42
POWML? ......................................................................................................... 43
POWSTAT........................................................................................................ 44
POWSTAT? ...................................................................................................... 45
POWSET ......................................................................................................... 46
POWSET? ........................................................................................................ 47
PROG.............................................................................................................. 48
PROG? ............................................................................................................ 49
REPLY............................................................................................................. 50
REPLY? ........................................................................................................... 51
STATUS?......................................................................................................... 52

3
About
This user manual was written for CAN-port firmware version 1.0.0 and
describes the general features, usage, specifications of the CAN-port unit,
including detailed descriptions of the communications commands used by the
unit.
Introduction
The CAN-port unit is designed as an interface between a CAN network and a
Newtons4th PPA series Power Analyzer. The unit receives commands from the
CAN network or via serial (RS232) and then processes these commands and
controls and instructs the PPA; responses from the PPA are reformatted and split
into multiple messages and placed onto the CAN network. The CAN-port unit
can be used to control the PPA remotely by using CAN messages to send
instructions to the PPA, additionally the CAN-port unit can be instructed to send
commands as soon as it is powered on that automatically sets the PPA up for
logging.

4
Technical Specification
Microcontroller
NXP LPC2194/01
Memory
32kByte EEPROM Atmel AT24C32B (via I2C)
CAN
High-Seed CAN ISO 11898-2
Transceiver NXP TJA1040T
Bit rates 40kbit/s –1Mbit/s
No termination
RS232
RxD and TxD serial connections with DTC and CTS
shorted
Status Indication
Duo LED
Supply Voltage
8-30V DC
Current Consumption
Max 70mA at 12V
Operating
Temperature
-40 to +85 °C (-40 to +185 °F)
Relative Humidity
15-90%, not condensing
Size
130 x 82 x 44 (W x D x H)
Weight
150g
EMC
EN 61326-1:2013-07
EC Directive 2004/108/EG
Ingress Protection
(IEC 60529)
IP20
Serial Connection (RS232)
The RS232 port on the CAN-port uses 9-pin male ‘D’ type with the following
pins.
Pin
Function
1
Not used
2
RX data
3
TX data
4
Not used
5
GND
6
Not used
7
RTS
8
CTS
9
Not used
Serial Connection (CAN)
The CAN port on the CAN-port uses 9-pin male ‘D’ type with the following pins.
Pin
Function
1
Not used
2
CAN L
3
GND
4
Not used
5
Not used
6
GND

5
7
CAN H
8
Not used
9
Not used
Quick Start
This section of the manual describes how to setup and begin using the CAN-
port unit and PPA in a CAN network.
Loading firmware into the CAN-port
To load new firmware into the CAN-port unit, ensure it is powered off. Connect
the CAN terminal to a PC using a CAN converter. To place the CAN-port unit
into Boot Mode, hold the boot switch on and then power on the unit. The light on
the CAN-port unit should be flashing orange, indicating it has successfully
entered boot mode.
Once in boot mode, load up PCAN-Flash and navigate to Application->Option.
Set the Hardware Profile to PCAN-RS-232, and then select the Filename’s browse
button, and navigate to the firmware’s .bin file, and select it. Leave all other
settings as default and press “OK”.
Next navigate to PCAN->Connect and select the CAN-port device which should
appear in a list in the connect window and press OK.
Finally, Navigate to Module->Detect to have PCAN-Flash detect the CAN-port’s
firmware, select Module 15 which will appear in the main window of PCAN-Flash
and then select Module->Programme.
The status bar at the bottom shows the progress of the firmware install and will
announce when the firmware upload has finished. Close the program and power
cycle the CAN-port unit and it will now use the new firmware
Manual Setup of the CAN-port
The CAN-port unit can be set up manually by sending commands to the CAN-
port unit via a serial connection. Ensure the CAN-port unit is powered on; the
status light should be blinking green. Once the CAN-port unit is on, connect an
RS232 cable to the serial port and connect it to your PC. Open Newton4th
CommView2 program and connect to the COM Port that is connected to the
CAN-port unit.
Once connected on CommView2 commands can be sent to the CAN-port unit by
typing them into the command bar at the bottom of the program and pressing
the Enter key. Any responses from the CAN-port unit will be displayed in
CommView2.
Using PPA Datalogger to set up the CAN-port
The easiest way to set up the CAN-port unit is to use Newtons4th’s PPA
Datalogger program to choose which settings the CAN-port unit should be set
up with when it powers on, and allow PPA Datalogger to send all the commands
to set up the unit

6
This is a simple one-time setup that can be performed once, and the CAN-port
will remember the settings each time it powers on and will attempt to set up the
connected PPA.
Connecting to PPA Datalogger
Ensure the CAN-port unit is powered on; the status light should be blinking
green. Once the CAN-port unit is on, connect an RS232 cable to the serial port
and connect it to your PC. Open the PPA Datalogger software and navigate to
the PCAN menu.
Press the Connect button to bring up the connection window where you will set
up your serial connection to the CAN-port unit.
Select serial, the correct com port and the correct baud rate (default: 19200).
Use the Test button to check if the software is able to form a connection and
communicate with the CAN-port unit; once the settings are correct press
Connect.
If the connection was a success you will see a message telling you that the
connection was successful and the details of the unit you connected to.

7

8
Adjusting the CAN-port’s settings using PPA Datalogger
The PPA Datalogger software now allows you to edit the settings that your CAN-
port unit will remember when it powers on. Some of these settings will help set
up the CAN-port and others tell the CAN-port to set up the PPA.
The Connection Settings allows you to set the CAN Bitrate and Serial Baudrate
The CAN Message Settings allow you to edit how the CAN-port unit interacts
with the rest of the CAN network.
CAN Read ID is the CAN message ID (in hex) that the CAN-port unit will accept
CAN messages from.
CAN Reply ID is the CAN message ID (in hex) that the CAN-port unit will send
its CAN messages to.
The Power On Settings allows you to configure what the CAN-port unit does
when it first powers on.
Send status when PCAN powers on? causes the CAN-port unit to send a status
message (the equivalent of the STATUS? command) over the CAN network as
soon as it powers on.
Load a PPA Program when PCAN powers on? allows you to send a command over
the serial connection to the PPA that gets it to load one of its stored programs,
allowing the CAN-port to send a command when it powers on to set up all the
PPA’s settings.
Set up Multilog information when PCAN powers on?allows the CAN-port to send
commands when it powers on to set up the PPA’s Multilog list, ready for logging
data.
Request Multilog data when PCAN powers on? causes the CAN-port to request
an initial set of data from the PPA as soon as the multilog information has been
set into the PPA upon power up. If the CAN-port is set to repeatedly request
data from the PPA, this will start the loop of data being requested.

9
The Multilog Settings allows you to configure how the CAN-port unit handles
multilogs, including which multilogs to set, and how to format them
Reply with old data if no new data is available? ensures the CAN-port unit sends
a reply when multilog data is requested, even if no new data is available. The
previous set of data is sent in case a new set of data is not available.
Send the first reply in a multilog response as the data count? causes the CAN-
port unit to send a counter as the first CAN message in a formatted set of
multilog responses; the counter increases each time new data is received from
the PPA.
Send multilog data over CAN… allows you to change where the multilog data will
be sent, per multilog value. You can either send all responses to the CAN Reply
ID, to custom IDs set per multilog value, or to incremental IDs per message,
starting at the CAN Reply ID.
When to request result from the PPA… determines when the CAN-port would
request multilog data for you. You can have multilog data return only when
requested, repeatedly at a set interval or repeatedly (on command) when told to
using the MLSTART/MLSTOP commands at a set interval.
Repeat Speed is the speed at which the CAN-port unit sends multilog data if its
available.

10

11
Setting up Multilogs for the CAN-port in PPA Datalogger
Using PPA Datalogger you can select up to 60 Multilog parameters that can be
set into the CAN-port unit which it will, when powered on, send the
corresponding commands to the PPA to set it up to log those parameters.
To choose the multilog parameters press the Select Multilogs
PPA Datalogger will display a wide selection of Multilog parameters, check the
values you want to log and then press OK.

12
The selected values will now appear in the list on the PCAN Setup page; to
change the selected multilog parameters, pres Select Multilogs again and change
your selection.
The first value is Data Count, because we have “Send the first reply in a multilog
response as the data count?” selected. Un-ticking that removes the data count.
Additionally the ID starts at the CAN Reply ID, and increases each message that
will need to be sent across the CAN Network, as “Send Multilog Data over CAN”
setting is set to “To incremental IDs starting at Reply ID”. Selecting “To the
Reply ID” changes the ID value to the CAN Reply ID:

13
Selecting Custom allows the ID to be changed using the “Edit Selected” button.
To use this button, select a multilog by clicking it (other than Data Count) and
press the Edit Selected Button.
Editting a multilog allows you to change the format type, start location in the
message, the length of the message this value will use up and a scale factor and
offset. Additionally, if “Send Multilog Data over CAN” is set to “To custom IDs”
you can also edit the ID the message will be sent to.
Multiple values can be share a CAN message by ensuring that they do not
overlap and fit in 8 bytes. If the “Send Multilog Data over CAN” is set to “To
Custom IDs” they also need to share IDs.

14
Saving and Loading PCAN Setup Settings in PPA Datalogger
To save the setup, press the Save button in the bottom left corner of the PCAN
Setup window
This allows you to save the current setup as a .ini file
The .ini file is fully editable, and a good way to edit multilogs and other settings

15
Load an .ini file using the Load button in the bottom left corner
And the settings will match the values in the .ini file

16
Finalising the setup with PPA Datalogger
Once all the settings are correct press the Setup PCAN button to transfer the
settings to the CAN-port unit.
Once PPA Datalogger has sent all the settings to the CAN-port
PPA Datalogger disconnects from the CAN-port unit. At this point, the CAN-
port unit should be turned off, and the serial cable removed from the PC. Attach
the serial cable to the PPA and ensure the PPA is turned on and its interface is
set to RS232 (and with the correct baud rate) in the REMOTE menu.
From then onwards, each time you turn the CAN-port unit on, it will then set up
the PPA as per the settings from PPA Datalogger.

17
Communications Usage
All commands can be sent over SERIAL or CAN connection, all responses from
the PCAN RS232 will be sent back along the connection you sent the command
from, unless otherwise noted. Commands sent via SERIAL must end in either a
Semi Colon (‘;’), a Newline character or a Line Feed Character. Everything
received over SERIAL that isn’t a command is stored until terminated by a Semi
Colon, Newline or Linefeed character, and then it is processed and sent over CAN.
There is a 1 second timeout on all serial commands, if the command is not
terminated before the timeout, it is discarded.
The CAN-port will only respond to messages where the message’s CAN ID
matches the set read ID. CAN commands that require more than 1 CAN Message,
or CAN commands to be sent to the PPA will be stored until terminated by either
a Semi Colon, Newline or Linefeed character, then it is processed. There is a 1
second timeout for multiline CAN commands; if the command is not terminated
before the timeout it is discarded.
Sending Commands to the CAN-port unit
Commands can be sent to the CAN-port unit either by sending a CAN message
with the CAN Message’s ID set to the ID that the CAN-port unit is set to read
over the CAN network, or by connecting to the CAN-port unit with a serial
(RS232) connection and using Newtons4th’s CommView2 program.
Direct Commands
Commands can be sent to the PPA via the CAN-port unit by sending the full
command for the instrument followed by a semi-colon, line feed or newline
character (eg. “SPEED,WINDOW,0.002;”). To see a full list of commands that
can be sent to the PPA please refer to your PPA’s Comms Manual.

18
Requesting Multilog Data
To request Multilog data from the PPA via the CAN-port, simply send a direct
command to the PPA using the “MULTIL?;”, “MULTI#?;” or “MULTIL,lines?;”
query over CAN, as described in your PPA’s Comms Manual.
The “MULTI#?;” command will be sent for you automatically if you have set the
CAN-port to repeatedly request data from the PPA, and on power up if POWML
is set (either via command or by using PPA Datalogger’s “Request Multilog Data
when PCAN powers on?” option)

19
Command List
A list of all commands the CAN-port uses
BAUD
BAUD?
BITR
BITR?
ID
ID?
IDN?/*IDN?
MLCOUNT
MLCOUNT?
MLNOOLD
MLNOOLD?
MLREP
MLREP?
MLREPLY
MLREPLY?
MLSTART
MLSTOP
MS
MS?
MULTILOG
POWLOAD
POWLOAD?
POWML
POWML?
POWSTAT
POWSTAT?
POWSET
POWSET?
PROG
PROG?
REPLY
REPLY?
STATUS?

20
BAUD
Description:
Sets the baudrate of the serial output
Parameters:
Single integer value, representing baudrate
Values:
0 = 1200
1 = 2400
2 = 4800
3 = 9600
4 = 19200
5 = 38400
6 = 57600
7 = 115200
Example:
"BAUD3"
Sets the baudrate to 9600
Table of contents
