NextBase 9 Duo Professional User manual

9 Duo Professional
Instruction Manual
Do not throw electronic devices into household
waste, for detailed information contact your
local civic office, household waste center or place
of purchase.
PIXEL FAILURE STATEMENT
The LCD screen contains 1,152,000 pixels, pixels can fail during normal product life.
1 pixel = 0.0003% failure rate. One pixel failure per year or operation is considered
normal and not a cause for concern or warrantable.

PRECAUTIONS
TABLE OF CONTENTS
CAUTIONS ON USING
THIS PLAYER
DISCS PLAYABLE
PACKAGE CONTENTS
PARTS AND REMOTE
CONTROL
BASIC OPERATIONS
USB & SD PLAYBACK
MULTIMEDIA PLAYBACK
PRECAUTIONS
TABLE OF CONTENTS
CAUTIONS ON USING THIS PLAYER
DISCS PLAYABLE ON THIS DVD PLAYER
PLAYABLE FORMATS
PACKAGE CONTENTS
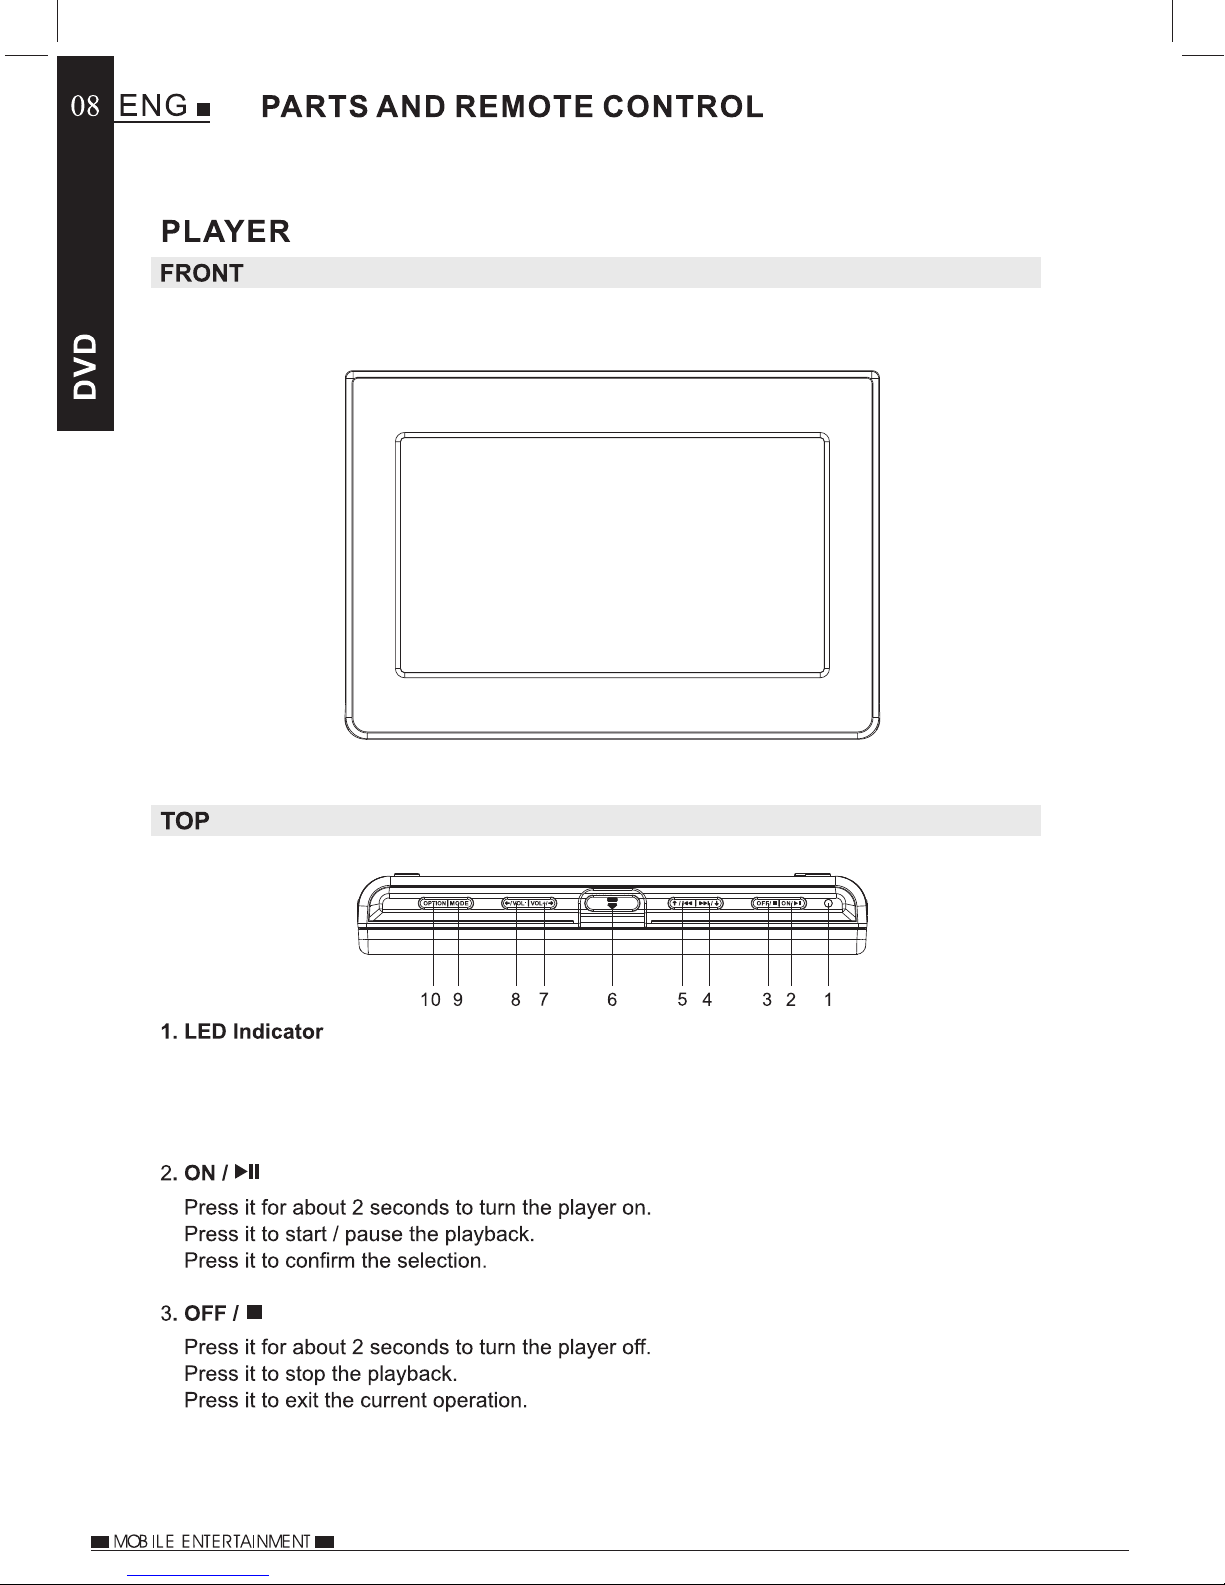
PLAYER
FRONT
TOP
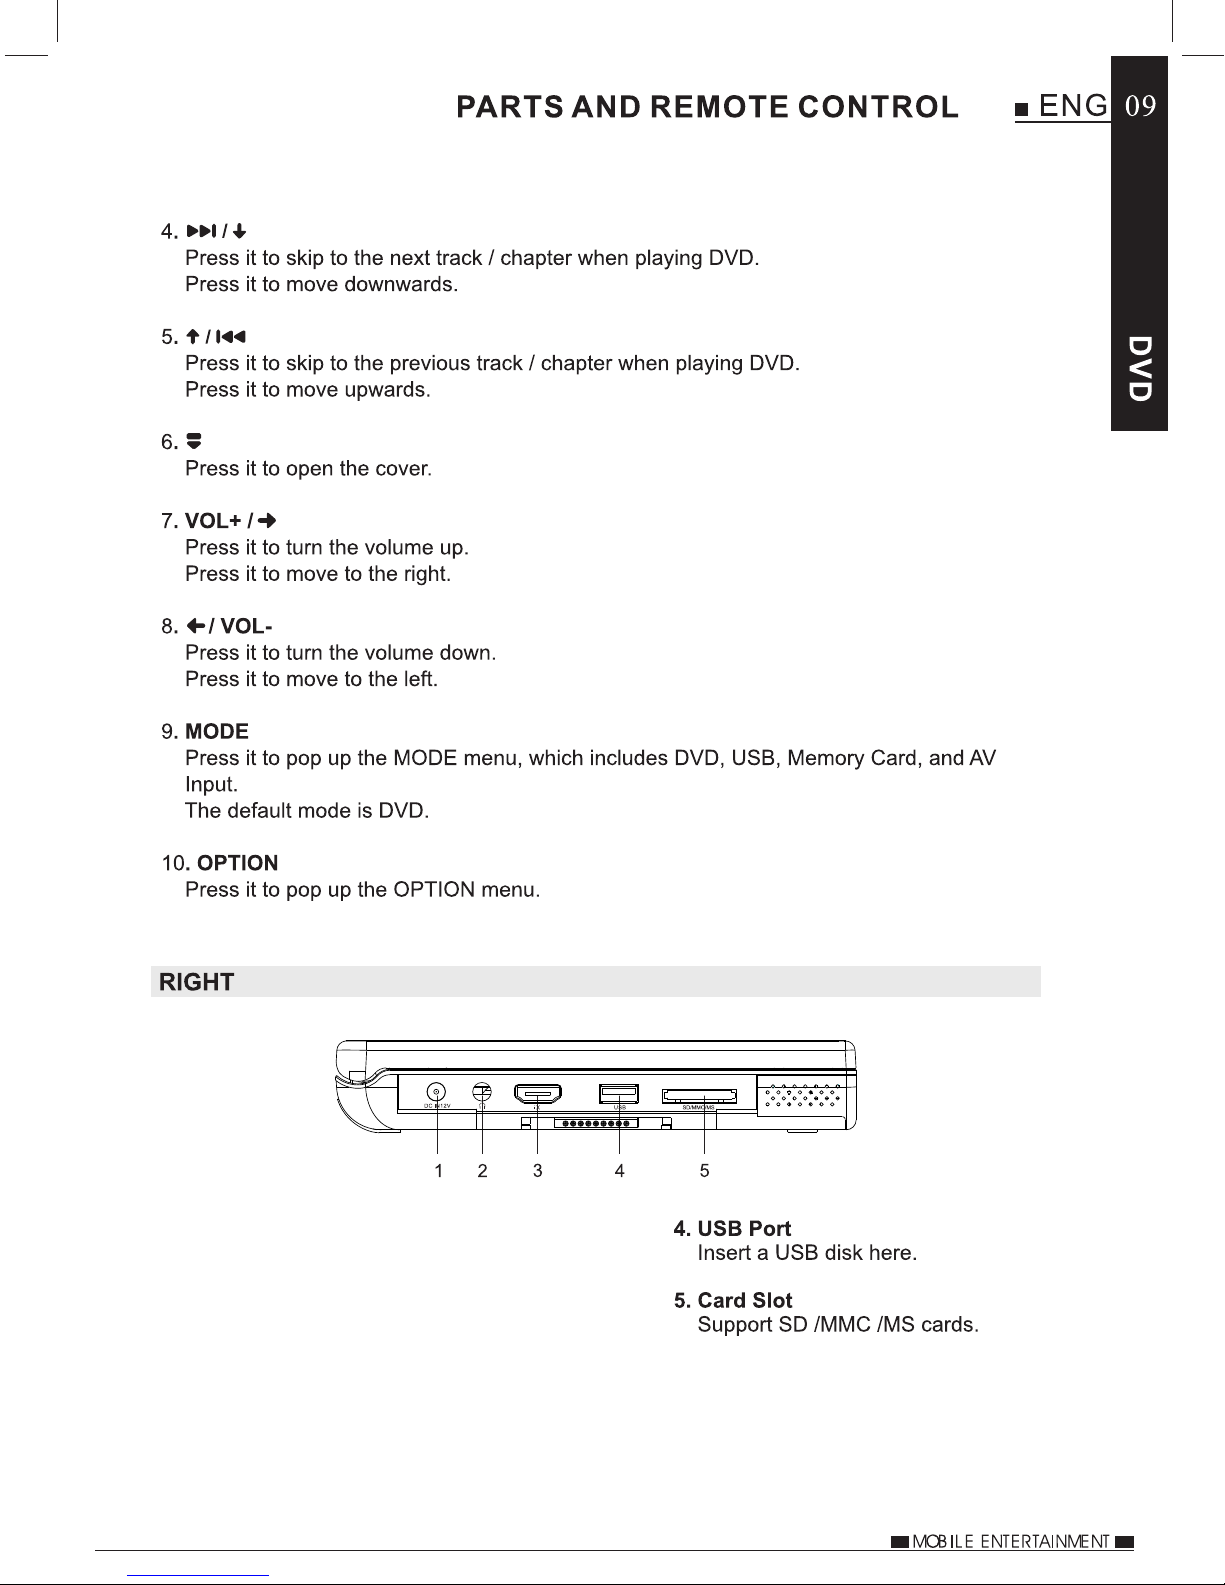
RIGHT
LEFT
BACK
HOW TO USE THE STAND
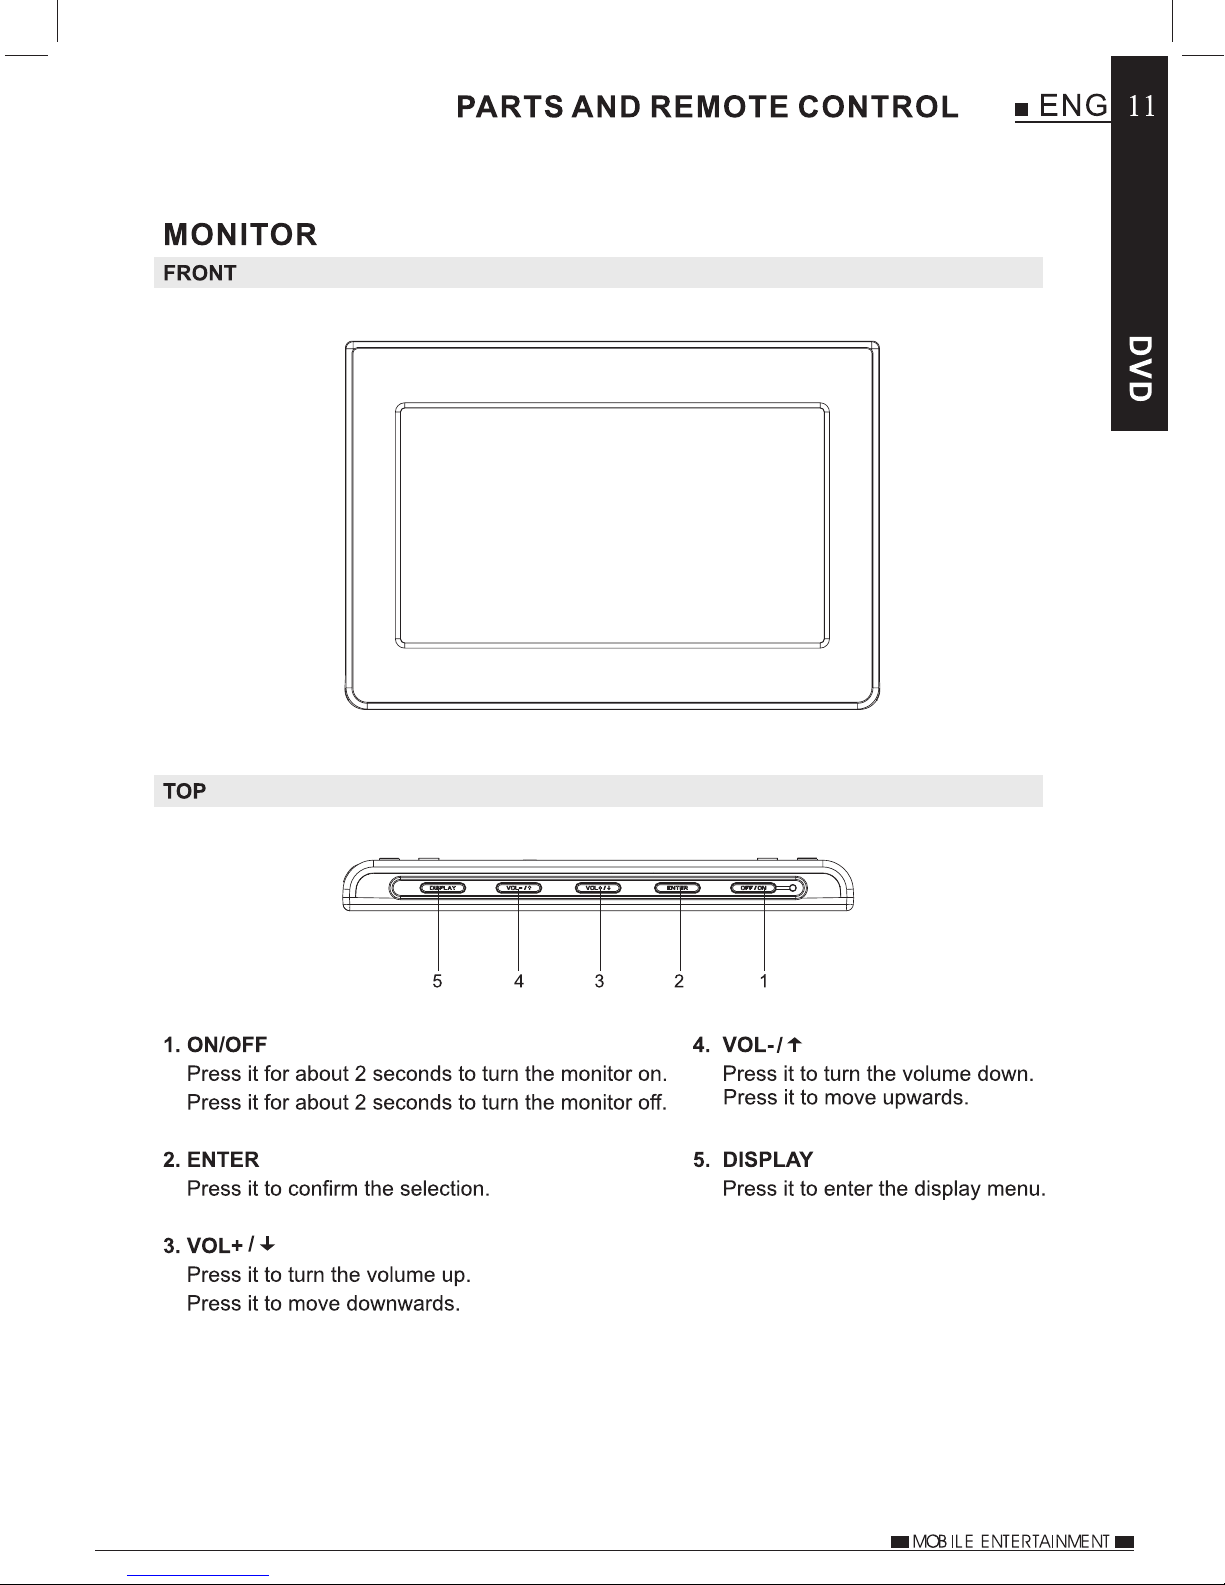
MONITOR
FRONT
TOP
RIGHT
LEFT
HOW TO USE THE STAND
REMOTE CONTROL
NOTES ON USING THE REMOTE CONTROL
REPLACING THE BATTERY
TURNING ON THE PLAYER AND MONITOR
SELECTING A LANGUAGE
TURNING OFF THE PLAYER AND MONITOR
LOADING A DISC
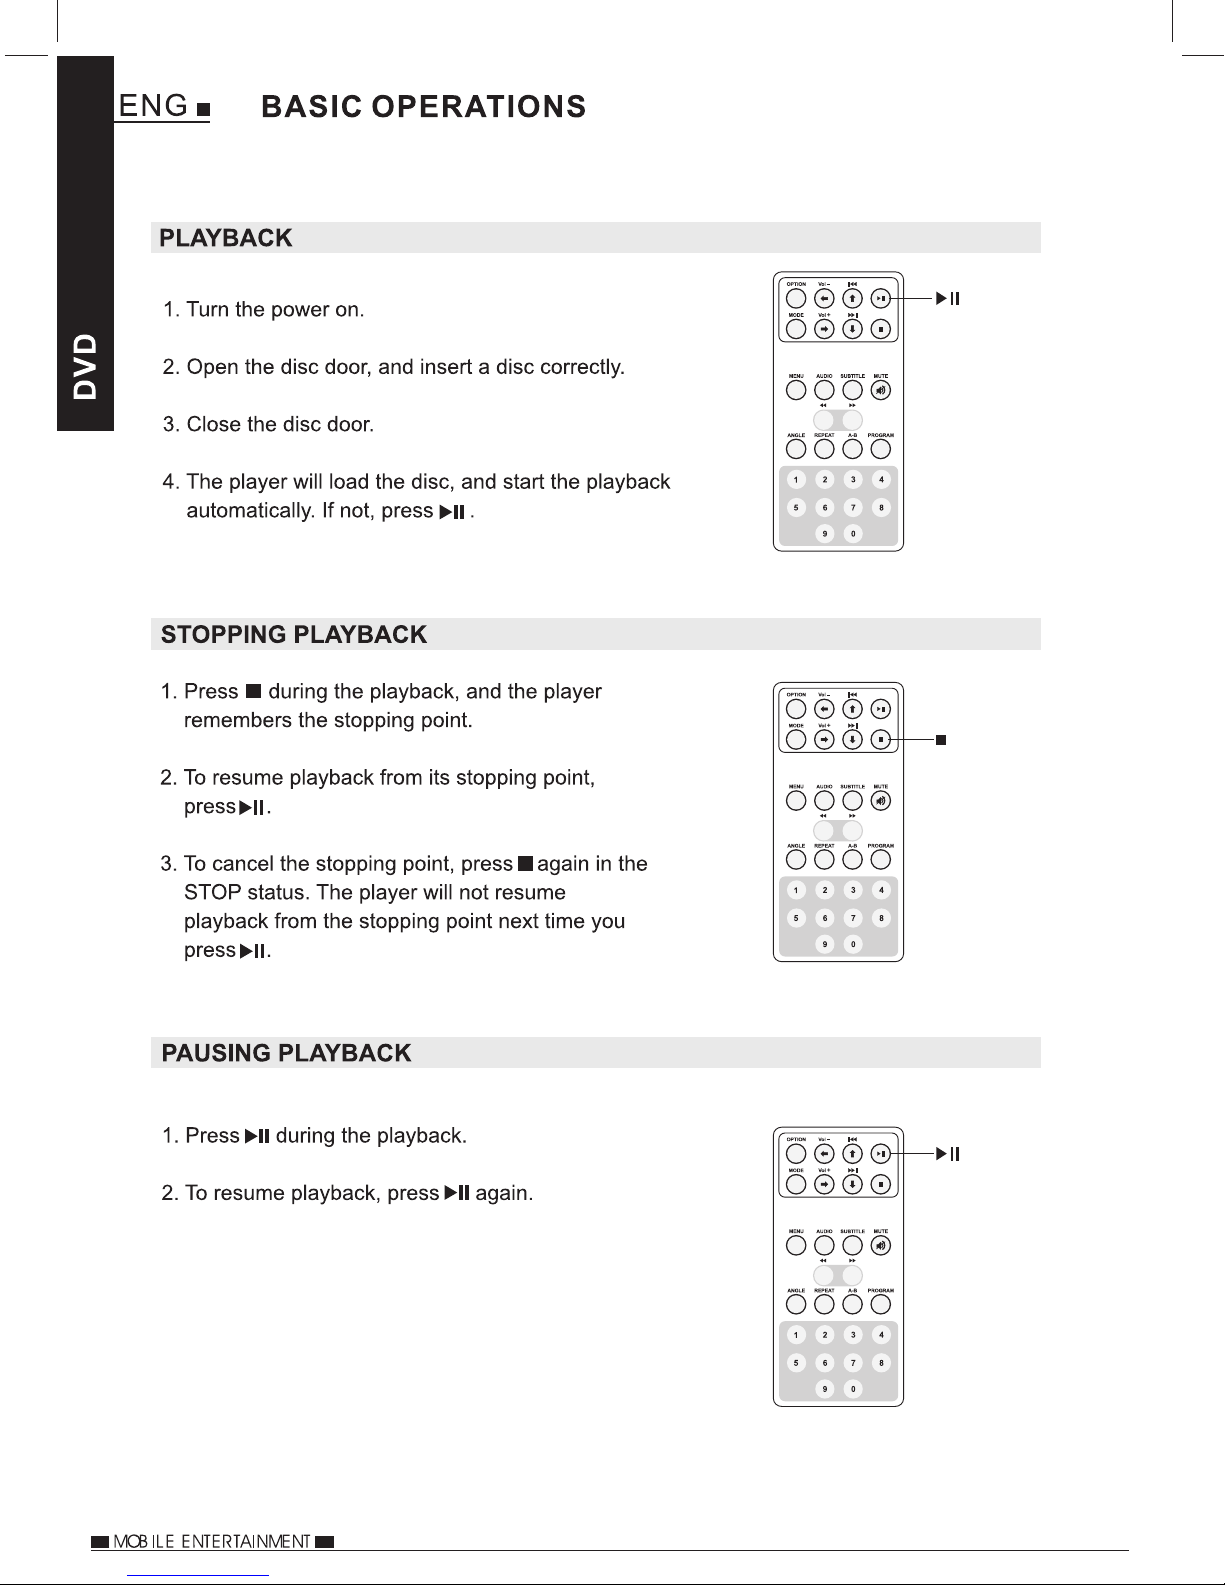
PLAYBACK
STOPPING PLAYBACK
PAUSING PLAYBACK
INSERTING A USB STICK
INSERTING A SD CARD
MULTIMEDIA FILE PLAYBACK
PLAYING MUSIC FILES
VIEWING JPEG FILES
PLAYING VIDEO FILES
.......................................................1
..........................................3
........................5
.................6
.............................................6
............................................7
...................................................................8
........................................................................8
....................................................................9
.....................................................................10
...................................................................10
.....................................10
.................................................................11
......................................................................11
..................................................................12
....................................................................12
.....................................12
.............................................13
..........15
...................................15
............16
....................................16
..........17
..................................................17
..........................................................18
.........................................18
............................................18
......................................19
.........................................19
...............................20
.........................................20
..........................................21
.........................................21

SYSTEM SETUP
DIGITAL SETUP
DISC SETUP
MODE
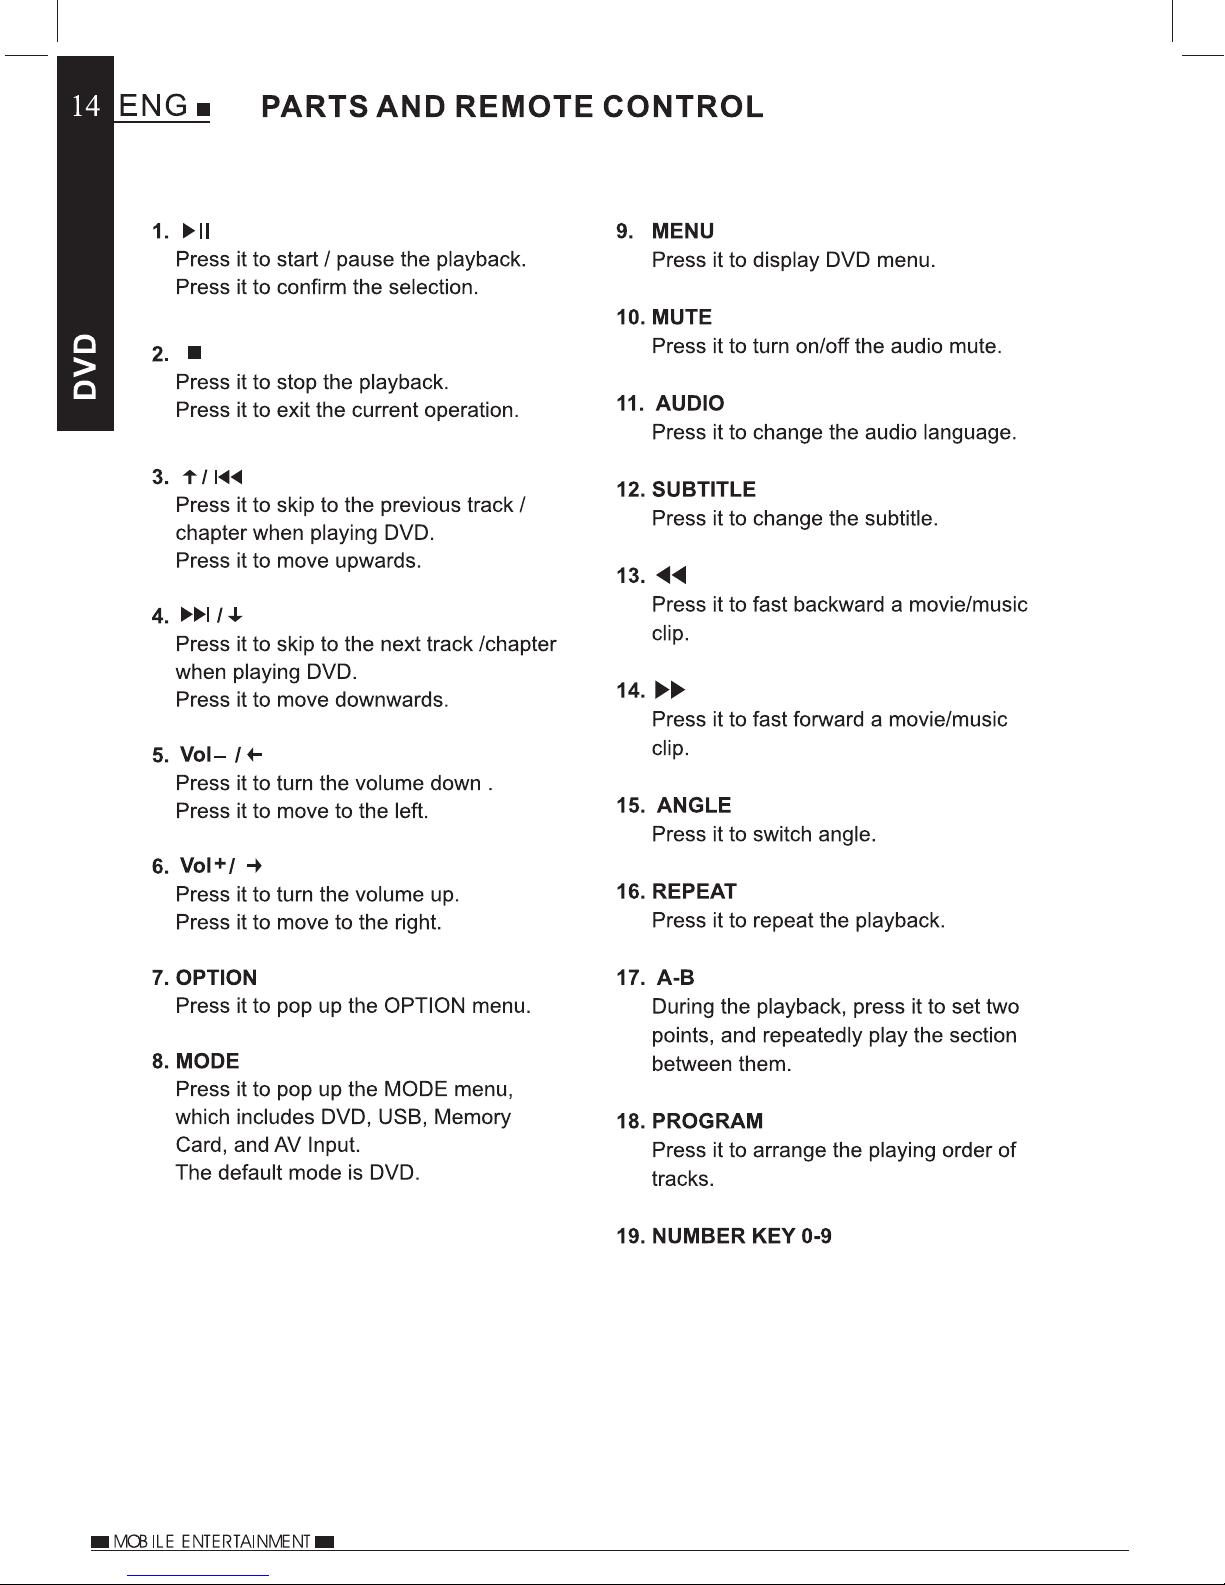
FUNCTIONS ON THE
REMOTE CONTROL
INFRA RED
HEADPHONES
OPTIONAL
ACCESSORIES
INFORMATION
OPTION MENU
TURNING ON THE INFRA RED TRANSMITTER
PLAYER DISPLAY
MONITOR DISPLAY
TV SYSTEM
SCREEN SAVER
TV TYPE
PASSWORD
RATING
FACTORY RESET
LANGUAGE
SUBTITLE
SOUND EFFECT
DYNAMIC RANGE
DIVX® VOD
DISC MENU
INFORMATION
MUTE
AUDIO
SUBTITLE
REPEAT
ZOOM
MODE
USB STICK AND SD CARD READING
PLAYING AT FAST SPEED
A-B PLAYBACK
ANGLE
PROGRAM
USING THE INFRA RED HEADPHONES
OPTIONAL ACCESSORIES
DIMENSION AND PARAMETERS
TROUBLE SHOOTING
REPLACING THE CAR POWER CABLE FUSE
BROKEN SCREEN IDENTIFICATION
....................................................24
.......24
.................................................25
...............................................26
..........................................................26
...................................................26
..............................................................27
..........................................................27
................................................................28
..................................................28
..........................................................29
............................................................29
...................................................30
.................................................30
..........................................................31
..........................................................32
.....................................................32
...................................................................33
.................................................................34
............................................................35
...............................................................36
..................................................................37
.................................................................38
.....................39
......................................40
.....................................................40
.................................................................40
............................................................41
..................43
....................................44
............................45
...........................................45
.........46
......................47

1. DO NOT MOVE THE PLAYER DURING PLAYBACK
During playback, the disc spins at high speed. Do not lift or move the player. doing
so may damage the disc.
2. TRANSPORTING THE PLAYER
Before transporting the player, please remove the disc, turn off the power, and
disconnect from power source.
3. PLACE IF INSTALLATION
When used outside of a vehicle, select a suitable place to position the player,
for example do not place on top of a TV or colour monitor.
Do not place next to another device that may be effected by magnetic forces.
4. TURN OFF THE POWER WHEN NOT USING THE PLAYER
If the player is connected to your TV but not in use, switch the power off. it can
cause interference with your normal TV picture.
Noise problems may also be experienced if the player is used near a radio.
5. STORAGE TEMPERATURE OF THE PLAYER
Do not leave the player in places where temperature is extremely low (about -10°C
or lower) or extremely high (about 60°C or higher), such as in the passenger
compartment or trunk in midsummer. Doing so cause damage to the product.
6. WHEN USING IN A VEHICLE
Please turn the engine on prior to connecting power via the car power cable.
7. CLEANING THE PLAYER
Clean the player with a soft dry cloth. for tough dirt, apply some neutral detergent
diluted in 5 to 6 parts water to a soft cloth, and wring out thoroughly. Wipe off the dirt,
then clean the player with a dry clean cloth. note that alcohol, thinner, benzene,
insecticides, etc., may cause the paint or coating to peel off, Also avoid leaving
rubber or plastic products in contact with the player for long periods of time, as this
may damage the cabinet. When using chemically treated cloths, read the cloths
instructions carefully. Always disconnect the product from the power source before
cleaning.
8. NEVER TOUCH THE LASER PICKUP LENS
Do not touch the laser pickup lens. Doing so may cause damage the to the player.
Refer servicing to the qualified personnel.
9. COPYRIGHTS
Unauthorized duplication, broadcast, public performance or rental is prohibited by law.
10. MODEL NUMBER
To find the model number of the player, please remove stand.

DISCS PLAYABLE ON THIS DVD PLAYER

After unpacking, please check the contents.
Optional accessories, available from you local dealer.
Player
IR Headphone x 2
Car Power Cable
Remote Control
Stanchion Mounts x 2
Instruction Manual
Carry Case
Quick Start Guide
Monitor
Power Pack
(Battery & AC Adaptor)
Additional
IR Headphones
When the power is connected, the LED indicator will be green to show the player is
powered.
1. DCIN 12V
the correct adaptor which is supplied
with the ‘Power Pack’ optional accessory.
2. Earphone Jack
Connect earphones or amplifier here.
3. iX (Interface Extend) Port
Connect to other devices here.
Connector / Cable is specific to the player,
contact Technical Support for details.
Connect the AC Adaptor here, use
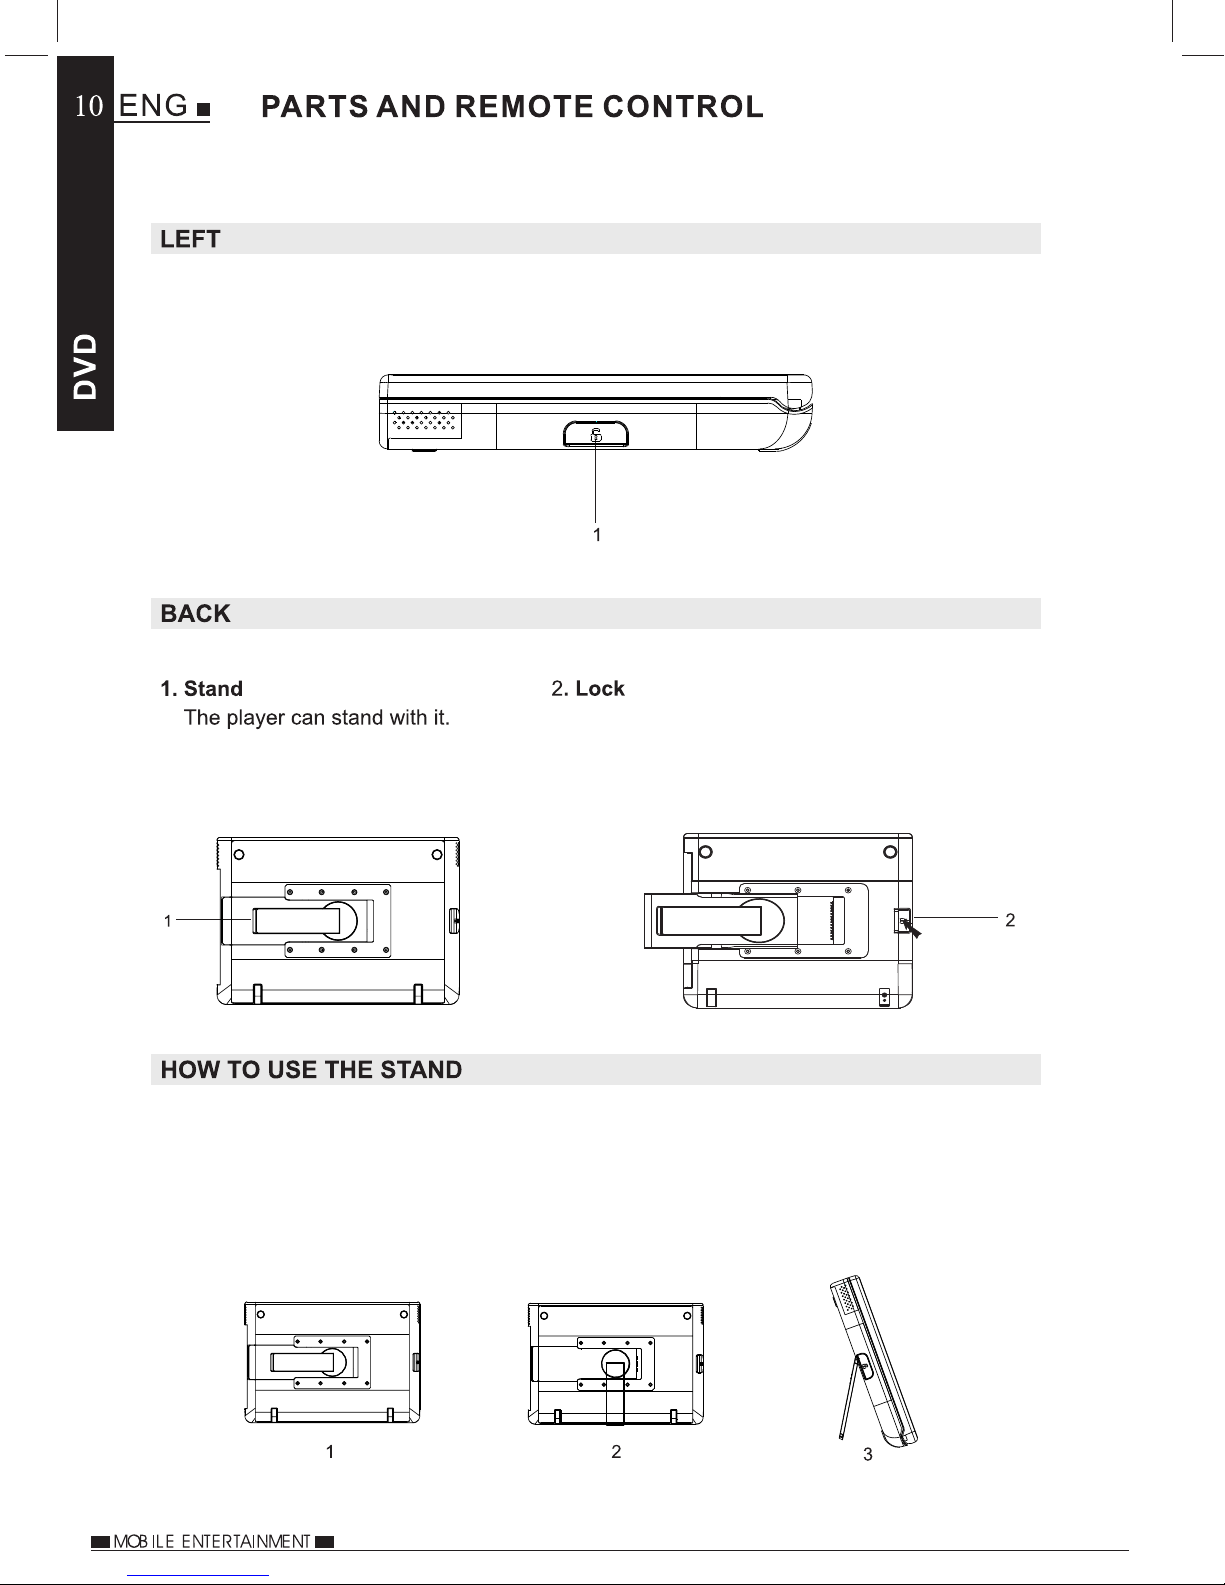
1. Lock
Lock / unlock the player stand / stanchion mount.
1. Pull out the support of the stand.
2. Rotate 90degrees.
3. Lean the player back.
Unlock the stand and remove before
mounting onto the stanchion mount.

1. DC IN 12V
Connect the AC Adaptor here, use
the correct adaptor which is supplied
with the ‘Power Pack’ optional accessory
2. Earphone Jack
Connect earphones or amplifier here.
3. Audio
Connect an audio cable for audio input here.
4. Video
Connect a video cable for video input here.
1. Lock
Unlock the stand and remove before mounting onto the stanchion mount.
1. Pull out the support of the stand.
2. Rotate 90degrees.
3. Lean the monitor back.

.language.

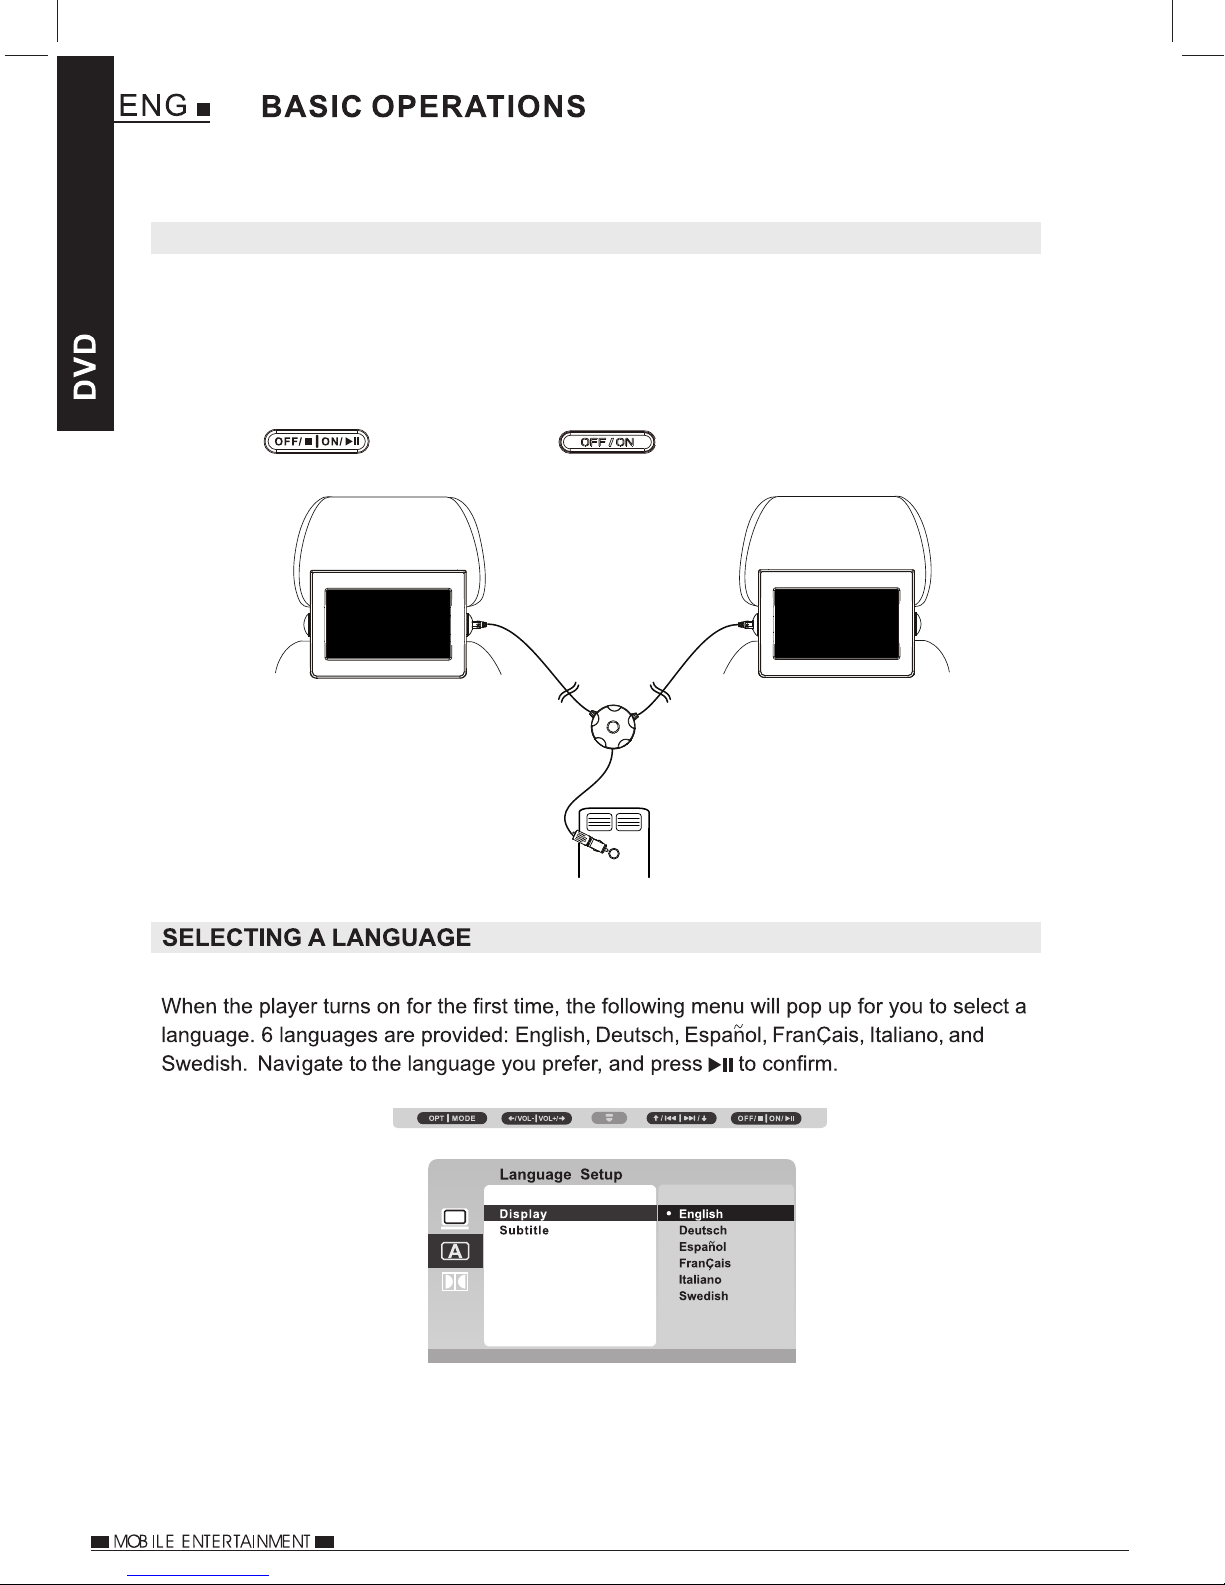
1. Install the stanchion mounts, screens and connect the car power cable as shown
in the supplied Quick Start Guide.
2. The player and monitor will turn on automatically once connected to the stanchion
mounts. the ON / OFF buttons are located on the top right-hand side of both the
player ‘ ‘ and the monitor ‘ ‘.
Please Note:
For use in 12Vdc vehicles only.
16
TURNING ON THE PLAYER AND MONITOR

17
TURNING OFF THE PLAYER AND MONITOR
LOADING A DISC
1. Press OFF / on the unit for about 2 seconds.
2. Disconnect the car power cable from the vehicles 12Vdc socket.
18
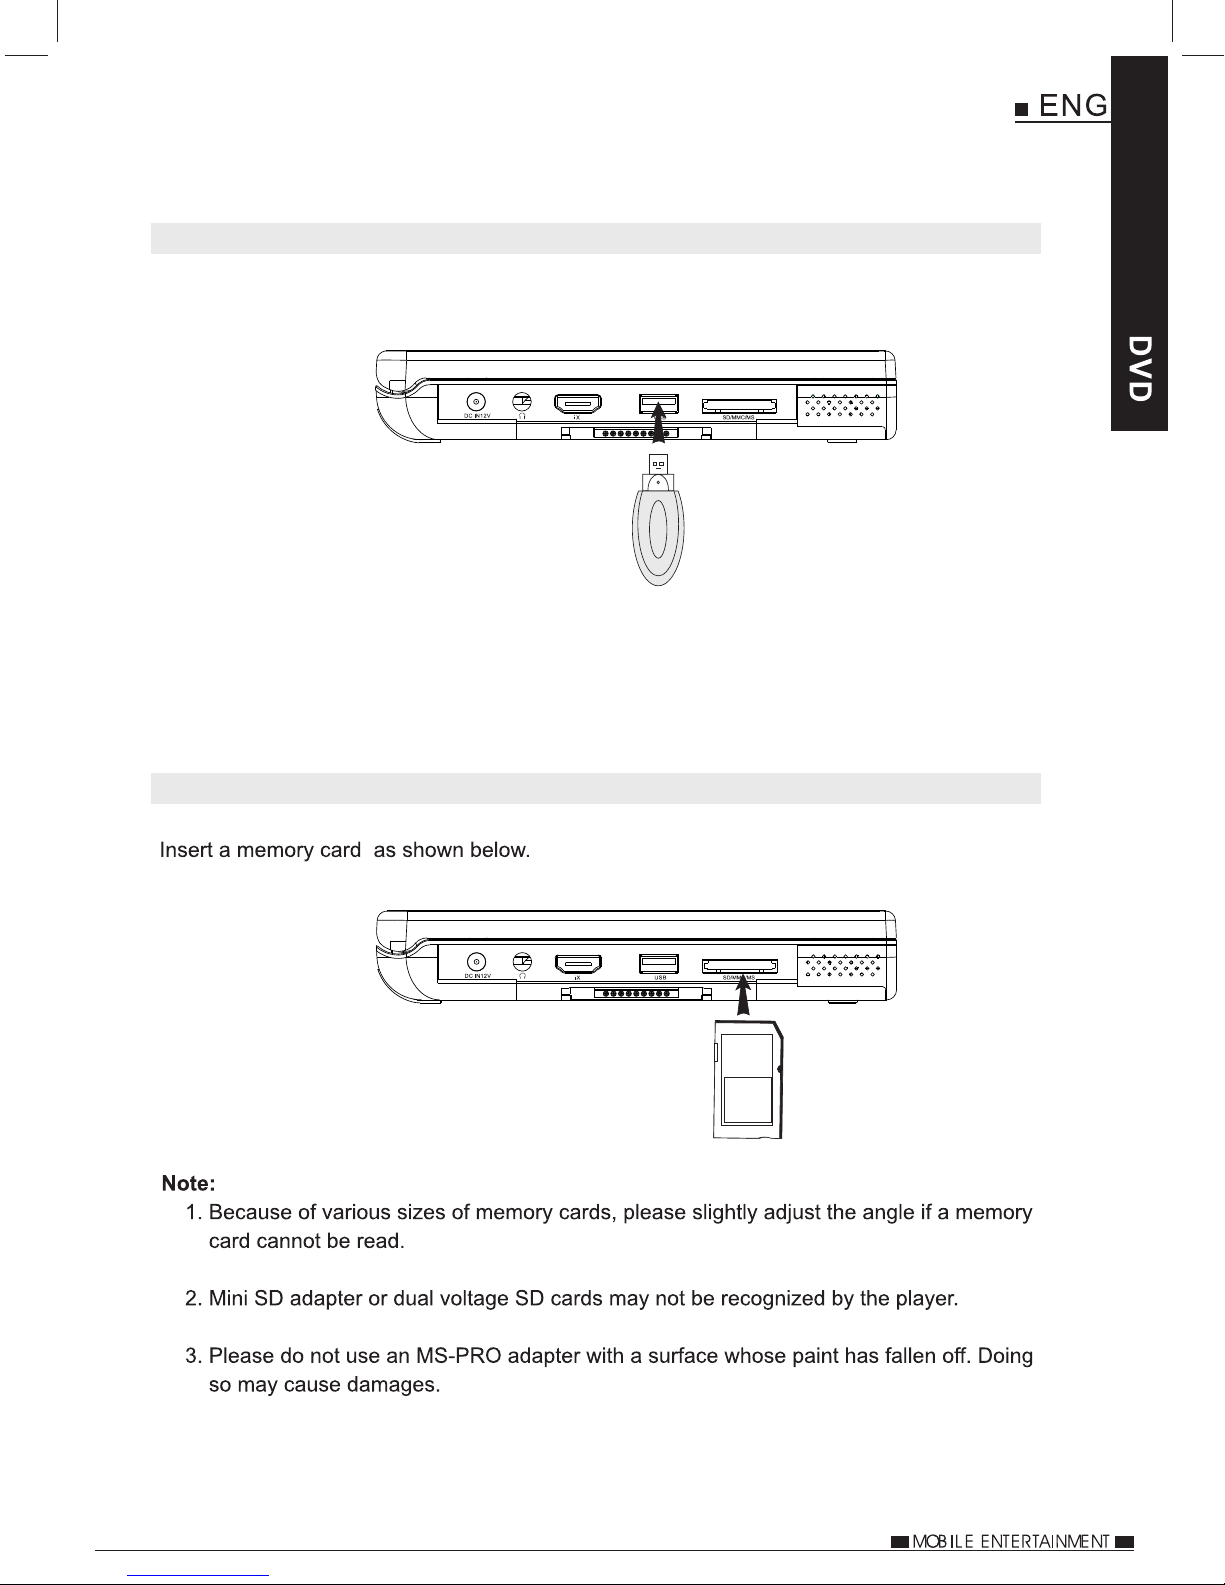
USB & SD PLAYBACK
NOTE:
Connect the USB stick directly to the player, do NOT use a USB hub,
an external hard-drive or extension cable, etc.
Insert a USB stick as shown below.
Maximum size is 32Gb and the USB stick must be formatted in FAT or FAT 32.
4. Maximum size is 32Gb and the SD Card must be formatted in FAT or FAT 32.
19
INSERTING A USB STICK
INSERTING A SD CARD
Table of contents
Other NextBase DVD Player manuals

NextBase
NextBase Click 7 Duo User manual

NextBase
NextBase Click 9 LiteDuo User manual

NextBase
NextBase SDV77-BD User manual

NextBase
NextBase SDV97-AC User manual

NextBase
NextBase Click 9 Duo Deluxe User manual

NextBase
NextBase SDV47 User manual

NextBase
NextBase SDV97-AM User manual

NextBase
NextBase SDV1102-D User manual


