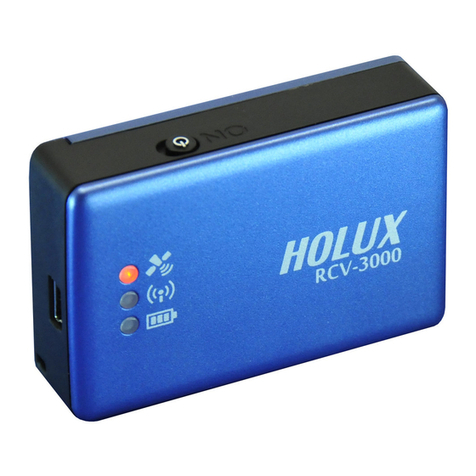
NexTraq VT-2300 User manual

NexTraq VT-2300 Installation Guide
Version 1.1

2
Notice
This installation guide is published and copyrighted by NexTraq. Information and specifications
contained in this document are subject to change without notice and do not represent commitments on
the part of NexTraq. Under copyright laws, no part of this installation guide may be reproduced or
transmitted in any form or by any means, electronic or mechanical, including photocopying and
recording, for any purpose, without the express written permission of NexTraq. This installation guide
does not constitute a warranty as to any product or service, except to the extent expressly provided in
the agreement under which such a product or service was provided.
Trademarks
NexTraq is trademarked. All other trademarks and service marks contained within this document are
the property of their respective owners.
Disclaimer
The complete terms and conditions under which NexTraq provides hardware and services are contained
in separate agreements. None of the information in this document is intended to create additional or
separate warranties or guarantees.
© 2012 NexTraq. All Rights Reserved.

3
Contents
Introduction ............................................................................................................................... 4
VT-2300 Hardware ..................................................................................................................... 4
VT-2300 Wiring Diagrams ........................................................................................................... 5
Power Cable Diagram............................................................................................................... 6
VT-2300 Adapter Cable Diagram .............................................................................................. 7
Equipment and Tools .................................................................................................................. 9
Antennas ................................................................................................................................. 10
Antenna Installation Types ........................................................................................................ 11
Glass Mount ......................................................................................................................... 11
Dashboard Mount .................................................................................................................. 11
Covert Installation ................................................................................................................. 12
Vehicle Wiring.......................................................................................................................... 13
Ground................................................................................................................................. 13
Power................................................................................................................................... 13
Ignition ................................................................................................................................ 14
VT-2300 Location .................................................................................................................... 15
Mounting Location ................................................................................................................ 16
Post-Installation Testing............................................................................................................ 17
Installation Troubleshooting....................................................................................................... 18
Appendix A – Technical Specifications ....................................................................................... 20
Appendix B - Garmin Device Installation Notes............................................................................ 22
Appendix C – 1-Wire Device Installation Notes ............................................................................ 24
Appendix D - Starter Interrupt Installation Notes ......................................................................... 29

4
Introduction
Following the purchase of VT-2300, there will be several factors to consider prior to its installation,
including placement of the VT-2300 hardware and the selection and placement of the antenna(s). This
installation guide is designed to provide instructions for the installation of the VT-2300 hardware for
use with the NexTraq™ Fleet Tracking platform.
This document is designed for new and experienced installers and their managers to anticipate and
answer questions associated with VT-2300 installations.
This installation guide covers the following:
•Equipment and Tools
•Types of Antenna Mounts
•Placement of VT-2300
•Installations
•Troubleshooting
•Appendices covering installation of available peripheral devices
VT-2300 Hardware
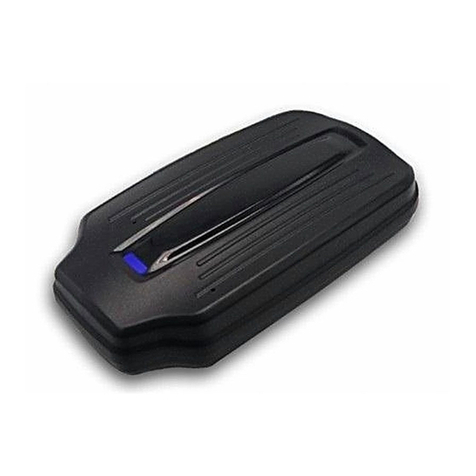
The VT-2300 consists of a nylon plastic engineered housing containing the electronic components.
Additional equipment includes a separate power connection cable and a modular cellular GPS
antenna.
Specifications for the VT2300 can be found in Appendix A.
The VT-2300 is powered by an external power supply; vehicle power (12-24 volts). The device is
designed to be installed in the vehicle’s cab.
The unit is not waterproof or dustproof, nor is it designed to be placed near or on heat-generating
sources (ex: in the engine compartment, attached to the heater).
Fig. 1 – VT-2300

5
External mounting tabs are provided that allow the VT-2300 to be secured to the chassis of the
vehicle. If you are replacing a Wahoo 2 or VT-2200, the VT-2300 will fit in the area you have the
previous unit secured. Additional equipment is required to properly mount the VT-2300 hardware and
is provided in the installation kit for each VT-2300.
The VT-2300 connector configuration is composed of unique connectors to eliminate the chance of an
installer incorrectly wiring the unit. Five connectors make up the VT-2300’s configuration: power,
GPIO, a serial port interface, GSM antenna connector and GPS antenna connector.
VT-2300 Wiring Diagrams
Fig – 2 -Schematic of VT-2300
Pin Out Power Cable
Pin Signal Color
1 Ground Black
2 Positive Input
Sensor 1 / GPIO1
Green
3 Ignition White
4 12V Supply Red
Pin Out IO – VT-2300 Adapter Cable
Pin Signal Color
1 One-Wire Data – Temperature
Sensor/ Driver ID
Green
2 Negative Input Sensor 1/GPIO2 Yellow
3 Negative Input Sensor 2/GPIO3 Blue
4 Sink Output / GPIO4 Orange/White
5 Positive Output Sensor 2 /
GPIO5
Blue/White
6 Ground Black

6
Power Cable Diagram
Fig. 3 Power Cable Description
The 4 pin power cable is the only harness needed if install requires ONE positive input sensor / GPIO1
(in addition to normal 3-wire install).
PIN2 (green wire) will be covered by heat shrink. Installer will need to cut back heat shrink to expose
for sensor install.
NOTE: While the power cable is backwards compatible with the VT-2200, PIN2 (green wire) is not
functional on VT-2200 devices.

7
VT-2300 Adapter Cable Diagram
Fig. 5 VT-2300 Adapter Cable Position
Each wire on the VT-2300 Adapter Cable will be part of a connector. Wires can be cut from a
connector when necessary for sensor installs.
PIN2 is Negative Input Sensor1/GPIO2. PIN3 is Negative Input Sensor 2/GPIO3. PIN4 is Sink
Output/GPIO4 and is used for Starter Interrupt.
NOTE: PIN configuration of the VT-2300 Adapter Cable has changed from VT-2200. PIN1 now
handles 1-Wire® data including Driver ID and Temperature Sensors. (The positive input/GPIO1, PIN1
on the VT2200 Adapter Cable, has moved to PIN2 on the power cable.)
WARNING:Do not connect a wire with voltage to PIN1 (Green). This will damage the 1-Wire device.

8
Fig. 6 VT-2300 Adapter Cable Connectors
The VT-2300 Adapter Cable is composed of three connectors:
Two PIN connector Used with Driver ID Key Fob Reader or Temperature
Sensing Probe (Black/Green)
Four PIN connector Used with Driver ID Key Fob Buzzer, LED, or any other
output (Yellow/Blue/Orange-White)
Three PIN connector Used with two inputs and one output (Blue-White/Black)

9
Equipment and Tools
The following is a general list of tools and supplies required for a VT-2300 installation:
Recommended Equipment Recommended Supplies
Digital Volt and Ohm Meter (DVOM) Electrical Tape
Screwdrivers (standard, Phillips, Torx, Hex) Double-sided Tape
Wire Strippers/Wire Cutters Velcro
Coax Stripper Silicon Sealant
Pliers 5 Amp Fuses
Razor Knife Ground Terminals
Cordless Drill Tie-wraps
Drill Bits Grommets
Wire Snake Crimp Connectors
Crimping tool Butt End Connectors
Upholster Removal Tool Sheet Metal Screws
Flashlight 18-gauge Wire
Standard & Metric Socket Set

10
Antennas
Among all installation variables, antenna location has the greatest impact on the performance of the
radio module. Great care should be taken before installing the antennas. The standard antenna type
used for the VT-2300 is a combination antenna in the style of either a blade or a puck. Two FAKRA
connectors provide connection for GPS (blue) and GSM (violet).
Fig. 7 – Combo Blade Antenna
The combination antenna combines the cellular and GPS antennas into a single antenna package. The
combination antenna can be mounted on glass, on the dashboard or as a covert installation.

11
Antenna Installation Types
Glass Mount
When mounting the antenna, it should be oriented with the top section facing the sky.
NOTE: The blade antenna specifies which side is the bottom. The puck antenna comes with a
sticker indicating which side should face the sky.
The glass mount provides the best reception for cellular and GPS. It is recommended that the antenna
have a view of at least 40 percent of the sky. The antenna needs to be mounted as horizontal as
possible. The antenna should not be mounted behind windscreens, ladder racks or other radio
transmission antennas.
Fig. 8 - Glass Mount
Dashboard Mount
The antenna should be mounted on the dashboard with a view of at least 40 percent of the sky. It is
recommended that the antenna be as horizontal as possible. When mounting the blade antenna, it
should be oriented with the top section facing the sky. When mounting the puck style antenna, it
should be oriented according to the instructions on the antenna.
Fig. 9– Dashboard Mount

12
Antenna placement is optimal underneath a removable plastic cover near the windshield on the top of
the dashboard.
If no removable cover is present, then removing the front dash bezel, the radio or instrument cluster to
gain access under the dashboard is a good alternative position.
Placement behind the plastic A pillar cover works well, but should be a second choice.
If the dashboard is metal and/or does not have enough clearance behind the A pillar, mount the
antenna at the top center of the windshield behind the rear view mirror or at the top right corner of the
windshield. See Glass Mount notes.
Covert Installation
When mounting a covert installation, make sure that the antenna is not shielded by metal. However, it
can be mounted on non-metallic materials such as plastic, fiberboard, fiberglass, etc. When mounting
the blade antenna, it should be oriented with the top section facing the sky. When mounting the puck
style antenna, it should be oriented according to the instructions on the antenna.
Fig. 10 – Covert Mount
NOTE: The minimum distance between other transmission antennas should be at least 18 inches for
all antenna installations.

13
Vehicle Wiring
The 4-pin Molex®connector on the back of VT-2300 contains the power, ground, ignition, and positive
input sensor leads. The supplied power cable plugs into the Molex connector. The opposite end of the
cable has a black wire for ground, a red wire for vehicle power, a white wire for vehicle ignition, and a
green wire for a positive input sensor/GPIO1.
Fig. 11 – Power Cable
Ground
Make sure the ground point is welded, not bolted, to the vehicle’s dash support structure. Strip enough
slack in the power cable to allow sufficient length as to attach the black wire to a solid metal surface
that is welded, not bolted to an under dash support. Add a grounding ring connector to the end of the
black wire, crimp it and screw it securely onto a non-painted metal frame or plate. Temporarily connect
VT-2300 to ensure it is on constant power before your final placement.
Power
Find constant 12 volt wire and slide crimp over wire. Slide red fused wire from NexTraq power cable all
the way into the holder and crimp with pliers. Cable tie the fused wire to the lead wire. Next, find an
ignition wire that is 12 volt when ignition is in the “ON” position and open or ground when ignition is
“OFF.” Slide crimp onto lead wire and the insert fused ignition lead into side of crimp and crimp with
pliers. Cable tie the fused wire to the lead wire. Optional step: Apply torque seal to all connections.
A constant power source is essential in the retention of GPS data inside VT-2300, and is required. Be
sure to verify that the power source you have chosen will work when the vehicle is not running and the
keys are removed. Verify a 5-amp fuse is inline with the power and ignition lead. This will protect the
unit against power surges and voiding the warranty.

14
NOTE: The first choice for power connections should always be at the ignition column. Use cable-
splicing interconnects (such as Scotch locks) or solder to secure connections.
If the column is unobtainable or if there are too many other devices wired to the column, the
input wires behind the fuse box can be a valid connection alternative.
If connections must be made to fuses at the fuse box, using a fuse tap is acceptable when all
other options are exhausted.
Ignition
An ignition source is also required for proper installation of VT-2300. Connect the white wire to the
vehicle ignition source. This wire can be found in close proximity to the main power wire. Be sure that
the tapped wire is a vehicle ignition wire and not an accessory wire. Some vehicles have wires that are
only powered when the vehicle is running; this is the preferred wire. Ignition wires maintain a voltage
through the crank. The best place to pull power is at the ignition harness leading to the ignition switch.
See Appendix A for specifications relating to power, ground, ignition and sensors.
IMPORTANT: Late Model Vehicle Installation
When installing a VT-2300 in any late model vehicle, verify all connections using a digital multimeter.
In some instances, obtaining power will require direct connection to the battery.
CAN-based vehicles will contain data lines that will show voltage on the line itself (usually 5V), but the
line is actually a data line. Most late model vehicles can utilize CAN-based ignition and accessory
circuits so the ignition line running down the center of the steering column is actually a data circuit.
Connecting VT-2300 to these circuits can and will cause the unit to malfunction and may damage the
OEM electronic modules within the vehicle.
As a rule of thumb, use the thickest wires as they carry the most amperage.
If there any questions, please contact Customer Support at 800.358.6178.

15
VT-2300 Location
VT-2300 placement is dependent on several factors:
•Type of vehicle
•Placement of the antennas
•Availability of a constant 12-volt power supply
In most vehicles, the VT-2300 can be placed inside or underneath the dashboard. The vehicle’s radio
can be removed and the unit placed behind the radio. A kick plate can be removed and the unit can be
safely secured to a firewall or zip-tied onto a permanent fixture.
VT-2300 can be secured underneath the dashboard on ether the driver or passenger side, in any
location that will not interfere with the safety of vehicle operation. The device can be secured by the
individual tie-wraps or by self-taping screws or Velcro tape.
Fig. 11 – VT-2300 Location
Avoid placing VT-2300 near moving parts or next to any vehicle pedals. Always consider the placement
of antennas and be sure the cables can reach the desired location of the mobile. Permanently mount
the VT-2300.

16
Fig. 12 - VT-2300 Placement
Connect the radio, GPS and power cables to VT-2300. Wrap any extra cable neatly with tie-wraps or
electrical tape. Replace any paneling or molding that was removed in the running of any antenna wires
or power cable.
Fig 13 – VT-2300 Mounting
Mounting Location
The mounting of the VT-2300 is limited by the 3 foot length of power cable. The unit must be placed
within the vicinity of the power connections.
Locate a flat metal or plastic surface big enough to fit the unit and use at least two screws to mount.
Tie-wrapping VT-2300 to a wiring harness is also acceptable.

17
At no point should VT-2300 be “wedged” or left unmounted. Since 90 percent of power connections
are on the driver’s side, an unmounted box can easily fall and interfere with the braking and/or gas
pedal of the vehicle creating a serious safety hazard.
Post-Installation Testing
VT-2300 registers in the NexTraq platform when radio, GPS coverage and ignition are switched on. The
presence of solid blue lights on the face of VT-2300 confirms that the unit is in coverage. When VT-
2300 is operating correctly, there should be a solid blue light on PWR, GPS and COM.
NOTE: The Radio LED will flicker while receiving or transmitting messages.
When ignition is off, only the power light will be on. The unit will be in standby mode.
When the unit has been installed and operation had been verified, place black tape across the surface
of the LEDs to conceal the lights.
Verify with the Customer Service Representative that the VT-2300 is operational and displayed in the
application. Also verify the operation of any additional peripherals installed.
Call NexTraq Customer Service at 800.358.6178 for post-installation verification.
Customer Service Hours:
Monday-Friday 7:00am to 11:00pm (Eastern Time)
Saturday-Sunday 7:00am to 3:00pm (Eastern Time)

18
Installation Troubleshooting
VT-2300 will not power up.
•Check connection to power supply.
•Check fuse holder for voltage.
•Check the voltmeter to confirm that there are 12-volts on the red power wire at the plug end.
•Make sure the unit is properly grounded snugly to a non-painted metal surface (chassis
ground).
GPS light blinking or not on at all.
•Check GPS antenna connections.
•Ensure that nothing obstructs antenna’s view of the sky.
•Check the antenna cable for pinching or crimping in the corner.
•Reset power.
COM light not on or blinks.
•Check GSM antenna connections.
•Ensure that nothing obstructs the antenna such as metallic sunscreens.
•Make sure VT-2300 is within the AT&T coverage map
(http://www.wireless.att.com/coverageviewer/#?type=data). Contact NexTraq Customer Service
for assistance.
•Reset power.
Ignition light is not on when vehicle is switched on.
•It is mandatory that the ignition wire be correctly wired to “on” power and not an accessory
line.
•Test the circuit used for ignition voltage with a digital voltmeter.

19
Vehicle will not appear in NexTraq Web application when verifying operation.
•Be sure PWR, GPS and COM are on and solid blue. Check that the ignition light tracks the
vehicle ignition.
•Check to see if the radio light flickers when the ignition is turned on or off.
•Check power on mobile.
•Be sure to view the correct mobile in the NexTraq Web application.
•Check antenna connections and placement.
•Drive the vehicle for more than two miles at 30 mph.
See Appendix A for Technical Specifications.
See Appendix B for Garmin™ Device Installation Notes.
See Appendix C for 1-Wire Device (Automatic Driver ID and Temperature Sensor) Installation Notes.
See Appendix D for Starter Interrupt Installation Notes.

20
Appendix A – Technical Specifications
The VT-2300 GPRS device is the latest hardware component from NexTraq that enables vehicle
location and tracking through the NexTraq™ platform. The VT-2300 provides enhanced
functionality through the support of Starter Interrupt, Driver ID, and Temperature Sensors.
Specifications:
Mechanical
The VT-2300 consists of an ABS Plastic
engineered housing containing the electronic
components.
Enclosure UV Stabilized ABS Plastic, Black
Weight 158.75g
(5.6 oz)
Dimensions 28mm x 86mm x 153mm
(1.09” x 3.40” x 6.02”)
Connectors Automotive Grade FAKRA
connectors
Electrical
The VT-2300 power cable is a 4-pin connector
for simple installation. The power cable is
preconfigured for battery, ground and ignition.
Power Operating Range 8v – 24v DC
Consumption
Normal 55-60mA
Idle 1.7-32 mA
Hibernate < 1mA
Data Communication Interfaces
The VT-2300 can interface with external
devices for enhanced tracking and
navigation. These options include:
Dedicated serial port for Garmin/NexTraq
Fleet Dispatch device connectivity
Dedicated serial port with GPS NMEA
output for in vehicle navigation
Full serial interface for future use
Auxiliary Inputs/Outputs
Digital Inputs 2 negative triggered
1 positive triggered
Digital Outputs 2 relay driver (500 mA)
Accelerometer Enhanced tracking
behavior
Table of contents

