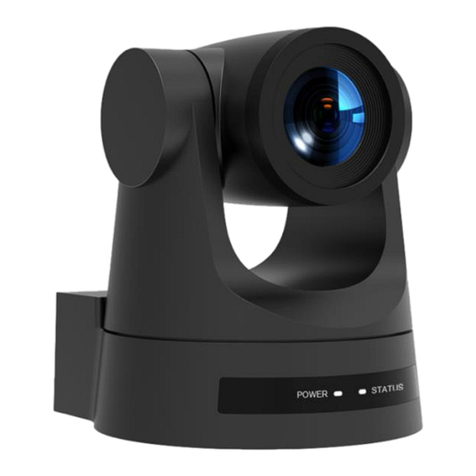
Nexvoo N412 User manual

Nexvoo
PTZ Video Camera
USER MANUAL
(Model: N412 & N420)

1
Video conference camera overview
Preface
Thank you very much for using Nexvoo PTZ video camera. Please read this manual in detail
and use accordingly.
This manual introduces the function of video camera, opening and operation principle in detail.
The PTZ video camera is high-quality and flexibility with a remote pan355° /tilt 120° operation
and image flip, and a DSP dealing integration module input. Support VISCA and PELCO P/D
protocol.
Allowing install on the ceiling /desk and an accurate remote control of RS232/422/485.
Safety requirement
In order to avoid camera and other connecting equipment damaged and lead to potential
danger, please follow the rules as below:
Only professional technician can install and maintenance.
Prohibit setting on the places which raining or dampness, using unit under stated
temperature, humidity and power.
Using accessories from original factory or allowed.
Once exchange product or repair happen, please use universal meter test before using.
Please use soft and dry rag for cleaning, not strongly corrosive cleanser for avoiding mangled
for outside of camera or lens.
Take care using and no squeeze crust avoiding camera broken.
Bracket must be endured 3 times weight of camera at least.
Features
1080p full HD PTZ camera;
Pan 355°, Tilt 120°.
The features include advanced ISP processing algorithms to provide vivid images with
a strong sense of depth, high resolution, and fantastic color rendition.
Multi function IR remote controller can control PTZ, lens and other function conveniently;
Using PC to control camera with Sony Visca or Pelco command.
IR remote controller, RS422, RS232 and other control method.
9 preset positions by remote controller, 200 preset positions by PC or remote control unit,
memory auto saved when power off.
The maximum speed of horizontal rotation: 80° /s, tilt: 60° /s.
Providing multifunctional accurate remote control.

Video camera (1)
Packing list
Please check up all devices inside while open package.
Video camera------------------------1
Remote controller------------------1
USB cable----------------------------1
HDMI cable---------------------------1
Power adapter------------ ----- --- --1
RS232 cable--------------------------1
Bracket--------------------------------1
User manual-------------------------1
Remote controller (1)
USB cable (1) HDMI cable (1)
Power adapter (1) Rs232 cable (1)
Bracket ( )
1User manual (1)
2
or (Optional)

Parts and Introduction
1.Lens
2.Sensor for the remote control
3.Power lamp
4.Standby lamp
5.Tally lamp
6.RJ-45 network video output
7.RS-422/485 VISCA/PELCO
8.HDMI video output
9.Line-in
10.3G-SDI HD video output
11.IR select switch
12.USB3.0 video output
13.VISCA RS-232 IN/OUT connector
14.DC IN 12V input
15.Power on/off
16.Local hole
17.British screw holes
3
1
234 5
6
7
8
9
10
11
12
13
14 15
16
17

10
Remote Controller
Attention:
RS-422 and RS-232 can not be used
at the same time.
4
*Infrared address modifying operation (combination buttons):
Press the button over 5 seconds, then press F1/F2/F3/F4 to switch infrared address
1/2/3/4 respectively.
IR transmit
POWER
PAN-TILT RESET
CAMERA SELECT
POSITION: (Number area; PRESET: press PRESET
then press 1-9 for set up preset position)
RESET: (Press RESET and then press1-9 for
eliminate preset position)
MENU
S-OUT: SWITCH TO 720P50
PAN-TILT ; HOME for return middle position
CLOSE THE MENU
DATA-SCREEN: Switching color mode
Reserved buttons have no function
FOCUS: (auto or manual)
ZOOM: (Telephoto or Wide Angle)
F1:Press and hold for 3 seconds to quickly
switch the image normal and inversion
F2:Press and hold for 3 seconds to quickly
restore the factory settings
Brightness adjustment: bright-/ bright+
BACK LIGHT
1
2
3
4
5
6
7
8
9
10
11
12
13
14
15
16
17
18
VISCA RS-422
Pin No. Function
1 GND
2 RXD IN+(RS485-)
3 RXD IN-(RS485+)
4 TXD IN+
5 TXD IN-
1 2 3 4 5

VISCA RS-232
Video camera Windows D-Sub 9 pin
1.DTR
2.DSR
3.TXD
4.GND
5.RXD
6.GND
7.N.C.
8.N.C.
1.CD
2.RXD
3.TXD
4.DTR
5.GND
6.DSR
7.RTS
8.CTS
Video camera EVI Camera or
Mini DIM 8 pin serial
1.DTR
2.DSR
3.TXD
4.GND
5.RXD
6.GND
7.N.C.
8.N.C.
1.DTR
2.DSR
3.TXD
4.GND
5.RXD
6.GND
7.OPEN
8.OPEN
Video camera Windows D-Sub 25 pin
1.DTR
2.DSR
3.TXD
4.GND
5.RXD
6.GND
7.N.C.
8.N.C.
1.FG
2.TXD
3.RXD
4.RTS
5.CTS
6.DSR
7.GND
8.DTR
NO
1
2
3
4
5
6
7
8
Pins
DTR
DSR
TXD
GND
RXD
GND
N.C.
N.C.
Signal
Data Transmission Ready(OUTPUT)
Data Set Ready(INPUT)
Transmit Data(OUTPUT)
Ground
Receive Data(INPUT)
Ground
No Connection
No Connection
5

Autofocus using the camera
Press the "Auto" key.
Manual focus using the camera
After pressing the "Manual" key, press
the "Far" or "Close" key to focus the
camera.
Focus
A、PTZ control
6
Basic Operation
Basic Operation
1. The camera is powered on, and the pan/tilt reset
action will be performed automatically.
2. Press the arrow keys to change the direction of
the cameraWhile checking the image on the screen,
press the desired arrow key. To move the camera little
by little, just press the button once.
To move the camera in a wide range, keep pressing
the button.To move the camera diagonally, hold down
the arrow key (left or right) while holding down the
arrow key (up or down).
Return the camera to face forward and press the
HOME button.If the camera is in the wrong direction.
The angle of the gimbal will be different from the angle
when the camera is in the normal position.
Whenever the front (right) key is pressed, the camera
is preset to the right. You may want to orient the
camera opposite the direction of the key you pressed,
so that you can change the orientation of the camera
while checking the image on the screen. To do this,
turn on the PAN reverse switch in the PTZ option in
the menu.
Notice
If using multiple remotes, repeat the above steps for each remote. This is because
the settings are made by changing the signal from each remote control, not by
changing the settings of the camera itself.
B、Adjust the camera
Notice
When the camera is in the telephoto mode,
the image movement speed on the screen
may be a little jerky if you perform a pan/tilt
operation.
Zoom
Press the zoom in/out button to zoom in/out
the screen.

7
Operate multiple cameras with the remote control
1. Set a different remote control address in the serial
port option of the camera menu that you want to operate
remotely.
2. Set the remote control to send different infrared
address channels by using the remote control F1-F4
combination shortcut keys. The digitally designated
camera can then be operated. Each time the camera is
operated with the remote control, pressing the "Camera
Select" key in step 2 will light up.
Shoot with background light
If there is a light source behind the subject, the subject
will become dark. Press the "Backlight" key in this case.
To cancel this function, press the "Backlight" key again.
C、Preset operation
The camera stores a preset position
Up to 200 preset positions (position, zoom, focus and
backlight) can be set. Only 9 preset positions can be
set and recalled through the remote control. 200 preset
positions can be set and called through the user-defined
agreement.
1. Adjust the position, zoom, focus and background
light of the camera.
2. While holding down the "Preset" key, press (number
keys) at the same timeAny of 1-9 - one.
Recall stored settings
Press any of the (numeric keys) 1-9 to save the settings.
Cancel preset storage
While holding down the "Delete" key, press the number
key whose setting is to be canceled.
Note: If a location channel is storing or deleting a new setting, it cannot be recalled,
set or unset on the channel.
when pressed
Simultaneously
press a key to set
the preset
when pressed
Simultaneously
press a key to set
the preset

MENU
Serial Port>
PTZ>
Exposure>
White Balance>
Image>
Audio>
Video>
Network>
System>
Exit
Roll Change
[HOME] Enter [CLOSE] Back
Serial Port
This option can set protocol, address, baud rate,
speed scale, speed limit when the camera is
communicating through serial port.
PTZ
This option can set PTZ related functions,
including digital zoom, focus mode, remote
speed, pan direction, tilt direction, filp
and mirror.
Exposure
This option can set exposure mode including
full auto exposure, manual exposure, shutter
priority, iris priority, bright priority, etc.
White Balance
This option can set white balance mode including auto, manual, indoor, outdoor, one
push, ATW, etc.
Image
This option allows you to set image effects, including 2D/3D noise reduction, contrast, chroma,
acutance, gamma, wide dynamic range, defog, anti flicker, etc.
Audio
Video
Network
This option can check the network information of the camera, and can set the DHCP function
on/off.
System
This option can set language of camera, review present version and reset default factory settings.
Exit
Exit menu.
This option can set the switch of Audio, if turn it on, the audio signal of camera can be input
through HDMI.
This option can set the megapixel of camera as well as image mode.
Due to product iteration, the product menu is subject to change without
prior notice, subject to the actual object .
The Menu
8

1.Serial Port Settings
Serial Port Settings>
Protocol: <Auto>
Address: <1>
Address Fixed: <OFF>
Baud Rate: <9600>
Speed Grade: <Standard>
Speed By Zoom: <OFF>
RS-485: <OFF>
Remote Control Address: <1>
Back>
Roll Change
[HOME] Enter [CLOSE] Back
Serial Port Settings Sub Menu
Protocol: Can set auto/visca/pelco-p/pelco-d.
Address: Can set camera serial communication
address.
Baud Rate: Can set serial communication baud
rate, 2400/4800/9600/ 19200/ 38400/115200.
Speed Grade: Can set speed range of PTZ(only
take effect when using serial communication),
standard/ expand.
Speed By Zoom: Can set on/off of pan tilt speed
and lens magnif ication linkage.
RS-485: This option can set the camera to
enable/disable the RS-485 serial port return
code function.
Remote Control Address:Can be set up to receive
the remote control address signal .
2.PTZ Settings
PTZ Settings>
Dzoom: <OFF>
Focus Mode: <Auto>
Zoom Speed: <Normal>
Remote Speed: <4>
Installation: <Dial(Normal)>
Reload Preset 1: <ON>
PAN Reverse: <OFF>
TILT Reverse: <OFF>
Back>
Roll Change
[HOME] Enter [CLOSE] Back
PTZ Settings Sub Menu
Dzoom: on/off.
Focus Mode: auto/ manual.
Remote speed: PTZ speed 1-16(only take effect
when using IR remote controller).
Pan Reverse: Can set pan direction normal/
reverse.
Tilt Reverse: Can set pan direction normal/
reverse.
Address Fixed: This option is used to cover
automatic distributing order under VISCA
protocol.
Zoom Speed: This option is for setting the
zoom speed of camera, there are 3 levels: low,
standard and high levels.
Installation: This option can set image flip
effect of camera in order to match intallation
of desktop and ceiling.
Reload Preset: This option can set the function
that automaticly call number 1 preset position
after starting camera.
The Menu
9

3.Exposure Settings
Exposure Settings>
AE Mode: <Auto>
Backlight: <OFF>
De-Flicker: <OFF>
Back>
Roll Change
[HOME] Enter [CLOSE] Back
Exposure Settings Sub Menu
4.White Balance Settings
White Balance Settings>
WB Mode: <Auto>
Back>
Roll Change
[HOME] Enter [CLOSE] Back
White Balance Settings Sub Menu
WB Mode: Auto, Indoor, Outdoor, Auto Tracking
White Balanced, Keyed, Manual
Manual mode:
Red gain is adjustable, 0-254.
Blue gain is adjustable, 0-254.
Backlight Can be adjustable in auto mode,
open/off.
De-Flicker:This option can set the reflesh
frequency of camera to resolve problem of
image blink caused by light source.
Iris pri: Iris value can be adjustable in iris
priority mode, Close-1/ 1.8.
Exposure compensation can be adjustable in
auto mode, 0-15.
Backlight can be adjustable in auto mode,
open/off.
Shutter pri: Shutter value can be adjustable in
shutter priority mode, 1/1-1/ 10K.
Exposure compensation can be adjustable in
auto mode 0-15.
Backlight can be adjustable in auto mode,
open/ off.
Bright pri: Bright value can be adjustable in
bright priority mode, 0-27.
Manual: Exposure compensation can be adjustable
in manual mode 0-15.
Iris value can be adjustable in manual mode,
Close-1/1.8.
Shutter value can be adjustable in manual mode,
1/ 1-1/10K.
The Menu
10

5.Image Settings
Image Settings>
2D NR: <8>
3D NR: <8>
Bright: <8>
Contrast: <8>
Color Gain: <8>
Sharpness: <8>
HUE: <8>
Gamma <1>
Flip: <OFF>
Mirror: <OFF>
Back>
Roll Change
[HOME] Enter [CLOSE] Back
Image Settings Sub menu
2D NR: 2D noise reduction, 0-15.
3D NR: 3D noise reduction, 0-15.
Contrast: Can set image contrast, 0-15.
HUE: Can set image color saturation, 0-15.
Gamma: Can set image gamma, 0-15.
Sharpness: Can set image sharpness value,
0-15.
Bright: Can set image bright, 0-15.
Flip: Can set the camera image to flip up and
down 180 degrees.
Mirror:Can set the camera image to flip left
and right 180 degrees.
6.Audio Settings
Audio Settings>
Audio: <OFF>
Sound channel: Stereo
Back>
Roll Change
[HOME] Enter [CLOSE] Back
Audio Settings Sub menu
Audio: This option can set the HDMI/SDI audio
turn on/off.
7.Video Settings
Video Settings>
Video Format: <1920x1080p60>
HDMI Mode: <DVI>
Color Space: <RGB>
Enter>
Back>
Roll Change
[HOME] Enter [CLOSE] Back
Video Settings Sub menu
Video Format: This option can set the current
resolution of the image.
HDMI Mode: This option can set the HDMI/DVI mode.
Color Space: This option can set RGB/YCbCr.
Color Gain: Can set image color gain, 0-15.
The Menu
11

9.System Settings
System Settings>
Language: <English>
Version: V1.0.20
Preset Color: <ON>
Reset Device>
Back>
Roll Change
[HOME] Enter [CLOSE] Back
System Settings Sub menu
Version: You can view the current software
version, which can not be modified.
Preset Color: This option can be used to set
the camera to enable/disable the function
of saving the image effect in the preset
position.
Reset Device: You can restore to the default
factory settings for all the camera parameters.
8.Network Settings
Network Settings>
DHCP: <OFF>
IP Address: 192.168.1.118
Subnet mask: 255.255.255.0
Default gateway: 192.168.1.1
Back>
Roll Change
[HOME] Enter [CLOSE] Back
Network Settings Sub menu
Can check the network information of camera,
can set the DHCP on/off.
The Menu
Language: Camera menu operation language
can be set, English/simplified Chinese.
12

Direct connection mode: connect the camera directly to the computer with a network cable.
The computer must have the network segment where the camera IP is located. If the network
segment is not added, you will not be able to log in. If the default IP address of the camera is
192.168.1.118, you need to add 1 network segment to the computer. The specific method
is as follows :
Firstly open the computer network local connection properties window, select “Internet
Protocol Version 4 (TCP/Ipv4)” double click or click the property “Internet Protocol
Version 4 (TCP/IPv4)” enter the properties window, click “Advanced” to enter advanced
TCP/IP Set the IP address and subnet mask in the IP address field. After the addition is
completed, click 0K to complete the IP network segment addition. Users can add corresponding
network segments according to the modified camera IP address.
WEB login:
Enter the device IP address in the browser address bar to default to 192.168.1.118, and press
Enter to enter the web client login interface. Enter “admin” in the [Username] field, “admin”
in the [Password] field, and pass the verification to enter the background preview interface.
Language selection: The selected language can be displayed at the bottom of the login
interface.
Network Connections
Connection modeConnection mode
Network login
Preview and pan/tilt
Configuration
After successful login, enter the management interface, the default entry is the video
preview interface. On the left side of the preview interface, is the image preview area,
and on the right side of the preview interface, is the PTZ control area, which can realize
the following functions: PTZ up and down rotation, PTZ left and right rotation, the gimbal
returns to the initial center position, the lens zooms out and in, adjusts the near focus
and far focus, adjusts the PTZ speed level, adjusts the zoom speed level, and adjusts the
focus speed level; set the preset position Number, starts counting from number 1, which
is the num ber 1 pres et positi on; sav e the c urren tly set pr eset p ositi on; delet e the
corresponding preset position; call the corresponding preset position; the upper part of
the preview interface can take local photos and videos of the preview screen.
Click “Configuration” at the top of the interface to enter the software parameter configuration
interface, which mainly includes the following options: system, network, audio and video,
image, and user management.
Network connection mode: connect the camera to the Internet network, and access the network
through a router or switch. Users can log in to the device through the browser.
13

Configuration
System
1) System settings: display the basic information of the device (not adjustable), time
configuration is used to configure the system time;
2) System maintenance: can be used for software upgrade, restore factory settings and
restart the device.
Internet
1) Basic Configuration.
TCP/IP configuration.
DHCP: Set whether to enable automatic IP acquisition.
IP address: set the IP address, the default is 192.168.1.118, where the IP is the address of
the login web page.
Subnet Mask: Set the subnet mask (default is 255.255.255.0).
Default Gateway: Set the default gateway (192.168.1.1 by default).
Preferred DNS Server: Set the DNS server (default is 192.168.1.1).
DNS state selection.
Port Configuration.
HTTP port: Set the HTTP port, the default is 80.
RTSP port: Video Acquisition port, the default is 554.
ONVIF port: Set the ONVIF port, the default is 8765.
Service Port: Set the service port, the default is 90.
2) Advanced configuration.
Configurable FTP, email configuration, QOS, IGMP, SRT, RTMP, RTSP and other related
parameters.
Video&Audio
1) Video
Set the video compression format, the default main/sub stream compression format is
H.264/H.265;
Stream: Set different video output modes and select different streams. Including main
stream and sub stream, the main stream can be 1920*1080, 1280*960, 720*576, 720*480,
640*480; the sub stream can be 640*480, 480*360, 352*288, 320*240 , 176*144;
Video frame rate: set the video frame rate, the default frame rate is 30 frames, 3-50
optional;
Frame interval: set key frame interval, default 60, 5-120 optional;
Bit rate type: default variable bit rate;
Image quality: Under the condition of variable bit rate, the image quality can be selected,
the default is medium;
Bit rate upper limit: default 512KB, 128~20000 optional.
2) Audio
Configure Network Audio.
3) Local Path
Select the local save path for photos and videos.
14

Image
Image parameters The image parameters interface can make the following adjustments
to the image effect.
Image adjustment: it can set picture brightness, contrast, saturation, sharpness, chroma,
3D noise reduction and other functions.
Exposure: Exposure mode, shutter speed, gain, aperture, etc. can be set.
Image enhancement: video format can be set, left and right mirroring, up and down
mirroring, backlight compensation.
White balance: White balance mode, red and blue gain effect image can be set.
User Administer
Used to modify username and password.
Configuration
15

Technical parameter Due to the continuous iteration of the product, if there
is any parameter change, it is subject to the actual
product.
Image
Sensor SONY
1/2.8"
Progressive
CMOS
Pixels 3.1/3.5
Megapixels
Image
Sensor,2.07
Megapixels
Effective
Pixels
Resolution
HD 1080p60/50/59.94,1080i60/50/59.94,1080p30/25/29.97,720p60/50
Signal PAL/NTSC
Lens 12X/20X
optical
zoom
Focal
Length 12X:
f=3.9mm(W)〜46.8mm(T)
20X:
f=4.7mm(W)〜94.0mm(T)
Horizontal
View
Angle
12X:
72.5°(W)〜7.4°(T)
20X:
58.7°(W)〜3.2°(T)
Focus
System Auto/Manual
Minimum
Illumination 0.1Lux
Exposure
Control Auto/Manual
Shutter 1/1〜1/10000s
Gain Auto/Manual
White
Balance Auto/Indoor/Outdoor/Manual
Image
Effect Full
color/image
flip
S/N
Ratio ≥50db
Pan 355°(max.speed:80°/s)
Tilt
-30°to
+30°(max.speed:60°/s)
Video
Output
HD HDMI、3G-SDI、RJ45、USB3.0
Power 12V
DC(10.8〜13.0V
DC)
Protocol SONY
VISCA、PELCO
P/D、VISCA
over
IP、ONVIF
Control
Mode RS-232C、RS-485/422、USB
Control
Size (L)161×(W)133×(H)181mm
Weight 1200g
Color Black/White
Accessories Power
adapter,
IR
Remote,
User
manual,
HDMI
cable,USB
cable,
RS232
cable,
Bracket
16

17
Nexvoo, Inc.
Asia office:
No.56-58, North 5F, Huoju Plaza, Huoju Road, Huli district,
Xiamen city, Fujian province, China
support@nexvoo.com
USA office:
9325 Uptown Drive, Suite 900 IN 46256 Indianapolis, USA
support@nexvoo.com
EMEA office:
Poort van Midden Gelderland Rood 22 6666 LT Heteren, Netherlands
info@nexvoo.eu
This manual suits for next models
1
Table of contents
Other Nexvoo Security Camera manuals
