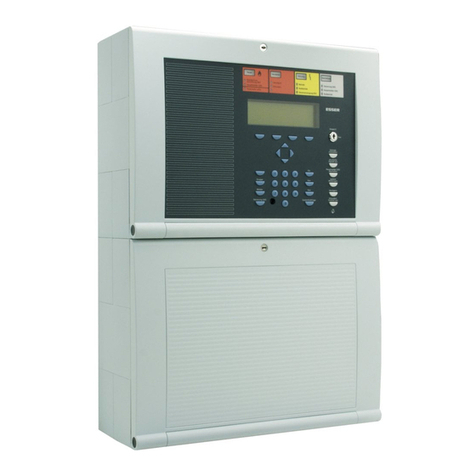
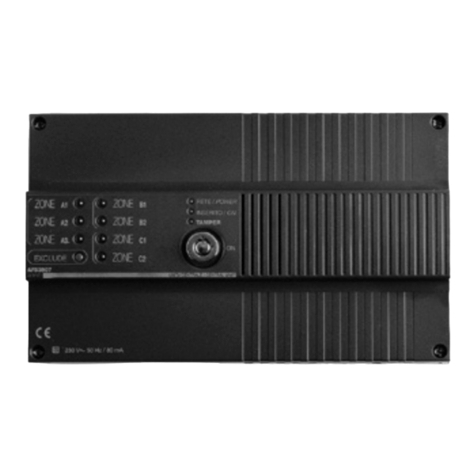
NIBBLE EN 54-2 User manual

User Manual
Version 5.3
FIRE ALARM CONTROL PANEL
FIREWALL 1 to 16 ZONES
EC Certificate of Conformity
ref. NGQ050 0008
NIBBLE – Engenharia, Lda.
Rua Júlio Dinis, 265, 1D
47 5-330 Trofa
Portugal
EN 54- / EN 54-4
FIRE DETECTION AND FIRE ALARM SYSTEMS: CONTROL AND INDICATING
EQUIPMENT, POWER SUPPLY EQUIPMENT
- FIRE ALARM CONTROL PANEL -
1 / 8

User Manual
Version 5.3
1 - Introduction:
Congratulations for buying the NIBBLE FIREWALL Fire Alarm Control Panel!
In this manual you will find a detailed description of all functionalities and operating modes.
The NIBBLE Fire Alarm Control Panel is suited to conventional systems, offering high security patterns in different applications.
The FIREWALL complies with EN-54 and its main features are:
•Up to 16 zones, monitoring both short-circuits and open-circuits;
•Up to 3 conventional detectors, by each zone;
•Open-collector programmable auxiliary outputs (one by zone);
•Up to 2 relays that can be programmed to signal several fails or fire alarm;
•Monitored output against short-circuits and open-circuits for sounder of 24VDC and up to 500mA;
•Configurable delay between detection and signaling of the fire alarm allows user to avoid false alarms that some detectors could generate
(normally during the day);
•4VDC outputs allow to connect external circuits up to 500mA;
•Backup power-supply through only one battery of 1 VDC / 7Ah, or two batteries of 6 VDC / 12Ah in series.
•User-friendly frontal panel.
- Features:
2.1 Delay mode:
Some detectors could generate false alarms because of electromagnetic or light interferences. To avoid the occurrence of such false alarms, the
FIREWALL could be configured to introduce a delay between the detection instant (by the detectors) and the actuation by the control panel.
This time period is programmable and allows the user to reset the control panel when he verifies the alarm doesn't exist.
2.2 Intelligent and automatic zones:
The circuits of detection can be constituted by conventional detectors and callpoints. In the case of callpoints, the signaling of the fire alarm
should be immediately executed.
An intelligent zone have the ability to distinguish if the alarm was generated from a detector or from a callpoint, and when in “Delay mode” the
delay is only applied to the detections which origin was a detector.
In an automatic zone, there is no difference between detectors and callpoints, and the alarm is immediately signaled.
2.3 Open-collector auxiliary outputs:
For each zone is available an auxiliary output that can be configured to signal a failure or an alarm detection in the corresponding zone. Each of
these open-collector outputs can sink up to 500mA.
2.4 Automatic test:
The FIREWALL has a test mode which resets the system automatically after an alarm (see 7.6) allowing the system to be tested by a single
person.
2.5 mart setup:
The FIREWALL can be configured to adapt to any detector, manual callpoint, or termination resistor (see 7.7). This way, it is possible to replace
another fire alarm panel by a NIBBLE FIREWALL without having to change the existing circuit.
2.6 Maintenance warning:
In order to always ensure the safety of the premises, the FIREWALL can notify when it’s time to perform a check-up. The maintenance period can
be configured according to section 4.7.
3 - Mounting:
The FIREWALL is for indoor use with low humidity, and should be mounted in vertical position with screws.
It can be mounted either in flush or surface positions, keeping access to the frontal cover for mounting and maintenance purposes.
Note: Detectors should be mounted near the fire alarm control panel. This allows to minimize the risk of control panel destruction
by the fire before emitting the alarm. Automatic fire extinguish systems should be placed avoiding control panel damaging when actuated
(eg. sprinkler ).
4 - Connections:
With exception for power supply and relays, it is recommended to use shielded cables with a section of at least
0,25 mm2, and the shield should be connected to earth.
4.1 Main power supply:
There is a connector to connect the control panel to main power supply. It is recommended to use cable type
A05VV-F with 3 wires with section of 1,5 mm2.
This connector have also the main fusible (F4A L250V).
To power the control panel on and off the circuit switch, located upstream, should be used with a minimum of
16A.
Note: Power on the control panel only after finishing all connections.
4.2 Zones:
For each zone there are available 4 terminals, 2
for the detection circuit and 2 for an open-collector
auxiliary output (Figure 2).
The auxiliary output signals the detection of an
alarm in the corresponding zone. When activated, it
closes the circuit between AUXn+ and AUXn–
2 / 8
Figure 3: Zone with detectors and termination resistor.
R
Figure 2: Zone
connectors.
Figure 1: Power supply
connector

User Manual
Version 5.3
terminals, and supports up to 500mA, and 0VDC.
The detection circuit is connected in Zn+ and Zn- terminals. This circuit must always be
terminated by a resistor of 3300Ω, 1/4W.
In each zone can be connected up to 32 detectors and any number of callpoints. When
mounting callpoints, it should be used a zener diode, in series, of 5V1, 1/4W.
Figure 3 shows a circuit only with detectors. The termination resistor (R: 3300Ω, 1/4W)
should be connected at the end-of-line, in parallel with the detectors.
A zone can also have only callpoints in its circuit.
Figure 4 shows how to make the connections between callpoints, zener
diodes (Z: 5V1, 1/4W) and termination resistor (R: 3300Ω, 1/4W). In such case,
delays will be ignored and the alarm is immediately activated.
In the example shown in Figure 5, it is possible to see how to connect
detectors and callpoints in the same zone. Such zone, when configured as
'intelligent', will distinguish if an actuation comes from a detector or from a
callpoint. If delay mode is activated, the delay will only be applied to detectors.
Auxiliary outputs that are available for each zone can be used as switches
that close a connection when actuated. Figure 6 represents a circuit with a
lamp (L), using an external power-supply (P). (Maximum specifications: 0
VDC, 500mA).
4.3 Relays:
For each relay there are 3 terminals, as shown in Figure 7. Terminal C is the common. Terminals NC
and NO are, respectively, normally-closed and normally-opened.
The relays in the FIREWALL are capable of controlling voltages up to 250VAC and currents up to 10A.
The cables to use with these circuits should be in accordance with the current to use. As an example, for
10A@250VAC it should be used a cable similar to the one of main power supply (A05VV-F with 3 wires of
section of 1,5 mm2).
Note: Relays are programmable so they can be used to signal alarms and/or fails. When programmed to signal
at least a fail, a relay will have a complementary behavior, i.e., in standby, the internal coil of the relay remains
activated, and, in case of fail, it is deactivated.
4.4 ounders:
This output allows to control one or more sounders in parallel (maximum specifications 500mA @ 24VDC).
It is protected by a fuse and it is monitored for detection of fails due to short-circuit or open-circuit.
It should be used a termination resistor of 3300Ω, 1/4W, at the end-of-line and in parallel with the sounder(s).
4.5 Auxiliary power:
It is available an auxiliary output to power external equipments up to: 500mA @ 24VDC.
4.6 Battery:
It is mandatory to use a battery (lead-acid), not included with the equipment, of 12VDC, 7Ah; or two batteries of 6VDC,
12Ah (connected in series) that allows a greater autonomy in the event of main-power shutdown.
Note: Pay attention to the polarity. When using 2 batteries, the voltage of each one must be 6VDC and not
12VDC. Do not use other type of batteries to avoid explosion!
4.7 Maintenance:
To ensure the correct operation of the control panel, periodically test the functions of all systems.
With a minimum periodicity of 6 months, verify if the battery level is above 12VDC (with 1 battery) or 6VDC (with 2 batteries).
When exchanging fuses use only the same reference.
Note: Before any maintenance take place, the control panel should be turned off.
5 - Testing the system:
Once all connections are made, the entire system should be tested.
When powered on, the control panel should not be signaling any fault (unused zones must be deactivated).
Disconnect the battery and check if the battery fault is signaled. Connect it again and then check if the control panel returns to its initial state.
Break a zone circuit (removing a detector) and verify that the open-circuit condition is detected. Establish a short circuit between the terminals of
the zone and verify that the fault is signaled. Repeat for all zones in use.
Follow similar procedures for the circuit of the Sounder (remove the sounder and establish a short circuit). Verify that the sounder is off.
Using appropriate mechanisms to simulate a fire situation by activating a detector. Check that the control panel signals the alarm, activating the
sounder (may have a delay if the delay mode is active). Since version FW 3.20, the FIREWALL has an autotest mode, which resets the system when
an alarm occurs, see 7.6.
Also check if the relay(s) switch properly according to your programming.
3 / 8
Figure 5: Zone with callpoint, detectors, zener diodes and
termination resistor.
Z RZ
Figure 4: Zone with callpoints, zener diodes and
termination resistor.
ZZZ R
Figure 7: Relay
connector
Figure 8: Sounder
connector
Figure 9: Auxiliary
power connector
Figure 6: Auxiliary outputs example,
with a lamp and an external battery.
LP

User Manual
Version 5.3
6 - Control and Indication:
6.1 Front panel user interface:
1 Zone activation key 10 24VDC fuse fault indication LED
2 Zone fault indication LED 11 Earth circuit fault indication LED
3 Zone alarm indication LED 12 Battery presence indication LED
4 Internal buzzer silence key 13 Battery charging indication LED
5 External sounder silence key 14 General fault indication LED
6 Reset key 15 Sounder fault indication LED
7 Delay Mode key 16 Sounder fuse fault indication LED
8 General Alarm indication LED 17 Disabled indication LED
9 Main-power indication LED 18 System fault indication LED
19 Access level indication LED
Table 1: Legend of Front panel user interface
6.1.1 Zone activation key:
With this key is possible to activate or deactivate the corresponding zone.
Note: Action only available with level 2 access (after the introduction of the access code or key).
6.1. Zone fail indication LED:
The detection circuits of each zone are monitored to make possible to detect short-circuits or open-circuits. If a short-circuit is detected this LED
blinks fast, in case of open-circuit it will blink slowly.
This LED also indicates if a zone is active or not. When permanently ON it indicates inactive zone.
6.1.3 Zone alarm indication LED:
This LED indicates an alarm in the corresponding zone. If it blinks fast, it means that the alarm was signaled at a callpoint. If it is permanently ON,
it means that the alarm was signaled by a detector.
6.1.4 Internal buzzer silence key:
With this key, it is possible to silence the internal buzzer which is activated every time that an alarm or a fail occurs.
Note: Once silenced, the buzzer will only be activated when a new alarm or fail occurs.
6.1.5 External sounder silence key:
Once detected a fire alarm, the sounder will be activated. It is possible to silence the sounder pressing this key, or reactivate it by pressing again
the key. Even when there is not any alarm, it is possible to activate the sounder manually.
Note: Action only available with level 2 access (after the input of the access code or key).
4 / 8
Figura 10: Front panel user interface for 16 zones model.
1
7
6
5
4
14
12
8
9
10
11
19
18
16
15
17
13
3
2

User Manual
Version 5.3
6.1.6 Reset key:
Even when the conditions that had conduced an alarm disappear, the FIREWALL remains in that state until the reset key is pressed. This action
is not needed with fail conditions because once they disappear the FIREWALL will leave that state.
Note: Action only available with level 2 access (after the input of the access code or key).
6.1.7 Delay Mode key:
This key allows to activate/deactivate the Delay Mode. In this operating mode, a (configurable) delay time is considered between the detection
and the indication (through auxiliary outputs, sounders, relays). This delay allows the user to verify if it is or not a false alarm, and act conveniently.
It is also possible to use this key when occurring the delay count-down to force the alarm immediately.
Note: Action only available with level 2 access (after the input of access code or key).
6.1.8 General Alarm indication LED:
This red LED indicates a fire alarm. It is permanently ON during a fire alarm, and blinking during delay countdown (in Delay Mode).
6.1.9 Main-power indication LED:
The presence or absence of main-power is indicated by this green LED. It is permanently ON when main-power is present and blinking when a
problem is detected.
6.1.10 4VDC fuse indication fail:
The 24VDC outputs are fuse protected. When the maximum specifications are not respected, the fuse opens the circuit and the yellow LED will
indicate it.
6.1.11 Earth circuit fail indication:
The FIREWALL is capable of detecting earth leakage currents from 1mA. When it occurs the yellow LED indicates it.
6.1.1 Battery presence indication LED:
When the secondary power-supply (battery) is not present, the yellow LED will indicate such fail.
6.1.13 Battery charging indication LED:
When the battery (secondary power-supply) is not fully loaded, the yellow LED will indicate that the battery is charging, until it is fully loaded.
6.1.14 General Fail indication LED:
Every time a fail occurs, this LED will be ON.
6.1.15 Sounder fail indication LED:
The output for external sounder is monitored to detect fails. When a short-circuit occurs, the LED blinks fast, and when an open-circuit is
detected, the LED blinks slowly.
6.1.16 Sounder fuse fail indication LED:
When the maximum specifications for sounders output is not respected (500mA), the fuse opens the circuit to prevent damages. When this
happens the yellow LED indicates it.
6.1.17 Disabled indication LED:
When any functionality of the FIREWALL is deactivated (a zone, for example) this LED indicates it.
6.1.18 System fail indication LED:
The FIREWALL has a microcontroller that controls all the system. When it fails, it will be indicated through this yellow LED.
6.1.19 Access level indication LED:
This LED remains ON while the FIREWALL is in level 1, blinks fast when someone is entering access code and blinks slowly when in level 2.
Note: After entering level 2, if nobody presses any key for 1 minute, the FIREWALL goes back automatically to level 1.
6.2 Fire Alarm Panel Control:
It is possible to change several functionalities using the front panel keys. While some functions are directly available, others are only accessible
by entering an access code or turning ON an access key. These two access levels are called level 1 and level 2.
6. .1 Introducing access code to level :
1. Press Buzzer key for 2 seconds (approx.).
2. Keyboard LED starts blinking fast, indicating that the control unit is waiting for the input of the access code.
3. Enter the access code. The default code is Buzzer, ounder, ounder, Buzzer. The user has 7 seconds between keys to enter the code. If
this condition is not satisfied, a beep will be emitted and the user has to start from step 1.
4. Press Z1 key to validate the entered code.
5. If the entered code is correct, a double beep will be emitted and the Keyboard LED will start blinking slowly. If the entered code is not correct,
the Keyboard LED will be permanently ON indicating level 1.
6. To leave level 2, press Buzzer key for more than 2 seconds (approx.). Otherwise, if no key is pressed within 1 minute, the control unit will
enter level 1 automatically.
Note: The default access code is Buzzer, Sounder, Sounder, Buzzer. To change the default access code to a new one please
proceed as described in point 7.1.1. After step 1, and until the entered code is accepted or rejected, the internal buzzer is automatically
muted.
5 / 8

User Manual
Version 5.3
6. . Activating/deactivating zones:
1. Enter the access code.
2. Press the zone key to activate/deactivate it.
3. Fail indication LED of each zone will be ON when the zone is not active and OFF when the zone is active or in steady-state.
6. .3 ounder silencing:
1. Enter the access code.
2. Press the Sounder key to silence the sounder and press it again to reactivate it.
3. Sounder key has a LED that blinks fast when the sounder is muted and remains ON when the sounder is active.
6. .4 Reset:
1. Enter the access code.
2. Press Reset key to reset the fire alarm panel.
Note: Zone circuits are supplied and monitored only 30 seconds after fire alarm panel reset.
6. .5 Activating/deactivating 'Delay Mode':
1. Enter the access code.
2. Press Delay Mode key to activate/deactivate 'Delay Mode'.
7 - Configuration:
To enter configuration mode it is necessary to remove the frontal and switch the position of the jumper JP1 to ON position.
Note: This actions should only be performed by specialized technicians.
The control unit will reset and enter configuration mode. Main alarm LED and main fail LED will blink slowly.
The available configurations are grouped and the selected group in each moment is indicated through LEDs associated to keys Buzzer, Sounder,
Reset and Delay Mode.
It is possible change the selected group using Buzzer (forward) and Sounder (backward) keys.
To select a group press Delay Mode key (enter) and to leave a group press Reset key (cancel).
Whenever a group is selected, LEDs of keys Buzzer, Sounder, Reset and Delay Mode blink fast, and stay ON when the group is not selected.
A double beep is emitted to signal a successful operation, and a single beep otherwise
7.1 General:
These general configurations allow to change the access code and to reset all parameters to the default ones.
Note: Resetting the parameters to the default values will also set the access code to the default one (Buzzer,
ounder, ounder, Buzzer).
7.1.1 Change access code:
1. Press Z1 key.
2. A double beep is emitted.
3. Enter new code using any combination of keys Buzzer, ounder, Reset and Delay Mode. Code maximum length: 9
keys; if exceeded the extra keys will be rejected and an error beep will be emitted.
4. Press Z1 key to confirm and Z2 key to cancel.
5. A double beep will be emitted in case of a successful operation and a single beep otherwise, backing to the previous
state.
7.1. Replace original parameters:
1. Press Z2 key.
2. The parameters will be replaced to the default ones (Table 2) and a double beep will be emitted, backing to the previous state.
Relay 1 Signals general alarm.
Relay 2 Signals all faults.
Delay Mode Active, 30 seconds
Intelligent zones All
Automatic zones None
Auxiliary outputs All signal fire alarm at corresponding zone
Access code Buzzer, Sounder, Sounder, Buzzer
Maintenance Disabled
Table 2: Original parameters
7.2 Delay mode:
The delay of a fire alarm, used in Delay Mode, is configurable and can be set to: 0s, 15s, 30s, 1min, 2min, 3min.
1. Press Buzzer and ounder keys to increase and decrease the delay time.
2. The delay is associated to LEDs: Main power, 24VDC Fuse, Earth, Battery and Battery state. A delay of 0s
corresponds to all LEDs OFF and the maximum delay time corresponds to all LEDs ON.
3. Press Delay Mode key to accept and Reset key to cancel.
4. A double beep will be emitted in case of a successful operation, and a single beep otherwise, backing to the
previous state.
6 / 8
Figure 12: Delay
mode group
selected.
Figure 11:
General group
selected.

User Manual
Version 5.3
7.3 Intelligent and automatic zones:
1. The zone keys (Z1, Z2, ...) allow to change between modes (intelligent and automatic). When a zone is in intelligent
mode, the corresponding fail LED remains ON, when it is in automatic mode the alarm LED turns ON. When the
mode is changed, the corresponding LED blinks until user confirmation.
2. Press Delay Mode key to accept and Reset key to cancel.
3. A double beep will be emitted in case of a successful operation, and a single beep otherwise, backing to the
previous state.
7.4 Auxiliary outputs:
Auxiliary outputs can signal fails, alarms or both for corresponding zone. They can also be deactivated.
1. Zone keys (Z1, Z2, ...) allow to change between modes:
Alarm LED Fail LED Mode
Off Off Auxiliary output deactivated.
Off On Auxiliary output indicates failure at the zone.
On Off Auxiliary output indicates alarm at the zone.
On On Auxiliary output indicates both failure and
alarm at the zone.
Table 3: Auxiliary outputs modes
2. Press Delay Mode key to accept and Reset key to cancel.
3. A double beep will be emitted in case of a successful operation, and a single beep otherwise, backing to the
previous state.
7.5 Relays:
The available relays can be configured to actuate under any combination of fails and/or alarms.
1. Press Buzzer and ounder keys to select a failure or an alarm indicated in the front panel.
2. Press Z1 key to associate/disassociate the failure or alarm to relay. The failures and alarms
previously configured are indicated maintaining the corresponding LED ON. For the selected
failures and alarms but not yet confirmed, the LEDs that signal them blink slowly.
3. To configure the relay in sounder repetition mode (mutable), press the Buzzer or ounder
key to navigate to the Sounder LED and press Z2 key. (NOTE: All the other failures and
alarms related to the relay must be removed for this mode to work properly, or else the relay
will be synchronized with those. By default, the General Alarm is selected and must be
removed).
4. Press Delay Mode key to accept or Reset key to cancel.
5. A double beep will be emitted in case of a successful operation, and a single beep otherwise,
backing to the previous state.
7.6 Test mode:
The FIREWALL has a test mode with the ability to reset after the occurrence of an alarm. To enter the test mode, follow
the next procedure:
1. Press the Buzzer and Siren keys to increase or decrease the alarm time, before perform the automatic reset. It can
be configured with the values of 1s, 5s, 10s, 15s, 30s and 1min.
2. The selected delay is represented by the LEDs Main power, 4VDC Fuse, Earth, Battery and Battery state. A
delay of 1s is represented by all LEDs off and the maximum delay by all LEDs on.
3. Use the Delay mode key to confirm and the Reset Key to cancel.
4. A double beep will be emitted in case of a successful operation, and a single beep otherwise, backing to the previous
state.
5. The FIREWALL will enter test mode and the General alarm LED will remain blinking. In this mode, it will work
normally but will reset in case of an alarm after the configured delay.
6. Press the Reset key to leave the test mode and return to the configuration menu.
Note: This feature is available since version FW 3.20.
7.7 Thresholds configuration:
Detection thresholds can be configured to work with termination resistors values between 1000Ω and 000Ω. To
configure the thresholds follow this procedure:
1. Press the Zone keys (Z1, Z , Z3, …) according to the zone you want to configure. It is possible to configure multiple
zones at the same time by pressing multiple keys.. The zone’s fault LED will turn on if the zone is selected;
2. Press the Delay Mode key to begin configuring the selected zones. The fault LED of each zone should be blinking;
3. The Battery Level LED will start blinking, indicating that the zone should be in rest mode (with the line termination
resistor and all fire detectors and manual callpoints inactive). If the value of a zone is not acceptable by the
FIREWALL, then the zone’s alarm LED will remain on until it reads a correct value;
4. Press the Delay Mode key to move to the next step. A double beep will sound in case of success, or an error beep in
case of failure returning to step 3;
5. The Battery LED will start blinking, indicating that the zone should be activated using a detector (if more than one
zone is being configured, then all of them should be activated before proceeding). If the value of a zone is not
acceptable by the FIREWALL, then the zone’s alarm LED will remain on until a correct value is read;
7 / 8
Figure 14: Auxiliary
outputs group
selected.
Figure 18: Test
mode group
selected.
Figure 13: Zones
group selected.
Figure 15: Relay 1
group selected.
Figure 16: Relay 2
group selected.
Figure 17: Test
mode group
selected.

User Manual
Version 5.3
6. Press the Delay Mode key to move to the next step. A double beep will sound in case of success, or an error beep in case of failure returning
to step 5;
7. The Earth LED will start blinking, indicating that the zone should be activated using a manual callpoint (if more than one zone is being
configured, then all of them should be activated before proceeding). If the value of a zone is not acceptable by the FIREWALL, then the
zone’s alarm LED will remain on until a correct value is read. If the zones in configuration do not have a callpoint, then this step can be
ignored by pressing the Buzzer key and jumping to the last step;
. Press the Delay Mode key to move to the next step. A double beep will sound in case of success, or an error beep in case of failure returning
to step 7;
9. A double beep will be emitted in case of a successful operation returning to the group selection.
Note: This feature is available since version FW 3.30.
7.8 Maintenance setup:
The maintenance warning can be configured with the values disabled, 6 months, 1 year and 2 years.
1. Press Buzzer and ounder keys to increase and decrease the maintenance period.
2. The delay is associated to LEDs Earth, Battery and Battery state. All LEDs OFF corresponds to maintenance
disabled and the maximum maintenance period corresponds to all LEDs ON.
3. Press Delay Mode key to accept and Reset key to cancel.
4. A double beep will be emitted in case of a successful operation, and a single beep otherwise, backing to the previous
state.
When the period is reached the FIREWALL will enable its sounder and the Buzzer LED will blink fast. The timer can be
reset by entering test mode (see 7.6) or by setting factory defaults (see 7.1.2).
Note: This feature is available since version FW 3.30.
8 - Specifications:
Main power
100 – 240 VAC
50/60Hz
45VA
Battery 12VDC
7Ah
,or 2x 6VDC 1
12Ah
tandby current 60mA
Maximum current 1A
Peak current 1,3A
24 VDC auxiliary output 24VDC
500mA
Fuses
Main power 4A
24V 1,6A
Sounder 500mA 2
ounder(s) output 24VDC
500mA
Relay contacts 250VAC
10A
Zones
24V
< 60mA
up to 32 conventional detectors, with termination resistance of 3300Ω,
1/4W in parallel (Callpoints with zener diodes of 5V1, 1/4W in series)
Auxiliary outputs by
zones (open-collector)
80VDC
500mA
Dimensions
Length: 255 mm
Height: 360 mm
Depth: 93 mm
Cable entries: 8 x Ø20mm
Table 4: Technical specifications
1 – Recommended for 16 zones models.
2 – Depending on version, sounder circuit may be protected by a PTC instead of a fuse.
8 / 8
Figure 19:
Maintenance setup
group selected.
This manual suits for next models
1
Table of contents
