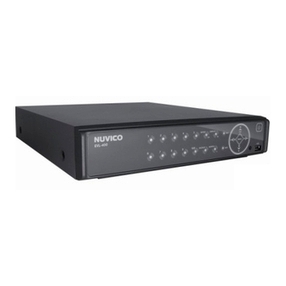
Night Watcher NW-8CVI-4MP User manual

A full version Instruction Manual for this product is available online at
NightWatcher.co.UK/Support
NW-4CVI-2MP (FHD) Kit
NW-8CVI-4MP (2K) Kit
NW-8CVI-8MP (4K) Kit
Digital Video Recorder
Quick Start Guide
Version 6.1.0

2
A full version Instruction Manual for this product is available online at
NightWatcher.co.UK/Support
Contents
Safety First………………………………………………………………………………………….3
CCTV and the law…………………………………………………………………….……3
1 Quick Start………………………………………………………………………………………..4
What’s in the box?..............……………………………………………………………….4
Checking the components…………………………………………………………………4
Booting up………………………………………………………………………………..….4
2 The rear panel…………………………………………………………………………………….4
3 Set-up………………………………………………………………………………………………5
Cameras……………………………………………………………………………………..5
Initializing the DVR…………………………………………………………………….……5
The Mobile app……………………………………………………………………………...7
Configuring P2P Settings……………………………………………………………….….8
Adding DVR to the app……………………………………………………………………..8
Configuring recording storage…………………………………………………………….10
Playing recorded video…………………………………………………………………….11
4 Navigating the DVR’s screens………………………………………………………………..11
5 Web operations……………………………………………………………………………....…12
6 Trouble shooting……………………………………………………………………….…….…13
7 Support………………………………………………………………………………………..….18
8 Product Compliance……………………………………………………………………….…...18
9 Specifications……………………………………………………………………………………19

3
A full version Instruction Manual for this product is available online at
NightWatcher.co.UK/Support
Safety First
Please read this ’guide’ carefully before using your DVR and keep it for future reference.
Operation Requirement
⚫Install the DVR indoors in normal living space.
⚫Do not install the DVR in a place exposed to direct sunlight, near a heat source, or in
very cold conditions.
⚫Keep the DVR away from dampness, high humidity, dust or soot.
⚫Keep the DVR installed horizontally in a stable place to prevent it from falling.
⚫Do not drop or splash liquid onto the DVR, and make sure there is no object filled with
liquid on the DVR to prevent liquid from flowing into the DVR.
⚫Install the DVR in a well-ventilated place, and do not block the ventilation of the DVR.
⚫Operate the DVR within the range of power input and output (according to rating
labels).
⚫Do not dissemble the DVR.
Electrical Safety
⚫There is a CR1220 button cell on the PCB for providing back up power to maintain
date and time etc. This will last for a long time, but when it comes time to replace it,
replace with a reputable brand battery and ensure it is replaced in correct polarity (+
up).
⚫Please recycle exhausted batteries. Do not dispose to unsorted waste. Button cells
can be lethal if swallowed, always keep them securely and out of reach of children and
pets.
⚫Use only the 12V (SELV) power adapter provided with the DVR. Using an incorrectly
specified adapter will invalidate your warranty and may present a risk of electric shock
and fire.
⚫Do not remove or destroy the rating label(s) on the product; they contain vital safety
information and data that is needed for aftersales support.
CCTV and the law
CCTV systems are subject to specific legislative restrictions in the EU/UK. You are allowed to
operate CCTV systems on your own property to protect that property, but you must preserve the
privacy of your neighbours and the general public.
•Do not point cameras at neighbour’s windows,
•Avoid covering areas that are not your property in camera view where possible
•Do not keep recordings for longer than is necessary for security purposes
•Do not publish or display video footage out of context of security.
•Do display a ‘CCTV in operation’ sign within the area of your surveillance.
To avoid conflict with your neighbours, you should discuss the siting and angle of cameras with them
before you install. For further details of the law on CCTV, look at our website
www.nightwatcher.co.uk or directly at government websites with reference to the following
legislation.
•The Protection of Freedoms Act 2012
•The Surveillance Camera Code of Practice 2013 (the ‘SCOOP’)
•The Data Protection Act (the ‘DPA’)

4
A full version Instruction Manual for this product is available online at
NightWatcher.co.UK/Support
Help is at hand!
If at any point you are unsure or need further guidance, consult the troubleshooting section at the
end of this instruction, the FAQs on our website or contact our support centre. See
www.nightwatcher.co.uk for details.
1. Quick Start
What’s in the box?
1. DVR
2. USB Mouse
3. UK 3 pin mains adapter
4. HDMI lead
5. LAN cable
6. Instruction manual
Booting up
Ensure the output voltage/amperage on the adapter corresponds to the power requirement
of the DVR.
Connect the DVR to a display.
Plug in the power cable to the DVR.
Connect your cameras to the DVR (see camera instructions for details)
Press the power button to turn on the DVR. The power indicator glows. On the
connected display, the live view screen is displayed.
2. The front panel
No.
Port Name
Function
1
HDD
Glows blue when HDD status is abnormal.
2
NET
Glows blue when network status is abnormal.
3
POWER
Glows blue when the power is connected properly.
4
USB port
Connects to peripheral devices such as USB storage device,
keyboard and mouse.

5
A full version Instruction Manual for this product is available online at
NightWatcher.co.UK/Support
3. The rear panel
The following figure shows the rear panel of model with 4 video input ports (as an
example).
NW-2CVI-2MP
NW-8CVI-8MP
No.
Port Name
Function
1
Video input ports
Connects to analog camera to input video signal.
2
Audio input port
Receives audio signal output from the devices such as microphone.
3
Audio output port
Outputs audio signal to the devices such as the sound box.
4
HDMI port
High definition audio and video signal output port.
The port outputs the uncompressed high definition video and multi-
channel audio data to the connected display with HDMI port.
5
Network port
Connects to Ethernet port.
6
RS485
communication
port
Connects to the control devices such as speed dome PTZ. RS485_A
port is connected by the cable A and RS485_B is connected to the
cable B.
7
VGA port
Outputs analog video data to the connected display with VGA port.
8
USB port
Connects to external devices such as USB storage device, keyboard
and mouse.

6
A full version Instruction Manual for this product is available online at
NightWatcher.co.UK/Support
No.
Port Name
Function
9
Power input port
Inputs DC 12V power.
10
Power cable
fastener
Use clamp to secure the power cable on the DVR in case there is
any loss.
11
Ground terminal.
•To enter the Main Menu, right-click on the live view screen to display the shortcut menu, and
then click Main Menu and login the system.
•In order to make use of network services such as peer to peer camera viewing on your
mobile phone, you need to connect your DVR to your network router. This DVR does not
support wifi, so this must be done via the LAN cable supplied to the network port (5 in the
diagram above). See also internet connection and P2P on P7.
4. Set-Up
Cameras
For details on siting fitting and set-up of cameras see the separate camera instructions that come
with your NightWatcher cameras. Connect the camera leads for your cameras to the back panel via
the BNC connectors (item no.1 in the back-panel diagrams.
Set the recording resolution in Camera>Encoding>Resolution during or after Initializing the DVR.
Note that the the substream options define the bandwidth fed to the app, rather than direct
connection, which is the mainstream.
Initializing the DVR
When booting up for the first time, the DVR Initialization interface is displayed. You need to
configure the password information for ‘admin’. If needed, you can also configure an unlock pattern
and password protection mode (see password parameters table below).
Use your mouse to click on the spaces to activate the onscreen keyboard. Your password can be
set from 8-32 characters and should contain at least 2 types of character, e.g. number and letter,
letter and special characters (excluding inverted commas).
Leave yourself a clue to your password in the prompt field

7
A full version Instruction Manual for this product is available online at
NightWatcher.co.UK/Support
Note your login e-mail and password here for future reference
E-mail
Password
Now enter your recovery e-mail address and security answers for password reset. If you don’t want
to, do this you can disable these features with the toggle switches.

8
A full version Instruction Manual for this product is available online at
NightWatcher.co.UK/Support
Password
Protection Mode
Description
Email Address
In the Email Address box, enter an email address for password reset. In
the event that you forget your password you can get a reset sent to this
address. You will be asked to enter the security code sent to this
reserved email address to reset the admin password.
Security Questions
Configure the security questions and answers. In case you forget your
password, enter the answers to the security questions that will be used
when you reset the password.
If you want to configure the email or security questions function or change the configuration
later, select Main Menu > ACCOUNT > USER> then click the edit icon.
Auto-check for updates
In order to keep your DVR up to date with developments, bug fixes and security updates, please
update your DVR when advise to do so by the operating system. These updates ensure the smooth
running of your system. So please leave the auto-check for updates, ticked.
General
There is no need to change any of the settings in the General screen for a standard set-up, but note
down the device name and its useful to enable the Navigation bar for easy access to main menu
options in live view.
Date and time
For use in the UK this should be set for GMT 00.00 Greenwich Mean Time. To set the DVR to
automatically adjust for changes to and from British Summer time just set the DST switch to ON
(regardless of what time of year it is). The start and end times for the auto-DST are factory set to
March/Last/Sunday/1.00 and end time to October/last/Sunday/2.00 (for UK use). If you are setting
up outside the UK you may need to adjust these to national settings.
Changes in this screen will not take effect until you press next.
You can also set the date format (DDMMYYYY, YYYYMMDD etc,) in this screen.
Network
Network is set-up to be as automatic as possible. You shouldn’t need to change anything here.
DHCP (Dynamic Host Configuration Protocol) is enabled as a default. This should set up your IP
address automatically and works well for most common UK routers. If your internet connection does
not work after a basic set-up, you may need to disable DHCP and set up your IP address manually.
Internet connection
It is only necessary to connect your DVR to your router if you want to make use of the mobile app
services. This allows you to view your cameras remotely via your phone. Connect one end of the
LAN cable supplied with this DVR to the Network Port (5 in the rear-panel diagram) and the other
end to your router. If you DVR is not located conveniently close to your router you will need to
connect your DVR to a network device which allows it to connect to your router remotely. Such
devices typically use the house’s wiring to conduct signal or else use wifi technology to provide a
remote wired LAN connection.

9
A full version Instruction Manual for this product is available online at
NightWatcher.co.UK/Support
The mobile app – Lite version
Download the Easy Viewer (Lite) mobile app from the Apple app store or from the Google play store
and install it.
The screenshot below is from the Google Play Store
The Lite version is free and allows you to view your cameras (individually or in groups) remotely from
your mobile device (smartphone or tablet) on wifi or mobile data connection.
Upgrade to Easy Viewer Pro /Easy Viewer Plus
The full app is called Easy Viewer Pro on Android (Google Play Store) and Easy Viewer Plus on IOS
(Apple Store). There is a small one-off fee for purchasing these apps. The full app has extra
functionality much of which is not relevant to the NightWatcher starter kits (pan/ tilt/ zoom controls
etc. for PTZ cameras) but the key feature is it enables push notifications to your phone from your
DVR. This means you can set your system to send alerts to your phone when certain trigger criteria
are met. You can set up notifications from motion detection, cross-line (IVF) or face detection
triggers. We recommend using the cross-line function in the IVF feature on your DVR for this, as it
gives fewer alerts than MD.
MD can also be used in areas where there are not likely to be many false triggers, and is easier to
set up.
Face detection only works at very short range and has no practical benefit over cross-line triggering
There are further options to view the alert as a still image, recorded incident video or live video from
this type of push notification. Thus, you can see what triggered the camera, or view what is
happening right now from the camera that triggered through your mobile device anywhere you have
mobile data or wifi connection.
For full details on this feature see the Full Manual online - section Push Notifications

10
A full version Instruction Manual for this product is available online at
NightWatcher.co.UK/Support
Configuring P2P Settings
Make sure the DVR is connected into the Internet, and if yes, in the Status box of the P2P interface,
it shows Online.
You can add the DVR into your cell phone client or the DVR’s P2P platform to manage
Entering P2P Interface
Select Main Menu > NETWORK > P2P, the P2P interface is displayed.
Enable the P2P function.
Click Apply. You can start adding the DVR into Cell Phone Client or the platform.
Adding the DVR into the Cell Phone Client (mobile app)
Note that the American term ‘cell phone client’ meaning mobile application (‘app’) is used in the
DVR’s software.
To use P2P (Peer to peer) function, take adding wired DVR into Cell Phone Client as an example.
Use your cell phone to scan the QR code under Cell Phone Client to download the
application. Or go to the app store to download Easy Viewer (Lite) mobile app from
the Apple app store or from the Google play store and install it.
Open the application and tap , the menu is displayed.
Tap Device Manager > >Add Device, the Add DVR interface is displayed. Tap
Wired device.

11
A full version Instruction Manual for this product is available online at
NightWatcher.co.UK/Support
Tap P2P, enter your own name for the DVR, then enter your username and
password, scan the QR code under DVR SN, and then tap Start Live Preview. The
DVR is added and displayed on the live view interface of the cell phone.
Tip
To view a single camera in full screen from the mobile app, double tap the screen segment you want
to view and double tap to exit full screen
Add DVR
Live view
◼Logout
On the top right of the Main Menu interface or any interface after you have entered the
Main Menu, click .
⚫Select Logout, you will log out the DVR.
⚫Select Reboot, the DVR will be rebooted.
⚫Select Shutdown, the DVR will be turned off.
You can also press the power button on the DVR to turn it off.
Encode
In the Camera>Encode menu you set up your recording settings.
Recording Resolution
The DVR will automatically recognize the installed cameras and set the maximum recording
resolution offered by the camera/DVR combination. Note also that max recording resolution is
limited not only by the camera’s resolution, but also by the DVR to a maximum determined by the
model.
NightWatcher kit
Max. resolution
offered by DVR
Max. resolution offered
by Cameras in the kit
Max. recording
resolution offered by kit
NW-4CVI-2MP
1920x1080 (FHD)
1920x1080 (FHD)
1920x1080 (2MP/FHD)
NW-4CVI-4MP
3840x1260 (4K)
2560x1440 (2K)
2560x1440 (4MP/2K)
NW-4CVI-8MP
3840x1260 (4K)
3840x1260 (4K)
3840x1260 (8MP/4K)

12
A full version Instruction Manual for this product is available online at
NightWatcher.co.UK/Support
Frame rate
The DVR will also set the frame rate for you. Note that the max frame rate will depend on the
resolutions set and is limited by the process rates of each DVR model. For example, on the NW-
4CVI-2MP running its 4 cameras at 1920x1080 (FHD), channel 1 is set to 20 fps and channels 2,3,4
are all limited to 7 fps. The NW-8CVI DVR kits come with 8 higher resolution cameras which limits
frame rate as follows.
NightWatcher kit
Default Recording
resolution
Frame rate at default resolutions
NW-4CVI-2MP
1920x1080 (FHD)
Channel 1- 20fps channels 2,3,4 - 7fps
NW-4CVI-4MP
2560x1440 (2K)
All channels 15fps
NW-4CVI-8MP
3840x1260 (4K)
All channels 7fps
Higher resolution takes more space on the drive. So, your recording time will be shorter before it
starts to overwrite but you should consider that you may need to blow-up (digitally zoom) images to
recover details such as faces or car number plates, so the highest resolution you can get is usually
the best option.
Configuring Recording Storage Schedule
Select Main Menu > STORAGE > SCHEDULE > Record, the Record interface is displayed (see
graphic below).
The default setting is 24 hours recording for all channels. You can modify the settings if needed.
Choose motion detect or continuous video
Motion detect is set as default recording mode. This means that your cameras will only record when
they detect movement in front of them. This means you can record events rather than days of
nothing happening. This takes much less space on the drive, so you can keep weeks of events from
several cameras on your hard disk before it is overwritten by new video.

13
A full version Instruction Manual for this product is available online at
NightWatcher.co.UK/Support
Parameter
Description
Channel
In the Channel list, select a channel to record the video.
Pre-record
In the Pre-record list, enter the amount of time that you want to start
the recording in advance.
Redundancy
If there are several HDDs installed to the Device, you can set one of the
HDDs as the redundant HDD to save the recorded files into different
HDDs. In case one of the HDDs is damaged, you can find the backup in
the other HDD.
Select Main Menu > STORAGE > HDD MANAGER, and then
set a HDD as redundant HDD.
Select Main Menu > STORAGE > SCHEDUE > Record, and
then select the Redundancy check box.
If the selected channel is not recording, the redundancy
function takes effect next time you record no matter you
select the check box or not.
If the selected channel is recording, the current recorded
files will be packed, and then start recording according to
the new schedule.

14
A full version Instruction Manual for this product is available online at
NightWatcher.co.UK/Support
Configure the record settings parameters. See the table below.
Table 1-1
Define the video recording period by drawing or editing. By default, it is active all the time.
⚫Define the period by drawing.
1) Select the check box of event type. See the picture below.
2) Define a period. The system supports maximum six periods.
Define for the whole week: Click next to All, all the icon switches to
, you can define the period for all the days simultaneously.
Define for several days of a week: Click before each day one by one,
the icon switches to . You can define the period for the selected days
simultaneously.
3) On the timeline, drag to define a period. The Device starts recoding the
selected event type in the defined period. See the picture below.
⚫Not all models support this function.
⚫The redundant HDD only back up the recorded videos but
not snapshots.
Event type
Select the check box of the event type which includes General, MD
(motion detect, video loss, tempering, diagnosis), Alarm (IoT alarms,
local alarms, alarms from alarm box, IPC external alarms, IPC Offline
alarms), MD&Alarm, Intel (IVS events, face detection), and POS.
Period
Define a period during which the configured recording setting is
active.
The system only activates the alarm in the defined period when
set.
Copy
Click Copy to copy the settings to other channels.

15
A full version Instruction Manual for this product is available online at
NightWatcher.co.UK/Support
The color bar indicates the event type that is effective in a defined period:
Enabling/Disabling PIR
In the Alarm>Video Detect menu, you can find and enable or disable the PIR setting. PIR as a
setting can only be enabled on cameras that have the PIR function. It is enabled by default, however
the range of the PIR sensor is lower than that of the Motion Detect.

16
A full version Instruction Manual for this product is available online at
NightWatcher.co.UK/Support
Playing Recorded Video
Select Main Menu > VIDEO, the video search interface is displayed. See the graphic below. You can
view, search, and play back the recorded video.
To select a channel (camera) click the numbered channel bars at the bottom of the screen with your
mouse. A green bar will appear, and the recording will appear in the central box. If no green bar
appears, there are no recordings on that channel.
5. Navigating the DVR’s screens
Once you have completed set-up (initialization) most screens have a tool bar along the top of the
screen. This includes Live, the head and shoulders admin icon, logout and QR code icon. Left click
‘Live’to view live feeds from the cameras.
Right click on any area (that is not a data field) gets you back to the main menu.
Right click from anywhere in main menu takes you to Live,
Left click in a blank space on any screen to get back to the main menu.
The main menu
Here you have large buttons to enter Video, Alarm, IVS, POS, Face detect and Back-up feature
pages and buttons along the bottom of the screen to enter Camera, Network, Storage, System,
Account, and Info submenus.

17
A full version Instruction Manual for this product is available online at
NightWatcher.co.UK/Support
From these you can configure every part of the system, change your password, set camera
resolutions and frame rates, recording schedules, revise account details, open QR codes to scan
etc.
6. Web operations
Connecting to Network
The factory default IP address of the DVR is 192.168.1.108.
The DVR supports monitoring on different browsers such as Safari, fire fox, Google, on Apple and
PC to perform the functions such as multi-channel monitoring, and device parameters
configurations.
Check to make sure the DVR has connected to the network.
Configure the IP address, subnet mask and gateway for the PC and the Device. For details about
network configuration of the Device, see Set-up, Initialization
On your PC, check the network connection of the Device by using "ping ***.***.***.***". Or similar
network connection test. Usually the return value of Time to Live (TTL) is 255.
On your computer, open your internet browser, enter the IP address of the DVR, and then press
Enter key. The Login in dialog box is displayed. See below. Enter the user name and password to
login to the DVR.
DVR initialization is required at the first login.

18
A full version Instruction Manual for this product is available online at
NightWatcher.co.UK/Support
The default administrator account is admin. The password is the one that was configured during
initializing settings. To keep your account secure, it is recommended to keep your password
securely and change it periodically (but keep it written down somewhere safe).
You can select the protocol type as TCP, UDP, or MULTICAST depending on the networking
structure. The default is TCP.
If you forgot the password, click Forgot Password? to reset the password.
When entering the Live interface for the first time, follow the onscreen instructions "Please install
plugins first!" to install the plugins.
7. Troubleshooting
FAQs and further information
For FAQs and additional instructions of the features of these DVRs and kits please go to
www.Nightwatcher.co.uk/support
Resetting your password
You can reset the password through the QR code or the security questions.
⚫To reset through the QR code, make sure the Enable check box is selected in Main
Menu > SYSTEM > SECURITY > Password Reset.
⚫To reset through the security questions, make sure the security quesitons is
configured.
Enter the login interface.
⚫If you have configured unlock pattern, the unlock pattern login interface is
displayed. Click Forgot Pattern, the password login interface is displayed.
⚫If you did not configure unlock pattern, the password login interface is
displayed.
On the unlock pattern login interface, click Switch User to login; or on the
password login interface, in the User Name list, select other users to login.

19
A full version Instruction Manual for this product is available online at
NightWatcher.co.UK/Support
Click .
⚫If you did not set the reserved email address, the email entering interface is
displayed. Enter the email address, and then click Next, the Reset the
password interface is displayed.
⚫If you have set the reserved email address the reset password interface is
displayed

20
A full version Instruction Manual for this product is available online at
NightWatcher.co.UK/Support
Rest the password.
⚫QR code
Follow the onscreen instructions to get the security code in your reserved email
address. In the Security code box, enter the security code.
⚫You are given the limited times to get the security code by scanning the
QR code within 24 hours. Please operate carefully.
⚫Please use the security code received in your email box to reset the
password within 24 hours; otherwise the security code becomes invalid.
⚫Security questions
4) On the Reset the password interface (as shown below), in the Reset Type
list, select Security Questions, the Security Questions interface is displayed,
see below.
If you did not configure the security questions before, in the Reset Type list,
there will be no Security Questions.
5) In the Answer box, enter the correct answers.
This manual suits for next models
2
Table of contents
Other Night Watcher DVR manuals
