CONTENTS
FOREWORD
.......................
.
.....................
..
.....
.
.. .. ..
.
..
.
............
.4 OPE
RATI
ON
IN
S
HUTIER
-PRIORITY AUTO
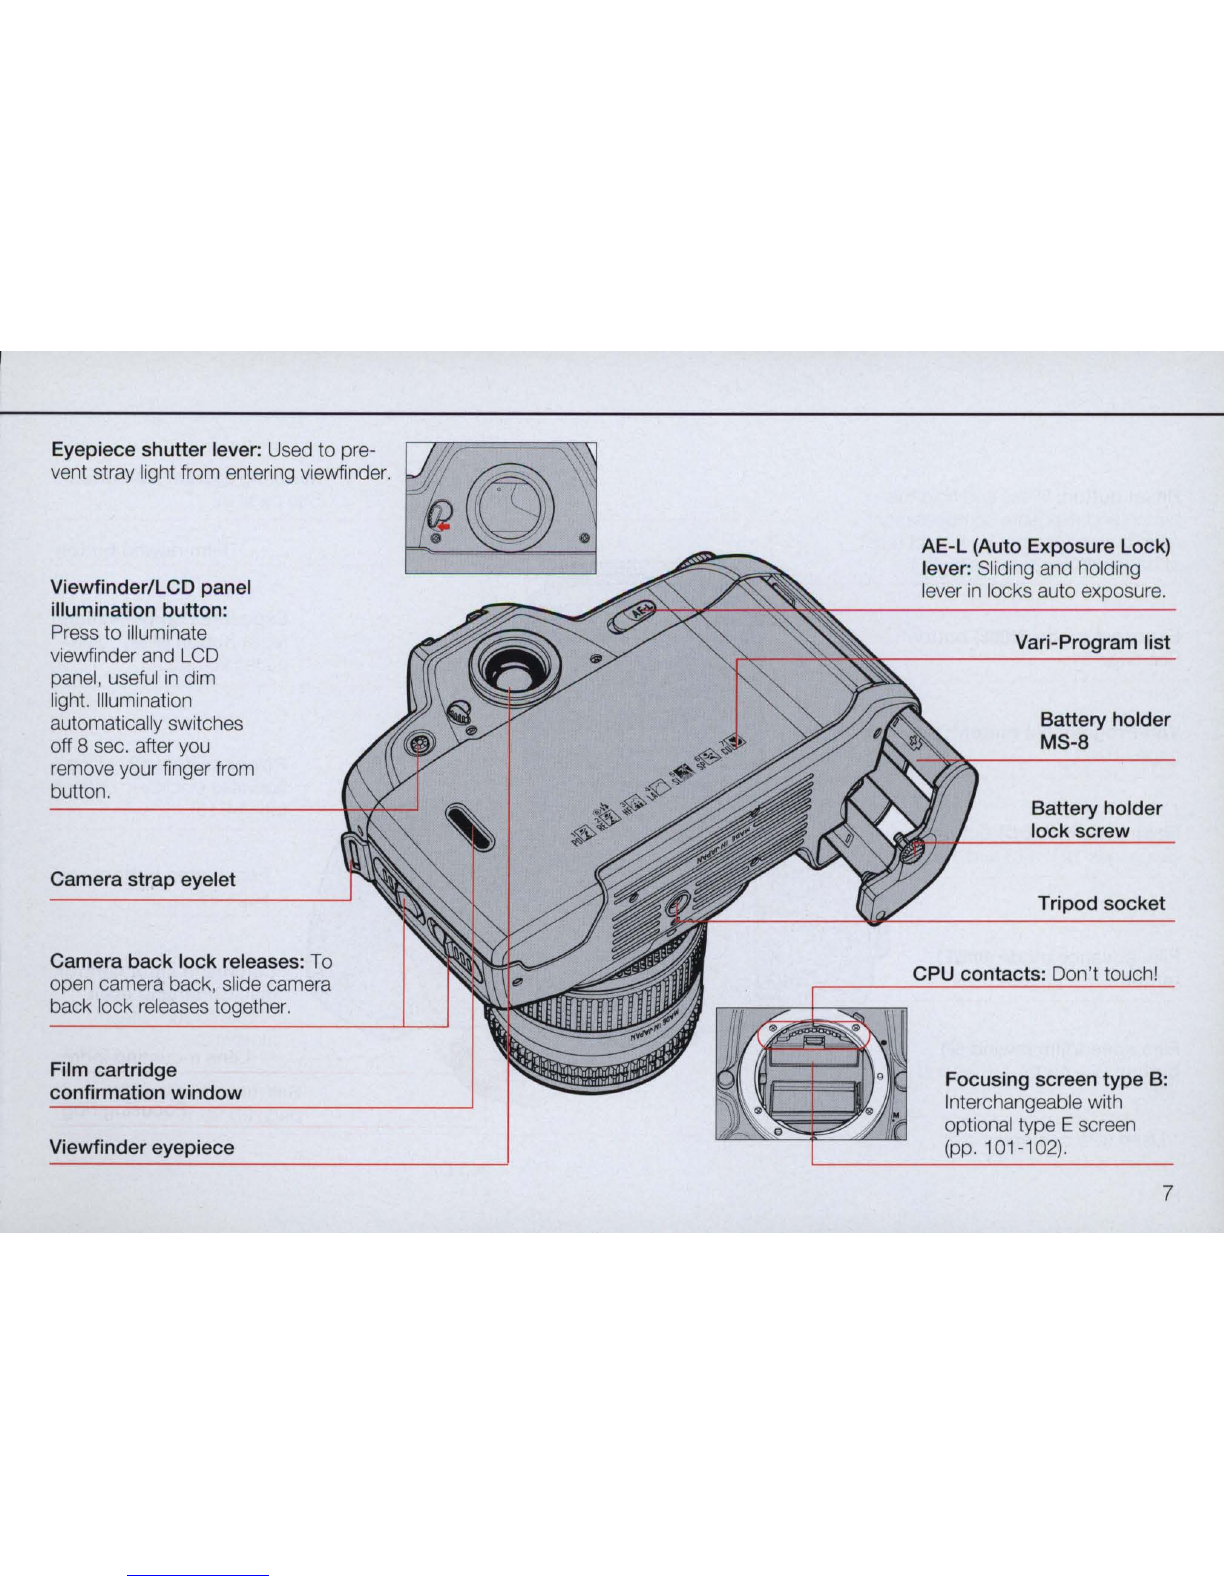
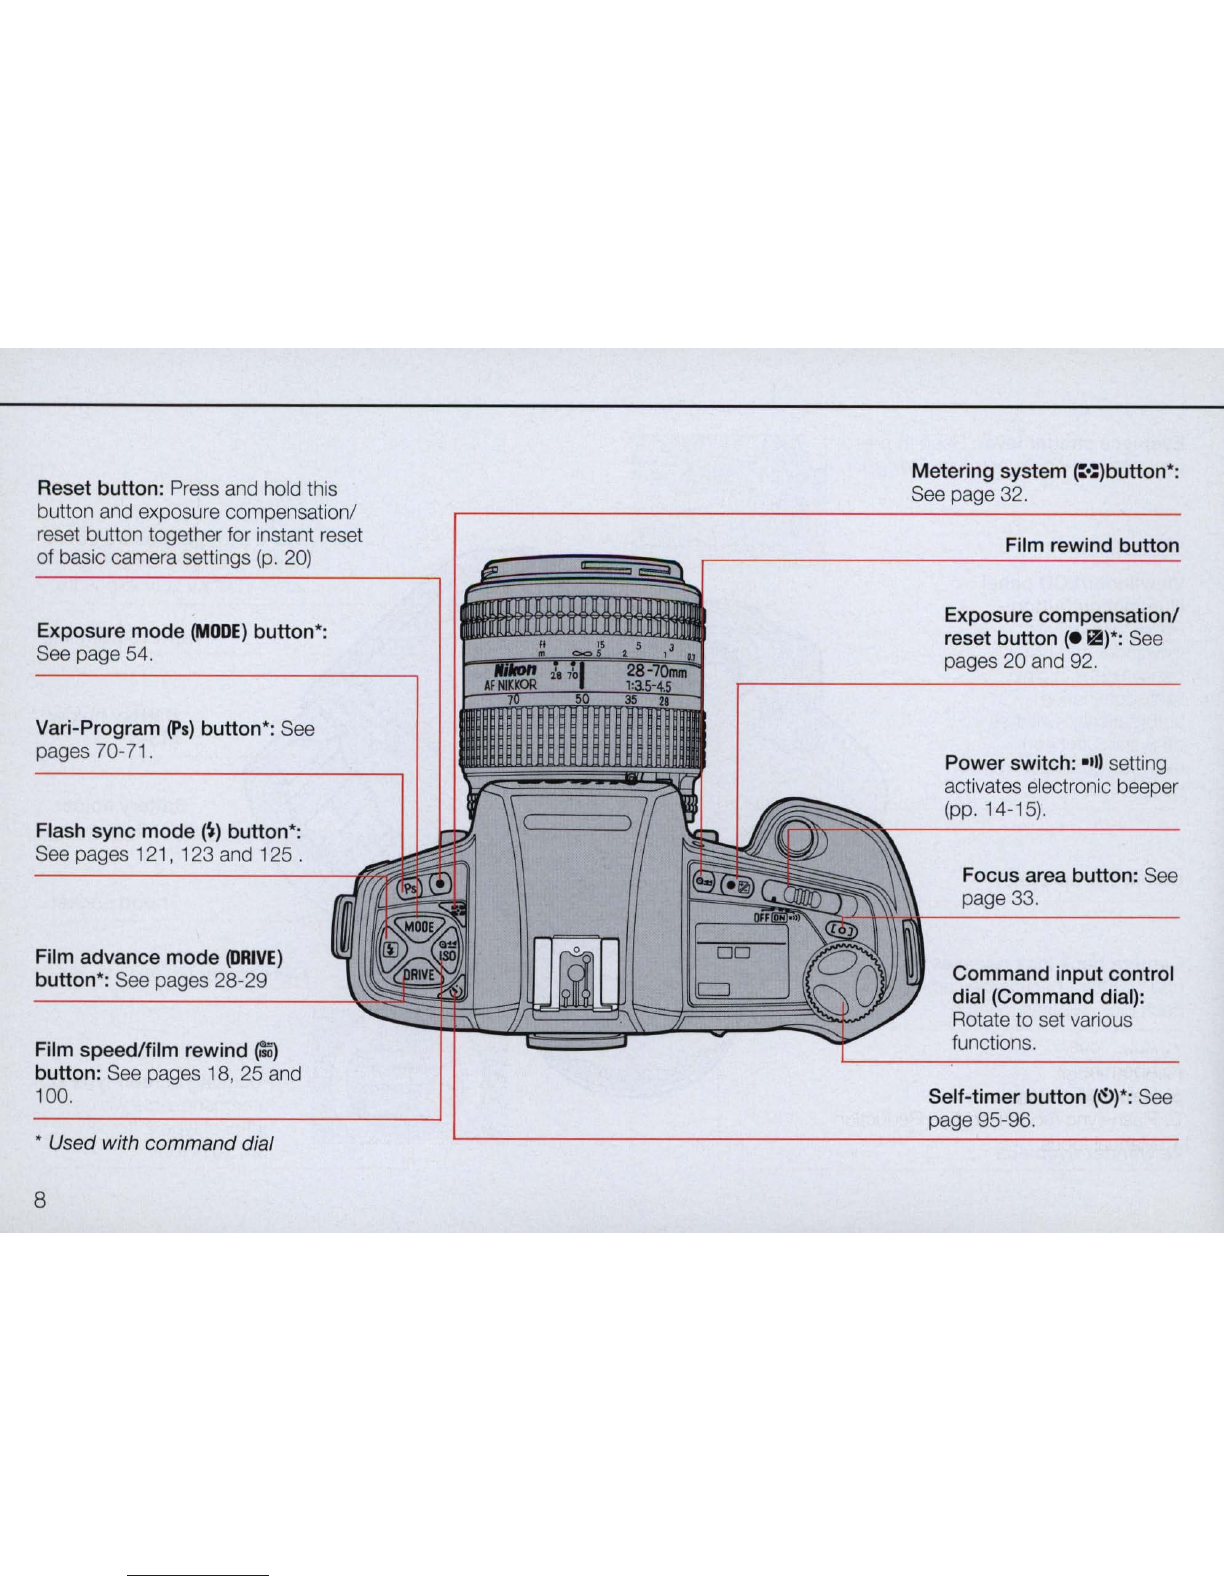
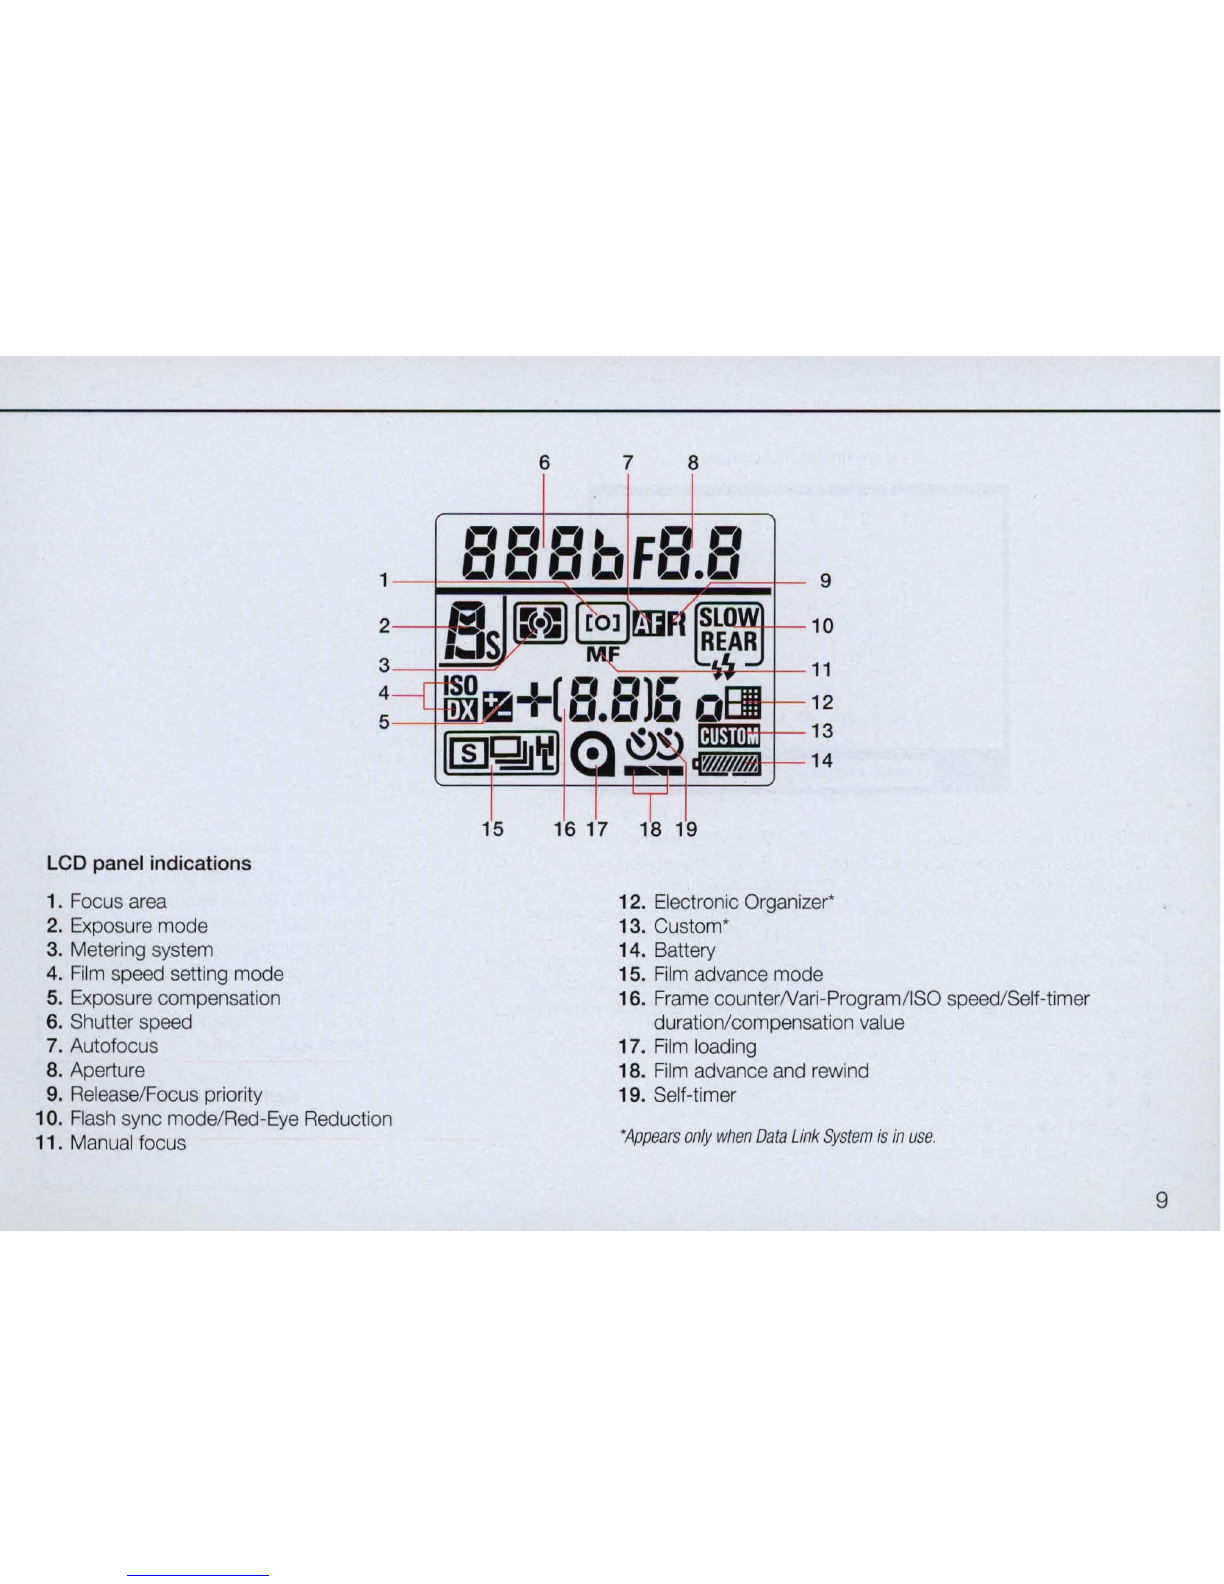
NOMENCLATURE
....
...................................................5-
10
EXPOSURE MODE
..
.........................
..
..
...................
56-59
BASIC OPERATION ................. .
..
. .
.....
..
...........
11
-26 OPE
RATI
ON
IN
APERTURE-PRIORITY AUTO
MOUNTING
THE
LENS
...............
..
...........................
....
..
........
..
12 EXPOSURE MODE ...................................................
60-62
INSTALLING
BATIERIES
............
..
.........
..
.................................13 OPERATION
IN
MANUAL EXPOSURE MODE
..
..
...........
63-66
CHECKING
BATIERY
POWER
.............................................14-15 VARI-PROGRAM..............................................
.....
.
..
..
67
-85
LOADING
FILM
..
..
.
..
...
..
..
.. ..
.
..
.
........
..
.
....
..
..
.......
..
....
.....
..
16-18
WHAT
IS
VARI
-
PROGRAM?
...
..
...
....
....
..
...
..
..
.......................
68-69
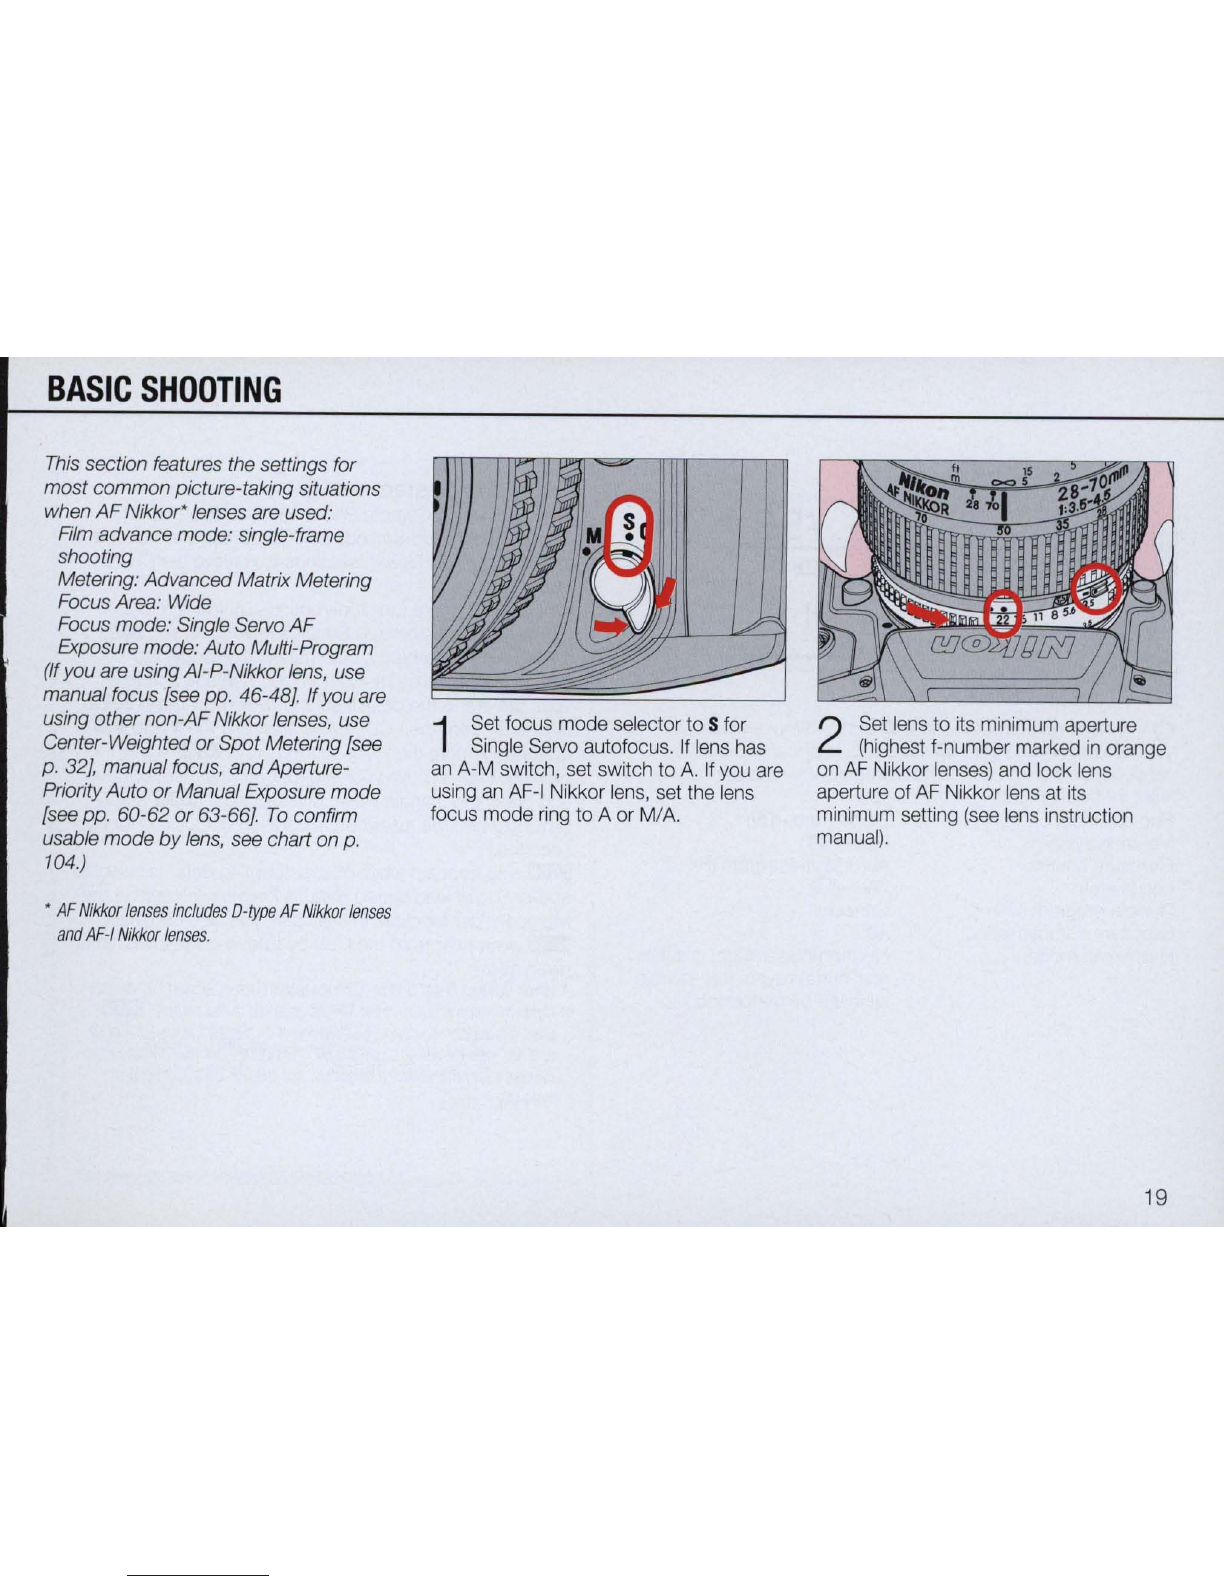
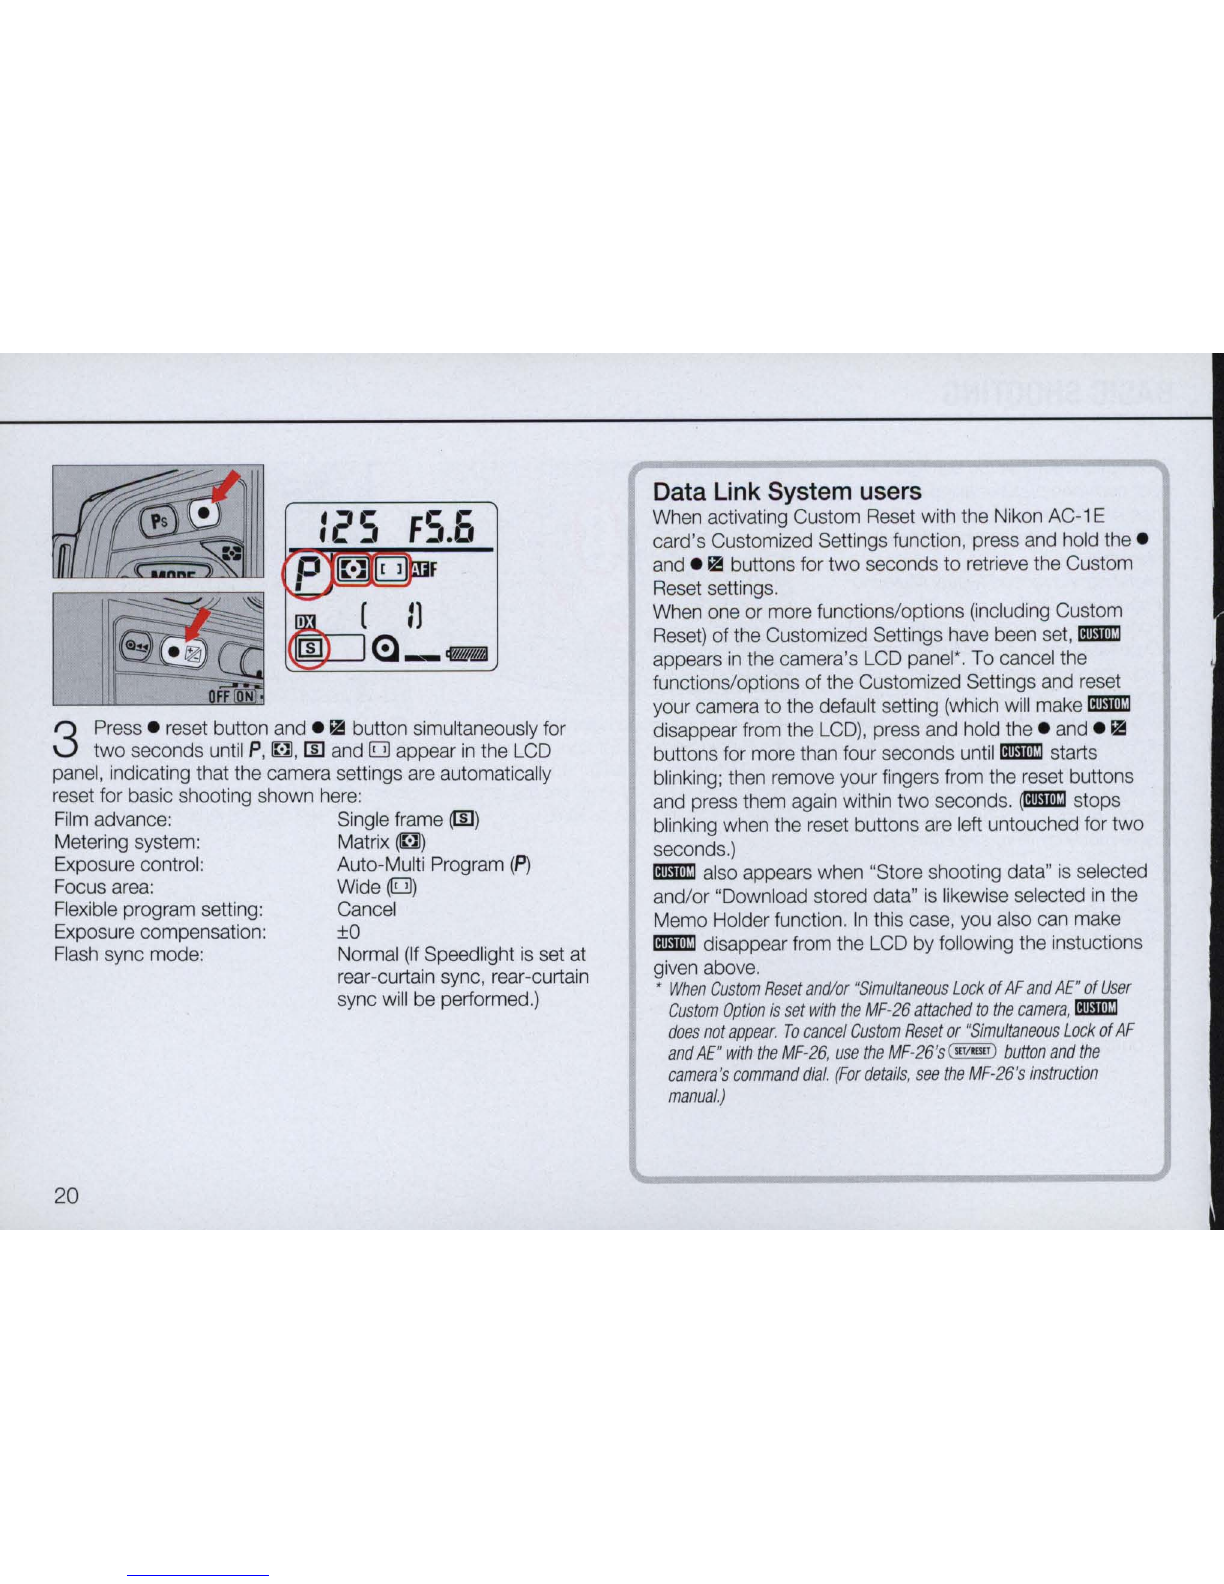
BASIC
SHOOTING
..............
....
.. ..
....
....
..
....
.
......
.......
..
..
19-24
SELECTING
VARI-PROGRAM
SOFTWARE..
..
..
..........
..
..........
70-7
1
REWINDING
FILM
.
.. ..
..
..
............
....
..............
..........
...
....
25-26
SHOOTING
WITH
VARI
-
PROGRAM
.
..
......
....
..
..
......
..
....
...
......
72-85
GENERAL FUNCTIONS
..
..
......
........................
......
27
-66
PORTRAIT
PR
OGRAM .................................................
72-73
FILM
ADVANCE
MODE
....
....
.. ..
........
....
..
.........
.
...
.. .. ..
.
..
.
....
.28-29 PORTRAIT
PR
OGRAM WITH RED-EYE REDUCTION
S
IN
G
LE
-FRAME SHOOT
IN
G.........................................
..
...
28 (with
SB-25
Speedlight exclusivel
y)
..........
.. ..
..........
...
74-75
CONTINUOUS SHOOT
IN
G ................
.. ..
..
..........................29 HYPERFOCAL PROGRAM ...........................................76-77
EXPOSURE
METERING
SYSTEM
......
..
...............................30-32 LANDSCAPE PROGRAM............................
..
................
78-79
MATRIX METERING ...........................
..
....
..
........................30 SILHOUETTE PROGRAM .........
..
......................
..
........
..
80-8
1
CENTER-WEIGHTED METERING ....................
..
...
.....
....
..
.
31
SPORT PROGRAM...
...
.................................................
82-83
SPOT METERING ........................................
..
.......
..
...........31 CLOSE-UP PROGRAM.................................................84-85
SETTING METERING SYSTEM
..
..
........
..
............................32 SPECIAL FUNCTIONS
.......
..
....
..
............................
86-
1
02
FOCUS
..................................
...
...
..
...
.................................
33-48
EXPOSURE
COMPENSATION
.......................
..
...........
.
..
...
...
.87-93
FOCUS AREA........ ............................................33-35 AE-L (AUTO EXPOSURE LOCK) LEVER .......................
88-89
AUTOFOCUS.........................................................
...
.. ..
35-39
TO OBTA
IN
METER READ
IN
G
FOR
A PARTICULAR
AUTOFOCUS W
ITH
MAIN SUBJECT O
FF
C
EN
TER
......
40
-43 SUBJECT
IN
MANUAL
EX
POSURE MODE...............
90-9
1
SPECIAL FOCUSING SITUATIONS...............................44-45 EXPOSURE COMPENSATION
BUTIO
N.................
...
92-93
MANUAL FOCUS....................
... ...
..
..
...
...
..
...................46-48
SELF-TIMER
OPERATION
..
..
...
.
..
....
.
...
.
....
.
.....
.
.........
.
...
...
.....
94-96
EXPOSURE
MODE
....
....
..
.
....
.................
..
.....
.
.. ..
.................
.49-66 ONE-SHOT SELF-TIMER ................................................
..
95
SELECT
IN
G EXPOSURE MODE .
..
......
................
..
...
50-53 TWO-SH
OT
SELF-TIMER..
..
..
....
.. ..
.
..
.....
...
..
..
.....
..
.
.. .. ..
........96
SETTING EXPOSURE MODE
..
..
..
.. ..
..
..
........................
..
....54
TO
CONFIRM
SHARPNESS
BEFORE
SHOOTING
FLEXIBLE
PR
OGRAM
..
. . ................
.. ..
..
.. .. ..
..
........55
-DEPTH-OF-FIELD
PREVIEW
BUTION
..................... ..
.. ..
.97
2