------------------------
-------------------
-
Contents
Foreword.
.....
.............
.
....
...
..
..
..
.
....
...
..
.
..
.
..
. .
...
..
.
..
.
..
..
..
.......
..
2
Viewfinder
indications
........................
...
..
..
....
..
23
WARN
I
NG
for
safe
hand
l
ing
of
the
camera
.......................
.
...................
3
Shooting
............................................
..
.
......................
.
......
..
24
Conten
ts
................
........
..
....
..
.......
..
......
..
....
..
...
..
.........
..
........
..
......
.4
H
ow
to
use
focus
l
ock
................
.........................
..
...
.
..
..
.
..
.
...
..
.
........
25
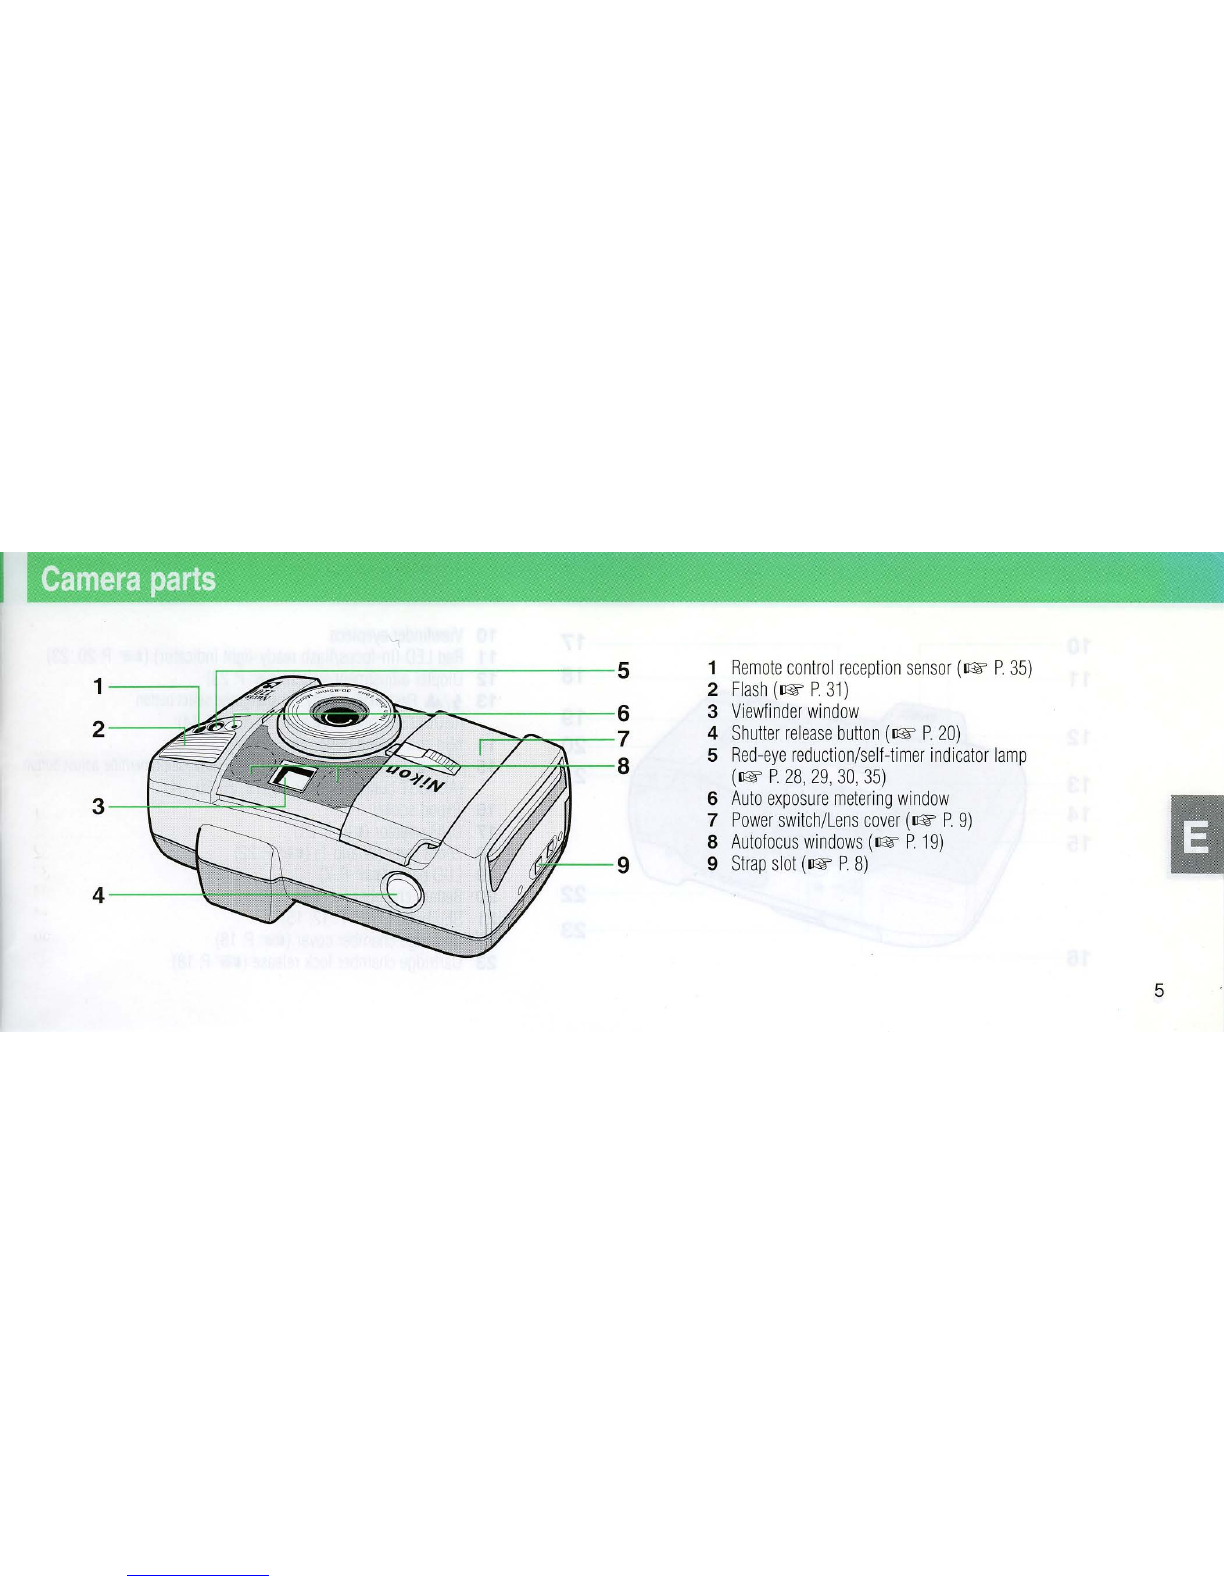
Camera
parts
....................................
.
........
...
........
...
........
...
...............
5
Removing
the
fi
lm
..
.
..
.
..
....
..
.
.........
.
..
....
..
.
.................
..
.....................
26
Getting
ready
to
take
pictures
..
....
..................
....
..
....
..
..................
8 Tor
ewi
nd
th
e
film
in
mid-roll
......
..
................
....
....
....
.
..
....
....
....
..
.......
27
A
tt
aching
the
strap
..........................
.
.........
.
..
...
..................
.
.................
8
Advanced
operation
.....
.
...
.
..
....
.............
....
.
............
.......
..
....
..
..
....
28
Installing
the
battery..
....
.
................
...
........
..
..................
....
..
....
.8
Red-eye
reduction
m
ode
.............................................
....
.............
..
.
28
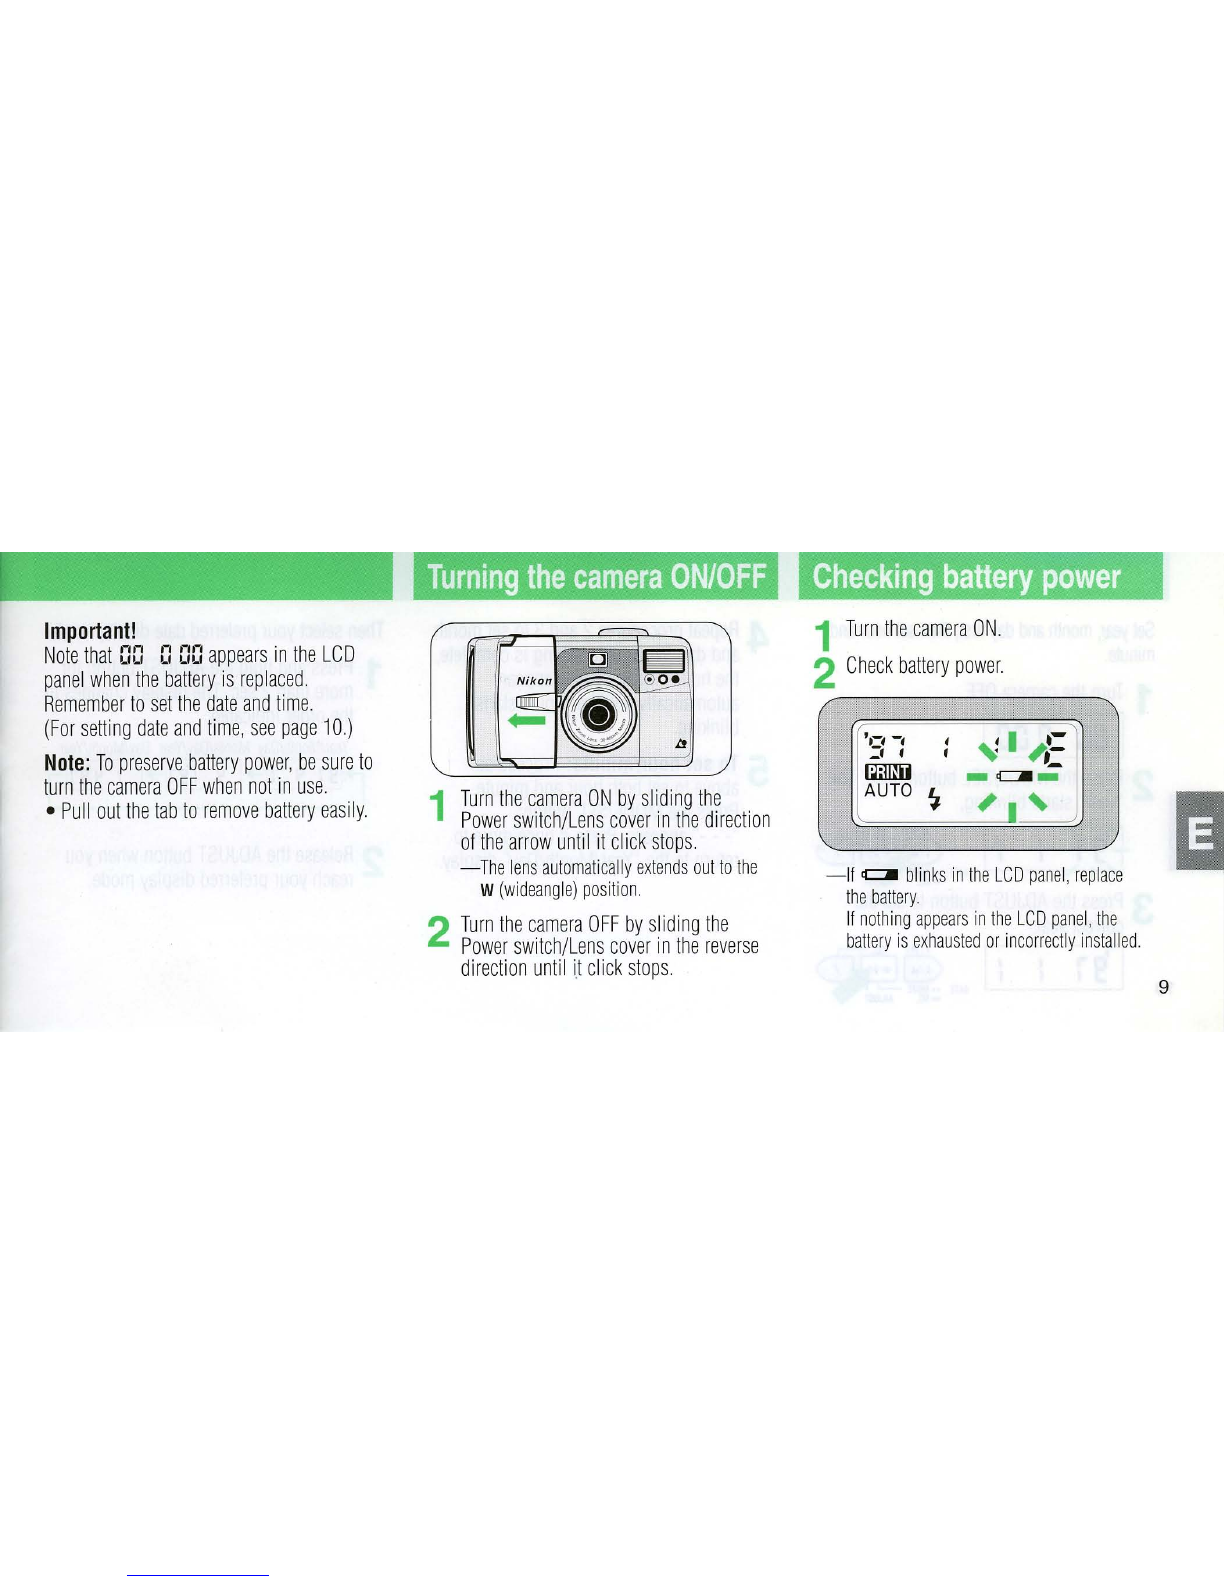
Turning
the
camera
ON/O
FF.....
..
............
.9
Self-timer
operation
..................
....
..........
..
.
.....
......
......
..........
29
Chec
k
ing
battery
power
..................
..
....
..
....
..........
....
.
..
....
..
.......
9
In
f
inity
focus
.............................
..
...................
..
........
.
..
..................
.30
Setting
date
and
time
................
....
..
........
.......
.....
..
......
.
........
10
Fl
ash
photography
..........
..
..
.
.....
..
..........
..
......
....
.......
..
....................
31
Data
r
eco
rd
i
ng
function
..............
...
........
......
..
.....
.................
....
.......
11
Auto
flash
mode
...................
..
..
.
..........
..
........
..
.
.....
..
..............
.....
32
Se
tting
titles
......
........
....
..
..
..
......
....
....
........
..
........
12
Flash
cancel
mode
....
.
....
.........
.
..
......
...........
................
..
....
32
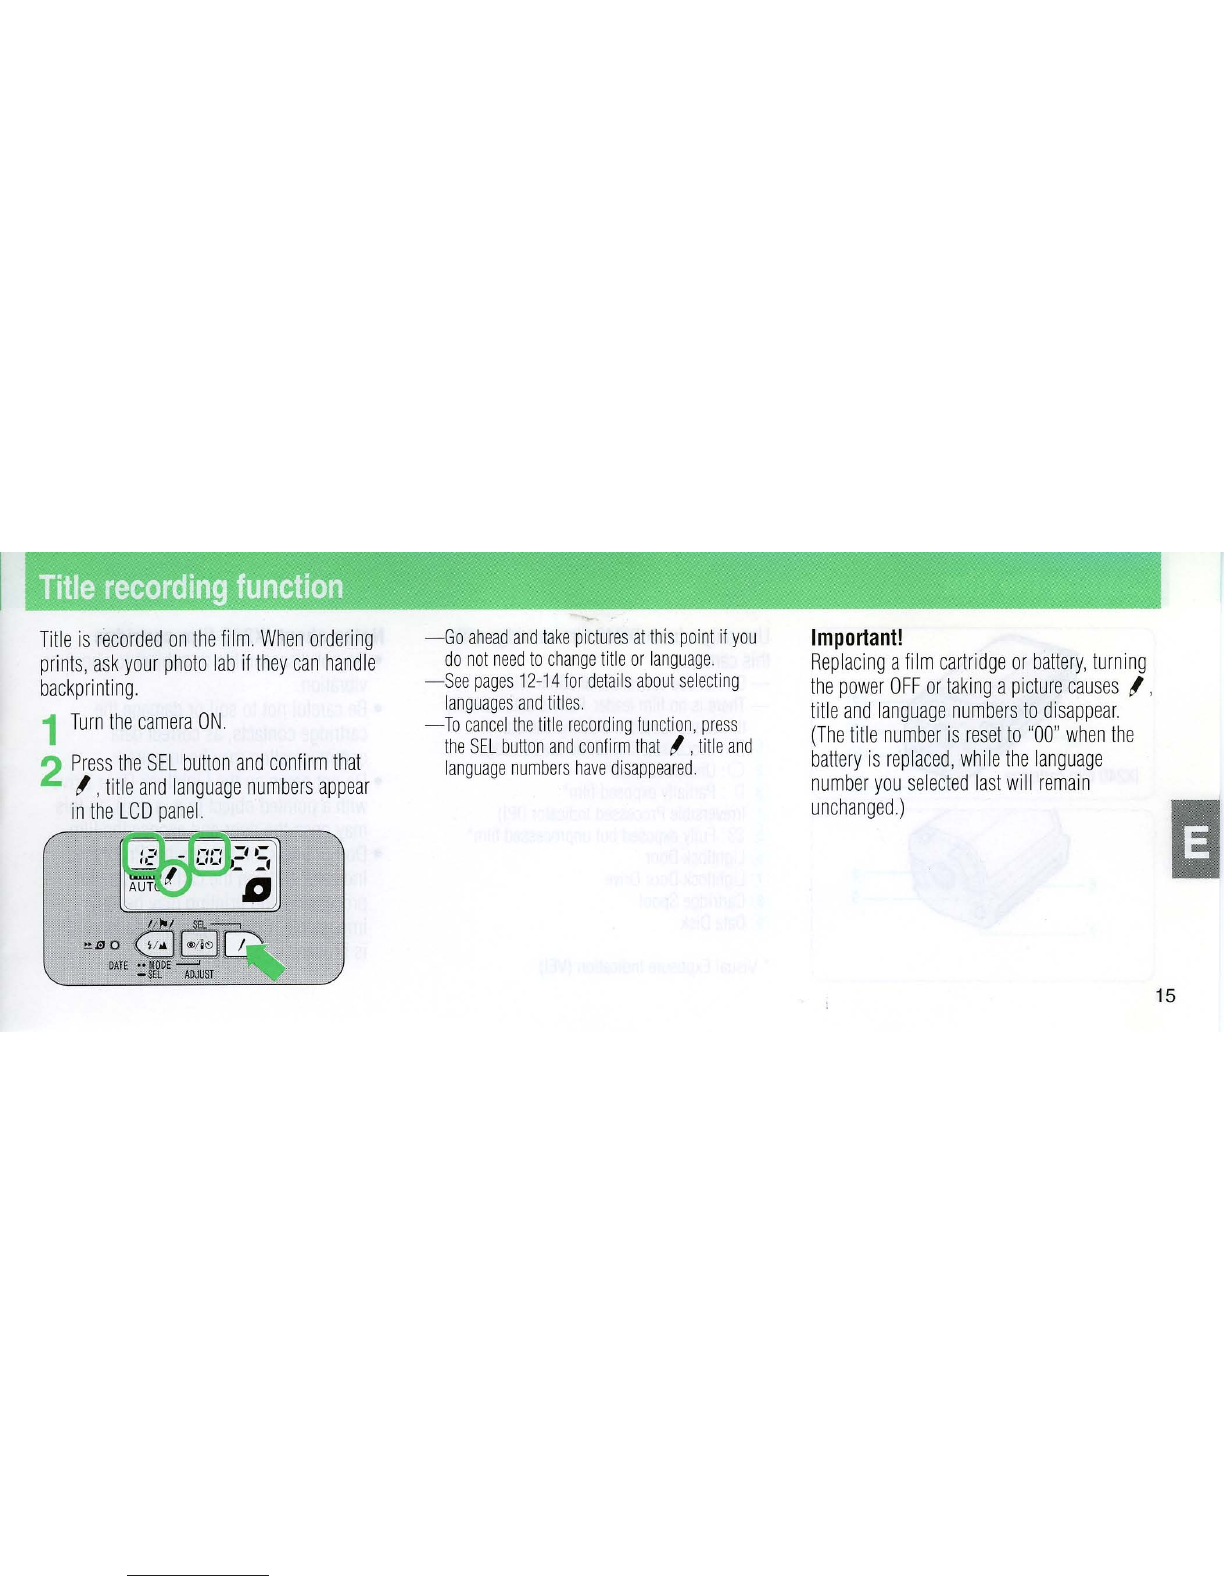
Title
re
cor
ding
funct
ion
.................
...
.....................................
......
......
15
Anytime
flash
mo
de
........
.....................
....
. .
....
....
........
..
........
33
L
oading
the
film...
......
.
..
...........
....
....
....
........
...
.
..
...
16
Slow
sync
flash
mode
....................
..
.............
..
......
...
..
......
.
34
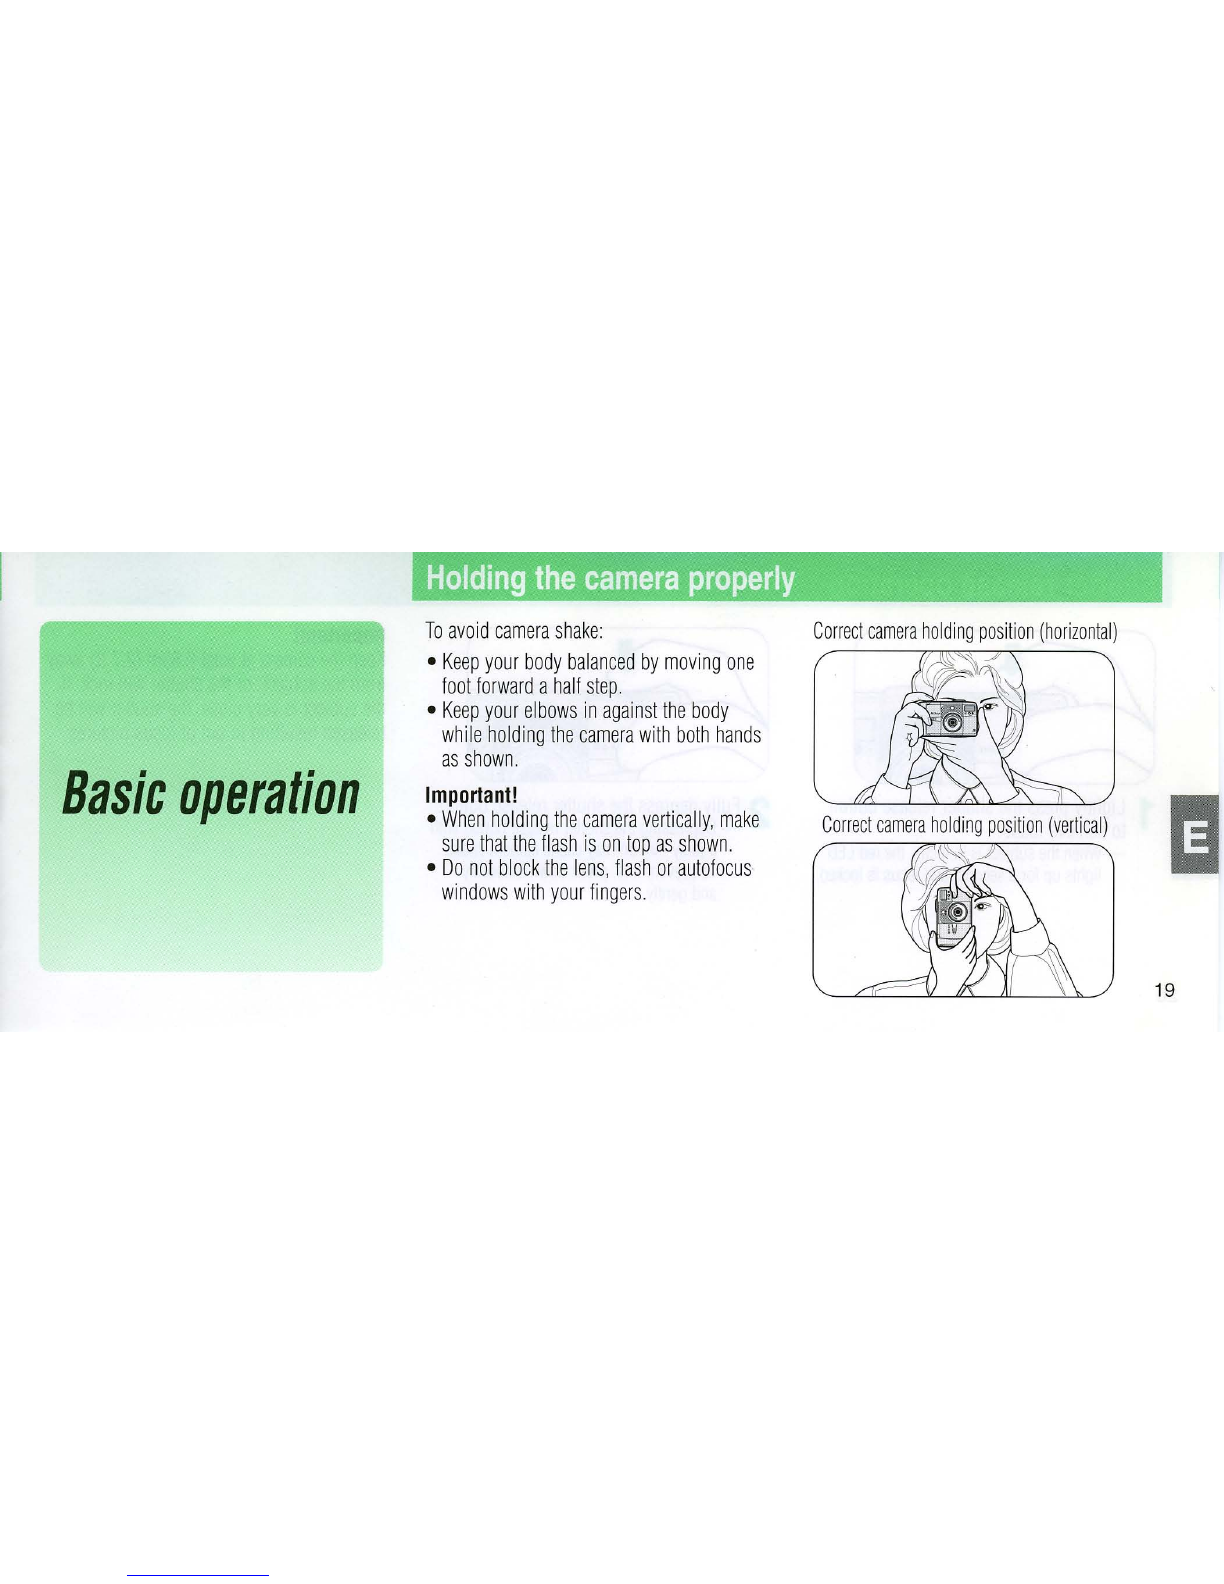
Basic
operation
..........
......
.....
....
..........................
....
.................
19
Remote
control
photography
(optional)
......
..
.......
.
..
........
....
................
.34
Hold
ing
the
camera
properly
.
......
..
......
..
.
..
.
....
19
F
or
sa
fe
handling
of
the
camera
.........................................
....
.
........
.
..
.36
Shutter
release
ope
ra
ti
on
.....
..
.....
..
...........
..
.
..
..............
...........
20
Camera
care
tip
s
......
.
..
.
..
.
..
.
....
..
.
..
.............
....
......
36
Selecting
apr
int
type
:.................
..
.
..
.....
.......
21
Zooming
..
..
..
..
..............................
. .
........
.
........
22
4
Notes
on
b
atte
r
ies
...
..
......
..
........
..
.....................
.
..
..
..
37
Sp
ecificat
i
ons
.............................
..
...................
.....................
..
..
...
.38


 FS User manual")


