Nite Devil CAM950 User manual

www.nitedevil.com Doc XCAM950
NiteDevil Hi-Res Covert Camera Modules
Email: support@nitedevil.com Last Revised: 11/08/2010
All 3 cameras provide a resolution of 600TVL in colour and 700TVL in b/w. These cameras come
with many of the NiteDevil features including an OSD menu, the SENS-UP feature allowing minimum
illumination down to an incredible 0.00019 Lux and a WDR option. The cameras run on a 12V DC
supply and only draw 90mA allowing it to be used effectively in covert systems.
The dome requires a 12v DC regulated power supply providing a minimum of 120mA. When connecting to 12v DC power
supply, always use a regulated supply. The camera has a 2.1 power jack plug.
Powering the Camera
Connect a BNC cable to the BNC connector on the camera and connect cable to monitor or DVR as required. You will need
a female to female BNC connector when connecting to a DVR
Connecting Video
Do not install the camera in extreme temperature conditions. Only use the camera where temperatures are between –20
degrees centigrade and +50 degrees centigrade.
Precautions
Never install the camera in damp or humid conditions. This can affect image quality.
This camera requires stable lighting conditions to operate effectively.
Do not touch the front lens of the camera. Fingerprints can stain the lens glass.
The camera must not be placed directly facing the sun or strong light. This may damage the camera CCD.
Never expose the camera to rain or liquids. These will corrode the camera electronics.
Do not subject the camera to vibration as it may cause camera malfunctions.
Only use this camera internally.
Features
1/3” Sony Super HAD CCD 600/700 TVL Low Light 0.00019Lux
Wide Dynamic Range setting 12V DC 90mA power consumption
3 Lens Options SENS-UP auto function 2x – 256x
Built-in OSD menu Built-in 3DNR function
Miniature covert camera Auto BLC function
Free mounting bracket Electronic Shutter
CAM955
NiteDevil CAM950/955/960 Covert Modules
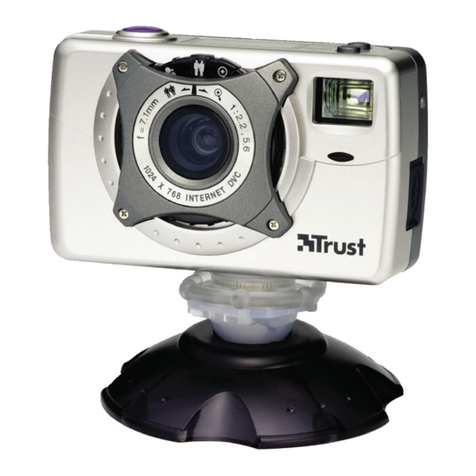
This NiteDevil Camera is a miniature covert camera
measuring only 36.5mm wide x 36.5mm high and
includes a free fixing bracket.
Available in three lens options.
CAM950 - 3.6mm board lens,
CAM955 - 3.7mm flat pinhole lens
CAM960 - 3.7mm cone pinhole lens.
CAM960
CAM950

www.nitedevil.com Doc XCAM950
NiteDevil Hi-Res Covert Camera Modules
Email: support@nitedevil.com Last Revised: 11/08/2010
▲
◄►
▼
FUNCTION MENU STRUCTURE
LENS
■DC
■MANUAL
EXPOSURE ■SHUTTER
■SENSE-UP
■BRIGHTNESS
■BLC / HSBLC
■AGC
■D-WDR
WHITE BAL ■AWB
■INDOOR
■AWC- SET
■OUTDOOR
■MANUAL
■ATW
DAY NIGHT
■COLOUR
■AUTO
■EXT
■B/W
3 DNR
■ON
■OFF
SPECIAL
■CAM TITLE
■PRIVACY
■D-EFFECT
■SYNC
■RS485
■LANGUAGE
■MOTION
ADJUST
■SHARPNESS
■BLUE
■RED
RESET
■FACTORY
EXIT
NOTE: All menu items with the
icon require the SET button to be depressed.
If -- - is displayed then feature is unavailable on this camera.
Menu Settings
1. LENS DC
2. EXPOSURE
3. WHITE BAL AWB
4. DAY NIGHT AUTO
5. 3DNR ON
6. SPECIAL
7. ADJUST
8. RESET
9. EXIT
To display the OSD menu press the SET button down
for 3 seconds. Menu closes when no operation.
UP
LEFT
RIGHT
DOWN
SET BUTTON
PRESS DOWN TO SET
SET BUTTON: Displays menu on the screen. Press button down
to confirm status or after changing a selected item.
UP/ DOWN BUTTON: Used to move cursor up and down to
select a menu item.
LEFT & RIGHT BUTTONS: Moves cursor left and right or
change the value of a selected item.

www.nitedevil.com Doc XCAM950
NiteDevil Hi-Res Covert Camera Modules
Email: support@nitedevil.com Last Revised: 11/08/2010
SHUTTER AUTO, 1/50, FLK, 1/250, 1/500, 1/2000, 1/5000, 1/10000, 1/100000, x256, x128, x64, x32, x16, x8, x4, x2
Select EXPOSURE by using UP & DOWN buttons and then select desired mode.
AUTO Select this mode to control the shutter speed automatically.
FLK Select this mode if flickering occurs on screen.
BRIGHTNESS (1 – 100) You can control the brightness by using the LEFT & RIGHT buttons in Manual lens mode.
AGC OFF / LOW / MIDDLE / HIGH
Set AGC from low to high gain. Note that the higher the gain level, the brighter the screen but the higher noise level.
Note that if AGC shows - - - then RESET the camera.
SENSE-UP OFF / AUTO
x2 / x4 / x8 / x16 / x32 / x64 / x128 / x256
When it is dark the camera automatically detects the light level and tries to compensate by maintaining a clear picture.
OFF The option is deactivated when the OFF option is selected or when AGC is OFF or DAY&NIGHT is OFF.
AUTO You can adjust brightness by increasing/decreasing the shutter speed (x2 ~ x256)
Note that noise can be amplified as SENSE-UP in increased.
BLC OFF / BLC
/ HSBLC
Backlight compensation allows you to get a clear picture even when objects are in a strong backlight.
BLC
Selecting BLC and pressing SET button enters the BLC menu.
Menu Settings
1.LENS MANUAL
2. EXPOSURE
3. WHITE BAL AWB
4. DAY NIGHT AUTO
5. 3DNR ON
6. SPECIAL
7. ADJUST
8. RESET
9. EXIT
LENS
When the SETUP menu screen is displayed, select LENS
by using the UP & DOWN buttons so that the arrow
selects LENS.
Select the connected type by using the LEFT & RIGHT
buttons.
Selecting MANUAL selects manual lens
Selecting DC selects Auto Iris Lens. When DC is selected
you can select the brightness control by pressing the SET
button. Set range between 0 ~ 100.
MENU SETTINGS
1. LENS MANUAL
2. EXPOSURE
3. WHITE BAL AWB
4. DAY NIGHT AUTO
5. 3DNR ON
6. SPECIAL
7. ADJUST
8. RESET
9. EXIT
EXPOSURE
SHUTTER 1/250
BRIGHTNESS - --
AGC MIDDLE
SENSE-UP OFF
BLC OFF
D-WDR INDOOR
RETURN RET

www.nitedevil.com Doc XCAM950
NiteDevil Hi-Res Covert Camera Modules
Email: support@nitedevil.com Last Revised: 11/08/2010
BLC / HSBLC MENUS
D-WDR OFF / INDOOR / OUTDOOR
Digital Wide Dynamic Range allows de-saturation of light in a single pixel so providing the mean light level overall.
This allows a scene that may include for example objects that show light and shade and then compensates by providing an
overall balanced light view. WDR can be set to INDOOR, OUTDOOR or OFF.
GAIN LOW
DEFAULT
LEFT/RIGHT ____I_____
WIDTH ___I______
TOP/BOTTOM _____I____
HEIGHT ___I______
RETURN
This menu allows a selected area of the picture to be viewed
more clearly in varying light conditions.
GAIN LOW / MIDDLE / HIGH
Select the level of gain by selecting low, middle or high.
DEFAULT Press SET button to select default option.
The LEFT/RIGHT, WIDTH, TOP/BOTTOM and HEIGHT
are used to create a window and place it in the picture view
using BLC. When there is a bright light e.g headlights on a car,
using the HSBLC menu may compensate for this condition so
allowing you to view a car number plate that would otherwise
be obliterated by the light level.
MENU SETTINGS
1. LENS
MANUAL
2. EXPOSURE
3. WHITE BAL AWB
4. DAY NIGHT AUTO
5. 3DNR ON
6. SPECIAL
7. ADJUST
8. RESET
9. EXIT
WHITE BAL ATW / AWB / AWC SET / MANUAL /
INDOOR / OUTDOOR
ATW Auto Tracking White Balance. Suitable for viewing
objects with changing colour temperature. Select when colour
temperature between 2,500°K and 9,800°K.
AWB Auto White Balance. This uses stored settings for
white balance and is most suitable where there is little change
in light source.
AWC SET The auto white-balance control analyses the
incoming light and estimates the best camera setting for
pleasing colors.
MANUAL
This option allows the blue and red colours
to be manually set.
INDOOR Select this when the colour temperature is around 3,100°K.
OUTDOOR Select this when the colour temperature is around 5,100°K.
SPECIAL NOTE:
In the event that problems are found with the white balance settings, it is recommended that the AWC mode is
selected. These problems can be:-
(i) When the colour temperature in the environment is beyond the control range.
(ii) If the camera is situated close to a fluorescent light white balance may become unstable.

www.nitedevil.com Doc XCAM950
NiteDevil Hi-Res Covert Camera Modules
Email: support@nitedevil.com Last Revised: 11/08/2010
DELAY The seconds before the switch from one mode to the next mode.
S-LEVEL The setting of the brightness illumination before switching from colour to b/w
E-LEVEL The setting of the brightness illumination before switching from b/w to colour
EXT This deactivates the EXT function.
BW This option will always display in black and white.
SPECIAL NOTE: You cannot control the DAY/NIGHT menu when AGC in the EXPOSURE menu is set to OFF.
If it is, then DAY and NIGHT mode will operate only in COLOUR mode.
OFF Deactivates 3DNR. Noise is not reduced.
ON Activates 3DNR so that noise is reduced.
SPECIAL NOTE:
You cannot set the 3DNR to ON or OFF when the AGC mode in the EXPOSURE menu is set to OFF.
When adjusting the noise reduction level in this mode, the higher the setting the more the noise level will be reduced but
the more likely ghosting will occur.
MENU SETTINGS
1. LENS
MANUAL
2. EXPOSURE
3. WHITE BAL AWB
4. DAY NIGHT AUTO
5. 3DNR ON
6. SPECIAL
7. ADJUST
8. RESET
9. EXIT
DAY NIGHT COLOUR / AUTO
/
EXT / BW
COLOUR The option will always display in colour.
AUTO
This option allows colour mode during day
and b/w at night or when ambient light levels are low. To
setup the switching time or speed press the SET button.
DAY NIGHT AUTO
DELAY __________ 8
S-LEVEL __________ 63
E-LEVEL __________ 55
RETURN
MENU SETTINGS
1. LENS MANUAL
2. EXPOSURE
3. WHITE BAL AWB
4. DAY NIGHT AUTO
5. 3DNR ON
6. SPECIAL
7. ADJUST
8. RESET
9. EXIT
3DNR OFF / ON
Digital Noise Reduction reduces the background noise in
a low light environment.
Select ON and press SET button to enter 3DNR menu.
3DNR
LEVEL ____________ 56
RETURN RET

www.nitedevil.com Doc XCAM950
NiteDevil Hi-Res Covert Camera Modules
Email: support@nitedevil.com Last Revised: 11/08/2010
CAM TITLE Allow the display of a 15 character camera title displayed on the monitor.
D-EFFECT
This option covers the display effects that can be selected.
MENU SETTINGS
1. LENS MANUAL
2. EXPOSURE
3. WHITE BAL AWB
4. DAY NIGHT AUTO
5. 3DNR ON
6. SPECIAL
7. ADJUST
8. RESET
9. EXIT
SPECIAL
1. CAM TITLE OFF / ON
2. D-EFFECT
3. RS485
4. MOTION OFF
5. PRIVACY OFF
6. SYNC INT
7. LANGUAGE ENGLISH
8. RETURN
CAM TITLE
0 1 2 3 4 5 6 7 8 9
A B C D E F G H I J K
L M N O P Q R S T U V
W X Y Z > ►◄▲▼ ( )
_
_
_ / = & “ ~ , ..
CLR POS END
__ __ __ __ __ __ __ __ __ __ __ __ __ __ __
CAM TITLE
If you wish to display the camera title you must
switch camera title to ON.
Note that if the CAM TITLE is OFF no title is
displayed on the monitor even if one is entered.
Move up and down buttons to select CAM TITLE
and switch it ON. Then press the SET button and
move to the required character using the direction
buttons and press the SET button to select. Repeat
to select up to 15 characters. If you move to CLR
and press the SET button all characters are cleared.
To edit a character select the character bottom left
arrow and press SET button, move the cursor over
the character to be edited, then select the character
required and press the SET button. Then select POS
to position cam title, press SET, move to the
position required and select END. Press SET again
to return to SPECIAL menu.
SPECIAL
1. CAM TITLE OFF / ON
2. D-EFFECT
3. RS485
4. MOTION OFF
5. PRIVACY OFF
6. SYNC INT
7. LANGUAGE ENGLISH
8. RETURN
D-EFFECT
FREEZE OFF / ON
MIRROR MIRROR / V-FLIP / ROTATE
OFF
D-ZOOM OFF / ON
GAMMA 0.45
NEG IMAGE OFF / ON
RETURN RET

www.nitedevil.com Doc XCAM950
NiteDevil Hi-Res Covert Camera Modules
Email: support@nitedevil.com Last Revised: 11/08/2010
FREEZE OFF / ON
This option if set to ON will freeze current picture. Select OFF to revert to normal video
MIRROR MIRROR / ROTATE / V-FLIP / OFF
This option allows the normal video displayed to be switched to vertical flip, horizontal flip, both or none.
MIRROR This flips the camera view vertically on the screen.
ROTATE This flips the camera view horizontally on the screen.
V-FLIP This flips the camera horizontally and vertically on the screen.
D-ZOOM OFF / ON
This option switches on digital zoom
GAMMA The standard value is O.45 The values 0.05 ~ 1.00 can be set.
NEG IMAGE OFF / ON A colour negative image can be set.
RETURN Returns to the SPECIAL menu.
D-ZOOM
DZOOM x1 ~ x32
PAN _______ 0
TILT _______ 0
RETURN RET
SPECIAL
1. CAM TITLE OFF / ON
2. D-EFFECT
3. RS485
4. MOTION OFF
5. PRIVACY OFF
6. SYNC INT
7. LANGUAGE ENGLISH
8. RETURN
RS485
This option is not available on this camera.
MOTION This option allows motion detection to be set
and although it does not output an alarm on this camera
it can be used to display MOTION DETECTION on the
monitor.
MOTION
AREA SELECT AREA 1 ~ 4
AREA DISPLAY ON / OFF
LEFT / RIGHT __________ 51
WIDTH __________ 42
TOP / BOTTOM __________ 38
HEIGHT __________ 30
SENSITIVITY __________ 34
MOTION VIEW OFF / ON
RETURN END
MOTION
Motion can be detected in 1 – 4 areas. You can
select 1-4 areas in SENSITIVITY setting. To
see the MOTION DETECTION message
displayed on the monitor, MOTION VIEW
must be set.
AREA SELECT 1 ~ 4 Select the area required.
AREA DISPLAY ON / OFF Determines whether to use the motion area selected in SENSITIVITY.
LEFT/RIGHT Determines the vertical axis for area.
WIDTH Adjusts the selected vertical area.
TOP/BOTTOM Determines the horizontal axis for area.
HEIGHT Adjusts the selected horizontal area.
SENSITIVITY You can select up to 4 areas. The higher the sensitivity the smaller the change to initiate
motion detection.
MOTION VIEW If you set this option to ON you can select an area colour and display MOTION
DETECTION on the monitor.
RETURN Return to SPECIAL menu.

www.nitedevil.com Doc XCAM950
NiteDevil Hi-Res Covert Camera Modules
Email: support@nitedevil.com Last Revised: 11/08/2010
SPECIAL
1. CAM TITLE OFF / ON
2. D-EFFECT
3. RS485
4. MOTION OFF
5. PRIVACY OFF
6. SYNC INT
7. LANGUAGE ENGLISH
8. RETURN
PRIVACY ON / OFF
Allows an area on screen to be hidden.
PRIVACY
AREA SELECT AREA 1 ~ 8
AREA DISPLAY ON / OFF
LEFT / RIGHT __________ 51
WIDTH __________ 42
TOP / BOTTOM __________ 38
HEIGHT __________ 30
COLOUR __________ 34
RETURN END
AREA SELECT 1 ~ 8 Select the area required.
AREA DISPLAY ON / OFF Determines whether to use the area selected in AREA SELECT.
LEFT/RIGHT Determines the vertical axis for area.
WIDTH Adjusts the selected vertical area.
TOP/BOTTOM Determines the horizontal axis for area.
HEIGHT Adjusts the selected horizontal area.
COLOUR You can select area colour from 0 ~ 15.
RETURN Return to SPECIAL menu.
SPECIAL
1. CAM TITLE OFF / ON
2. D-EFFECT
3. RS485
4. MOTION OFF
5. PRIVACY OFF
6. SYNC INT
7. LANGUAGE ENGLISH
8. RETURN
SYNC INT
This option is not selectable.
LANGUAGE
English, Chinese or Japanese.
If you change this you can work out how to return to
English by selecting option 7.
RETURN Returns to SPECIAL menu.

www.nitedevil.com Doc XCAM950
NiteDevil Hi-Res Covert Camera Modules
Email: support@nitedevil.com Last Revised: 11/08/2010
MENU SETTINGS
1. LENS MANUAL
2. EXPOSURE
3. WHITE BAL AWB
4. DAY NIGHT AUTO
5. 3DNR ON
6. SPECIAL
7. ADJUST
8. RESET
9. EXIT
ADJUST
SHARPNESS ________ 21
BLUE ________ 81
RED ________ 88
RETURN END
ADJUST
This option is used to improve the sharpness of the picture and balance the blue and red colour.
SHARPNESS
This sets the sharpness by moving the direction keys to right or left. Parameter ranges from 0 ~ 31.
BLUE
This sets the overall blue hue. Parameter ranges from 0 ~ 100.
RED
This sets the overall red hue. Parameter ranges from 0 ~ 100.
RETURN
This returns to the main menu.
MENU SETTINGS
1. LENS MANUAL
2. EXPOSURE
3. WHITE BAL AWB
4. DAY NIGHT AUTO
5. 3DNR ON
6. SPECIAL
7. ADJUST
8. RESET
9. EXIT
RESET
FACTORY RESET
RETURN RET
RESET
This option resets the camera to factory
defaults.
RETURN
Returns to main menu
EXIT
This saves the changes made and exits the main
menu.

www.nitedevil.com Doc XCAM950
NiteDevil Hi-Res Covert Camera Modules
Email: support@nitedevil.com Last Revised: 11/08/2010
TECHNICAL SPECIFICATIONS
FUNCTION
CAMERA MODEL
Camera Model
CAM950
CAM955
CAM960
Imaging Sensor
1/3” SONY Super HAD CCD 11
Signal System
NTSC: 525 Lines / PAL: 625 Lines
Scanning System
2:1 Interlace
Scanning Frequency
H:15.625Hz / V:50Hz
S/N Ratio
More than 52dB (AGC Off)
Horizontal Resolution
600 TVL (Colour) / 700 TVL (B/W)
Video Output Level
1.0 vp~p (75 ohm, composite)
Lens
3.6mm Board (92
3.7mm Flat (92
)
3.7mm Pinhole (92
)
)
Minimum Illumination
Colour: 0.03Lux(@F1.), 0.00019(Sens-up 256x)
Sync System
Internal
On Screen Display
Built-in (Multi-language support)
Electronic Shutter Speed
Auto/FLK
PAL: 1/50sec ~ 1/100,000sec
White Balance
AWB / AWC-Set / Manual / Indoor / Outdoor / ATW
Backlight Compensation
BLC / HSBLC / Off
D-WDR
Indoor / Outdoor / Off
Gain Control
Low / Middle / High / Off
Adjust
Contrast / Sharpness / CB_Gain / CR_Gain (Level Adjustable)
Language
Korean / English / Chinese / Japanese (selectable)
Camera Title
On / Off (Selectable)
Day & Night
Auto / B.W / Colour (selectable) / EXT
Digital Zoom
On / Off (0x ~ 32x)
Motion Detection
On / Off (4 zone selectable)
Privacy Masking
On / Off (8 zone selectable)
3DNR Digital Noise Reduction
On /Off (Selectable)
Sens-up (Frame Integration)
On / Off (Selectable limit ~ 256x)
D-Effect
Freeze / Mirror / D-Zoom / Gamma / Neg. Image
Supplied Voltage
12v DC
Power Consumption
90 mA / 1.6W
Infra Red Sensitive
Yes
Dimensions
36.5(W) x 36.5(H) x 30(D)mm
36.5(W) x 36.5(H) x 19.7(D)mm
36.5(W) x 36.5(H) x 19.7(D)mm
Weight
Approx. 50g
All specifications are approximate. Kovert.com
reserves the right to change any product
specifications or features without notice. Whilst
every effort is made to ensure that these
instructions are complete and accurate,
kovert.com cannot be held responsible in any
way for any losses, no matter how they arise,
from errors or omissions in these instructions,
or the performance or non-performance of the
equipment that these instructions refer to.
This manual suits for next models
2
Table of contents
Other Nite Devil Digital Camera manuals
