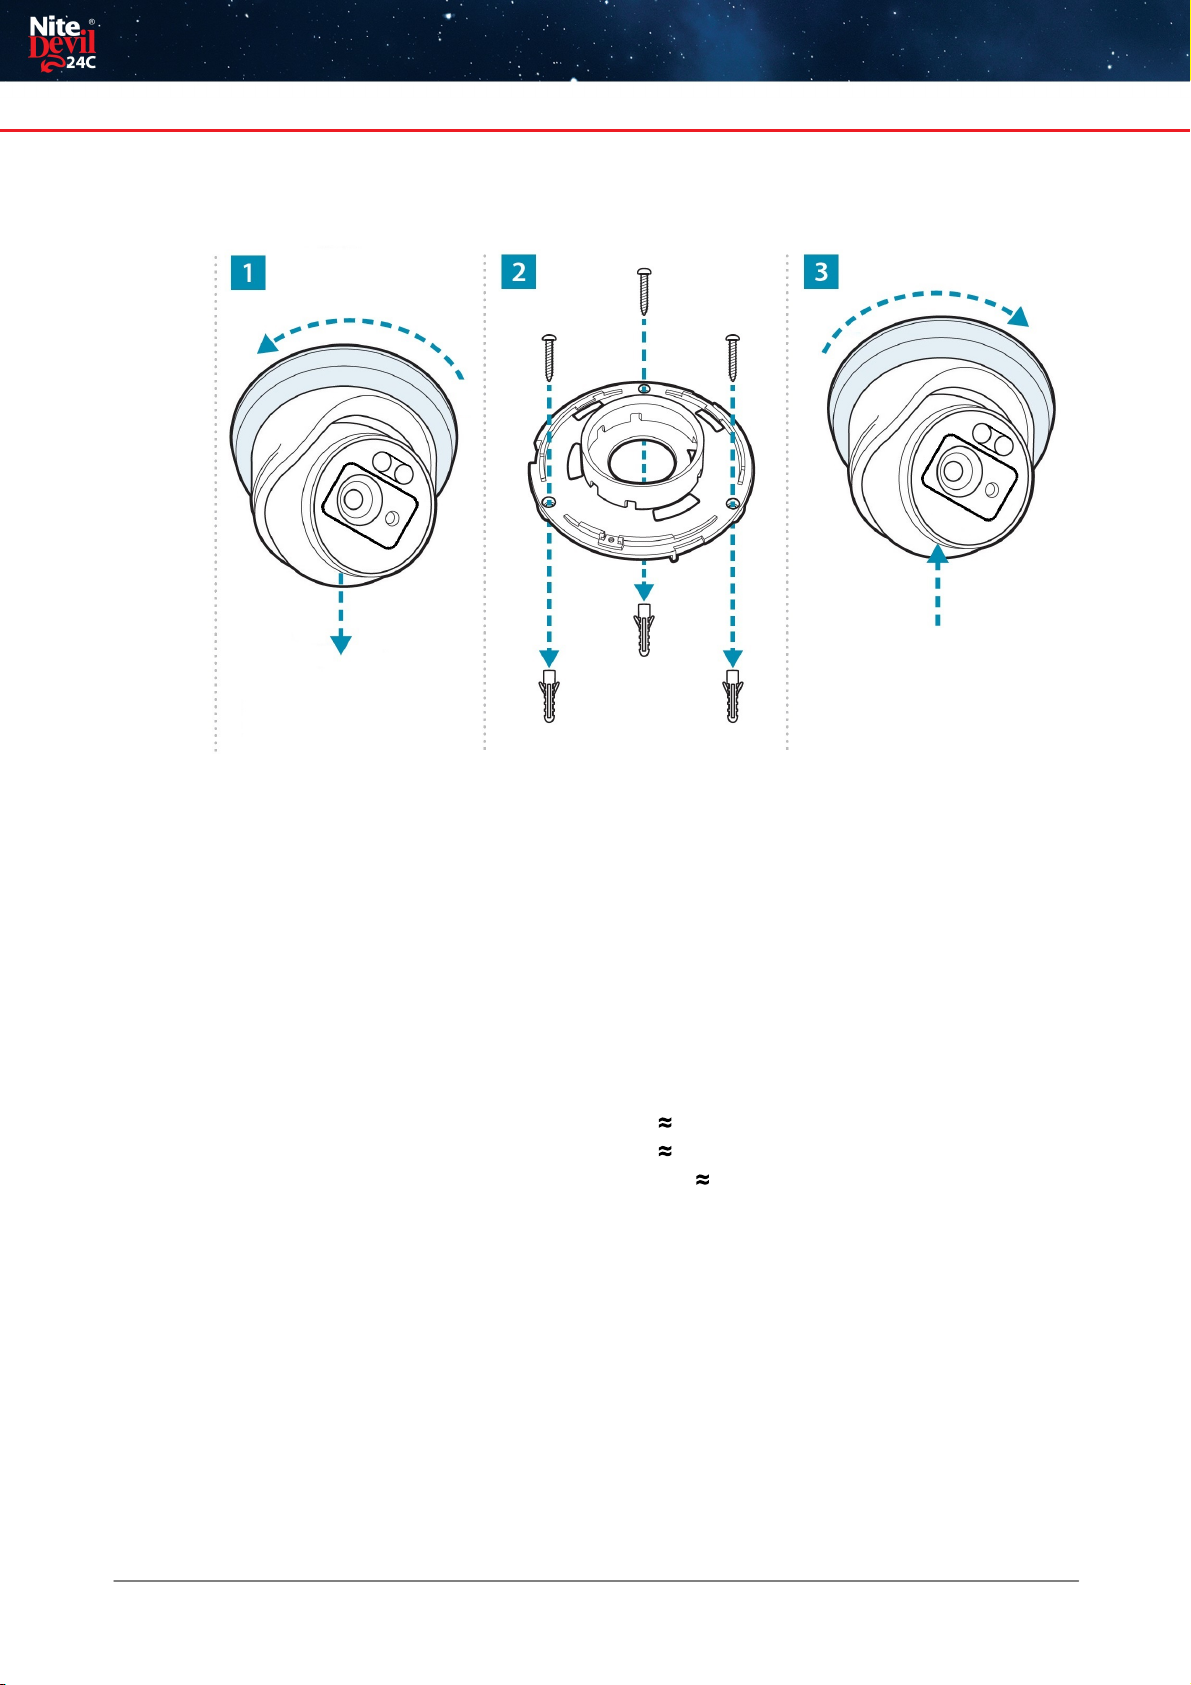
Introduction - NiteDevil Hero
© 2023 System Q Ltd
1
NiteDevil.com
Introduction - NiteDevil Hero
The NiteDevil Hero can stay in full colour around the clock using its built in white light
LEDs to produce superb full colour images.
Up to 25m IR range (true day/night filter) and up to 20m white light range, 4MP
resolution, built in PoE, H265 and H264 codec. With built in dual IR and white light
you can choose how the camera best works in your install. Using white light to give
visual warning or using IR illumination to get a more discreet set up.
This model also features blue and red deterrence LED as an option which can warn
off intruders, similar to law enforcement strobe lights. *Adjustable with compatible
NVR / DVR Firmware.
A built in microphone means you can see and hear what's happening, recording the
audio & video on your NVR for the best possible CCTV evidence.
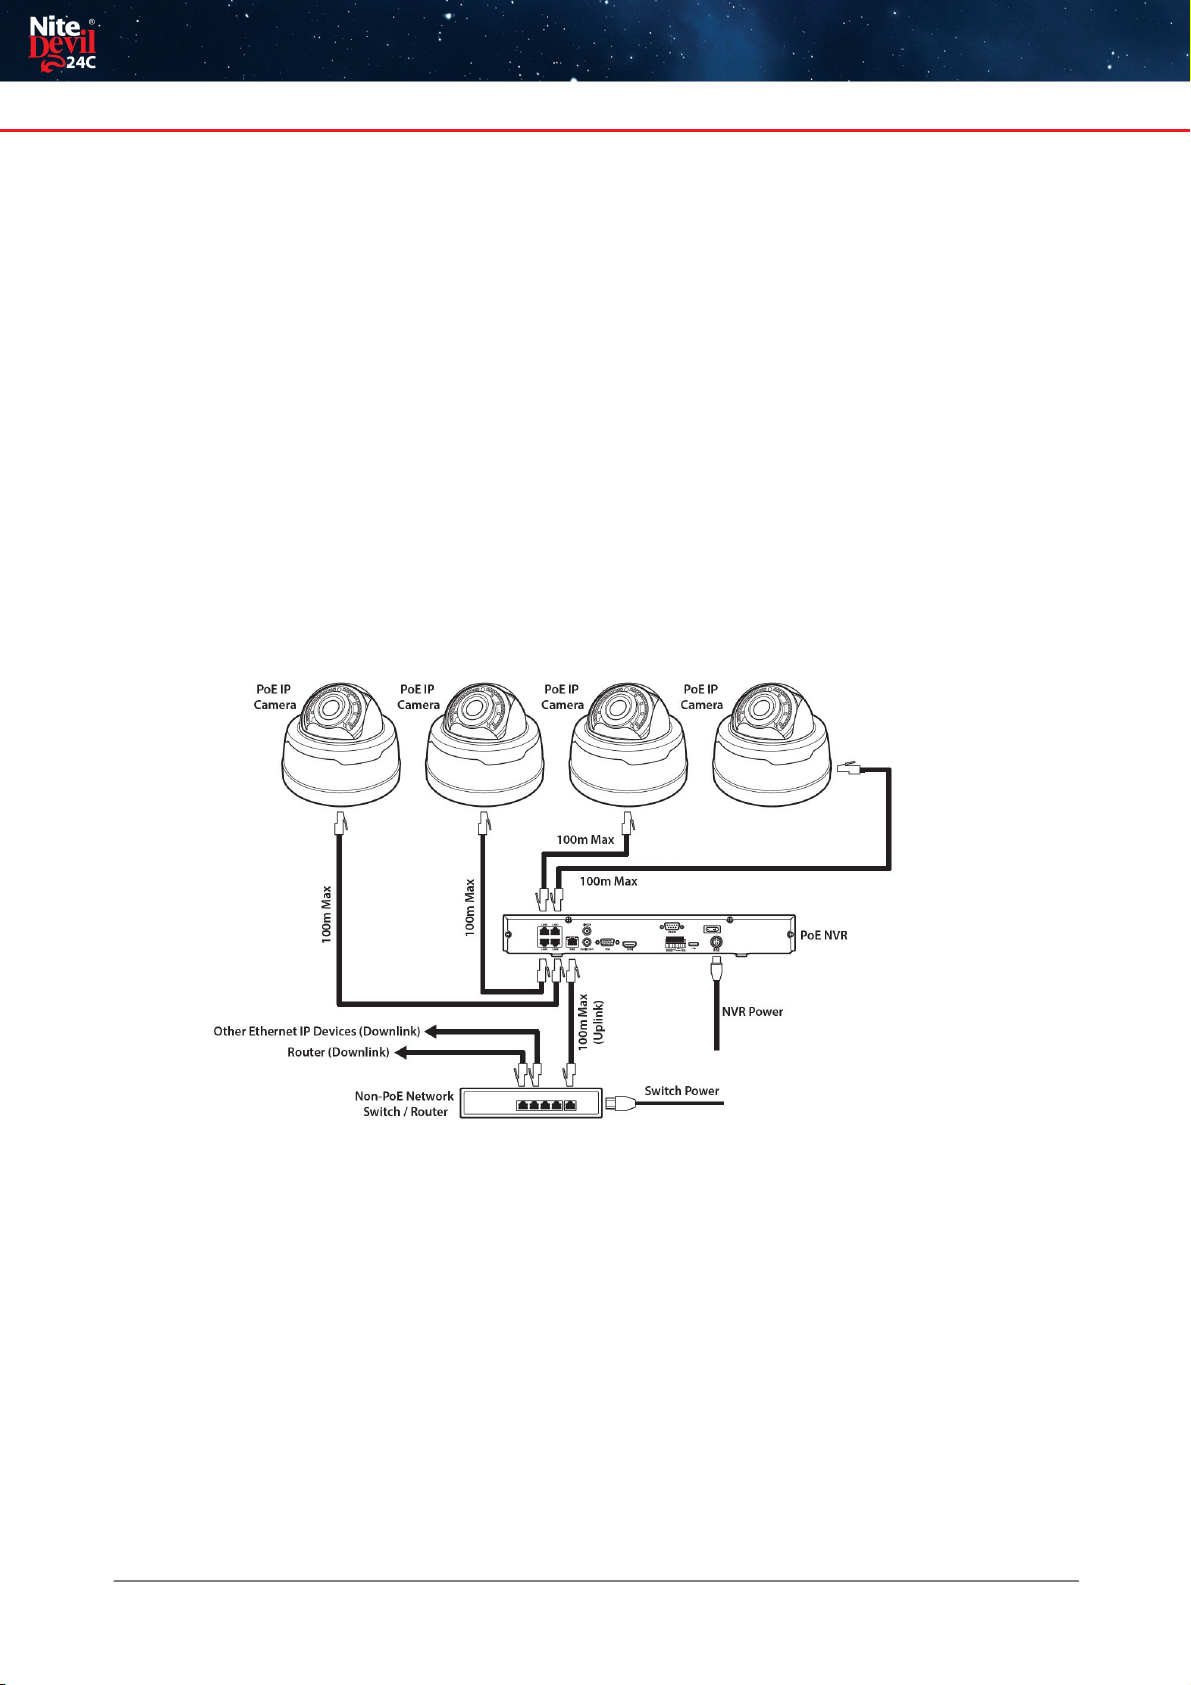
Dual PoE and 12V means you can power and connect the camera to POE NVRs in
seconds using one simple CAT5/6 cable for video, power and audio. If your system
doesn't support PoE use the 12V input or a PoE injector such as our POE200.
1.1 Key Features
oFull Colour 24/7
oSees in Low Light
oNiteDevil® Tech
o4MP
oStunning Images
oONVIF
oWhite or Grey Case
oIP66 In & Outdoor
oDual PoE/12V
oDual IR & White Light
oRed & Blue Strobe Deterrence
oWide-Angle 2.8mm
oBuilt-in Mic
oMetal Case
oMotion Detect
oPicture Flip