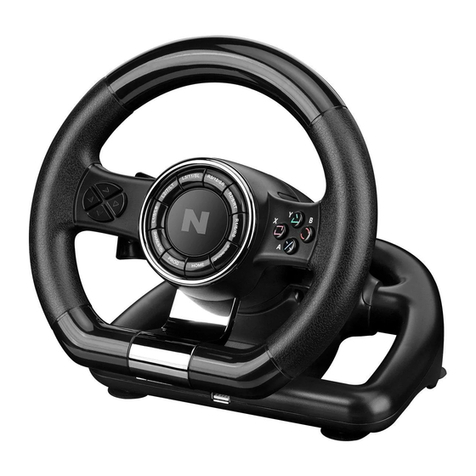
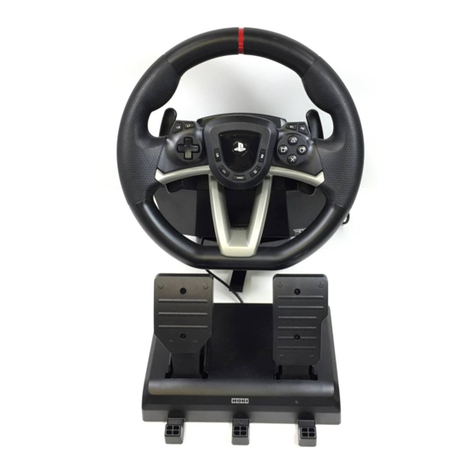
Nitho DRIVE PRO V16 User manual

QUICK START GUIDE
Model: MLT-DP16-K
EN

SPECIFICATIONS
THANK YOU FOR BUYING NiTHO DRIVE PRO WHEEL.
WE WOULD LIKE TO INTRODUCE ITS SPECIFICATIONS :
A、Compatible with Windows® VISTA®/7/8/10, PS3®, PS4®, XBOX ONE®,
SWITCH® and supports US, EU, Japan versions` consoles
B、Home button to enter into Settings on PS3®, PS4®, XBOX ONE® consoles
C、It`s provided with 2 axis a D-pad and 12 action buttons
D、8 programmable buttons:
R-wing, L-wing, Brake pedal (□/Y-/LT), Accelerator pedal (X/Y+/RT),
L3, (L3/11/SL), R3 (R3/12/SR), Gear Stick(-/+/R)
E、6
suction cups to keep the wheel stable
F、270
degrees wheel rotation, lock to lock
G、Three selectable sensibility levels
H、Spring loaded pedals
I、
X-INPUT & D-INPUT modes selector (X-INPUT mode as default)

BUTTON LAYOUT
Controller
sync port
Pedals Port
LED light:
Mode Selector
Programmable
buttons
Sensibility
selector
Brake (□/Y-/LT) Accelerator (X/Y+/RT)
Home/Options
/Share Buttons
L-wing
gear shi
R-Wing
gear shi

FUNCTION KEYS
Mode PS3® PS4® XBOX
ONE®
PC
(X-INPUT)
(D-INPUT)
SWITC
H®
X X A A 2 B
○ ○ B B 3 A
□ □ X X 1 Y
△ △ Y Y 4 X
R1 R1 RB RB 6 R
L1 L1 LB LB 5 L
R2 R2 RT RT 8 ZR
L2 L2 LT LT 7 ZL
R3 R3 SR SR 12 R3
L3 L3 SL SL 11 L3
UP UP UP UP UP UP
DOWN DOWN DOWN DOWN DOWN DOWN
LEFT LEFT LEFT LEFT LEFT LEFT
RIGHT RIGHT RIGHT RIGHT RIGHT RIGHT
START OPTIONS Menu Menu 10 +
SELECT SHARE View View 9 -
Direction LX LX ←/→ ←/→
←
/
→
LX
L-wing □L2 LT LT 1 B
R-wing X R2 RT RT 2 Y
L-pedal □L2 LT LT 1 B
R-pedal X R2 RT RT 2 Y
Mode Button HOME HOME
X-Guide X-Guide
13 HOME
L2 L1 LB LB 7 ZL
R2
R1
RB RB 8 ZR
△ △ Y Y 4 X
Function Key
Action Key
D-pad
Gear Shi
PC

FUNCTION INTRODUCTION
1、Here below are the DEFAULT buttons (the ones you can assign to other functions):
□//1/X, ○/3/B, △/4/Y, X/2/A, L1/5/LB, L2/7/LT, R1/6/RB, R2/8/RT
2、Here below are the PROGRAMMABLE buttons (the ones you can setup):
L-wing (□/1/LT), R-wing (X/2/RT), Accelerator pedal (X/2/RT), Brake pedal
(□ /1/LT), L3/11/SL, R3/12/SR, Gear-shi (L2/7/LB,R2/8/RB)
1、 Press & hold “SHARE/9/View” + “OPTIONS/10/Menu” for 3 seconds until
the green LED turns on
2、Press the PROGRAMMABLE button until the green LED starts blinking
3、Press the DEFAULT button until the green LED turns o
· PROGRAM SETUP
· CLEAR SINGLE PROGRAM
1、 Press & hold “SHARE/9/View” + “OPTIONS/10/Menu” for 3 seconds until
the green LED turns on
2、Press the programmed button until the green LED starts blinking
3、Press the programmed button until the green LED turns o
· CLEAR ALL PROGRAMS
1、 Press & hold “SHARE/9/View” + “OPTIONS/10/Menu” for 3 seconds until the
green LED turns on
2、Press & hold “OPTIONS/10/Menu” for 4 seconds until the green LED turns o
All the programmed buttons are cleared
1、Press & hold “SHARE/9/View” + “Option/10/Menu” for 3 seconds until the
green LED turns on
2、Press D-PAD LEFT until the green LED turns o
The pedals are programmed as Y-AXIS
· PROGRAM PEDALS AS Y-AXIS
PROGRAM FUNCTIONS
· INTRODUCTION
You can assign to some buttons (PROGRAMMABLE) functions of other buttons (DEFAULT)

Wheel sensitivity is adjustable from the sensibility selector (LO MID HI)
· WHEEL SENSITIVITY ADJUSTMENT (3 LEVELS)
1、 Press & hold “SHARE/9/View” + “Option/10/Menu” for 3 seconds until the
green LED turns on
2、Press D-PAD RIGHT until the green LED is o.
L-Wing and R-Wing are programmed as Y-AXIS
· PROGRAM L-WING AND R-WING AS Y-AXIS
1、 Press & hold “SHARE/9/View” + “OPTIONS/10/Menu” for 3 sec until the
green LED turns on
2、Press the L/R-wing or pedal set as Y-AXIS, the green LED will start to blink
3、Press the L/R-wing or pedal set as Y-AXIS until green LED o
Note:
All settings will NOT be cleared when the wheel is powered o
· CLEARANCE THE L/R-WING OR PEDAL AS Y-AXIS

PLATFORMS
PS3® GUIDE
1、 Connect the wheel to PS3® console and connect the pedal to the wheel
2、During PS3® gameplay, press the HOME button once to enter the XBM window
3、Press & hold the MODE button to enter in the MENU setup window
PS4® GUIDE
1、 Connect the wheel to PS4® console then connect the pedal to the wheel
2、Connect the wheel to original PS4® controller with the original USB cable (or a
cable with data function)
3、Aer the connection has been established, the RED LED on the wheel will turn on
then press the HOME button on the wheel to start the game
4、During PS4® gameplay, press the HOME button once to enter the XBM window
1、 Connect the wheel to XBOX ONE® console then connect the pedal to the wheel
2、Connect the wheel to original XBOX ONE® controller with the original USB
cable (or a cable with data function)
3、Aer the connection has been established, the RED LED on wheel and on the
controller will be On
4、During XBOX ONE® gameplay, press the HOME button to enter the main menu
XBOX ONE® GUIDE
SWITCH® GUIDE
1.、Connect the wheel to SWITCH® console then connect the pedal to the wheel.
2、Aer the connection has been established, the RED LED on the wheel will turn on
To screenshot :
Press“SELECT/SHARE/9/VIEW/-” and “START/OPTIONS/10/MENU/+”

PC GUIDE
1、 The wheel is set on X-INPUT as default.
2、Press & hold HOME for 3 seconds to switch to D-input then the LED will
switch o and switch on again aer 0.5 seconds
· X-INPUT
1、 Enter Test interface to test buttons and axis functions
2、Enter Calibration interface to calibrate the axis
· TEST
1、 Start→Control Panel→programs/Function
2、Find the driver you want to remove in the Interface ”current installed programs”.
Click “Remove” and follow the instructions to get the successful uninstall.
· DRIVER UNINSTALL

TROUBLE SHOOTING
PRECAUTIONS
1、 If the connection LED is not on, please re-connect to the controller again and
retry
2、If the wheel do not give any response, turn o and on again the console and
procees the wheel setup once again
1、Read carefully the user manual before using the wheel
2、Do not disassemble or modify
3、Avoid to store in a smoky, humid or dusty place
To easly remove the wheel from the table
pull and raise up the strap on the suction cup side
· SUCTION CUP

www.nitho.com
SERVICE & SUPPORT
For any question and support request, contact us on
www.nitho.com
WWW.NITHO.COM NITHOGAMES
NITHOGAMES
NiTHO GmbH – Victoriastrasse 3b – 86150 Augsburg – Germany

QUICK START GUIDE
Model: MLT-DP16-K
IT

SPECIFICATIONS
GRAZIE PER AVER ACQUISTATO IL VOLANTE DRIVE PRO
PERMETTICI DI INTRODURTI LE SPECIFICHE TECNICHE :
A、Compatibile con Windows® VISTA®/7/8/10, PS3®, PS4®, XBOX ONE®,
SWITCH® e le versioni US, EU, Japponesi
B、Il tasto HOME permette di entrare nelle opzioni su PS3®, PS4®, XBOX ONE®
C、Il volante é provvisto di 2 assi, un D-pad e 12 pulsanti
D、8 pulsanti programmabili:
Pagaia destra, Pagaia sinistra, Pedale freno (□/Y-/LT), Pedale acceleratore
(X/Y+/RT), L3, (L3/11/SL), R3 (R3/12/SR), Cambio manuale(-/+/R)
E、6
ventose garantiscono stabilitá al volante
F、270
gradi di rotazione
G、Tre livelli di sensibilitá selezionaili
H、Pedali caricati a molla
I、
X-INPUT & D-INPUT funzioni selezionabili
(X-INPUT come modalitá di base)

DISPOSIZIONE DEI PULSANTI
Porta di sincronizzazione
del controller
Porta dei pedali
LED :
Indicatore di modalitá
Pulsanti
programmabili
Selettore di sensibilitá
Freno (□/Y-/LT) Acceleratore (X/Y+/RT)
Home/Options
/Share
Pagaia sinistra Pagaia destra

FUNCTION KEYS
Mode PS3® PS4® XBOX
ONE®
PC
(X-INPUT)
(D-INPUT)
SWITCH®
X X A A 2 B
○ ○ B B 3 A
□ □ X X 1 Y
△ △ Y Y 4 X
R1 R1 RB RB 6 R
L1 L1 LB LB 5 L
R2 R2 RT RT 8 ZR
L2 L2 LT LT 7 ZL
R3 R3 SR SR 12 R3
L3 L3 SL SL 11 L3
UP UP UP UP UP UP
DOWN DOWN DOWN DOWN DOWN DOWN
LEFT LEFT LEFT LEFT LEFT LEFT
RIGHT RIGHT RIGHT RIGHT RIGHT RIGHT
START OPTIONS Menu Menu 10 +
SELECT SHARE View View 9 -
Direction LX LX ←/→ ←/→
←
/
→
LX
L-wing □L2 LT LT 1 B
R-wing X R2 RT RT 2 Y
L-pedal □L2 LT LT 1 B
R-pedal X R2 RT RT 2 Y
Mode Button HOME HOME
X-Guide X-Guide
13 HOME
L2 L1 LB LB 7 ZL
R2
R1
RB RB 8 ZR
△ △ Y Y 4 X
Function Key
Action Key
D-pad
Gear Shi
PC

INTRODUZIONE ALLE FUNZIONI
1、Pulsanti di base (non riassegnabili) :
□//1/X, ○/3/B, △/4/Y, X/2/A, L1/5/LB, L2/7/LT, R1/6/RB, R2/8/RT
2、Pulsanti programmabili (liberamente assegnabili a qualsiasi funzione dei
pulsanti di base):
Pagaia sinistra (□/1/LT), Pagaia destra (X/2/RT), Acceleratore (X/2/RT), Freno
(□/1/LT), L3/11/SL, R3/12/SR, Cambio manuale(L2/7/LB,R2/8/RB)
1、 Tieni premuto “SHARE/9/View” + “OPTIONS/10/Menu” per 3 secondi no a
che il LED verde si accende
2、Premi il pulsante programmabile no a che il led verde lampeggia
3、Premi il pulsante di base no a che il led verde si spegne
· PROGRAMMI
· CANCELLARE LA PROGRAMMAZIONE
1、 Tieni premuto “SHARE/9/View” + “OPTIONS/10/Menu” per 3 secondi no a
che il LED verde si accende
2、Premi il pulsante programmato no a che il led verde lampeggia
3、Premi il pulsante programmato no a che il led verde si spegne
· CANCELLARE TUTTE LE PROGRAMMAZIONI DEL VOLANTE
1、 Tieni premuto “SHARE/9/View” + “OPTIONS/10/Menu” per 3 secondi no a
che il LED verde si accende
2、Tieni premuto “OPTIONS/10/Menu” per 4 secondi no a che il LED verde si
spegne Ora tutte le programmazioni saranno resettate
1、Tieni premuto “SHARE/9/View” + “OPTIONS/10/Menu” per 3 secondi no a
che il LED verde si accende
2、Premere D-PAD sinistra no a che il LED verde si spegne Ora i pedali sono
programmati sull’asse Y
· PROGRAMMARE I PEDALI COME ASSE Y
PROGRAMMAZIONE
· INTRODUZIONE
Puoi assegnare ai pulsanti programmabili funzioni dei pulsanti di base.

Sensibilitá selezionabile sulla sinistra del volante (LO MID HI)
· 3 LIVELLI DI SENSIBILITÁ
1、 Tieni premuto “SHARE/9/View” + “OPTIONS/10/Menu” per 3 secondi no a
che il LED verde si accende
2、Premi D-PAD destro no a che il LED verde si spegne.
Pagaia sinistra e pagaia destra sono ora programmate come Asse Y
· PROGRAMMA LE PAGAIE COME ASSE Y
1、 Tieni premuto “SHARE/9/View” + “OPTIONS/10/Menu” per 3 secondi no a
che il LED verde si accende
2、Premi i pedali o le pagaie no a che il LED verde lampeggia
3、Premi i pedali o le pagaie no a che il LED verde si spegne
Attenzione:
Le modiche rimarranno attive anche dopo che il volante verrá scollegato
· CANCELLA LA PROGRAMMAZIONE DI PAGAIE O PEDALI COME ASSE Y

PIATTAFORME
GUIDA PS3®
1、 Connetti il volante alla PS3® ,successivamente connetti il pedali al volante
2、Durante la sessione di gioco, premi il tasto HOME una volta per entrare nella
schermata XBM
3、Tieni premuto il tasto MODE per entrare nel MENU
GUIDA PS4®
1、 Connetti il volante alla PS4® ,successivamente connetti i pedali al volante
2、Connetti il volante al controller originale PS4® utilizzando il cavo USB incluso
(o utilizzando un cavo data )
3、Dopo aver connesso il volante, il RED rosso si accenderá
premere il pulsante HOME per utilizzare il volante in gioco
4、Durante la sessione di gioco, Premere il pulsante HOME per entrare nel XBM
1、 Connetti il volante all’ XBOX ONE® ,successivamente connetti i pedali al volante
2、Connetti il volante al controller originale XBOX ONE® utilizzando il cavo USB
incluso (o utilizzando un cavo data )
3、Dopo aver connesso il volante, il RED rosso si accenderá
4、Durante la sessione di gioco, Premere il pulsante HOME per entrare nel Menu
GUIDA XBOX ONE®
GUIDA SWITCH®
1.、Connetti il volante alla console SWITCH® ,successivamente connetti i pedali al
volante
2、Dopo aver connesso il volante, il RED rosso si accenderá Per catturare l’immagine
dello schermo:
Premi “SELECT/SHARE/9/VIEW/-” e “START/OPTIONS/10/MENU/+”

GUIDA PC
1、 Il volante ha la funzione X-input di base
2、Tieni premuto il pulsante HOME per 3 secondi per cambiare a D-input.
Il LED si spegnierá e riaccenderá dopo pochi secondi
· X-INPUT
1、 Entra nell’interfaccia di test per vericare gli assi del volante
2、Entra nell’interfaccia di calibrazione per calibrare il volante
· TEST
1、 Start→Pannello di controllo→programmi/Funzioni
2、Dopo aver trovato il le da cancellare sotto ”Programmi installati”.
Clicca su “Cancella” e segui le direttive per la disinstallazione
· DISINSTALLAZIONE DEL DRIVER

PROBLEMI RISCONTRATI
PRECAUZIONI
1、 Se su console il LED non si accende, scollegare e ricollegare il controller
2、Se il volante non si accende provare a scollegare e ricollegare il cavo
1、Read carefully the user manual before using the wheel
2、Do not disassemble or modify
3、Avoid to store in a smoky, humid or dusty place
To easly remove the wheel from the table
pull and raise up the strap on the suction cup side
· SUCTION CUP

www.nitho.com
SERVIZI & SUPPORTO
Per qualunque domanda e supporto necessario,
contattaci per E-mail a
[email protected] o visita il nostro sito web :
www.nitho.com
WWW.NITHO.COM NITHOGAMES
NITHOGAMES
NiTHO GmbH – Victoriastrasse 3b – 86150 Augsburg – Germany
This manual suits for next models
1
Table of contents
Languages:
Other Nitho Video Game Controllers manuals
