Nixie Clock QTC Configuration guide

Nixie Tube Clock ‘Nixie QTC’
Issue 11a (11 December 2014)
www.pvelectronics.co.uk
- 1 -
Assembly Ins ruc ions
And
User Guide
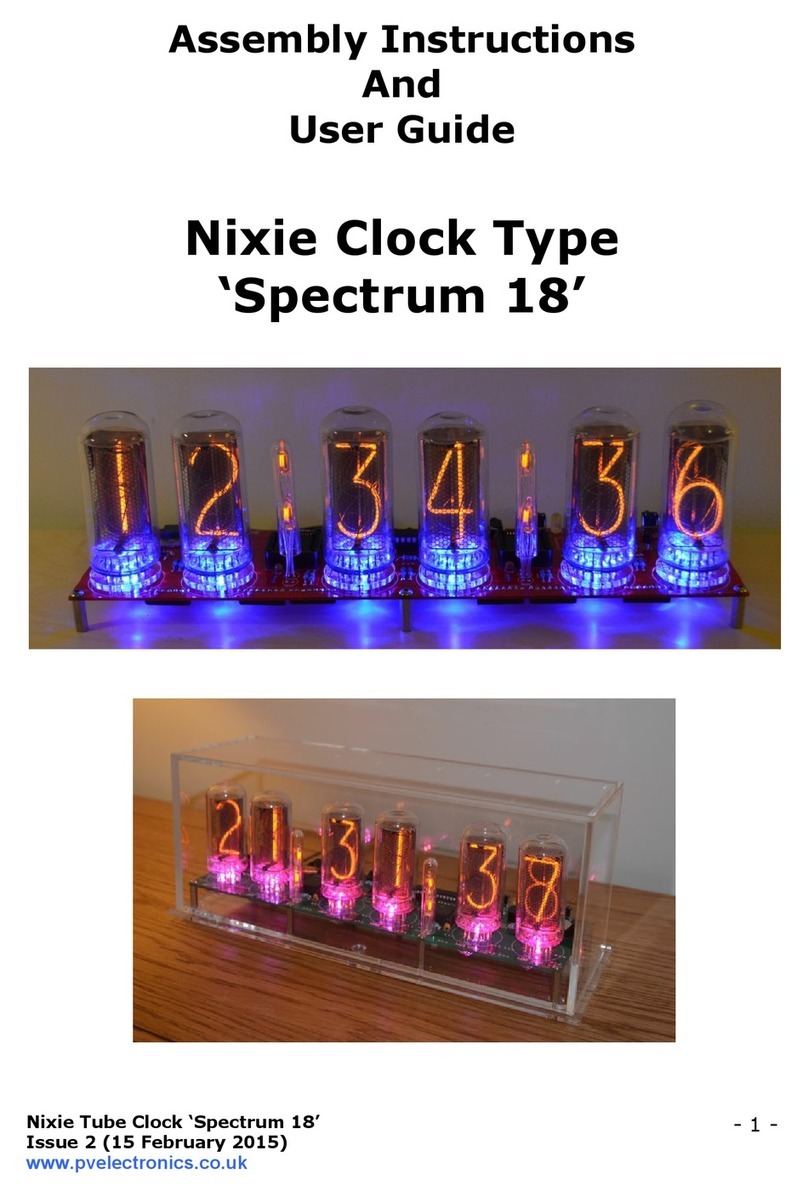
Nixie Clock Type
‘Nixie QTC’

Nixie Tube Clock ‘Nixie QTC’
Issue 11a (11 December 2014)
www.pvelectronics.co.uk
- 2 -
REVISION HISTORY
Issue
Number
Da e Reason for Issue
11a 11 December 2014 C5 changed to 10pF. Typing errors corrected
11 17 October 2014 Ne PCB – 30 September 2014
10a 21 March 2014 Errors corrected
10 20 March 2014 Ne tube types added and code configuration
procedure
9 03 April 2013 Troubleshooting connections chart added
ZM1177 tube procedure clarified
8a 09 September 2013 Improved IN14 cell details
8 21 October 2012 WWVB No Longer supported
7 8 October 2012 ZM1177 Tube details added
6 5 August 2012 Component designation errors corrected
5 27 July 2012 Ne PCB date 5 July 2012
4 14 June 2012 1
st
revie
3 29 May 2012 Errors in component listing corrected
2 22 May 2012 Anode resistors corrected to 10KΩ
1 20 May 2012 Ne document

Nixie Tube Clock ‘Nixie QTC’
Issue 11a (11 December 2014)
www.pvelectronics.co.uk
- 3 -
1. INTRODUCTION
1.1 Wha is Nixie QTC?
Nixie QTC takes a ne path for Nixie Clocks for mid-sized solder-in tubes.
Learning from our past experiences of thousands of kits sold, e
recognise a major customer concern and possibly the biggest dra back
ith solder-in tubes: They are soldered in!
Previously, a failed tube al ays meant a treacherous operation to
delicately remove the tube hilst trying to preserve all traces intact.
Whilst this as certainly possible, It as never easy, and made it
uncomfortable to give a Nixe Clock as a gift in case a tube ever failed.
With Nixie QTC (‘Quick Tube Change’), each tube is soldered only to its
o n mini ‘tube cell’ PCB. A tube can be changed in minutes ith no
danger to the main PCB. The small addition in cost is d arfed by the
huge advantage this gives. A single main board is capable of driving tens
of different types of solder-in Nixie Tube. You can even completely
change the tube type of your clock by installing ne tube cells and tubes.
Software
But at such a major change in direction, e have also taken the
opportunity to build on the solid soft are foundations of the predecessor
‘Frank 2’ format and add some truly useful and productive soft are
features. As before, the main controller is the mighty PIC16F1936
running at 16Mhz. The code is programmed entirely in the ‘C’
programming language.
Drive Mode
The former K155ID1 / 74141 nixie driver IC is no replaced by a modern
HV5812 High Voltage Driver IC by Supertex. With 20 outputs, it is able to
drive the six Nixie Tubes in a very comfortable and lo noise 3X2
multiplex.
GPS Time Synchronisation
A radical ne clock design deserves a ne and exciting GPS receiver
module for those that demand the best timekeeping. And, ith a
groundbreaking price for a GPS receiver, a fully featured Nixie Clock ith
GPS synchronsation is no ithin the price range of most buyers.

Nixie Tube Clock ‘Nixie QTC’
Issue 11a (11 December 2014)
www.pvelectronics.co.uk
- 4 -
1.2 Nixie QTC - Fea ures
Nixie clock type ‘Nixie QTC’ has the follo ing features:
- Hours, Minutes and Seconds display
- 12 or 24 hour modes
- Uses a Quartz Crystal Oscillator as the timebase
- Programmable leading zero blanking
- Date display in either DD.MM.YY or MM.DD.YY or YY.MM.DD format
- Programmable date display each minute
- Scrolling display of date or standard display
- Alarm, ith programmable snooze period
- Optional DCF / MSF / GPS synchronisation ith status indicator LED
- Dedicated DST button to s itch bet een DST and standard time
- Supercapacitor backup. Keeps time during short po er outages
- Simple time setting using t o buttons
- Programmable leading zero blanking
- Five programmable neon colon settings (Flashing AM/PM indication,
illuminated AM/PM indication, both flashing, both on, both off)
- Seconds can be reset to zero to precisely the set time
- Programmable night mode - blanked or dimmed display to save tubes
or prevent sleep disturbance
- Rear Indicator LEDs dim at night to prevent sleep disturbance
- Weekday a are ‘Master Blank’ function to turn off HV/ tubes and LEDs
on eekends or during orking hours
- Separate modes for colon neons during night mode
- Standard or fading change of digits
- Standard, fading, or fading ith scrollback display modes
- ‘Slot Machine’ Cathode poisoning prevention routine
- Programmable RGB tube lighting – select YOUR favourite colour palette
- 729 colours possible. Have a different colour or your choosing every
hour, or autochanging colours.
- Not AC frequency dependent – orks in all countries
- All user preferences stored to non-volatile memory

Nixie Tube Clock ‘Nixie QTC’
Issue 11a (11 December 2014)
www.pvelectronics.co.uk
- 5 -
1.3 Tubes Suppor ed
Each tube is soldered to a mini PCB 'Cell', making tubes easily
changeable. Through the use of 2 different cell types, and 3 different
configurations of the microcontroller, it is possible for the kit to drive a
ide range of solder-in tubes as detailed in the table belo . There are
detailed and specific instructions for mounting each type of tube, in
sections 5.1 to 5.8 of this manual.
Tube ypes
Cell ype
Code
Configura ion
Sec ion
IN
-
14
IN
-
14
A
5
.1
IN
-
8
-
2, ZM1177
IN
-
8
-
2
A
5
.2
Z570
M, Z570
0M, Z573
M, Z573
0M,
Z574M, Z5740M, GN-9A,
B570M, TAF1317A, TAU7030,
F9080B, F9080BA, TAF1093A,
ZM1080, ZM1082, ZM1134,
ZM1135, ZM1136, ZM1136A,
ZM1136L, ZM1136R, ZM1138A,
ZM1138L, ZM1138R
IN
-
8
-
2
A
5
.3
GNP
-
17A
IN
-
8
-
2
A
5
.4
GNP
-
7A, GNP
-
7AH
IN
-
8
-
2
A
5
.5
ZM1210, ZM1212
IN
-
8
-
2
B
5
.6
IN
-
16
IN
-
14
C
5
.7
CD66, ZM124
0
, ZM124
2
, XN11,
XN12
IN
-
8
-
2
A
5
.8

Nixie Tube Clock ‘Nixie QTC’
Issue 11a (11 December 2014)
www.pvelectronics.co.uk
- 6 -
1.4 SAFETY
DANGER: The clock pcb includes a s itched-mode voltage booster
circuit. This generates nominally 170 Volts DC. Assembly may only be
undertaken by individuals ho are suitably qualified and experienced in
electronics assembly, and are familiar ith safe procedures for orking
ith high voltages. If in doubt, refer to a suitably qualified engineer
before proceeding.
The vol ages genera ed by his circui can give a po en ially
LETHAL ELECTRIC SHOCK.
DISCLAIMER: This product is supplied as a kit of parts, intended only for
suitably qualified electronic engineers, ho are suitably qualified and
experienced in electronics assembly, and are familiar ith safe
procedures for orking ith high voltages. The supplier, his agents or
associates accept no liability for any damage, injury or death arising from
the use of this kit of parts.
This is not a finished product, and the person assembling the kit is
responsible for ensuring that the finished product complies ith any
applicable local regulations governing electrical equipment, eg. UL, CE,
VDE.

Nixie Tube Clock ‘Nixie QTC’
Issue 11a (11 December 2014)
www.pvelectronics.co.uk
- 7 -
2. TOOLS AND EQUIPMENT REQUIRED
2.1 Tools required o assemble he PCB.
The follo ing tools ill be required to assemble the PCB:
- Soldering iron ith a small tip (1-2 mm).
- Wire cutters to trim the excess component leads after soldering.
(TIP: A small pair of nail clippers orks very ell for this function).
- Wire strippers (TIP: A small pair of scissors is quite suitable).
- Multimeter for voltage tests and for identifying the resistors.
- For the RGB LED tube lighting, a small hot air gun ill be needed to
shrink the heat shrink tubing over the LEDs to form the light guides. A
small hair dryer may ork for this.
2.2 Ma erials you will need.
Solder – lead / tin solder is highly recommended. USE LEAD/ TIN
SOLDER!.
Lead free solder, as no required to be used in commercial products in
Europe, has a much higher melting point and can be very hard to ork
ith.
Desoldering ick (braid) can be useful if you accidentally create solder
bridges bet een adjacent solder joints.
2.3 O her i ems you will need.
The clock kit does not include a po er adapter.
The follo ing type of adapter should be obtained and used ith the kit:
Output 12V DC regulated, minimum power output capability of 500 mA
Output plug: 2.1mm pin, centre po itive.
A suitable adapter is sho n belo :

Nixie Tube Clock ‘Nixie QTC’
Issue 11a (11 December 2014)
www.pvelectronics.co.uk
- 8 -
3. LIST OF COMPONENTS
3.1 Table of Componen s – Driver Board
Circui Designa ion Par Descrip ion
Resistors
R1 4.7 KΩ, ¼ Watt
R2 390 KΩ, ¼ Watt
R3 4.7 KΩ, ¼ Watt
R4 390 KΩ, ¼ Watt
R5 4.7 KΩ, ¼ Watt
R6 - R11 270 Ω, ¼ Watt
R12 – R14 4.7 KΩ, ¼ Watt
R15 – R17 390 KΩ, ¼ Watt
R18 – R20 10 KΩ, ¼ Watt
R21 – R28 4.7 KΩ, ¼ Watt
R29, R30 390 KΩ, ¼ Watt
R31 – R48 270 Ω, ¼ Watt
Capacitors
C1, C2 220uF Electrolytic
C3 1uF, 250V,
C4 220uF, 16-25V, Electrolytic
C5 10pF Ceramic
C6 15pF Ceramic
C7 100nF Ceramic
C8 0.1F or 0.22F
C9, C10 100nF
Transistors
Q1 IRFD220 MOSFET
Q2 – Q4 2N7000 MOSFET
Q5 – Q7 MPSA42
Q8 – Q10 MPSA92
Q11 – Q13 MPSA42
Diodes
D1 – D3 1N5819
D4 62V zener
D5 UF4004
D6 5mm Yello LED
D7 5mm Green LED
D8 5mm Yello LED
D9 62V zener
D10 – D15 RGB 5mm LED, common anode
Integrated Circuits
IC1 LM2576 5V voltage regulator
IC2 PIC16F1936 8-bit microcontroller
IC3 HV5812
Miscellaneous
L1, L2 100uH inductor
AM, PM 4mm ire ended neon lamp
ALARM, SET, ADJ, DST Miniature push button
IC2 Socket 28 Way narro IC socket for IC2
IC3 Socket PLCC28 IC socket for IC3

Nixie Tube Clock ‘Nixie QTC’
Issue 11a (11 December 2014)
www.pvelectronics.co.uk
- 9 -
J1 2.1mm PCB po er socket
GPS / RFT Surface mount 3.5mm jack socket
LS1 Piezo sounder
FUSE 500mA fuse
Insulation Clear insulation for neons
NX1 – NX6 2X6 ay 0.1” header plug
X1 32.768KHz atch crystal

Nixie Tube Clock ‘Nixie QTC’
Issue 11a (11 December 2014)
www.pvelectronics.co.uk
- 10 -
3.2 Par s lis / Packing Shee - Componen Bag
Par Descrip ion Quan i y
Resistors
270 Ω, ¼ Watt 24
4.7 KΩ, ¼ Watt 14
10 KΩ, ¼ Watt 3
390 KΩ, ¼ Watt 7
Capacitors
10pF, Ceramic 1
15pF, Ceramic 1
100nF, Ceramic 3
1uF, 250V, Electrolytic 1
220uF, 16-25V, Electrolytic 3
0.1F or 0.22F 1
Transistors
IRFD220 MOSFET 1
MPSA42 6
MPSA92 3
2N7000 3
Diodes
1N5819 3
UF4004 fast recovery diode 1
62V Zener diode 2
5mm Green LED 1
5mm Yello LED 2
5mm RGB LED 6
Integrated Circuits
LM2576 5V voltage regulator 1
PIC16F1936 8-bit microcontroller 1
HV5812 1
Miscellaneous
100uH inductor 2
4mm ire ended neon lamp 2
Miniature push button 4
28 ay narro IC Socket for IC2 1
PLCC28 IC Socket for IC3 1
2.1mm PCB po er socket 1
Surface mount 3.5mm jack socket 1
Piezo sounder 1
500mA fuse 1
Clear insulation for neons 1
2X6 ay 0.1” header plug 6
2X6 ay 0.1” header socket 6
32.768KHz atch crystal 1

Nixie Tube Clock ‘Nixie QTC’
Issue 11a (11 December 2014)
www.pvelectronics.co.uk
- 11 -
It is recommended that the kit is checked against the list above, to
ensure all parts are present before commencing assembly. Don’t be
alarmed if there are some extra components, as some component
bags are shared bet een different kit types.
The resistors used in the kit are 1% tolerance metal film. They are
marked ith 4 coloured bands to identify the value. Ho ever it is
sometimes unclear in hich direction the bands should be read.
Therefore, e recommend that the resistors be identified ith a
multimeter.
Please note the fuse ill look like the picture belo . It can easily be
confused for a capacitor. It is a self-resetting fuse.

Nixie Tube Clock ‘Nixie QTC’
Issue 11a (11 December 2014)
www.pvelectronics.co.uk
- 12 -
4. ASSEMBLY OF THE PCB
DUE TO PRODUCT DEVELOPMENT AND IMPROVEMENTS,
YOUR PCB MAY NOT LOOK EXACTLY LIKE THE ONE
PICTURED.
4.1 Low Vol age Power componen s:
J1, FUSE
D1-D3 (1N5819)
D4 (62V Zener Diode)
IC1 (LM2576)
L2 (100uH Induc or)
C1, C2 (220uF)
Start by installing D1-D4. Align the band on the components ith
the band marked on the PCB.

Nixie Tube Clock ‘Nixie QTC’
Issue 11a (11 December 2014)
www.pvelectronics.co.uk
- 13 -
After placement, IC1 can be placed and bent over these diodes to
reduce the height of the assembled PCB. Continue to mount C1,
C2, J1 and FUSE. C1 and C2 are polarized. The longer lead goes in
the hole marked ‘+’.
4.2 Tes ing Low Vol age Power Supply.
Identify the test GND, 5V and HV test points as sho n belo .
Plug in the po er supply, and then test using a DC voltmeter:
Touch the black probe on the GND test point and the red probe on
the 5V test point. The voltage should measure bet een 5.6 and 5.9
Volts. If not, disconnect po er and check your ork. Do not
proceed ith the assembly until the error is corrected. Once the
test is completed, disconnect the po er.

Nixie Tube Clock ‘Nixie QTC’
Issue 11a (11 December 2014)
www.pvelectronics.co.uk
- 14 -
4.3 High Vol age Genera or componen s.
Socke for IC2
R1, R3 (4.7 KΩ)
R2, R4 (390 KΩ)
C3 (1uF)
C4 (220uF)
Q1 (IRFD220)
L1 (100uH Induc or)
D5 (UF4004)
D9 (62V Zener diode)

Nixie Tube Clock ‘Nixie QTC’
Issue 11a (11 December 2014)
www.pvelectronics.co.uk
- 15 -
All the resistors on the board need to be mounted upright to save
space. The leads need to be formed as sho n belo . Bend the
leads of each resistor as sho n and solder in to the correct postion,
making sure the component body is as close to the board as
possible.
Take care that the notched end of the IC socket is at the end
sho n. Also the MOSFET needs to be placed ith the t o joined
pins at the position sho n belo .
Ensure that the (-) light stripes on C3 and C4 are facing in ards
to ards each other as sho n belo .

Nixie Tube Clock ‘Nixie QTC’
Issue 11a (11 December 2014)
www.pvelectronics.co.uk
- 16 -
4.4 High Vol age Genera or Tes .
- Refer to the arnings on page 5
- Insert IC2 into its socket. Orient the notch on the IC ith the
notch on the IC socket and the PCB marking.
- Po er up the PCB, and using the GND and HV test points,
measure the high voltage generated using a voltmeter on DC
setting. It should be bet een 165 and 175 Volts. If this is in order,
disconnect the po er supply.
4.5 C5 (10pF)
C6 (15pF)
X1 (32.768KHz Crys al)
C7, C9, C10 (100nF)

Nixie Tube Clock ‘Nixie QTC’
Issue 11a (11 December 2014)
www.pvelectronics.co.uk
- 17 -
4.6 R6 - R11 (270 Ω)
R5, R12 – R14, R21 – R28 (4.7 KΩ)
R15 - R17, R29, R30 (390 KΩ)
R18 - R20 (10 KΩ)
4.7 Q5, Q6, Q7, Q11, Q12, Q13 (MPSA42)
4.8 Q8, Q9, Q10 (MPSA92)

Nixie Tube Clock ‘Nixie QTC’
Issue 11a (11 December 2014)
www.pvelectronics.co.uk
- 18 -
This is how he PCB should look now:
4.9 Socke for IC3
Align the notch on one corner of the socket ith the marking on
the PCB. Be careful not to force in the socket if all pins are not
aligned. Ensure all pins are fully pushed through the holes before
soldering in place.
4.10 NX1 – NX6 (6X2 way male pin header)

Nixie Tube Clock ‘Nixie QTC’
Issue 11a (11 December 2014)
www.pvelectronics.co.uk
- 19 -
Ensure the connectors are soldered very close to the PCB.
4.11 GPS/ RFT Connec or
LS1 (Piezo Buzzer)
C8 (0.1F)
To solder the GPS / RFT connector: First et one pad on the PCB
ith solder. Then place the connector in position and re-touch the
pad ith the soldering iron. This ill anchor the component and
then you can solder the remaining pads.
Ensure the arro s on C8 are aligned ith the corresponding arro s
on the PCB

Nixie Tube Clock ‘Nixie QTC’
Issue 11a (11 December 2014)
www.pvelectronics.co.uk
- 20 -
4.12 D7 (5mm Green LED)
D6, D8 (5mm Yellow LED)
SET, ADJ, ALARM, DST (Push swi ches)
First, bend the leads of the LEDs as sho n belo , paying attention
to the longer (+) lead being on the left hand side. Then solder in
place ith the body of the LED just touching the PCB.
Then place and solder the 4 push button s itches:
4.13 AM, PM Neon Indica ors
It is a good idea to install these components at the very end of the
assembly, hen you have a better idea of a suitable height that
ill look perfect ith your design of case. So, do not install them
no but remember to install them some time later! Use small
pieces of the clear insulation supplied to prevent shorts on the
leads.
Table of contents
Other Nixie Clock Watch manuals
