Noise Engineering Ruina Versio User manual

1
Noise Engineering
Ruina Versio
Stereo distortion with wavefolding, octavizing, phase
shifting, multiband saturation, notch ltering, and DOO .
Type Stereo distortion
Size 10 HP
Depth 1.5 inches
Power 2x5 Eurorack
+12 mA 70
-12 mA 70
+5 mA 0
Overview
Ruina Versio answers the age-old question: how many dierent types of distortion can
we t on a single module? The answer is a lot, as it turns out. Need a wavefolder? We
got a wavefolder. Want some multiband distortion? Of course you do! And that’s not
even including the DOOM parameter!
We also decided that Smoosh was a parameter we needed in our lives: press it and add
128dB of drive. Yes, you read that right: 128dB. Why have SOME drive when you can
have ALL the drive?
Not only is RV a unique distortion, it’s a stereo DSP platform. A simple USB connection
allows you to update RV to a variety of rmwares. Open-source support is available,
too, which allows you to write your own rmware! All info can be found on the World of
Versio page here.
Etymology
Ruina -- from Latin: “destruction”
Versio -- from Latin: “versatile”
“Versatile Destruction”
2
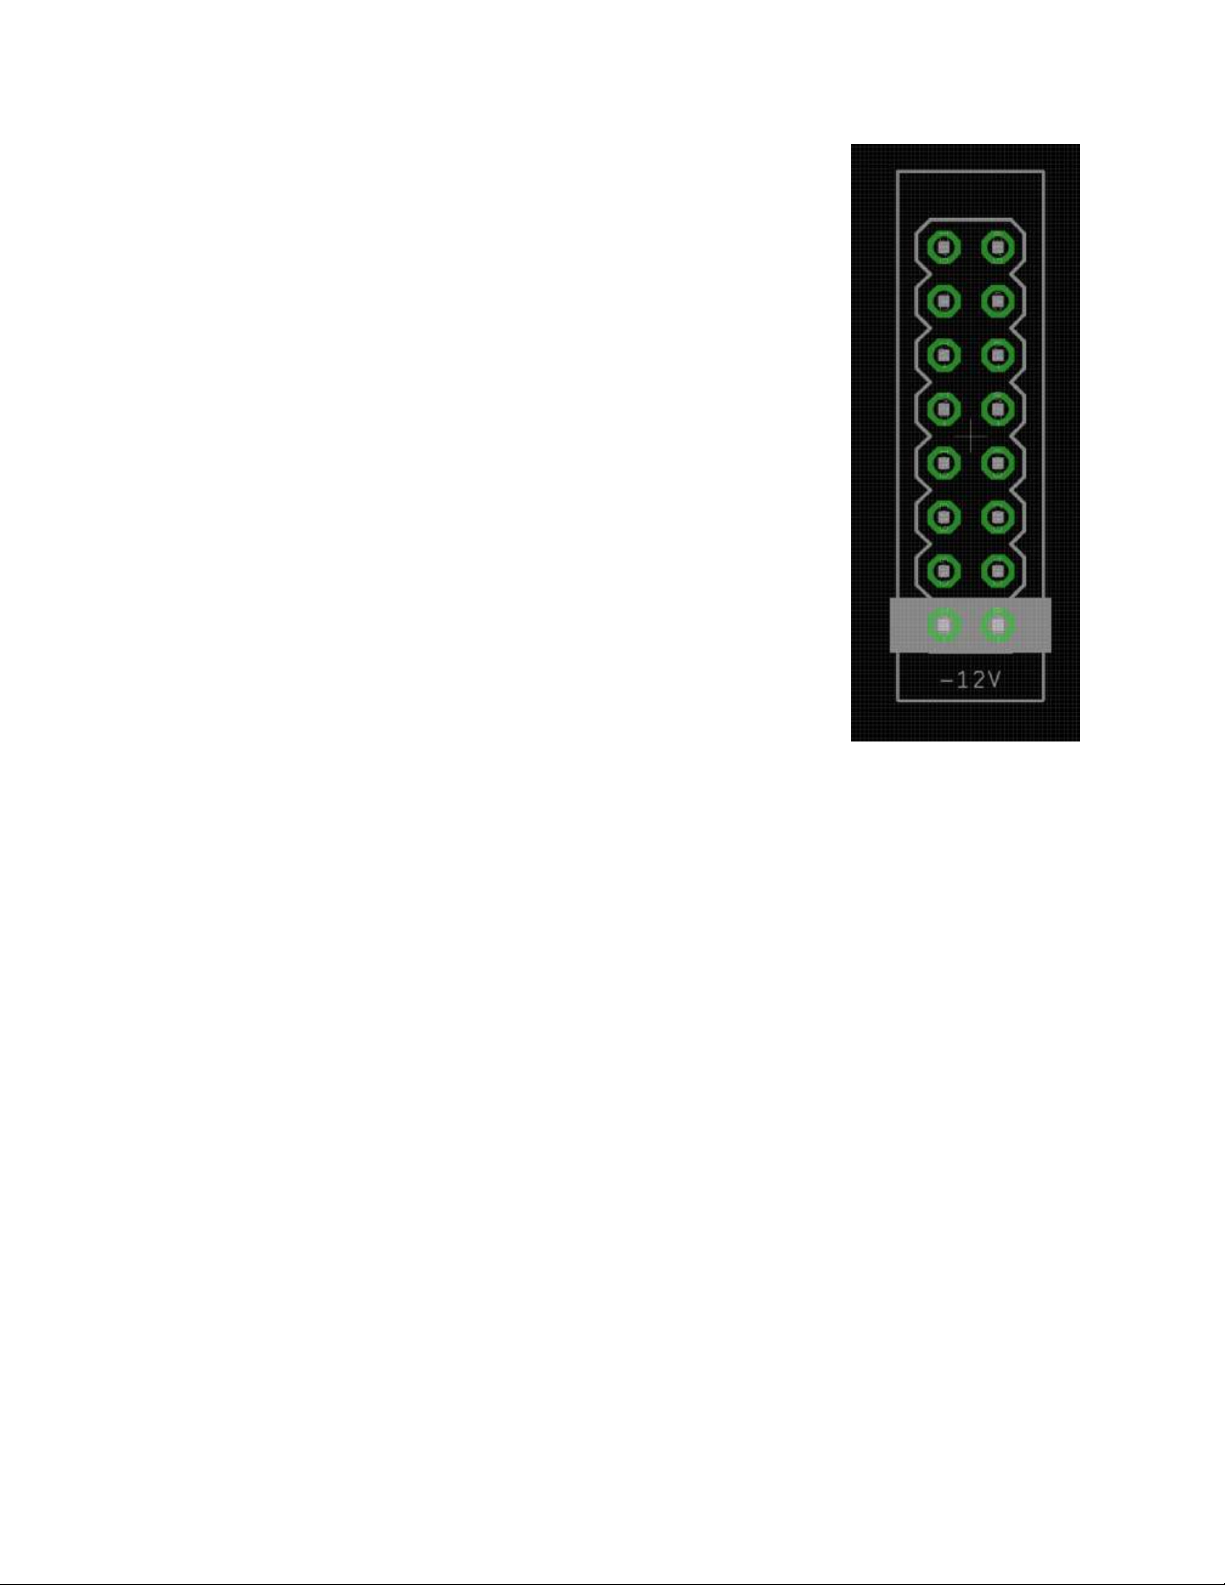
Power
To power your Noise Engineering module, turn o your case. Plug
one end of your ribbon cable into your power board so that the red
stripe on the ribbon cable is aligned to the side that says -12v and
each pin on the power header is plugged into the connector on the
ribbon. Make sure no pins are overhanging the connector! If they
are, unplug it and realign.
Line up the red stripe on the ribbon cable so that it matches the
white stripe and/or -12v indication on the board and plug in the
connector.
Screw your module into your case BEFORE powering on the
module. You risk bumping the module’s PCB against something
metallic and damaging it if it’s not properly secured when powered
on.
You should be good to go if you followed these instructions. Now
go make some noise!
A nal note. Some modules have other headers -- they may have
a dierent number of pins or may say NOT POWER. In general,
unless a manual tells you otherwise, DO NOT CONNECT THOSE
TO POWER.
Warranty
Noise Engineering backs all our products with a product warranty: we guarantee our
products to be free from manufacturing defects (materials or workmanship) for one year
from the date of the original retail purchase (receipt or invoice required). The cost of
shipping to Noise Engineering is paid by the user. Modules requiring warranty repair will
either be repaired or replaced at Noise Engineering's discretion. If you believe you have
a product that has a defect that is out of warranty, please contact us.
This warranty does not cover damage due to improper handling, storage, use, or abuse,
modications, or improper power or other voltage application.

Color code
On boot, the RV’s LEDs will shine with this color pattern to
indicate that it is running the current RV rmware:
Input and Output
Voltages
All CV inputs expect 0-5 V. All pots act as osets and sum
with the input CV. The FSU gate input responds to signals
above +2 V. The audio inputs clip around 16 V peak to
peak.
Interface
Blend: Dry/wet balance control. When turned fully left, the
unmodied input signal is passed through. Fully right, only
the processed signal is heard. Points in the middle give you
a mix of both.
Fold: Wavefolder, based on the Noise Engineering Innifolder that appears on many
modules like the Basimilus Iteritas Alter.
Center: Width and position of the multiband saturator center band.
DOOM: Doom is a suboctave chorus. Imagine it like a suboctave generator, but evil: as
you turn it up, the louder the suboctave is, and the more out-of-tune it becomes. In the
top quarter of the knob, overtone buzz is added to the suboctave chorus.
If you’ve ever wanted to emulate a swarm of bees descending on your waveforms, this
is the knob for you.
Phase: Phase shifts the left and right signals to create stereo width and/or phasing
eects.
Drive: Multiband saturator, inspired by our Seca Ruina module. Emphasizes the four
dierent bands, isolating the lowest when turned fully counterclockwise and the highest
turned fully clockwise. Blends through low, low-mid, high-mid, and high bands at other
settings.
8vize: A full-wave rectication distortion, inspired by our Pura Ruina module.
3

Interface (cont.)
UND/X/OVR: Sets the signal ow:
• UND: Fold -> DOOM -> Rectify -> Saturate
• X: Fold -> Saturate -> Rectify -> DOOM
• OVR: Fold -> DOOM -> Rectify -> Saturate -> Fold
(again)
OFF/ON/TRK: Notch lter:
• OFF: O.
• ON: Fixed-frequency notch at 1kHz.
• TRK: Tracks the frequency of the Center knob.
Smoosh: Press or trigger with a gate for 128dB of gain.
In L/In R: Audio input. If R is not patched, the signal from L
is normaled to both inputs.
Out L/Out R: Stereo output pair.
Patch Tutorial
First patch
Start by patching a saw wave into the L input, and patching the Out L and R jacks to
your mixer. Set Center, Drive, Phase, and 8vize to 12:00. Set Doom and Fold fully
counterclockwise, and Blend fully clockwise. Set both switches to the leftmost position.
This is the least distorted that RV will get… it’s all destruction from here.
Start by playing with Fold, Doom, Drive, and 8vize: these are the main controls for the
four types of distortion on RV.
Try dierent Phase settings to change the phasing of your signal and add stereo width.
Center and the OFF/ON/TRK switch change the frequencies emphasized and cut in
your signal.
Try dierent UND/X/OVR settings for dierent signal chains and distortion avors.
Lastly, hit Smoosh and really annihilate your signal.
4

Patch Tutorial (cont.)
Drum Crusher
Use RV to spice up your drum loops: start with Blend at 12:00 and Fold and Doom fully
counterclockwise. Start by using Drive, Center, and 8vize to spice things up… and hit
Smoosh to add some squish. Past that, try out all the other knobs and settings and
really destroy your percussion completely.
Smoosh sequencing
Smoosh sounds awesome when triggered with gate and trigger patterns: try it on simple
waveforms to create an enveloping eect. Or, try distorting some drums and mult one of
your drum triggers to Smoosh. Or, use random triggers to spice up any distorted patch.
Updating Firmware
Any Versio module can accept any Versio rmware. All Versio module rmwares can be
updated by the user via our Customer Portal. Go to the Customer Portal to check out
alternate rmwares including Desmodus, Imitor, Ampla, and many more coming soon.
Transform your module into a reverb, delay, and so much more with the click of a
button. Change it back whenever you like.
Go to portal.noiseengineering.us
To update the rmware on your Versio:
1. Turn o the power to your case and unscrew Versio.
2. Remove the power connector on the back of Versio.
3. Plug a micro USB connector into the port on the pack of the module, and the other
end into your computer.
4. Follow the instructions in the ash app.
5

Design Notes
In 2019, we released ve analog distortions, which we jokingly called the “Distortion of
the Month.” All good things come to an end, and we had to stop putting out distortions
for a while, despite having many more ideas. We expected that we would release
several in 2020. That...didn’t happen.
During the onslaught of 2019 releases, we had a lot of people asking if we were ever
going to do a stereo distortion (with one really fantastic person buying two of, I think,
every distortion we did that year so he could get stereo going!). The answer was an
unequivocal yes but here it is 2021 and we haven’t gotten these out yet.
This is not the stereo distortion we had in mind when we promised all those awesome
people that one was coming (that’s still coming though!). One day, Stephen just started
maniacally putting distortions together in software and we had way more fun with it than
we expected. He would put up a new version for us to test and the company Slack
would degenerate into ridiculous recordings and exclamations of joy. And always, we
had Markus (and the voice of Matt Lange in our ear) saying MORE DISTORTION.
Would you believe that 128dB gain on the Smoosh button was a compromise?
Ruina Versio is unapologetically digital. It’s 10hp, unlike our small, simple, analog ones
we were doing in 2019. But it is, if you will excuse the term, badass and hardcore. It’s
more distortion than we’ve ever dreamed of putting together, but it’s more fun than we
expected it would ever be. Enjoy.
Special Thanks
All the people who asked for stereo distortions, and especially Dave Skipper.
Matt Lange for being our distortion inspiration, always.
6
Table of contents
Other Noise Engineering Music Pedal manuals


