Norland Research Calculator Robot User manual

Calculator Robot
Norland Research Tel: 702-498-5799
Fax: 702-435-9437
Direct Connect
Calculator Kit
Norland Research
Using the software
(Examples are for the 83 plus, see our web page for other examples)
Warning, back up all your installed software with a Graph-link to
you computer first!
All you need to send commands to the robot processor is the Send
( command built in to your Texas Instruments calculator basic pro-
gramming. See your guidebook that came with your calculator or go
on line at: http://education.ti.com/product/prselect.html
Always follow the Send( command with a Get( command. Depending
on the command sent, the Get variable might contain important data
from the built in touch sensors and timing.
Command Left direction Right direction
1=timed movementonly 0=backward 0=backward
2=move till switch is hit 1=no motion 1=no motion
3=time or until switch 2=forward 2=forward
The first number sent, is the command. The movement commands
format isCLR. Where C is the command, L is the direction of the left
servo motor, and R is the direction of the right servo motor.
Format forCLR
C = command
L= left
R=Right
Format for C
1xx goes for certain time (requires second variable 1-65535)
2xx goes till switch is hit
3xx goes untilswitch or time (requires second variable 1-65535)
Format for L or R servo motor
0 = backwards
1 = stop
2 = forward
Examples:
Send({122,500})
Get(R)
(this will move the robot forward for approx 500 centiseconds)
Send({100,45})
Get(R)
(this will move the robot backward for approx 45 centisecond)
Send({221})
Get(R)
(this will allow the robot to rotate until the front contacts are hit)
Send({322,500})
Get(R)
(this will allow the robot to go forward approx 500 centiseconds or
until a switch is hit) (R will contain the time traveled)
The variable from the Get(R) command will contain the time the robot
moved.
To display this amount, justuse the Disp R command
Switch status command
Command Switch action
5=check switch 1=check for switch that stopped robot
2=check for switchesas they are now
You have two contact switches on the robot.
If no switches are pressed, you will get the value of zero.
If the right switch is pressed, you will get a value of 1.
If the left switch is pressed, you will get a value of 2.
If both switches are pressed, you will get a value of 3.
Example:
Send({51})
Get(R)
(R will contain a 0, 1, 2, or 3, depending on the switch pressed)
Other valid commands are:
Command Action
4=calibrate 21=calibrate left forward pulse length
01=calibrateleft backward pulse length
10=calibrate right backward pulse length
12=calibrate right forward pulse length
99=reset all settings to default
421 -calibrate left forward
401 -calibrate left backward
410 -calibrate rightbackward
412 -calibrate right forward
499-resets all settings to default
These commands are for advanced use. To control theservo motor, we just
send a pulse of 1-2 milliseconds. Full speed one way is 1 millisecond; full
speed the other way is 2 milliseconds. This command gives you speed con-
trol on the servos. A 1.5 millisecond should be stop or very slow. Use this
value(127) to calibrate the pot on the servo motor.
Right backwards is a 255 default
Right forward is a 0 default
Left backwards is a 0 default
Left forward is a 255 default
Valid values are 0-255
Example:
Send({421, 200})
Get(R)
(this will slow down the left forward speed)
Send({401, 75})
Get(R)
(this will slow down the left backwards speed)
Note: These setting will be reset when the robot is shut off.
Calculators will shut off after a period of time, allow for this in your ap-
plication.
Complete Kit $99.95
Options
Slide Cover $4.95
Link cable $4.95
Pen Holder $19.95
Order On line at
www.smallrobot.com
Or visit our website for a mail or fax
A great new application for your
Texas Instruments Graphing
Calculator
(calculator not included)
Copyright 2002 Norland Research
CBL is a trademark of Texas Instruments, Inc.
Visit our website for updates and examples for other models
www.smallrobot.com
Photo by Rebbecca Rowland

Congratulations on your purchase of the Calcu-
lator Robot from Norland Research. Please read
all these instructions before beginning. By ac-
cepting this kit you will assume all responsibil-
ity and damages that may occur.
If not, please return this kit for a full refund.
This kit has been fully tested. But, as with any
electronic product it may at times produce un-
desired effects. You will be adding motion to
your calculator and this could result in loss of
control and damage. We recommend that you
secure any area that you will operate your robot
in to be free of objects that can damage it, and
add barricades to prevent it from falling. Also,
do not operate your robot in a crowd as it could
be stepped on. Always use tools as designed,
wear eye protection and no loose clothing.
Children should always have adult supervision
when using tools and operating moving de-
vices. Moving items can become tangled in
clothing or hair. Always use caution when sol-
dering, using electricity, and connecting batter-
ies and chargers. Since Norland Research does
not control the final product, the kit owner/
assembler will assume the safety considerations
and responsibility of the final product. The kit
owner/assembler will also be responsible for
any damage to the products connected to the
Norland Research robot kit.
Specifications subject to
change without notice.
Phone:702-498-5799
Fax:702-435-9437
Email:[email protected]
Website:www.smallrobot.com
Calculator Instructions www.smallrobot.com
Norland Research
Tools required or helpful
Tape measure or ruler
Small phillips screwdriver
Wire cutters
Sand paper or file
Items needed but not included in kit
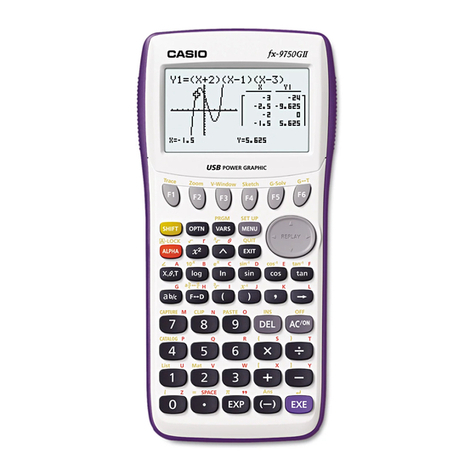
Texas Instrument graphing calculator (73, 82, 83, 83plus,
85(CBL Model), 86, 89, 92*)
Slide case
Link Cable
4 AA batteries
Items useful, but not necessary
Texas InstrumentTI-GRAPH LINK TM
Assembly Time
Allow approximately one hour to assemble your Calculator
Robot. Be sure to understand the operation of your Calculator
and the Graph Link procedures. These instructions are provided
from the calculator manufacture. Skills and techniques usedin
model building are useful. Some edges may need cleaning due
to the cutting process. Care in measurement will improve the
operation of this kit. E-mail us if you have any questions.
Where to operate the robot
The best place to operate the robot is a table with barriers to
prevent it from falling off. You canalso use the robot on the
floor. We recommend a hard surface. If you plan on using the
robot on carpet, be sure to spray if withanti static spray or a
static charge could damage the electronics.
Inspection first
Look closely at the robot chassis. Inspectit for any shipping
damage. Also look at all edges. If there are any sharp edges
from the cutting process, just sand or file them smooth. The
link cable should come out and tuck next to the battery holder,
through the caster wheel and out the hole at the back of the
robot.
Step one, Install the wheels
Take the rubber traction band and stretch it over the wheel and
work it arounduntil it is centered and even all the way around.
Plan on spending a few minutes making this fit on both wheels.
Once the band is installed, remove the Phillips screw from the
servo motor, push the wheel on and reinstall the screw. Repeat
this on the otherservo motor.
Step two, Install the bumper
Remove the backing on the ½ inch double side tape and place
on the two contact switches. Place the bumper on these mak-
ing sure it is level, square and centered. Use the “X” to line up
the switches.
Step three, Install the slide cover
You will find (2) ¾ inch double-sided tape squares provided
in the kit. Mount the 2 tape squares on the 2 spots as shown on
top. Do so by removing the backing to expose the adhesive.
Remove the backing on the other sideof the tape squares.
Now place the slide cover on top of these, being careful to be
behind the bumper and center between the wheels. The slide
cover will allow the calculator to slide out the rear. If you do
not wish to use your slide cover, replacementsare available
from Texas Instruments or Norland Research. They are also
available in colors to give your robot a custom look
Step four, install the calculator
Slide in your calculator (display and keypad up) until you hear
a click. Plug in the link cable. Make sure the cable is secured
and will not tangle in a wheels or the caster. Also, secure the
cable to prevent it from dragging on the ground.
Step five, install the batteries
Install 4 AA Batteries in the Norland Research battery holder
on the bottom as marked. We recommend using good quality
batteries. Do not mix types and we do not recommend some
rechargeable batteries, as they only provide 1.2 volts each.
Please check the voltage on your batteries to insure they are
rated at 1.5 volts. Now, slide the switch on the circuit board to
on. The red LED light should come on. If not, check the bat-
tery installation, voltage and connections. A small jump from
the servos is normal. Low batteries will cause unpredictable
results
Norland Research
8475 Lisa Lane
Las Vegas, NV 89113
*92 will not fit on robot base
