Northern Industrial Tools PTO 540 RPM User manual


Thank you verymuch for choosinga NORTHERNTOOL+ EQUIPMENTCO., INC., Product!
For future reference,please complete theowner's record below:
Model: _______________ PurchaseDate: _______________
Save the receipt,warranty and theseinstructions. It isimportant that youread the entire
manual to becomefamiliar with thisproduct before youbegin using it.
This machine isdesigned for certainapplications only. NorthernTool+ Equipment strongly
recommends that youdo not modifyor use thismachine for anyapplication other thanthat
for which itwas designed. Ifyou have anyquestions relative toa particular application,DO
NOT usethe machine untilyou have firstcontacted NorthernTool+ Equipment todetermine
if it canor should beperformed on orwith this product.
For technical questionsand replacement parts,please call 1-800-222-5381.
DESCRIPTION & INTENDEDUSE
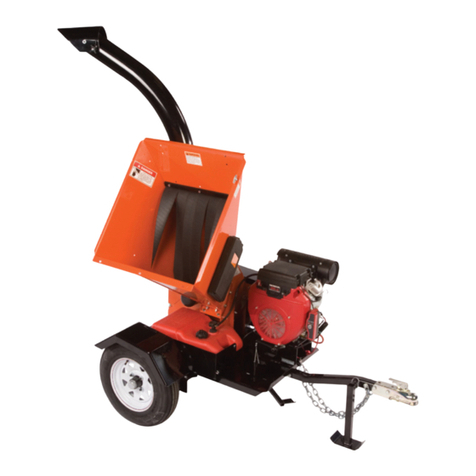
The PTO-Driven4.5" WoodChipper features anadvanced design witha compact structure,
superior technology andsubstantial attack strength.This modelis safe andeasy to operate.
TECHNICAL SPECIFICATIONS
SAVETHESE INSTRUCTIONS.
GENERAL SAFETYRULES
WARNING:Points out importantsafety precautions.This symbol meansATTENTION!
BE ALERT!It indicates ahazardous situation, ifnot avoided,COULD RESULT IN DEATH
OR SERIOUS INJURY.
CAUTION: This symbol indicatesa hazardous situation,which, if notavoided,COULD
RESULTIN MINOR ORMODERATEINJURY.
CAUTION: Read this safetyand operating manualand your tractorowner's manual
before you usethe PTO-Driven4.5" WoodChipper. Becomefamiliar with theoperation and
service recommendations toensure the bestperformance from yourmachine.
WARNING:This is ahigh-powered machine, withmoving parts operatingwith high
energy at highspeeds. You must useproper clothing andsafety gear whenoperating this
machine to preventor minimize therisk of severeinjury.This machinecan crush, grind,cut,
and sever partsof your bodyif they enterthe inlet ordischarge area ofyour chipper.
DANGER: The warnings, cautions,and instructions inthis manual cannotcover all
possible conditions orsituations that couldoccur. Itmust be understoodby the operatorthat
common sense andcaution are factorsthat cannot bebuilt into thisproduct, but mustbe
supplied by theoperator. Operatingthis chipper safelyis necessary toprevent or minimize
the risk ofDEATHOR SERIOUS INJURY. Unsafe operationcan create anumber of hazards
for you.
OPERATINGPRECAUTIONS
· Do not attemptto operate thechipper until youhave read andunderstood the owner's
Manual.
· THIS MACHINE ISDESIGNED TOOPERATEAT540 RPM ONLY! Never operate the
machine at afaster speed; doingso can causeserious injury tothe operator orbystanders
And couldcause damage tothe machine thatis not coveredunder warranty.
1 OF 13
Item
PTO
Flywheel Diameter
Flywheel RPM
Max Chipping Diameter
Specification
540 RPM
2 Feet (605mm)
1220
4.5in.
Knife to WearPlate Gap
Net Weight
Item
Knife & WearPlate
Bolt Torque
772 Lbs. (350kg)
Specification
1/8in. -3/16in. (3-5mm)
52ft.lb. (70Nm)

· Make sure thatthe guards andchip deflectors areinstalled properly beforeoperating the
Chipper.
· Avoid accidentalstarting. Disconnect thechipper from thePTO whennot in useand
when moving thechipper to anotherwork area.
· Never leave thechipper unattended whenit is running.
· Check the chippile to seeif the bladesneed to beserviced. Long sliversin the chippile
are a goodindication that theblades are dulland need sharpening.
· Never use themachine without firstensuring that allthe guards andshields are inplace,
including the chipperhopper, dischargechute, and blowbackshield.
· Never transport thechipper with thePTO engagedand the flywheelturning.
· The chipper mustbe operated withthe weight ofthe machine onthe ground. Operatingthe
machine while itis offthe ground canresult in injuryto yourself orothers, or candamage to
the machine, whichis not coveredunder warranty.
· Keep in mindthat the operatoris responsible foraccidents to otherpeople, their property,
and themselves.
· YourPTO-Driven 4.5"Wood Chipperis a tool,not a toy. Exercise extremecaution at all
Times.
This machineis designed tochip wood. Donot use itfor any otherpurpose.
· Know how tostop the chipperquickly by disengagingthe PTOand shutting downthe
Tractor.
· Operate this machineon a levelsurface only. Never operatethe unit ona slippery, wet,
muddy,or icy surface. Exercise caution toavoid slipping orfalling.
· Keep a safedistance from thechipper hopper toavoid accidental bounceback of any\
Material.
· When feeding materialinto the chipperhopper, beextremely careful thatpieces of metal,
rocks, or otherforeign objects arenot included.This could resultin personal injuryor
damage to themachine.
· Whenever you leavethe operating positionor if youhave to removeprocessed material,
leaves, or debrisfrom the machine,always disengage thePTO, shutdown theTractor
engine, remove thekey,and wait forall moving partsto come toa complete stop.Then
disconnect the PTO shaft fromthe Tractor. Waitan additional 5minutes before removing
processed material, leaves,or debris fromthe machine.
· If the machineshould start makingan unusual noiseor vibration, disengagethe PTO
immediately,shut down theTractor engine,remove the key, and waitfor all movingparts to
come to acomplete stop.Then disconnect thePTO shaftfrom theTractor.Wait an
additional 5 minutesbefore inspecting theunit for cloggingor damage. Vibration is
generally a warningthat something iswrong with themachine. Clean andrepair and/or
replace damaged parts.
· Never tamper withsafety devices. Checkthat they areoperating properly ona regular
Basis.
· Stay alert forpotential hazards.
· Never carry passengerson the machine.
· Never overload orattempt to chipmaterial beyond themanufacturer's specifications.This
could result inpersonal injury ordamage to themachine.
· While using thePTO-Driven 4.5"Wood Chipper, don't rush.When in doubt,stop the
machine and takethe time tocheck your surroundings.
· Never operate themachine when underthe influence ofalcohol or drugs,including
Medication.
· Use the machineduring daylight hours.
· Keep all nutsand bolts tightand the equipmentin good operatingcondition.
· YourPTO-driven 4.5"Wood Chipperis driven bya PTOshaft that transferspower from
your Tractor. APTO shaftis extremely dangerousand can causeserious injury ordeath.
Read and understandall of thesafety and operatinginstructions that camewith your PTO
Shaft.
· No list ofwarnings and cautionscan be all-inclusive.If situations occurthat are not
covered by thismanual, the operatormust apply commonsense. Alwaysoperate the
chipper in asafe manner.
2 OF 13

PERSONAL SAFETY
DANGER: THIS ISAHIGH-POWERED MACHINE WITHMOVING PARTS. Operate the
machine safely. Unsafe operationcan create anumber of hazardsfor you, aswell as
anyone else inthe nearby area.
SAFETY PRECAUTIONS
· Stay alert, watchwhat you aredoing and usecommon sense whenoperating a chipper. Do
not use thechipper while youare tired orunder the influenceof drugs, alcohol,or
medication. Amoment of inattentivenessmay result inserious personal injury.
· Keep the decalsin place andin good repair. Thefactory or yourdealer will furnishnew
decals upon request.
· Keep hair,hands, feet, andother extremities awayfrom the hopper.
· Point the dischargechute away fromdoorways, sidewalks, orany areas whereyour view is
obstructed. Thechute should bepointed downwind whenpossible to avoidgetting dust in
your eyes, nose,and mouth.
· Safety equipment suchas a dustmask, non-skid safetyshoes, and ahardhat should be
used to reducethe chance ofpersonal injuries.
· Always wear protectivegoggles or safetyglasses with sideshields while chipping
to protect youreyes from debris.
· Avoid wearingloose-fitting clothing orjewelry,which can catchon moving partsor
the material fedinto the chipperhopper.
· We recommendwearing gloves whilechipping. Make surethe gloves fitproperly and
do not haveloose cuffs ordrawstrings.
· Wear shoeswith non-slip treadswhen using yourchipper. Ifyou have safetyshoes,
we recommend wearingthem. Do notuse the machinewhile barefoot orwearing
Sandals.
· Wear longpants while operating.
· Use ear protectorsor earplugs ratedfor at least20 db toprotect your hearing.
· Do not attemptalterations, repairs, oradjustments while thechipper head isturning.
Always disconnectthe PTOand stop themotor.
· Never allow peoplewho are unfamiliarwith the instructionsto use thechipper. Only
individuals who arefamiliar with theserules should usethe machine.
· Never place yourhands, feet, orany part ofyour body inthe chipper hopper, discharge
opening, or nearor under anymoving part whilethe machine isrunning. Keep areaof
discharge clear ofpeople, animals, buildings,glass, or anythingelse that willobstruct
clear discharge and/orcause injury ordamage. Wind canchange the dischargedirection,
so be aware.
· If it becomesnecessary to pushmaterial into thechipper hopper,use a smalldiameter
stick, not yourhands.
· Keep bystanders back100 feet fromthe work areaat all times.Wood chipsexit the chipper
at great speeds.To be safe,do not operatethe machine nearsmall children orpets, and
never allow childrento operate thechipper. Disengagethe PTOand stop theTractor
engine when achild or apet is present.
· Never pass orstand on thedischarge side ofthe machine whenthe Tractorengine is
running or theflywheel is turning.
RECOMMENDED PROTECTIVE GEAR
· EyesWraparoundANSI-Approved Safety Glasses
· EarsEar-Plugs
· HandsLeather Gloves
· FeetSteel-ToedBoots
· LegsHeavy Pants
· ArmsLong-Sleeved Shirt
3 OF 13

WORK AREA
· Keep everyone, especiallychildren, away fromthe area ofoperation. Anyonewho has not
read this manualand received instructionsfrom a qualifiedperson should notbe in the
area.
· Thoroughly inspect thearea in whichyou will beworking and removeall foreign objects.
Look for rope,wire, etc., andremove these objectsbefore chipping. Insertingthese
objects into thechipper hopper coulddamage the machineand/or cause injury.
· Never, underany conditions, remove,bend, cut, fit,weld, or otherwisealter standard parts
on the PTO-driven 4.5" woodchipper.This includes allshields and guards.Modifications
to the machinecould cause personalinjuries and propertydamage and willvoid your
Warranty.
STARTINGTHE CHIPPER
· The chipper isa flywheel-and-knife typeof chipper,not a shredder. Theblades actually
chip the limbsas they arefed into thehead. Theblades must besharp to operateproperly.
Dirt, rocks, nails,or other foreignmaterial will shortenblade life.
· Before operating thechipper, reviewthe machine checklist.After turningthe chipper by
hand and makingsure there areno obstructions inthe head, startthe Tractorand raise the
chipper until thePTO shaftis within 15degrees of straight.
· Start the chipperslowly with thePTO engaged,and release thePTO
clutch slowly. Gradually increasespeed until theTractor PTO speed is
540 RPM.
OPERATIONNOTES
· Only operate thePTO-Driven 4.5"Wood Chipperfrom the OperatorZones (on the
Opposite side ofthe discharge chute)shown in theFigure below.
· The material willfeed into thehead more easilyif you startthe pieces largeend first.The
feed roll willfold branches asthey are pulledinto the hopper. Occasionally, a limbfork may
have to becut to feedproperly.
· If the materialstops feeding, sometimesa little pushon the longend of thelimb will help.
· If the materialstops the feedroll, release thefeed roll clutchby stepping onthe bar
beneath the hopper(See below picture).Hold the clutchin the disengagedmode, and pull
the material outof the hopper. Release thefeed roll clutchand the feedroll will turnagain.
· Watch thedischarge chute whileoperating the unit.If the chipsstop flowing, stopfeeding
material into theunit by steppingon the barbeneath the hopperand pulling thematerial
from the hopper. Most ofthe time thiswill be enoughto clear thechips out ofthe unit. Ifthe
unit slows downnoticeably,first shut off the PTO power,then theTractor,and remove the
Key.
Stepping on thebar to release theclutch
4 OF 13

· With the PTO and thetractor turned off, unplug thehead by turningit backwards byhand
with the dischargechute and topsection of thewrapper off.
· Remove the chipsfrom the topof the head.If this fails,remove the clean-outdoor, located
on the lowerpart of thefront side-plate ofthe chipper belowthe main shaft,then work the
chips out ofthe case.
· Replace the clean-outdoor after allthe chips areremoved, being sureto use boththe lock
washers and flatwashers.
· Do not operatethe unit withoutthe guards inplace.
Before stopping thechipper, besure the allof the materialis out ofthe head andout of the
feed roll.
· All of thematerial in thechute must begone or theunit could jamon a smallpiece of
material. Thiscan usually becleared by turningthe unit backwardsby hand.
· ALWAYS disengage thePTO whenleaving the OperatingZones or whenmoving the
Machine.
· Never move theChipper while thePTO isturning.
· Always operate theTractor PTO at 540RPM when chipping.
PROCESSING MATERIAL
CAUTION: The Chipperis designed toaccept wood only.
· The Chipper Knifemounted on arevolving flywheel turnsbranches fed intothe Chipper
Hopper into "chips".
· YourPTO-Driven 4.5Wood Chippercan process dryor green woodup to 4.5"in diameter.
· The Chipper willself-feed the woodonce it contactsthe knife edgeso forcing thebranches
into the Hopperis not necessaryif the knifeis sharp.
· Green wood willprocess quicker andeasier than drywood.
· Softwood processes easierthan hardwood.
· Experience will teachyou how different types ofwood will chipand how fastyou can
process them.
· When chipping branches,sometimes a tailwill develop atthe end ofa branch.Toavoid
this, rotate thebranch while feedingit into theChipper Hopper.
· Rotating the branchas you feedit into themachine will improvechipping performance.
· Use caution withsmall diameter greensaplings and branchesless than 2"in diameter.
Chip these groupedor bundled togetherto provide support.If the materialis 2" orlarger,
feed one ata time intothe Chipper Hopper.
· Make sure thePTO-Drive 4.5"Wood Chipperfinishes processing materialin the Hopper
before disengaging thePTO andshutting theTractor engineoff.
· Do not forcematerial into theChipper. Ifthe machine doesnot chip well,the Chipper Knife
may need sharpeningor replacement, orthe gap betweenthe Knife andthe WearPlate
needs adjusting.
· NEVER THROWREMAINING STUBS ORKNOTS INTOTHE CHIPPERHOPPER;
DAMAGE WILLRESULT.
· Extremely hard knotswill not processvery well. Feedthem in slowlyto reduce clogging.
Push any shortstubs that havenot self-fed throughthe chipper withthe next branchto be
chipped.
· Cut the materialto be chippedinto manageable lengthsof no morethan five orsix feet
before chipping.
· Overloading the chipperhopper will causethe rotor speedto decrease. Ifyou hear the
engine RPM decreasing,stop feeding materialinto the chipperhopper until theengine has
returned to fullspeed.
TO FREEAJAMMED FLYWHEEL
CAUTION: Before performing anymaintenance procedure orinspection on thechipper,
disengage the PTO, shut downthe Tractorengine, remove thekey,and wait forall moving
parts to cometo a completestop. Thendisconnect the PTO shaft fromthe Tractor. Waitan
additional 5 minutes.
5 OF 13

CAUTION: Never pry againstthe scroll weldmentwhen removing thedeflector or
discharge chute, orat any othertime. Thiswill cause damageto the machine.
CAUTION: Be certain theflywheel turns freelybefore trying toprocess more material
into the chipperhopper.
TO DISASSEMBLE
1.Disconnect thePTO Shaft.
2.Remove anymaterial in theChipper
Hopper.
3.Remove thetwo bolts andlocknuts with
Wrench andthen remove theaccess cover.
4.Check tosee if theFlywheel and theKnife are clogged.If it is,clear it witha branch.
5.With awooden stick, loosenand remove anymaterial left inthe Chipping Chamberand
make sure theFlywheel turns freelywith the stick.
TO REASSEMBLE
1.Position theaccess cover ontothe Chipper andsecure with twobolts and locknutsusing
Wrench.
2.Reconnect thePTO Shaft,start theTractor engineand engage thePTO; allowingthe
remaining material inthe Chipping Chamberto discharge.
3.If theChipping Chamber doesn'tclear and theflywheel is stilljammed, repeat theprocess.
TRANSPORTATION SAFETY
· Before transporting, becertain the chipperis correctly andsecurely attached toyour
Tractor andthe PTOsafety chains arein place.
· Make sure thechipper is raisedhigh enough toclear all obstaclesduring transportation.
· Never transport themachine long distances.
· Never allow anyoneto ride onthe chipper.
· Never transport anythingon the machine.
· Never transport thechipper with thePTO engaged.
· Obey local, state,and federal regulationswhen transporting themachine on publicroads
and highways.
· Factor in theadded length ofthe chipper indriving situations, e.g.,when turning, parking,
and crossing intersections.
· Adjust your speedfor terrain andconditions.
· Use caution whenbacking or turning.Be aware ofthe large turningradius required with
The PTO-driven4.5" wood chipperattached to yourTractor.
MACHINE ASSEMBLY
1. Set upthe chipper standplates and tighten 2. Put thebody onto thestand and
the bolts; fixthe lift arms(Part#13);
Part#8 Front Plate
Part#14
Left Plate Part#102
Right Plate
Part#103 Rear Plate
6 OF 13

3. Attachthe hopper assemblyto the chipper;
4. Fix thechute stand andattach the dischargechute;
5. Attachthe clutch barsto the chipper;
6. Attachthe PTOshaft to thetractor and thechipper;
STEP1 Insert the Keyinto the 3-PointHitch Drive Shaftof
the Chipper Align the KeySlot of thePTO Shaftwith the Key
in the Shaftand slide itonto the Shaft.
NOTE: Do notallow the 3-PointHitch Shaft toextend more
than 1/4" intothe U-Joint.This will allowproper clearance to
Prevent hitting theGrease Fitting.
STEP 2 Push in thePTO ShaftSpring Pin andslide the PTO
Shaft onto theTractor Spline;Release the SpringPin and
continue sliding thePTO Shafton until theSpring Pin Popsout
and locks intothe detent inthe TractorPTO Spline;
NOTE: Secure thePTO ShaftSafety Chains tostationary
parts of theChipper Frame andTractor tostop the Guardfrom
Turning;
Part#86
Chute Stand Part#83
Discharge Chute
7 OF 13
Part#20 Part#63
Hopper
Part#110
Clutch arm
Part#60
Rod

MACHINE MAINTENANCE
CAUTION: Before performing anymaintenance procedure orinspection on thechipper,
disengage the PTO, shut downthe Tractorengine, remove thekey,and wait forall moving
parts to cometo a completestop. Thendisconnect the PTO shaft fromthe Tractor. Waitan
additional 5 minutes.
CAUTION: The service intervalsshown are themaximum under normaloperating
conditions. Increase maintenancefrequency under extremelydirty or dustyconditions. See
the owner's manualthat came withthe Tractorand with thePTO shaftfor specificTractor
and PTOshaft maintenance.
BEFORE EACH USE
· Check General EquipmentCondition.
· Check that theFlywheel turns freely(with a longstick only).
· Visually inspectKnife for damage.
EVERY 8-10HOURS
· Check Knife andWear Platefor Sharpness.
· Check Knife andWear PlateAttachment Screws.
· Check Flywheel BearingCollar Set Screws. · Check Knife toWear PlateGap.
· Lubricate Flywheel Bearings. · Lubricate PTOShaft Grease Fittings.
· Lubricate PTOSheave Bearings. · Check BeltTensionand Condition.
EVERY 18-20HOURS
· Lubricate PTOShaft Spline endsand center overlap.
EVERY 40HOURS
· Inspect or replaceDrive Belt.
GREASE FITTINGS
CAUTION:Over lubrication candamage the bearings.
1.Remove theBelt Cover
2. Wipe alldirt, etc., fromthe grease fittingswith a cleancloth.
3. Grease witha flexible hosegrease gun toeach Bearing GreaseFitting.
8 OF 13

4.Replace theBelt Guard.
REMOVING, REPLACINGAND ADJUSTINGTHE CHIPPER KNIFEAND WEARPLATE
CAUTION: Excessive vibration thatwill cause damageto the PTO-driven 4.5" wood
chipper.
Routinely check thewear plate fora sharp squareedge. Using arounded or chippedwear
plate will decreaseperformance and causeexcessive vibration thatwill cause damageto
the PTO-Driven4.5" WoodChipper.
CAUTION: Before performing anymaintenance procedure orinspection on thechipper,
disengage the PTO, shut downthe Tractorengine, remove thekey,and wait forall moving
parts to cometo a completestop. Thendisconnect the PTO shaft fromthe Tractor. Waitan
additional 5 minutes.
1.Remove thetwo screws thatsecure the
Front AccessCover with awrench and
remove theAccess Cover.
2.Rotate theFlywheel with along stick until
the Knife isvisible.
3.If theKnife has visiblenicks or damageit must besharpened or replaced.Remove the dull
or damaged Knifeand visually inspectthe Flywheel Slotand Knife mountingarea and be
sure they areclean and thatthe replacement Knifewill be ableto mount flushagainst the
Flywheel. Install anew or sharpenedKnife as shownwith the Knifeedge facing upand
towards you. Fingertighten the screwsand lock nutsto hold theKnife to theFlywheel.
4.If theKnife does notappear to haveany damage, replacethe FrontAccess Cover and
secure with twoscrews using awrench.
" "
Adjusting the Knifeto WearPlate Gap
The knife towear plate gapis pre setat 1/8 - 3/16 (3-5mm) before leavingthe factory. After
use for aperiod of time,the wear plateand knife willget wearing andso the gapwill be
widened. To adjust thewear plate gap,loosen the nutson the boltsof wear plate,so the
wear plate willmove but stillhave a slightresistance. Now youcan slide thewear plate upor
down (in orout) to achievethe correct gapsetting. Adjustthe wear plateto desired position
and then tightenthe nuts.After that, reinstallthe hopper assembly.
9 OF 13

TROUBLESHOOTING
SYMPTOM
Flywheel won't turn.
The Belt fraysor rolls overthe Drive Pulley.
Chipping action seemstoo slow orflywheel
stalls.
The Belt burns.
The Flywheel won'tturn.
The machine hasexcessive vibration.
When chipping, the logseems to
vibrate excessively and "hammers"
my hands.
PTO turns butthe flywheel doesn'trotate. ·Loose Drive Belt; ReplaceBelt.
·Remove any built-updebris from theChipper Hopper Inletand
Discharge Chute.
POSSIBLE CAUSE/FIX
·The Flywheel maybe jammed. Immediatelydisengage the PTOand
stop the Tractor engine. Removeany built-up debrisfrom the Chipper
Hopper Inlet andDischarge Chute.
·Check the Drive Pulleyalignment and adjust ifnecessary.
·Replace the Drive Beltor reinstall if theBelt has come off the pulleys.
·Turn the Flywheelwith a woodenstick to besure it turnsfreely. Ifthe
Flywheel still won'tturn, call usfor assistance.
·The Drive Pulleygroove may havea nick init. File offany nicks onthe
Pulley.
·Check the Drive Beltfor wear and hardspots.
·The Drive Belt maybe stretched; replace it.
·The Pulleys maybe misaligned.
·If the DriveBelt still rollsoff the DrivePulley, callus for assistance.
·The PTO speedis too slowcausing the beltto slip. Runthe PTO at
540 RPM.
·Check for looseor damaged DriveBelt; replace asneeded.
·Check for adull or damagedKnife; sharpen orreplace the Knife.
·Immediately disengage thePTO and shutoff the Tractor.
·Turn the Flywheelwith a woodenstick to besure it turnsfreely.
·Check for a looseDrive Belt.
·Remove any built-updebris from theChipper Hopper Inletand
Discharge Chute.
·Check for adull or damagedKnife; sharpen orreplace the Knife.
·The Knife is notproperly seated on theflywheel. Loosen the Knife
mounting screws, reset theKnife and tighten thescrews.
·If the DriveBelt still rollsoff the DrivePulley, callus for assistance.
·The Knife is dull;sharpen or replace it.
·The gap betweenthe Knife andWear Plate istoo great; adjustthe Gap.
·Check PTO RPMs;run PTO at540 RPM whenchipping.
10 OF 13

DIAGRAM
11 OF 13

PARTSLIST
12 OF 13
1
2
3
4
5
6
7
8
9
10
11
12
13
14
15
16
17
18
19
20
21
22
23
24
25
26
27
28
29
30
31
32
33
34
35
36
37
38
39
40
41
42
43
44
180100-01
180100-02
180100-03
180100-04
180100-05
180100-06
180100-07
180100-08
180100-09
180100-10
180100-11
180100-12
180100-13
180100-14
180100-15
180100-16
180100-17
180100-18
180100-19
180100-20
180100-21
180100-22
180100-23
180100-24
180100-25
180100-26
180100-27
180100-28
180100-29
180100-30
180100-31
180100-32
180100-33
180100-34
180100-35
180100-36
180100-37
180100-38
180100-39
180100-40
180100-41
180100-42
180100-43
180100-44
Protective Cover for Pulley
Nut M10
Washer 10
Bolt M10x25
Spring Washer 35
Big Belt Pulley
Belt
Front Plate
Drive Shaft
Feed Roll Bearing 207
Nut 22
Spring Washer 22
Front Connecting Plate
Side Plate(2)
Connecting Pin
Nut M14
Spring Washer 14
Big Washer 14
Bearing Seat AdjustScrew
Bolt 10x35
Bolt M12x35
Wash 12
Nut M12
Front Supporting Plate
Outer Cover Assy
Stickler Assy
Bolt M14x140
Bolt 8x40
Nut 8
Main Shaft Assy
Bolt12x50
Key C10*60
Tension Spring
Knife
Bolt M10x45
Spring for Drive Knob
Circlip 25
Outer Drive Shaft
Oil Cup M6
Spring for Drive Shaft
Inner Drive Shaft
Clutch Outer Claw
Clutch Inner Claw
Key 5x20
1
28
26
4
1
1
5
1
1
2
2
2
2
1
2
26
16
22
4
20
8
14
22
1
1
1
14
2
2
1
4
1
2
4
8
2
2
1
1
1
1
1
1
1
58
59
60
61
62
63
64
180100-58
180100-59
180100-60
180100-61
180100-62
180100-63
180100-64
Release Handle
Tension Spring
Rod
Hair Pin 2.5/25
Rob Bracket
Hopper
Rob Bracket
1
1
1
4
1
1
1
Ser. No. NTE Part# Description Q'ty Ser. No. NTE Part# Description Q'ty
65
66
67
68
69
70
71
72
73
74
75
76
77
78
79
80
81
82
83
84
85
86
87
88
89
90
91
92
93
94
95
96
97
98
99
100
101
180100-65
180100-66
180100-67
180100-68
180100-69
180100-70
180100-71
180100-72
180100-73
180100-74
180100-75
180100-76
180100-77
180100-78
180100-79
180100-80
180100-81
180100-82
180100-83
180100-84
180100-85
180100-86
180100-87
180100-88
180100-89
180100-90
180100-91
180100-92
180100-93
180100-94
180100-95
180100-96
180100-97
180100-98
180100-99
180100-100
180100-101
Feed Roll Bearing204
Feed Roll
Bolt M10x35
Wear Plate
Flywheel
Spring Washer 10
Upper Small pulley
B-Pin 8/24
Upper Pulley Bracket
Lower Small Pulley
Steel String 2/820
Tension Spring
Nut4
Spring Washer 4
Clamp
Clutch Guard-2
Clutch Guard-1
Discharge Pipe
Protective Cover
Tightening Handle
Discharge Pipe
Rear Cover
Washer 6
Spring Washer 6
Bolt 6x12
Bolt M14x50
Bolt 6x20
Bearing Cover
Bearing 22209
Lower Cover
Feed Roll Bearing 209
Lock Washer 45
Screw M45/1.5
Small Belt Pulley
Screw M30*1.5
Lock Washer 30
Side Plate(1)
2
1
3
1
1
7
3
3
1
1
1
1
4
4
2
1
1
1
1
1
1
1
2
9
6
1
3
1
1
2
1
1
1
1
2
1
1

13 OF 13
45 180100-45 Bolt 8x25 18
46
47
48
49
50
51
52
53
54
55
56
57
180100-46
180100-47
180100-48
180100-49
180100-50
180100-51
180100-52
180100-53
180100-54
180100-55
180100-56
180100-57
Release Hand Seat
Gearbox Mounting Plate
Spacer 8
Nut8
Spring Washer 12
Spring Washer 8
Bolt 8x20
Key 4x20
Worm reduction gear
WPR40 30 1II
Bolt 6x90
Bolt 6x25
Nut6
1
1
20
24
8
8
8
1
1
1
2
3
Ser. No. NTE Part# Description Q'ty Ser. No. NTE Part# Description Q'ty
102
103
104
105
106
107
108
109
110
111
112
113
114
180100-102
180100-103
180100-104
180100-105
180100-106
180100-107
180100-108
180100-109
180100-110
180100-111
180100-112
180100-113
180100-114
Rear Plate
Bearing Seat Shim
Key C10*50
Screw M6x12
Driving pulley of W.R.G
Driving pulley of W.R.G
Key C6*20
Clutch Step Arm
Nut M10
Belt
Little around plate
Guide Plate
Flywheel Bearing Seat
1
2
1
2
1
1
1
1
1
1
1
1
1
For replacement partsand technical questions,please call1-800-222-5381.
WARRANTY
One-YearLimited Warranty

WARNING
Some dust createdby power sanding,sawing, grinding, drilling,and other construction
activities contains chemicalsknown to theState of Californiato cause cancer, birth defects
or other reproductiveharm. Some examplesof these chemicalsare:
Lead from lead-basedpaints
Crystalline silica frombricks and cementand other masonryproducts, and arsenicand
chromium from chemically-treatedlumber.
Yourrisk from theseexposures varies, dependingon how oftenyou do thistype of work.To
reduce your exposureto these chemicals:work in awell ventilated area,and work with
approved safety equipment,such as thosedust masks thatare specially designedto filter
out microscopic particles.
·
·
This manual suits for next models
1
Table of contents
Other Northern Industrial Tools Chipper manuals

