Safety Labeling –REV. D
9 | P a g e
Any Questions, Comments, Problems, or Parts Orders
Call NorthStar ProSHOT Product Support 1-800-969-7073
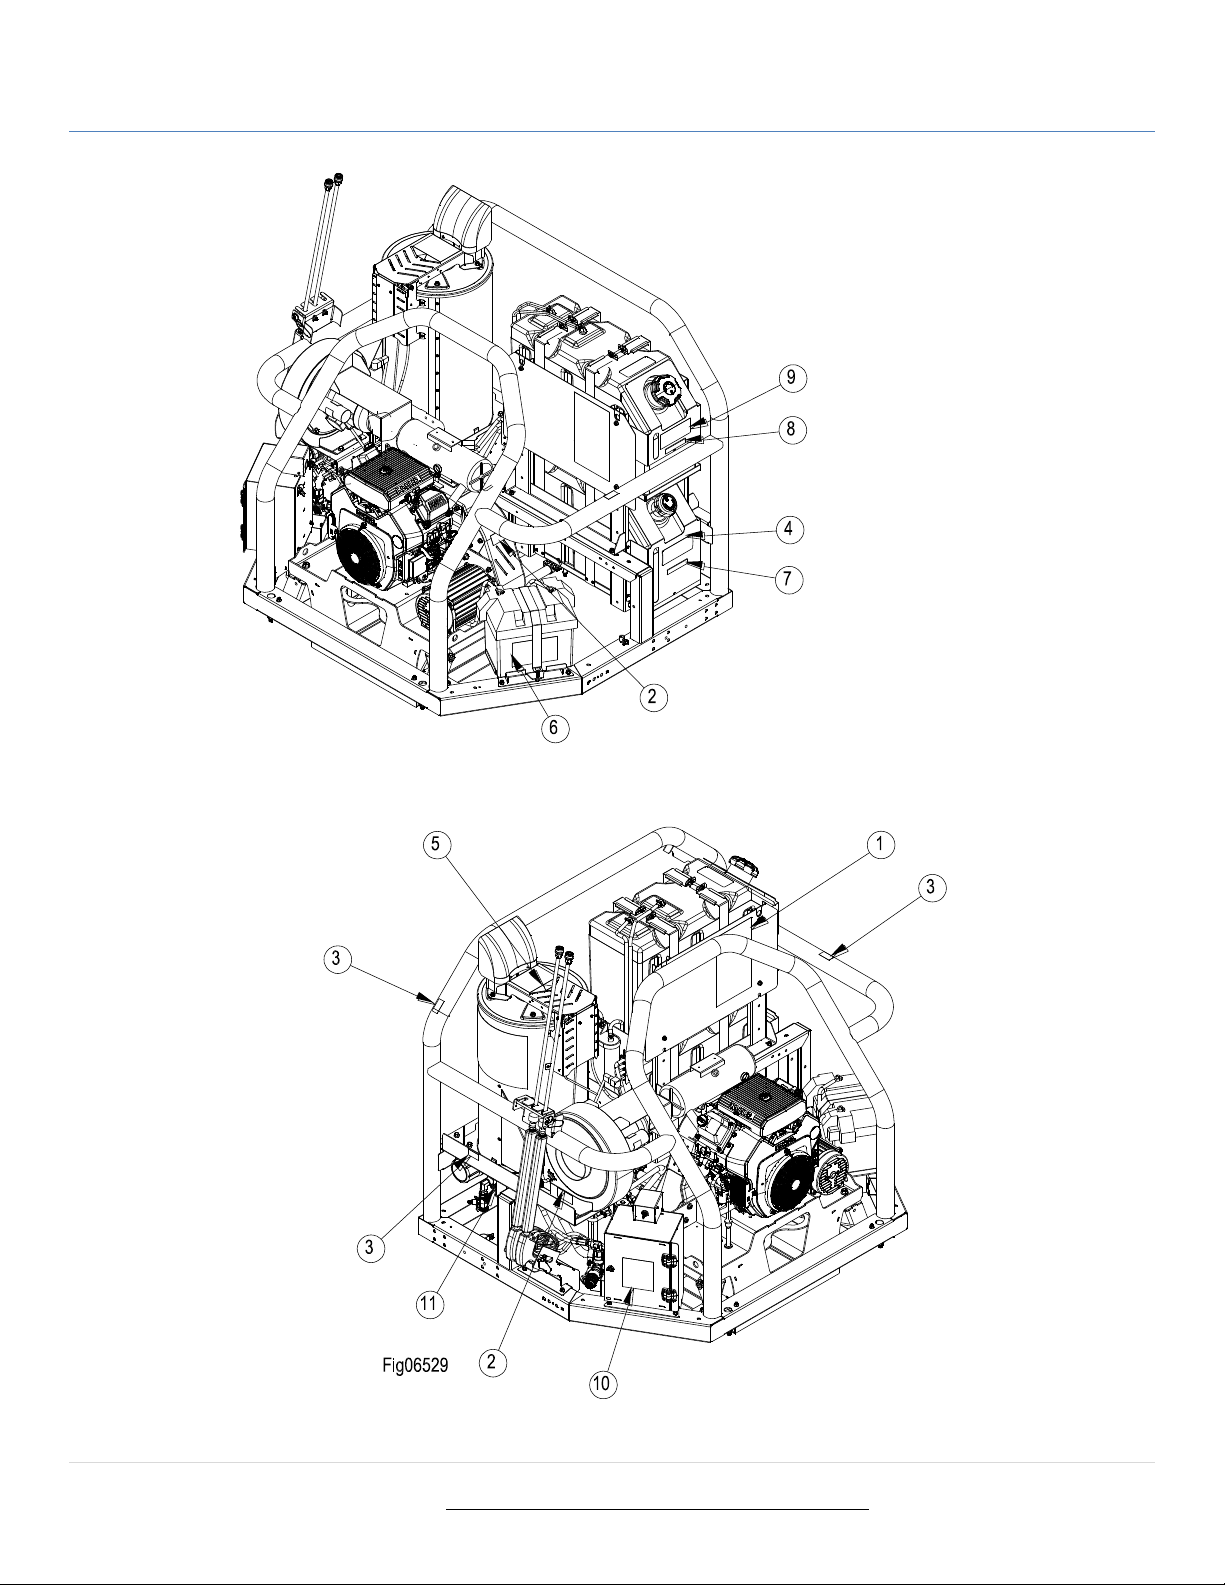
ON-PRODUCT WARNING LABELS
Decal, Danger and Warning
Decal, Rotating Equipment Warning
Decal, ISO Electric Shock Warning Triangle
Decal, Diesel, Kerosene or Fuel Oil Only
Decal, Control Box, Operating Instructions
Hantag, Rupture Disc Warning
Lanyard, Hangtag Warning (not shown)
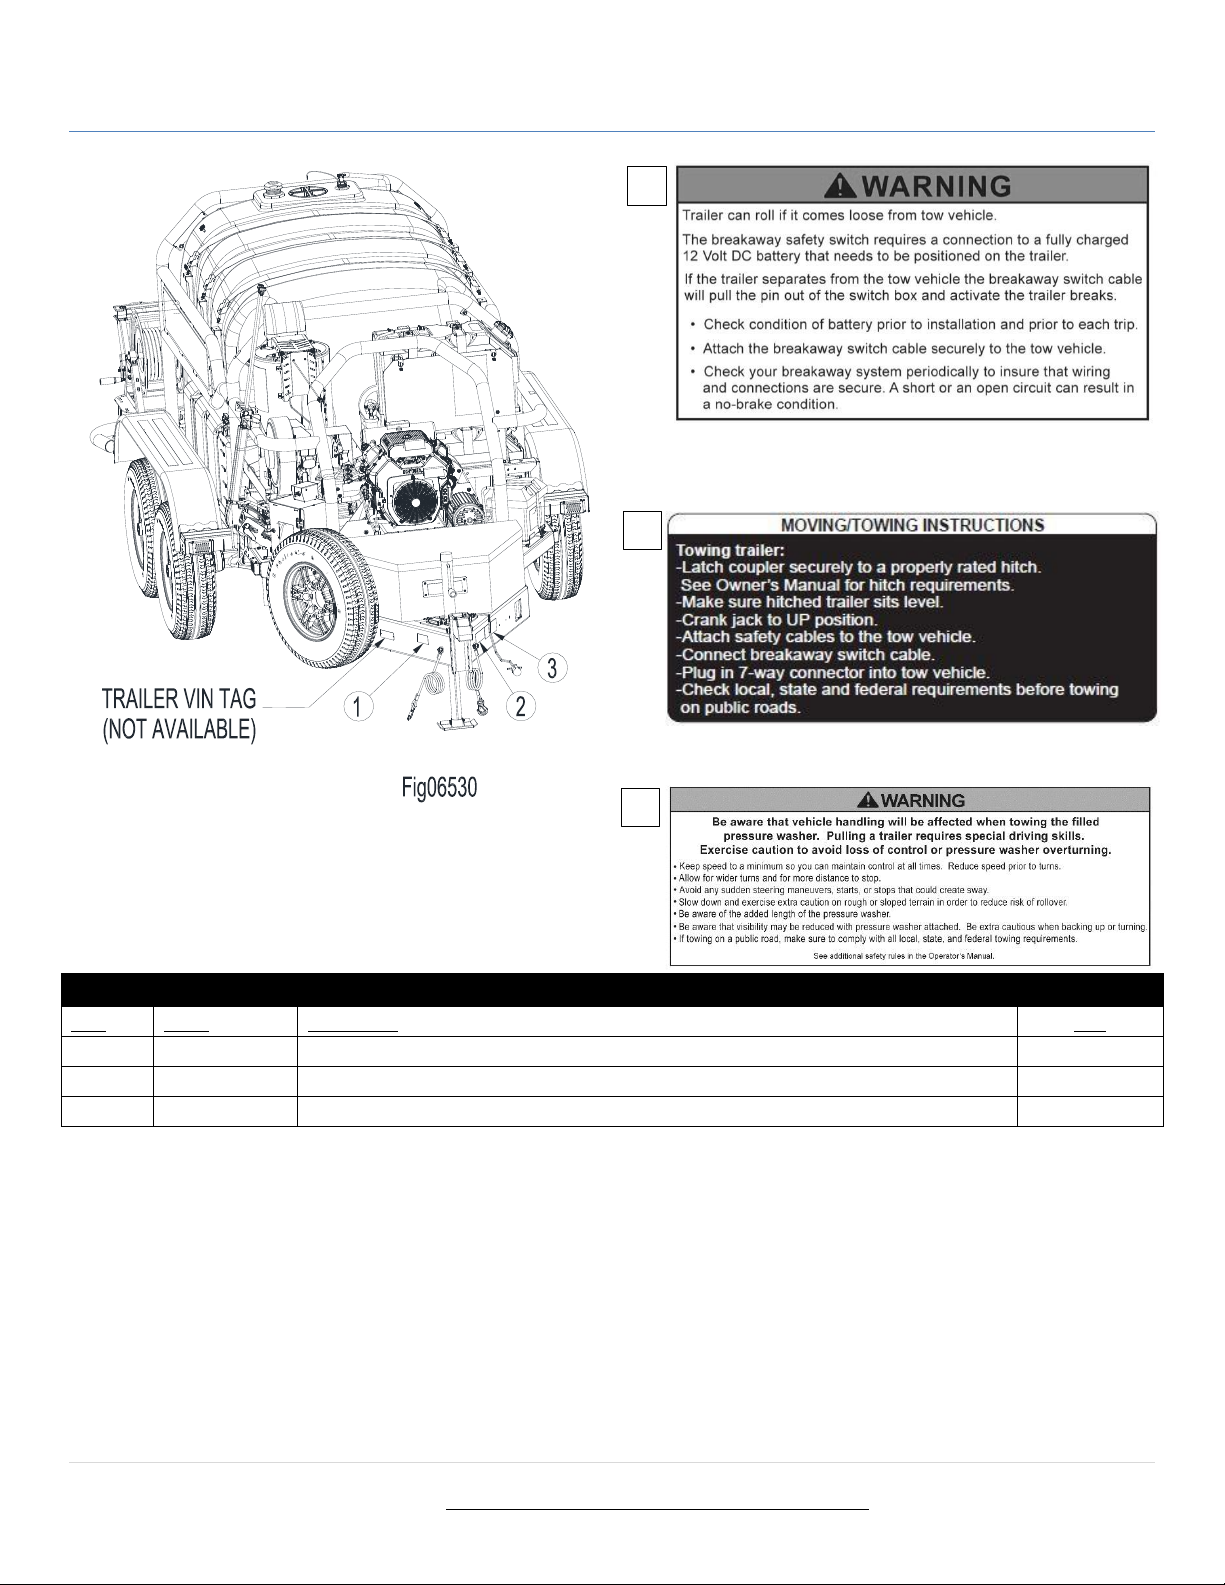
Always make sure safety labels are in place and in good
condition. If a safety label is missing or not legible, order new labels
or unsafe operation could result.
To order replacement safety labels, call NorthStar ProSHOT Product
Support at 1-800-969-7073.
NEVER use inside any building, structure or
garage, EVEN IF doors and windows areopen.
DANGER
WARNING
FOR OUTDOOR USE ONLY! Using this pressure washer indoors CAN KILL YOU IN MINUTES.
Engine exhaust and burner exhaust contain carbon monoxide. This is a poison you cannot
see or smell.
High pressure spray can cause injection injury, eye injury, and
loss of balance. Hot discharge fluid and hot surfaces can burn.
NEVER direct discharge stream at or near any person. Do not
allow any part of the body to come in contact with the fluid stream.
Gun kicks back - hold with two hands. Keep good footing and
balance at all times.
Surfaces of engine, burner, and wand can become very hot. Use
only designated gripping area of wand. Avoid contact with hot
engine and burner.
Spraying flammables can cause explosion. Fuel isflammable
and explosive. Exhaust can ignite combustible materials.
NEVER spray flammable liquids. Operate only where open flame
or torch is permitted.
NEVER fuel a running or hot engine or oil burner.
Ensure there are no fuel leaks before starting. Keep sources of
sparks and flames away.
Use approved container only for transferring fuel. Clean up fuel
spills immediately.
Keep engine and burner exhaust at least 7 feet from all
combustible objects. Situate on heat-resistant flooring when
using burner.
Understand all safety hazards and first aid measures for chemicals
being used.
Follow chemical manufacturer's directions when handling and
cleaning with chemicals. Wear safety gear as directed.
Keep spray away from electrical wiring, or electric shock /
electrocution could occur.
CAUTION: To Reduce Risk of Injury, Read Operating Instructions Carefully Before Using.
782325
Chemical Exposure Hazard
Electric Shock Hazard
Only use OUTSIDE and far away from
windows, doors, and vents.
Fire / Explosion Hazard
High Pressure Fluid Forces / Burn Hazards
ALWAYS use eye protection. Caustic acid and explosive
gases can cause blindness or severe burns.
NO smoking, sparks, or flames.
NEVER touch both battery terminals at the same time with your
hand or any non-insulated tools.
FLUSH immediately with water if battery acid contacts eyes,
skin, or clothing.
CONNECT cables in correct sequence: FIRST RED to POSITIVE
terminal, then BLACK to NEGATIVE terminal. When disconnecting,
DISCONNECT BLACK cable first, then RED.
NEVER charge a visibly damaged or frozen battery. ALWAYS
read and follow charger instructions.
BATTERIES:
1) contain caustic acid, 2) emit explosive gases,
3) can cause electric shock
WARNING - BATTERY HAZARDS
782397
FileName: 797513.ai
Decal Part Number: 797513
Decal Description: Warning Decal,Hot Surface
Material: KB14
Finish: DieCut withTab
Drawn By: Karan Harris
DateDrawn: 05/04/17 --
1”
2”
BURN HAZARD
Do not touch hot surface.
REV. ECN# DESCRIPTION DATE