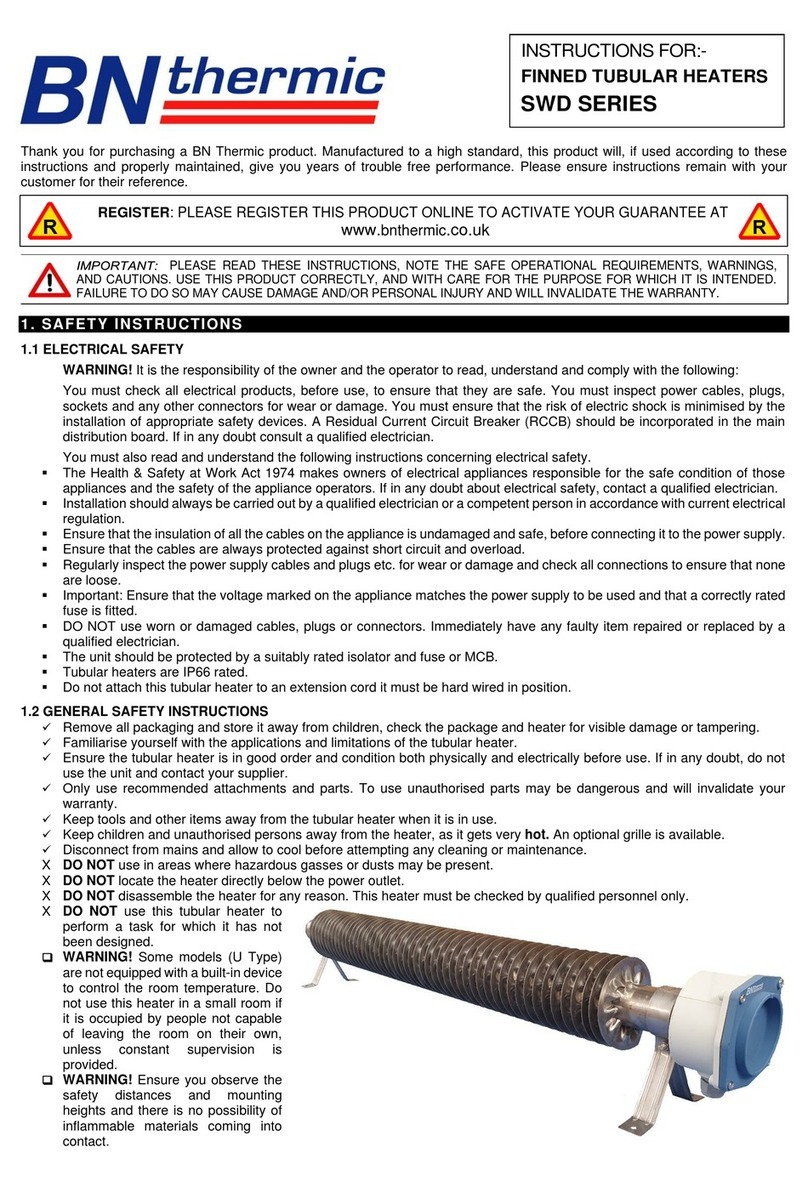
NOVENCO FALKINN VMA 42 Instruction Manual

VMAVMB
INSTALLATION AND
MAINTENANCE
918027-0
English
NoVa air heaters

918027-0
GB
1
MU15263 1115
NoVa
air heaters type VMA and VMB
Installation and maintenance
1. General
1.1 Scope of delivery
1.2 Mounting positions
2. Installation
2.1 Assembly and mounting
2.2 Pipe circuit construction
2.3 Connection of heating medium
2.4 Regulation and frost protection
2.5 Electrical connection
3. Maintenance
3.1 Inspection
3.2 Cleaning
3.3 Impeller
3.4 Motor
3.5 Heating coil
3.6 Damper
3.7 Filter
3.8 Other components
4. Electrical data
4.1 Motors
4.2 Regulators
4.3 Wiring diagrams
5. Sound
6. Troubleshooting
7. Inspection and test
8. Safety
9. Spare parts
10. Patents, trademarks and copy-
right
11. Quality management
12. Warranty
13. Declaration of conformity
Appendices – wiring diagrams
A. Thermostats RDG100T and NV515
B. RDG100T – 5-step regulators
C. RDG100T – stepless regulator 2.5 A
D. RDG100T – stepless regulator 5 A
E. NV515 – 5-step regulators
F. NV515 – stepless regulator 2.5 A
G. NV515 – stepless regulator 5 A
1. General
The air heater consists of a basic unit,
which can be fitted with various
accessories for air distribution on the
outlet side.
Figure 2. and 3.
Accessories for recirculation and
mixing of fresh and return air are
mounted on the inlet side.
The basic unit consists of a cabinet
with heating coil and axial flow fan.
The fan motor is mounted on the
inlet side. Pipe connections for the
heating medium are extended
through the side of the cabinet.
1. Fan suspension and wire mesh
2. Motor and fan
3. Heating coil
4. Cabinet
5. Mounting brackets
Figure 1. Basic unit
1. Basic unit with fan and heating
coil
2. Front grille J1 - with
individually adjustable-louvres.
3. Front grille J2 - with
individually adjustable louvres
in two directions.
4. Mixing housing in three designs
• B3, without damper, only
for connection of return air.
• B13, with inter-connected
dampers on top and bottom
for fresh and return air.
• B23, with inter-connected
dampers on the reverse side
and bottom for fresh and
return air.
5. Return air duct (3rd party
delivery)
6. Filter section F
3
5
1
2
4
Inlet
7. Fresh air duct - for intake of fresh
air through roof.
8. Fresh air hood H
9. Wall grille M - for intake of fresh
air directly into the mixing
housing (3rd party delivery).
10. Air diffuser J4 - for horizontal air
distribution in four directions
with vertical supply
11. Air cone K - for jet-shaped air
distribution in high-ceiling
rooms.
Figure 2. Horizontal position
Figure 3. Vertica l posi tion
2
1
7
8
9
4
5
6
5
Inlet
Outlet
1
3
10
11

2
The fan motor is fitted with 1.5 m
cable.
The VMA is for water from boilers or
heat pumps with temperature drops
of 10 to 20 °C.
The VMB is for water from district-
heating systems with temperature
drops of 40 °C.
Refer also to the technical
calculation.
1.1 Scope of delivery
The basic unit and accessories are
delivered in cartons. Ducting is
outside the scope of delivery.
Included with the basic unit
• 2 mounting brackets for
installations without
accessories on the inlet side
• A drilling template for
mounting brackets
• Self-tapping screws for
mounting of accessories on the
outlet side
A mixing housing includes two
mounting angles. The mounting
angles are screwed onto the open
ends of the housing during
transport.
The fresh air hood H includes four
supporting fixtures with clamping
bolts for hood and duct.
1.2 Mounting positions
The units are for wall mounting
(horizontal inlet) or roof mounting
(vertical inlet) with optional location
of the pipe connections for water on
the vertical sides of the fan.
2. Installation
2.1 Assembly and mounting
Before mounting, screw the air
distribution accessories onto the
outlet of the basic unit using the
supplied screws.
The natural frequency of the surface
the fans are mounted onto must be
20% higher than the fan speed.
No accessories on inlet side
– wall or ceiling mounting
1. Screw the mounting brackets
onto the basic unit.
Eight screws for mounting in the
corners of the unit on the inlet
side are included. The position of
the brackets is identical for
mounting onto walls and
ceilings.
2. Mark holes for mounting on the
wall or ceiling surfaces using the
included template sheet.
Note: Wall-mounted fans must
be at least 2.2 m above the
floor measured from the
underside.
3. Drill holes for M8 size bolts.
4. Lift the unit into position and
support it.
5. Tighten the fastening bolts and
screws carefully.
For non-supporting ceilings M8
threaded rods with discs and
nuts can be used for suspension
in sectional frames attached to
supporting parts.
Mixing housing and accessories on
inlet side - wall mounting
1. Mark holes for mounting on the
wall surfaces using the included
template sheet.
Note: Wall-mounted fans must
be at least 2.2 m above the
floor measured from the
underside.
2. Drill holes for M8 size bolts.
3. Mount one of the two mounting
angles on the wall to support the
second bracket.
Typ es Weights [kg]
VMA/B 42-43 20
VMA/B 52-53 30
VMA/B 62-63 40
VMA/B 72-73 50
VMA/B 82-84 67
Table 1. Maximum weights
Typ es Frequency [Hz] RPMs
VMA/B 42-43 50 / 60 1350 / 1490
VMA/B 52-53 50 / - 1300 / -
VMA/B 62-63
50 / 60
1320 / 1450
VMA/B 72-73 910 / 980
VMA/B 82-84 920 / 1080
Table 2. Fan RPMs
Figure 4. Wall mounting
Mounting
brackets
Figure 5. Ceiling mounting
Figure 6. Mounting brackets for
wall
Mounting
brackets
Mounting angle
Fixture

3
4. Secure the other mounting angle
to the top plate of the mixing
housing with the three screws.
5. Remove the screws at the bottom
of the mixing housing.
6. Mark the three upper mounting
holes on the wall using the
mixing housing.
7. Mount the mixing housing by
means of the four supplied
fixtures.
8. Assemble the basic unit with the
mixing housing using the
supplied screws.
9. Pull the motor cable through one
of the cable inlets on the access
side. See figure 6.
10. Mount the entire unit on the wall
in the upper mounting angle
11. Re-insert the screws in the
bottom plate of the mixing
housing through the lower
mounting angle.
12. Push the connected ducts across
the duct connections of the
mixing housing.
13. Attach the ducts by means of
self-tapping screws.
The return air duct should be
supported against the wall.
14. Mount regulators on the damper
shafts of the mixing housings.
Manually operated hand
regulators are mounted directly
onto the shafts.
Motor-driven regulators for
automatic operation are
mounted onto the shafts
according to the motor
supplier’s instructions.
A slot at the end of the damper
shaft marks the position of the
dampers plate. See figure 6.
15. Mount the filter section in the
return or fresh air duct by means
of U-cleats.
Note: The arrow at the filter
front indicates the air
direction.
Mixing housing and accessories on
inlet side - ceiling mounting
1. Assemble fan, mixing housing
and mounting angles on the
floor.
2. Hoist the entire assembly into
position.
M8 lifting eyes can be placed in
the mounting brackets.
3. Attach the unit to the ceiling.
4. Mount the fresh air hood on top
of the fresh air duct by means of
the supplied supporting fixtures
and stainless screws.
The hood has mounting holes.
Drill holes in the ducts when
mounting.
Figure 7. Wall-mounted unit
Cable
inlets
Hand
regulator
Figure 8. Hoisting air heater
Figure 9. Ceiling mounting
Mounting
brackets
1
Figure 10. Mounting fresh air hood
22
75
12.5

4
2.2 Pipe circuit construction
Review the basic system layout in
figure 11. It shows the principle,
which the implemented system
should follow.
It is recommended to make a plan of
both the pipe and the electrical
circuits.
Construction stages
1. Connect the air heaters and flow
valves to the heating medium as
described in section “2.3
Connection of heating medium”.
2. Connect the regulation and frost
protection. See section “2.4
Regulation and frost protection”.
3. Connect the electrical as
described in section “2.5
Electrical connection”.
4. Test the system.
2.3 Connection of heating medium
The air heaters are designed for hot
water as heating medium.
Heating media sources
• Boilers – type VMA
• Heat pumps – type VMA
• District heating – type VMB
Pipe connections are 5/4” pipe
thread. The water flow direction is
indicated on the pipe connections.
Check the orientation of the flow
valves and set the maximum water
flow rate. The flow rate can be
calculated with the following
formula.
Refer to the documentation included
with the valves for how to set the
flow rate.
2.4 Regulation and frost protection
Regulation of the heating capacity is
done by changing the fan speed. See
section “2.5 Electrical connection”.
In addition, the water flow in the
heating coil should be constant to
allow for regulation of the heat
supply through changing of the
water temperature.
Fans with fresh air supply must be
protected against frost. When using
water as heating medium an
automatic control system with a
frost indicator should be installed.
The preferred method is with a stem
bulb sensor in the return water. At
low temperatures this stops the fan,
closes the damper against the
outside air and ensures full flow in
the automatic regulator valve.
Figure 11. Basic system layout – pipe circuit and electric wiring
Supply230 V power supply, 10 A
Return
1x230 V
Speed control
(optional)
5-step Stepless
Dynamic flow valve
set to max. l/h
* Built-in motor
protection
Thermo-actuator
230 V, 180 s
Regulator
Optional external
temp.sensor
Thermostat
Temperature control
Example
Heat need: 50 kW
Heat loss: 20 °C
No. of heaters: 3
Important: The pipe circuit must
be made according to
current regulations
and by authorised
personnel.
Qwater P
Δloss
10 °C
-------------- 42×
---------------------------3600×=
Qwater
50
3
------
20
10
------42×
------------------ 3600×=
Qwater 714 l/h=
Figure 12. Constant flow in coil
M
Air direction Return
t1 Supply
t2
MV
SV T1
SV T2
M = Motor
MV = Dynamic flow valve
SV =Shut-off valve
t1 = Inlet air temperature
t2 =Outlet air temperature
T1 = Return water temperature
T2 =Supply water temperature

5
2.5 Electrical connection
Connect the motors to the electrical
supply.
The fans can be connected to
different types of speed regulators.
See the wiring diagrams on pages 8
to 11.
After connecting the motor, check
the direction of rotation from the fan
inlet side.
Directions of rotation
• VM-4 and –5: Counter-
clockwise
• VM-6, -7 and –8: Clockwise
Access to the fan motor on units with
mixing housings is done by
removing the side plate opposite the
damper shaft.
The damper motor has a terminal
box for direct cable connection.
3. Maintenance
The air heaters are designed to give
long and reliable operation and to
require little service.
The air heaters must be kept clean at
all times for optimum performance
and best level of comfort. Inspect
and clean the units as needed. Units
installed in dust-filled environments
require more frequent maintenance.
Refer to figure 1. Basic unit in the
following sections.
3.1 Inspection
Air heaters without accessories on
the inlet side can be checked directly.
Inspection of the inlet on units with
mixing housings is done by
removing the vertical side plate of
the mixing housing opposite to the
damper shaft.
3.2 Cleaning
Dust builds up inside the unit
cabinets and reduce the
performance if not removed.
Build-ups on fan suspensions, wire
guards, heating coils and dampers
can usually be removed by vacuum
cleaning. Cleaning the inlet of the
heating coil can be done after
removing the fan unit with
suspension. See section “3.4 Motor”.
On the outlet side it is possible to
remove the front grille.
Wall grilles for fresh air and wire
guards for return air ducts must also
be kept free from dust and foreign
particles.
3.3 Impeller
Prior to delivery, the fan unit has
been carefully balanced. If
vibrations occur during operation, it
is normally due to dust on the fan
blades. If vibrations persist after
cleaning; stop the unit and call for
skilled assistance. Continued
operation may damage the motor
bearings.
3.4 Motor
The motor and impeller is a one
piece assembly. The motor bearings
are greased for life, i.e. approx.
30.000 working hours and cannot be
greased anew. When the service life
of the bearings has run out, they
should be replaced. Replacement of
the bearings should be carried out by
a specialist. During replacement,
remove the entire unit comprising
fan suspension and fan. Afterwards,
remove the suspension from the fan.
When re-mounting, the fan must be
centred carefully with equal blade
clearance around the circumference.
3.5 Heating coil
The heating coil has copper tubes
with aluminium fins and is sensitive
to frost. If there is a risk of hard frost,
it might be necessary – besides the
established frost protection at the
fresh air inlet – to empty the heating
coil of water. In exposed installations
it is recommended to supply the
plant with antifreeze.
3.6 Damper
The damper function should be
checked on occasion.
3.7 Filter
The filter is made of synthetic
material and must be cleaned
occasionally to maintain fan
performance. Cleaning is done
either by vacuum cleaning the dirty
side of the filter mat, rinsing from the
clean side or by washing in
lukewarm soap water at max. 40 °C.
The filter mat can be washed four
times, before it must be replaced.
During cleaning or replacement of
the filter, draw out the filter cassette
and insert a new filter after cleaning
the mat retainers. The filter cassette
is fitted with a handle. The retainers
are of Velcro and reusable.
When ordering a new filter mat,
please state the type and size of fan,
e.g. VMA-62.
The filter condition must be checked
2 weeks after start-up of the fan and
then once every month.
Recommended rise in differential
pressure above the filter mat is
100 Pa.
3.8 Other components
Components for regulation,
ventilation, water outlet and other
accessories essential for the correct
operation of the fan, need regular
inspection and maintenance
according to the manufacturer’s
instructions.
Important: The electrical
connections must be
made according to
current regulations
and by authorised
personnel.
Important: The electric system
must be switched off
and locked to avoid
unintentionally starts
when the air heaters
are undergoing
maintenance.

6
4. Electrical data
4.1 Motors
All motors are 1x230 V.
4.2 Regulators 4.3 Wiring diagrams
The fan motors are connected
through a voltage regulator.
See the appendices for wiring
diagrams of how to connect each of
the thermostats and how to connect
each of the thermostats with the
different regulators.
Several fan motors can be connected
in parallel to the same regulator. See
table 5. “Max. number of motors per
regulator at 50 / 60 Hz”.
5. Sound
6. Troubleshooting
In case of breakdowns, the following
checklists should be completed,
before calling for service.
Lacking performance
•Damperclosed
•Ductsclogged
• Supply fan stopped
•Motordefective
• Motor disconnected
• Wrong direction of rotation
Noise and vibrations
• Motor bearings defective
• Impeller out of balance
• Impeller worn or damaged
• Bolts or components loose
Fans operating in the stalling area,
may result in breakdowns.
7. Inspection and test
It is recommended to test and
inspect the air heaters and
installation at regular intervals with
regard to operability and operating
conditions.
Extent of inspection
• Measure power consumption
• Check torques for fixing bolts
and correct if necessary
• Cleaning
• Visual inspection of cabinet,
pipe and electric connections
Enter all values and observations in
a log.
Sizes Frequency
[Hz] RPMs Power
[W]
Current
[A]
4- 50 / 60 1350 / 1490 110 / 148 0.52 / 0.66
5- 50 / - 1300 / - 190 / - 0.66 / -
6-
50 / 60
1320 / 1450 410 / 570 1.90 / 2.50
7- 910 / 980 390 / 580 1.80 / 2.60
8- 920 / 1080 470 / 730 2.30 / 3.20
Sizes
Starting
current
[A]
Ambient
temp. ranges
[°C]
Weight
[kg]
Encap-
sulation
4- 1.20 / 1.18 -20 to 45 3.5 IP44
5- - - -
6- 4.40 / - -15 to 60 9.2
IP547- - - -
8- 5.50 / - -15 to 45 12.8
Table 3. Motor specifications 1
1.The motors comply with EU’s ErP 2015 directive.
Typ es Regulation
type
Voltage
[V]
Max. current
[A]
Encap-
sulation
RDG100T Thermostat
1x230
4 IP30
NV515 6 IP34
5-step
Speed
1.5
IP54
2.5
5
10
Stepless 2.5
5
Typ es Max. current
[A]
h
[mm]
w
[mm]
d
[mm]
Weight
[kg]
RDG100T 4 128 93 30.8 0.3
NV515 6 - - - -
5-step
1.5 205 115 100 2.1
2.5 255 170 140 5.0
5 255 170 140 5.4
10 325 300 185 13.2
Stepless 2.5 82 82 65 0.24
5 160 83 81 0.59
Table 4. Regulator specifications
Typ es
Ampere
[A]
RDG100T
[max. 4 A]
NV515
[max. 5 A]
5-step
1.5 A
5-step
2.5 A
4- 0.52 / 0.66 7 / 5 9 / 7 2 / 2 4 / 3
5- 0.66 / - 6 / - 7 / - 2 / - 3 / -
6- 1.90 / 2.50 2 / 1 2 / 2 - / - 1 / 1
7- 1.80 / 2.60 2 / 1 2 / 1 - / - 1 / -
8- 2.30 / 3.20 1 / 1 2 / 1 - / - 1 / -
Typ es
Ampere
[A]
5-step
5 A 1
1.The regulator cannot be used with the RDG100T.
5-step
10 A
Stepless
2.5 A
Stepless
5 A
4- 0.52 / 0.66 9 / 7 15 / 13 4 / 3 9 / 7
5- 0.66 / - 7 / - 15 / - 3 / - 7 / -
6- 1.90 / 2.50 2 / 2 4 / 3 1 / 1 2 / 2
7- 1.80 / 2.60 2 / 1 4 / 3 1 / - 2 / 1
8- 2.30 / 3.20 2 / 1 4 / 3 1 / - 2 / 1
Table 5. Max. number of motors per
regulator at 50 / 60 Hz
Sizes RPMs Sound power
Level total [dB]
Sound pressure
level [dB(A)] 1
1.Sound pressure level at a distance of 5 m, room of
1.500 m3, normal reflection, direction factor Q = 2
4- 1350 59 45
5- 1300 – –
6- 1400 74 60
7- 910 71 57
8- 950 76 62
Table 6. Sound data, VMA and
VMB without accessories

Novenco Building & Industry A/S
Industrivej 22 Tel. +45 70 77 88 99
4700 Naestved www.novenco-building.com
Denmark
7
8. Safety
The air heaters must be installed
according to Novenco’s, the current
and the local safety regulations. At a
minimum these include EN 13850.
It is recommended to review and
revise safety procedures regularly.
Safety check
• Test if safety proceduresand the
installation work correctly.
• Check if safety regulations have
been changed and if the
installation needs revising.
• Consider taking additional
measures to improve the safety
of the installation.
9. Spare parts
Contact Novenco for information
about and ordering of spare parts.
10. Patents, trademarks and copy-
right
Novenco®, and are
registered trademarks of Novenco
A/S.
Other trademarks appearing in this
document are the property of their
respective owners.
Copyright (c) 2003 - 2015, Novenco
Building & Industry A/S.
All rights are reserved.
11. Quality management
Novenco is ISO 9001 certified. This
means that all air heaters are
inspected and tested, before leaving
the production.
12. Warranty
Novenco provides according to law
a standard 12 months warranty from
the product is sent from the factory.
The warranty covers materials and
manufacturing defects. Wear parts
are not covered.
Extended warranty can be agreed
upon.
13. Declaration of conformity
The Machinery Directive 2006/42/
EU, part 2, A.
Novenco Building & Industry A/S
Industrivej 22
4700 Naestved
Denmark
hereby declares that the air heaters
type VMA and VMB 42-84 have been
manufactured in accordance to and
comply with the European Council's
directives 2006/42/EU regarding
mutual approximation of the
machinery laws (the Machinery
Directive) of the member states.
EU directives
• Machinery Directive 2006/42/EU
• ECO design 2009/125/EU
• ECO energy labelling 2010/30/EU
• EMC directive 2004/108/EU
• LVD 2006/95/EU
Applied standards and regulations
EU 327/2011:
Fans driven by motors with electric
power between 125 W and 500 kW
EN ISO 12100:2011
Safety of machinery
- General principles for design
- Risk assessment and risk reduction
EN ISO 13857:
Safety of machinery - Safety distances
EN 60204-1:
Safety of machinery - Electrical equip-
ment of machines Part 1: General Re-
quirements
EN 61000-6-2:
EMC - Part 6-2: Generic standards -
Immunity for industrial environ-
ments
EN 61000-6-3:
EMC - Part 6-3: Generic standards -
Emission standard for residential,
commercial and light-industrial envi-
ronments
EN 61800-3, class C2:
Adjustable speed electrical power
drive systems, EMC requirements
and specific test methods
It is conditioned for the validity of
the warranty that Novenco’s
instructions for installation and
maintenance have been followed.
Naestved, 01.11.2015
Peter Holt
Technical director
Novenco Building & Industry A/S

8
Appendices – wiring diagrams
A. Thermostats RDG100T and NV515
B. RDG100T – 5-step regulators
Figure 13. Wiring diagrams for RDG100T and NV515 thermostats
Figure 14. Wiring diagram for RDG100T and 5-step regulators 1.5 A, 2.5 A, 5 A and 10 A
Phase
supply
NQ1
PE
Y2Y1
M
LMX1
L1
N
PE
Max. 10 A fuse L1
N
PE
Max. 10 A fuse
GND
supply
RDG100T
Temperature regulator
Phase
supply
GND
supply
Protective
earth
1 L4 NC
6 NO
5 C 2 N
3 PE
NV515
Thermostat
Flow valve
Fan
PE
M
Flow valveFan
Phase
supply
NQ1
* 3-phased
motors only
NLPE U N TK Tk
PE
Y2Y1
M
LMX1
L1
N
PE
Max. 10 A fuse
GND
supply
Motor
protection
Regulator
motorIn 230 VAC
RDG100T
Temperature regulator
926595-0
5-step speed control
1.5 A - 2.5 A - 5 A - 10 A
92660x-0
Thermal actuator
Flow valve
926522-0 Air heater
1x230 VAC

9
C. RDG100T – stepless regulator 2.5 A
D. RDG100T – stepless regulator 5 A
Figure 15. Wiring diagram for RDG100T and stepless regulator 2.5 A
Figure 16. Wiring diagram for RDG100T and stepless regulator 5 A
Phase
supply
NQ1 Y2Y1
M
LMX1
L1
N
PE
Max. 10 A fuse
GND
supply
RDG100T
Temperature regulator
926595-0
Termisk aktuator
Flowventil
926522-0
21NN
PE
Regulation
motorIn 230 VAC
Stepless speed control
2.5 A
Air heater
1x230 VAC
Phase
supply
NQ1 Y2Y1
M
LMX1
L1
N
PE
Max. 10 A fuse
GND
supply
RDG100T
Temperature regulator
926595-0
Thermal actuator
Flow valve
926522-0
NL L1 N PE PE
PE
Regulation
motorIn 230 VAC
Stepless speed control
5 A
Air heater
1x230 VAC

10
E. NV515 – 5-step regulators
F. NV515 – stepless regulator 2.5 A
Figure 17. Wiring diagram for NV515 and 5-step regulators 1.5 A, 2.5 A, 5 A and 10 A
Figure 18. Wiring diagram for NV515 and stepless regulator 2.5 A
L1
N
PE
Max. 10 A fuse
Phase
supply
GND
supply
Protective
earth
1 L4 NC
6 NO
5 C 2 N
3 PE
NV515
Thermostat
918097-0
PE
M
Thermal actuator
Flow valve
926522-0 Air heater
1x230 VAC
* 3-phased
motors only
NLPE U N TK Tk
Motor
protection
Regulation
motorIn 230 VAC
5-step speed control
1.5 A - 2.5 A - 5 A - 10 A
92660x-0
L1
N
PE
Max. 10 A fuse
Phase
supply
GND
supply
Protective
earth
1 L4 NC
6 NO
5 C 2 N
3 PE
NV515
Thermostat
918097-0
M
Thermal actuator
Flow valve
926522-0
21NN
PE
Regulation
motorIn 230 VAC
Stepless speed control
2.5 A
Air heater
1x230 VAC

11
G. NV515 – stepless regulator 5 A
Figure 19. Wiring diagram for NV515 and stepless regulator 5 A
L1
N
PE
Max. 10 A fuse
Phase
supply
GND
supply
Protective
earth
1 L4 NC
6 NO
5 C 2 N
3 PE
NV515
Thermostat
918097-0
M
Thermal actuator
Flow valve
926522-0
NL L1 N PE PE
PE
Regulation
motorIn 230 VAC
Stepless speed control
5 A
Air heater
1x230 VAC

WWW.NOVENCO-BUILDING.COM
NoVa air heaters
This manual suits for next models
19
Table of contents
