Novy 2140 User manual
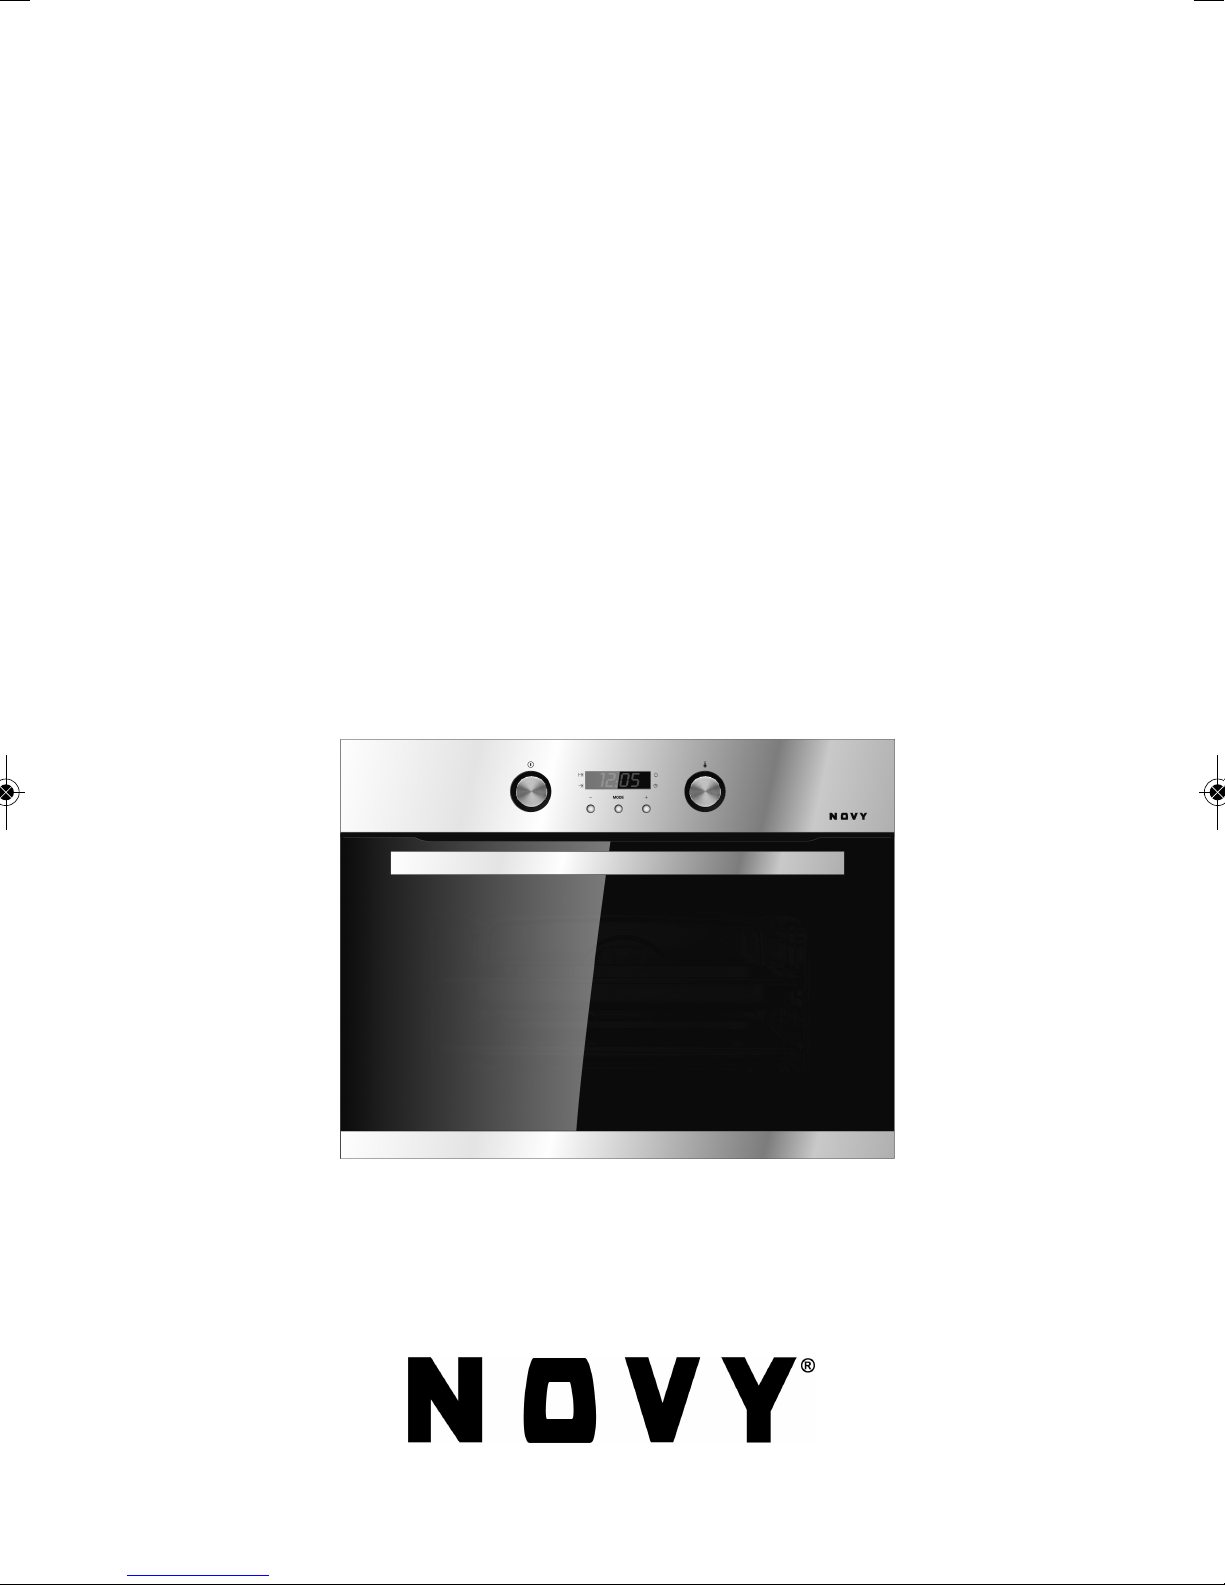
2140
Mode d'emploi
Gebruiksaanwijzing
Gebrauchsanweisung
Instructions for use
Hoja de Características
Istruzioni d'uso
v 1.1
3172723-001 03/02/15 08:34 Página 1

3172723-001 26/01/15 09:53 Página 2

3
FRANÇAIS
Panneau Frontal de Commande
21 3 4
1Sélecteur de fonctions.
2Programmateur.
3Sélecteur de températures.
4Voyant lumineux de chauffage*.
Fonctions du Four
Arrêt du four
Traditionnel pulsé
Recommandé pour les rôtis et la pâtisserie. Le
ventilateur répartit la chaleur de façon
uniforme à l'intérieur du four.
Traditionnel
Utiliser pour les gâteaux et les tartes qui
doivent recevoir une chaleur uniforme et pour
obtenir une texture moelleuse.
Maxi gril avec turbine
Permet en même temps de rôtir de façon
uniforme et de dorer superficiellement. Idéal
pour les grillades. Spécial pour les pièces
volumineuses telles que les volailles, le gibier. Il
est recommandé de placer la pièce de viande
sur la grille du four et la lèchefrite en-dessous
pour recueillir les jus de cuisson ou la graisse.
Maxi gril
Permet de gratiner des surfaces plus grandes
qu'avec le Grill avec une puissance pour
gratiner supérieure, qui permet ainsi de dorer
l'aliment de façon plus rapide.
ril
Pour gratiner et rôtir superficiellement. Permet
de dorer la couche extérieure sans affecter
l'intérieur de l'aliment. Indiqué pour les pièces
plates telles que les beefsteaks, les côtelettes,
les poissons, les toasts.
Attention
Quand on utilise la fonction Grill, MaxiGrill ou
MaxiGrill avec Turbine, la porte doit rester fermée.
Gril et résistance inférieure
Spécial pour les rôtis. Peut être utilisé pour
toutes sortes de pièces, indépendamment de
leur volume.
Sole
La chaleur provient seulement de la partie
inférieure. Approprié pour réchauffer des plats
ou faire lever des pâtes pour pâtisseries et
analogues.
Décongeler
Cette fonction permet de décongeler
doucement des mets. Spécialement mets qui
ne doivent pas être chauffés, comme p.ex.
crème chantilly, crème vanille, pâtes, gâteaux,
fruits,...
Attention
La lampe de votre four reste allumée pendant
toutes les fonctions de cuisson.
* Il indique que la chaleur est transmise à l'aliment et s'éteint quand la température choisie est atteinte.
3172723-001 26/01/15 09:53 Página 3
G
4
Maniement du Four
Programmation de la Durée de Cuisson
1Appuyer sur le bouton MODE jusqu'à ce que
l'indicateur qui se trouve a coté du symbo-
le commence à clignoter.
2Sélectionner la durée en appuyant sur les
boutons + ou –
3Par la suite, l'indicateur qui clignotait s'allu-
mera et indiquera ainsi que votre four va
s'éteindre de façon automatique.
4La pendule indiquera alors l'heure actuelle.
5Sélectionner une température et une fonc-
tion de cuisson.
6Une fois terminée la durée de la cuisson, le
four se déconnectera, un signal acoustique
se fera entendre et l'indicateur commence-
ra à clignoter.
7Appuyer sur n'importe quel bouton pour
arrêter le signal acoustique et le four s'al-
lumera de nouveau.
8Mettre les commandes sur la position
pour éteindre le four.
Programmation de l'Heure de Fin de Cuisson
1Appuyer sur le bouton MODE jusqu'à ce que
l'indicateur qui se trouve a coté du symbo-
le commence à clignoter.
2Sélectionner l'heure de la fin de la cuisson
en appuyant sur les boutons + et –.
3Par la suite, l'indicateur qui clignotait s'al-
lumera et indiquera ainsi que votre four va
s'éteindre de façon automatique.
4La pendule indiquera alors l'heure actuelle.
5Sélectionner une température et une fonc-
tion de cuisson.
6Quand l'heure de la fin de la cuisson est
atteinte, le four se déconnectera, un signal
acoustique se fera entendre et l'indicateur
commencera à clignoter.
7Appuyer sur n'importe quel bouton pour
arrêter le signal acoustique, et votre four
s'allumera de nouveau.
8Mettre les commandes sur la position
pour éteindre le four.
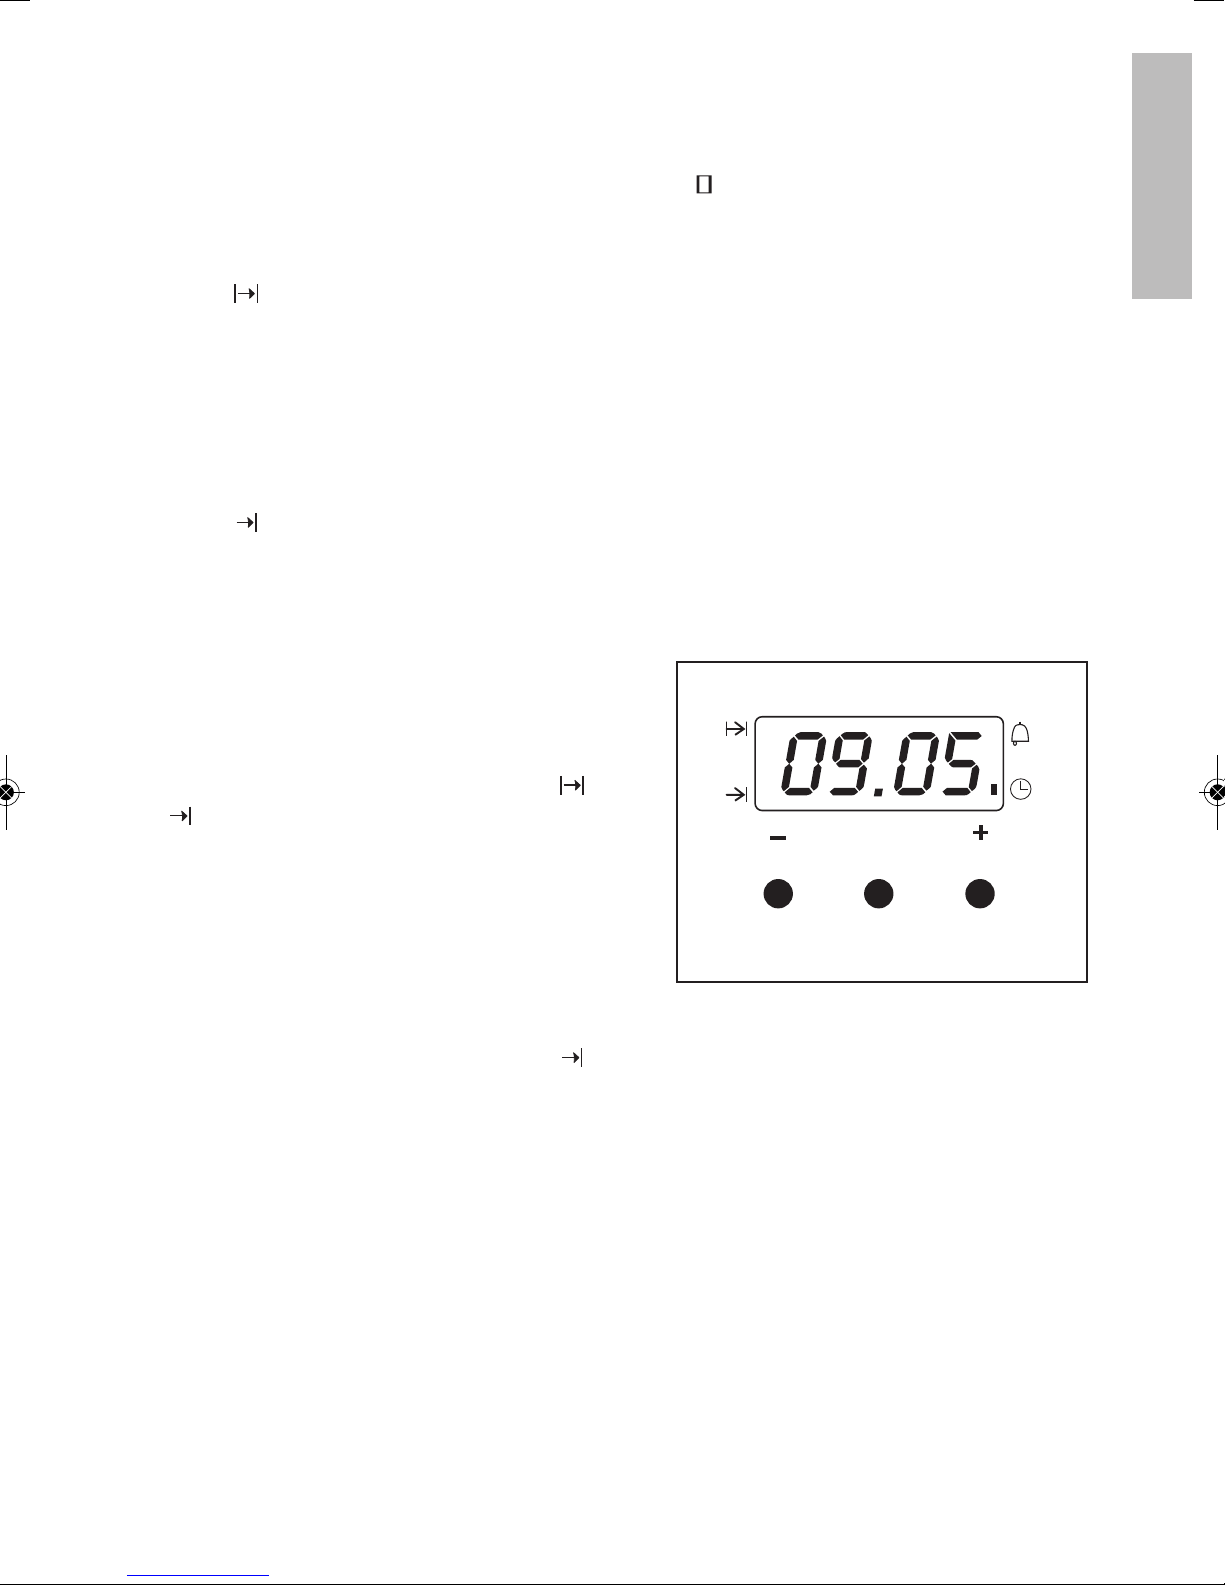
Mise à l'heure de l'horloge
Au moment de connecter votre four, vous obser-
verez que sur l'horloge apparait l'indication
12.00 et qu'un signal lumineux a coté du sym-
bole commence à clignoter. En appuyant sur
les boutons + et – on pourra mettre l'horloge à
l'heure; ensuite celle-ci sera enregistrée et le
signal lumineux s'éteindra.
Fonctionnement manuel
Une fois l'horloge est mis à l'heure, votre four
est prêt à cuisiner. Sélectionnez une tempéra-
ture et une fonction de cuisson.
Pour éteindre le four, mettre les commandes
sur la position .
Fonctions de l horloge électronique
Minuterie: Cette fonction permet de générer
un signal sonore à la fin du temps de cuisson,
indépendamment de l'état du four.
Durée de cuisson: Permet de cuisiner pendant
un temps préalablement déterminé, après
lequel le four s'éteindra.
Fin de cuisson: Permet de sélectionner l'heu-
re exacte de fin de cuisson, à laquelle le four
s'éteindra.
Durée et fin de cuisson: Cette fonction permet
de programmer la durée et la fin de la cuisson.
Le four se mettra en marche et s'éteindra de
façon automatique dans cette fonction.
Programmation de la fonction minuterie
1Appuyer sur le bouton MODE jusqu'à ce que
l'indicateur qui se trouve a coté du symbo-
le commence à clignoter.
2Sélectionner le temps à la fin duquel on
désire être averti par la pendule en
appuyant sur les boutons + ou –.
3Après cela l'indicateur restera allumé, indi-
quant ainsi que l'avertisseur est program-
mé.
4Une fois passé le temps programmé, un
signal acoustique sonnera et l'indicateur
commencera à clignoter.
5Appuyer sur n'importe quel bouton et l'heure
actuelle apparaîtra de nouveau sur l'écran.
3172723-001 26/01/15 09:53 Página 4
5
FRANÇAIS
Vous pouvez utiliser cette fonction même si
vous êtes déjà en train de cuisiner avec votre
four. Pour cela, suivez les instructions indi-
quées sauf la numéro 5.
Programmation de la Durée et Fin de Cuisson
1Appuyer sur le bouton MODE jusqu'à ce
que l'indicateur qui se trouve a coté du
symbole commence à clignoter
2Sélectionner la durée de la cuisson en
appuyant sur les boutons + et –
3Par la suite, l'indicateur qui clignotait s'al-
lumera de façon permanente.
4Appuyer sur le bouton MODE jusqu'à ce
que l'indicateur qui se trouve a coté du
symbole commence à clignoter.
5Sélectionner l'heure de la fin de la cuisson
en appuyant sur les boutons + et –.
6Par la suite, l'indicateur qui clignotait s'al-
lumera de façon permanente.
7Sélectionner une fonction et une tempéra-
ture de cuisson.
8Le four sera déconnecté et les indicateurs
qui se trouvent a coté des symboles
et resteront allumés. Votre four est
programmé.
9Au moment de l'heure du commencement
de la cuisson, le four se mettra en marche
et la cuisson se fera pendant le temps
sélectionné.
10
Quand l'heure programmée sera terminée,
le four se déconnectera, un signal acous-
tique sonnera et l'indicateur lumineux
qui se trouve a coté du symbole commen-
cera à clignoter.
11
Appuyer sur n'importe quel bouton pour
arrêter le signal acoustique et votre four
s'allumera de nouveau.
12
Mettez les commandes sur la position
pour éteindre le four.
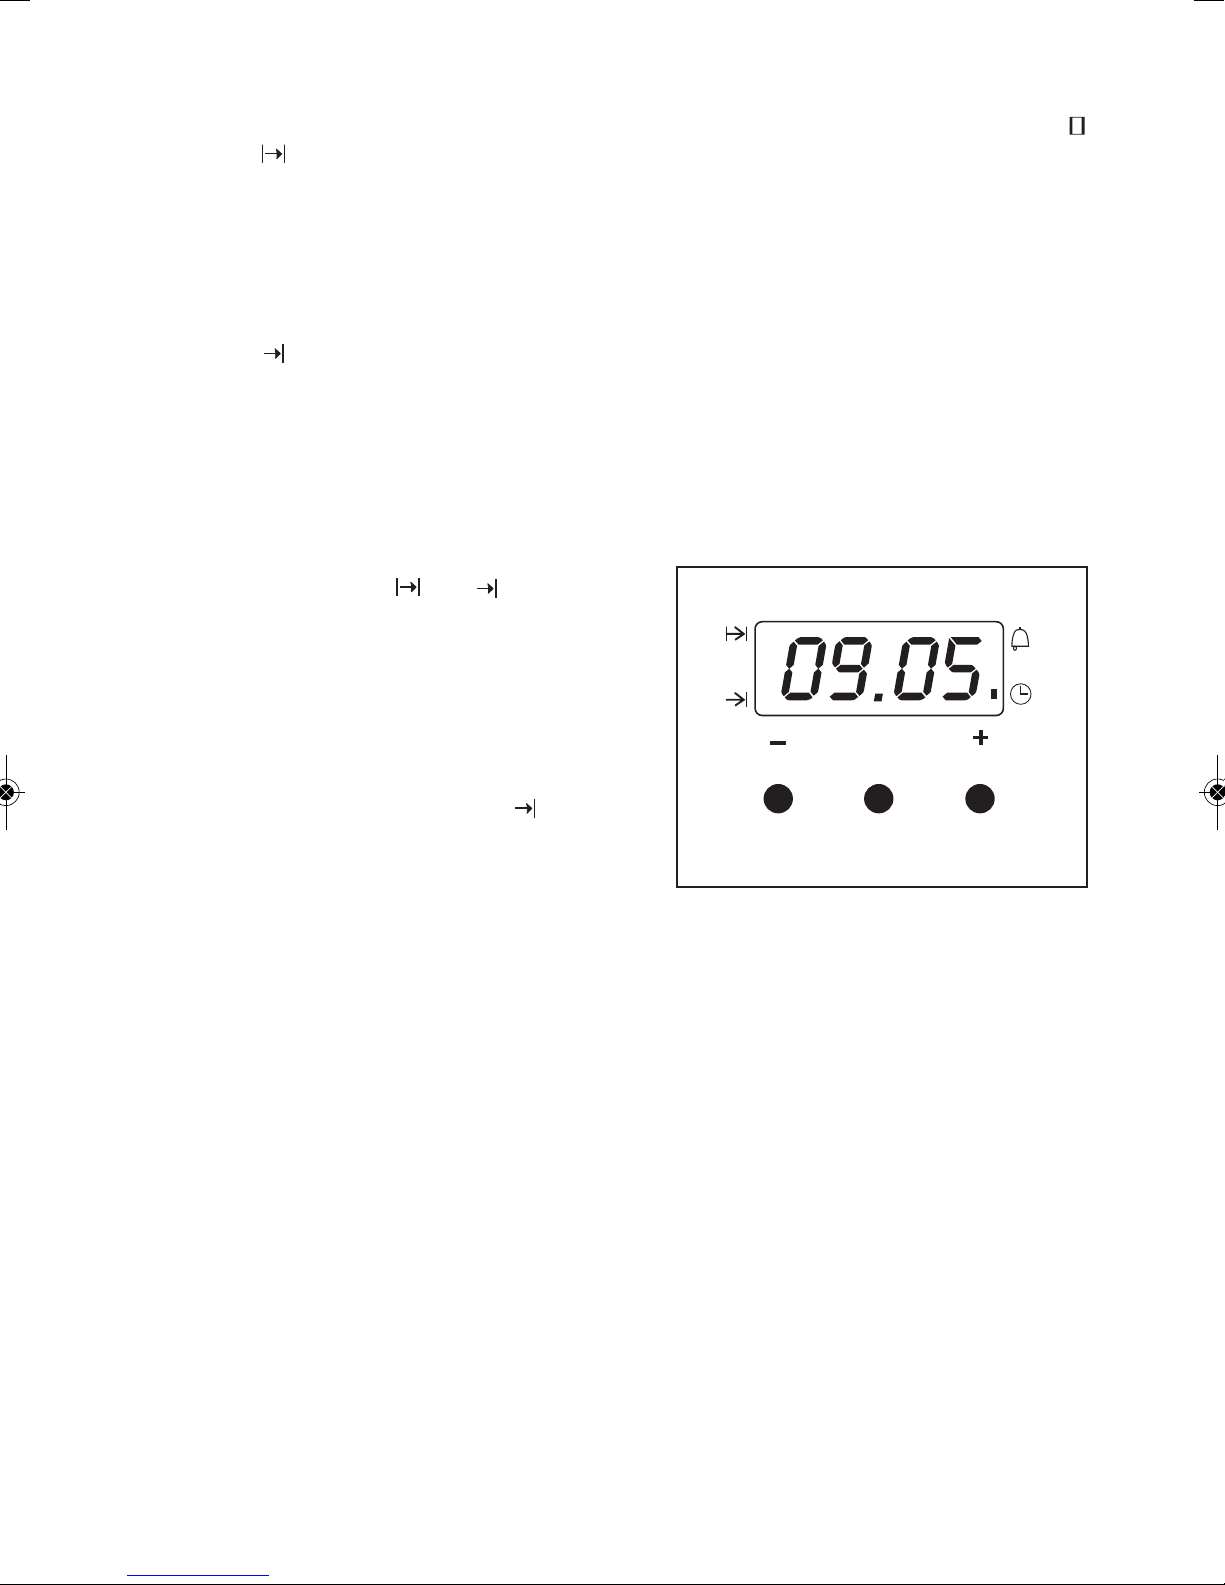
Attention
En appuyant sur le bouton MODE vous pour-
rez voir sur la pendule toutes les fonctions
programmées et les modifier , si nécessaire,
en appuyant sur les boutons + et –. Au
moment de sélectionner la fonction désirée,
l'indicateur qui se trouve au-dessus du sym-
bole correspondant s'allumera.
Au cas où il y aurait une coupure de courant,
toute la programmation de votre pendule
électronique sera effacée. Il faudra la
remettre à l'heure et la programmer de nou-
veau.
MODE
3172723-001 26/01/15 09:53 Página 5

6
Bedieningspaneel
21 3 4
1Draaiknop ovenfuncties
2Elektronische klok
3Draaiknop temperatuur
4Verwarmingslampje*
Ovenfuncties
Oven uitzetten
Traditioneel met ventilator
Geschikt voor braadgerechten en gebak. De
ventilator verdeelt de warmte gelijkmatig in de
oven waardoor de baktijd en -temperatuur
worden verlaagd.
Traditioneel
Wordt gebruikt voor cakes en taarten waarbij
de warmte gelijkmatig verdeeld moet worden
om een luchtige textuur te verkrijgen.
Maxigrill met ventilator
Om gelijkmatig te braden en tegelijkertijd de
buitenkant lichtbruin te bakken. Ideaal voor
geroosterde gerechten. Geschikt voor grote
stukken vlees zoals gevogelte, wild, enz.
Aanbevolen wordt om het stuk vlees op het
rooster van de oven te leggen en de bakplaat
eronder te plaatsen om vleessap of vet op te
vangen.
MaxiGrill
Hiermee kunnen grotere oppervlakken bereid
worden dan met de grill en, dankzij het hogere
vermogen, worden de etenswaren sneller
goudbruin gebakken.
Grill
Om oppervlakkig gebraden gerechten te
bereiden. Hiermee kan de buitenlaag
goudbruin worden gebakken zonder de
binnenkant van het voedsel mee te bakken.
Ideaal voor platte gerechten zoals biefstuk,
koteletten, vis en toast.
Opmerking
Als u de Grill, MaxiGrill of MaxiGrill met turbine
gebruikt, moet de ovendeur gesloten blijven.
Grill en onderwarmte
Speciaal voor gebraad. Het kan gebruikt
worden voor elk stuk vlees of vis, ongeacht de
grootte.
Onderwarmte
Verwarmt alleen aan de onderkant. Geschikt
om gerechten op te warmen of gebak en
dergelijke te laten rijzen.
Ontdooien
Deze functie is geschikt voor het langzaam
ontdooien van voedsel. Voor voedsel dat niet
wordt opgewarmd om genuttigd te worden,
zoals o.a. room, gebak, taarten, cakes en fruit.
Opmerking
Het ovenlicht blijft bij elke bakfunctie branden.
* Het verwamingslampje gaat aan wanneer de oven opwarmt, en gaat uit wanneer de oven de ingestelde temperatuur heeft
bereikt.
3172723-001 26/01/15 09:53 Página 6

7
NEDERLANDS
Gebruik van de oven
De baktijd programmeren
1Druk op de MODE knop totdat het lampje
naast het symbool begint te knipperen.
2Selecteer de baktijd (duur van het bakproces)
door op de + of – knoppen te drukken.
3Het lampje dat knipperde licht vervolgens op
en geeft daarmee aan dat de oven
automatisch zal worden uitgeschakeld.
4De klok laat dan de huidige tijd zien.
5Selecteer een temperatuur en een
bakfunctie.
6Als de ingestelde tijd is afgelopen, wordt de
oven uitgeschakeld, gaat er een alarm af en
begint het lampje te knipperen.
7Druk op een willekeurige knop om het alarm
uit te schakelen en de oven weer in te
schakelen.
8Zet de ovenfuncties draaiknop in stand
om de oven uit te schakelen.
De eindtijd van het bakproces programmeren
1Druk op de MODE knop totdat het lampje
naast het symbool begint te knipperen.
2Kies de tijd waarna u wilt dat het bakproces
wordt beëindigd door op de + of – knoppen te
drukken.
3Het lampje dat knipperde licht vervolgens op
en geeft daarmee aan dat de oven
automatisch zal worden uitgeschakeld.
4De klok laat dan de huidige tijd zien.
5Selecteer een temperatuur en een
bakfunctie.
6Als de ingestelde tijd is afgelopen, wordt de
oven uitgeschakeld, gaat er een alarm af en
begint het lampje te knipperen.
7Druk op een willekeurige knop om het alarm
uit te schakelen en de oven wordt weer
ingeschakeld.
8Zet de ovenfuncties draaiknop in stand
om de oven uit te schakelen.
Deze functie kan zelfs worden gebruikt als uw
oven reeds in werking is. Volg hiervoor de
gegeven instructies, behalve nr. 5, op.
De tijd van de klok instellen
Wanneer u de oven aanzet, ziet u dat op de klok
de cijfers 12:00 verschijnen en dat een lampje
naast het symbool begint te knipperen.
Door op + en – te drukken, kan de klok worden
ingesteld. De tijd wordt opgeslagen en het
knipperende lampje gaat uit.
Handmatige bediening
Na het instellen van de klok is de oven klaar
voor gebruik. Selecteer de temperatuur en een
bakfunctie.
Zet de ovenfuncties draaiknop in stand om
de oven uit te schakelen.
Functies van de elektronische klok
Kookwekkerfunctie: Deze functie kunt u
gebruiken om een bepaald tijdstip in te stellen
waarop de oven een alarm moet laten
weerklinken.
Baktijd: Met deze functie kan de duur van het
bakproces worden ingesteld. Na deze tijd gaat
de oven vanzelf uit.
Eindtijd van het bakproces: Met deze functie
kan het exacte tijdstip waarna de oven
automatisch wordt uitgeschakeld worden
geprogrammeerd.
Baktijd en eindtijd van het bakproces: Deze
functie wordt gebruikt om de duur en het tijdstip
waarop de oven vanzelf uitgaat te controleren.
Met deze functie kan de oven automatisch in en
buiten werking worden gesteld.
Kookwekkerfunctie
1Druk op de MODE knop totdat het lampje
naast het symbool begint te knipperen.
2Kies de tijd waarna u wilt dat het alarm afgaat
door op de + of – knoppen te drukken.
3Het lampje blijft vervolgens branden, wat
aangeeft dat het alarm is geprogrammeerd.
4Na afloop van de geprogrammeerde tijd gaat
het alarm af en begint het lampje te knipperen.
5Druk op een willekeurige knop om het alarm
uit te schakelen en het scherm toont weer de
huidige tijd.
3172723-001 26/01/15 09:53 Página 7

8
Baktijd en eindtijd van het bakproces
programmeren
1Druk op de MODE knop totdat het lampje
naast het symbool begint te knipperen.
2Selecteer de baktijd (duur van het
bakproces) door op de + of - knoppen te
drukken.
3Het lampje dat knipperde blijft vervolgens
ononderbroken branden.
4Druk op de MODE knop totdat het lampje
naast het symbool begint te knipperen.
5Kies de tijd waarna u wilt dat het bakproces
wordt beëindigd door op de + of - knoppen
te drukken.
6Het lampje dat knipperde blijft vervolgens
ononderbroken branden.
7Selecteer een bakfunctie en -temperatuur.
8De oven blijft uitgeschakeld en de lampjes
naast de en symbolen lichten op.
De oven is nu geprogrammeerd.
9Wanneer het tijd is om met bakken te
beginnen, gaat de oven automatisch aan en
zal hij gedurende de ingestelde tijd in
werking blijven.
10 Als de ingestelde tijd is afgelopen, wordt de
oven uitgeschakeld, gaat er een alarm af en
begint het lampje naast het symbool te
knipperen.
11 Druk op een willekeurige knop om het alarm
uit te schakelen en de oven wordt weer
ingeschakeld.
12 Zet de ovenfuncties draaiknop in stand
om de oven uit te schakelen.
Opmerking
Door de MODE knop in te drukken, verschijnt
op het scherm een willekeurig
geprogrammeerde functie. Deze kan gewijzigd
worden door op de + of – knoppen te drukken.
Nadat de gewenste functie is gekozen, licht
het lampje naast het overeenkomstige
symbool op.
Bij een stroomonderbreking worden alle
geprogrammeerde gegevens van de
elektronische klok gewist. De juiste tijd moet
opnieuw worden ingesteld en de klok moet
worden gelijkgezet.
MODE
3172723-001 26/01/15 09:53 Página 8

9
DEUTSCH
Bedienfeld
21 3 4
1Funktionswahl.
2Elektronische Schaltuhr.
3Temperaturregler.
4Heizkontrollleuchte*.
Funktionen des Herds
Ausschalten des Herds
Normal mit Umluft
Geeignet für Braten und für Gebäck. Der Lüfter
verteilt die Wärme gleichmäßig im Herd.
Normal
Verwendung für Kuchen und Tortenböden, bei
denen die Wärmeeinwirkung gleichmäßig sein
muß, damit diese gut aufgehen.
MaxiGrill mit Umluft
Gestattet gleichzeitig ein gleichmäßiges Garen
und Anbräunen der Oberfläche. Ideal zum
Grillen. Besonders für große Stücke wie
Geflügel, Wild usw. Es wird empfohlen, das
Stück auf den Rost zu legen und die
Auffangschale darunter einzusetzen, um
Bratensaft und Fett aufzufangen.
MaxiGrill
Grillen auf größerer Oberfläche und mit größe-
rer Leistung als mit dem Grill, hierdurch erfolgt
ein schnelleres Bräunen der Speisen.
Grill
Gratinieren und Anbräunen. Gestattet das
Anbräunen der Außenschicht, ohne das Innere
der Nahrungsmittel zu beeinflussen. Geeignet
für flache Stücke wie Beefsteak, Rippchen,
Fisch, Toastbrot.
Achtung
Bei Benutzung der Funktionen Grill, MaxiGrill
oder MaxiGrill mit Umluft muß die Herdtür
geschlossen sein.
Grill und Unterhitze
Besonders geeignet für Braten. Kann für Stücke
mit beliebiger Größe eingesetzt werden.
Unterhitze
Es wird nur von der Unterseite Wärme zuge-
führt. Geeignet zum Anwärmen von Tellern,
zum Aufgehen von Teigmassen oder für ähnli-
che Anwendungen.
Auftauen
Ideal für schonendes Auftauen von feinen
Speisen, die kalt verwendet werden, wie z. B.
Sahne, Vanillesoße, Teig, Kuchen, Obst...
Achtung
Die Beleuchtung ist bei allen Kochfunktionen
eingeschaltet.
*Das Lämpchen leuchtet während des Aufheizens. Es erlischt beim Erreichen der eingestellten Temperatur.
Inbetriebnahme
3172723-001 26/01/15 09:53 Página 9

10
Bedienung des Herds
Programmierung der Kochzeit
1Betätigen Sie die Taste MODE, bis die kon-
trollleuchte neben dem Symbol blinkt.
2Stellen Sie mit den Tasten + oder – die
gewünschte Dauer ein.
3Anschließend schaltet die blinkende kon-
trollleuchte auf Dauerlicht um und zeigt
damit an, daß sich der Herd nach Ablauf der
eingestellten Zeit automatisch abschaltet.
4Anschließend wird wieder die aktuelle
Uhrzeit angezeigt.
5Wählen Sie eine Kochfunktion aus und stel-
len Sie die gewünschte Temperatur ein.
6Nach Ablauf der eingestellten Garzeit schal-
tet sich der Herd ab, es ertönt ein akusti-
sches Signal und die Kontrolleuchte beginnt
zu blinken.
7Betätigen Sie eine beliebige Taste zum
Abstellen des Signaltons, hierdurch wird der
Herd erneut eingeschaltet.
8Zum Abschalten des Herds bringen Sie alle
Bedienelemente in Stellung .
Programmierung der Ende der Kochzeit
1Betätigen Sie die Taste MODE, bis die kon-
trollleuchte neben dem Symbol blinkt.
2Stellen Sie die gewünschte Uhrzeit für die
Beendigung des Garvorgangs mit den
Tasten + und – ein.
3Anschließend schaltet die blinkende kon-
trollleuchte auf Dauerlicht um und zeigt
damit an, daß sich der Herd nach Ablauf der
eingestellten Zeit automatisch abschaltet.
4Anschließend wird wieder die aktuelle
Uhrzeit angezeigt.
5Wählen Sie eine Kochfunktion aus und stel-
len Sie die gewünschte Temperatur ein.
6Nach Ablauf der eingestellten Uhrzeit für die
Beendigung des Garvorgangs schaltet sich
der Herd ab, es ertönt ein akustisches
Signal und die kontrollleuchte beginnt zu
blinken.
Stellen der elektronischen Schaltuhr
Nach dem inbetriebnahme des Herds zeigt die
Schaltuhr 12.00 an und eine kontrollleuchte
oberhalb des Symbols blinkt. Durch
Betätigen der Tasten + und – wird die Uhr
gestellt, anschließend wird die Uhrzeit abge-
speichert und die kontrollleuchte verlischt.
Manueller Betrieb
Nach dem Stellen der Uhr ist der Herd
betriebsbereit. Wählen Sie eine Kochfunktion
aus und stellen Sie die gewünschte
Temperatur ein.
Zum Abschalten des Herds bringen Sie alle
Bedienelemente in Stellung .
Funktionen der elektronischen Schaltuhr
Kurzzeitwecker: Mit dieser Funktion wird nach
Ablauf einer vorab festgelegten Zeit ein akusti-
sches Signal erzeugt.
Kochzeit: Ermöglicht das Backen während
einer vorher eingestellten Dauer. Danach
schaltet sich der Herd automatisch ab.
Ende der Kochzeit: Ermöglicht das Backen bis
zu einer vorab definierten Uhrzeit. Danach
schaltet sich der Herd automatisch ab.
Dauer und Ende der Kochzeit: Mit dieser
Funktion können Sie den Herd so programmie-
ren, dass er sich automatisch anschaltet und
nach Ende der Backzeit wieder ausschaltet.
Programmierung des Kurzzeitwecker
1Betätigen Sie die Taste MODE, bis die kon-
trollleuchte neben dem Symbol blinkt.
2Stellen Sie mit den Tasten + oder – die Zeit
ein, nach der die Schaltuhr das Signal abge-
ben soll.
3Anschließend bleibt die Anzeige eingeschal-
tet und zeigt damit an, daß der Signalgeber
programmiert ist.
4Nach Ablauf der eingestellten Zeit ertönt ein
akustisches Signal und die Anzeige blinkt.
5Betätigen Sie eine beliebige Taste zum
Abschalten des Signaltons, auf dem Display
wird wieder die aktuelle Uhrzeit angezeigt.
3172723-001 26/01/15 09:53 Página 10

11
DEUTSCH
7Betätigen Sie eine beliebige Taste zum
Abstellen des Signaltons, hierdurch wird der
Herd erneut eingeschaltet.
8Zum Abschalten des Herds bringen Sie alle
Bedienelemente in Stellung .
Sie können die Funktion nutzen, auch wenn Sie
bereits mit dem Herd kochen. Befolgen Sie
hierzu die Anweisungen mit Ausnahme von
Punkt 5.
Programmierung der Dauer und Ende der
Kochzeit
1Betätigen Sie die Taste MODE, bis die kon-
trollleuchte neben dem Symbol blinkt.
2Stellen Sie die gewünschte Dauer des
Garvorgangs mit den Tasten + und – ein.
3Anschließend schaltet die kontrollleuchte
von Blink- auf Dauerlicht um.
4Betätigen Sie die Taste MODE, bis die kon-
trollleuchte neben dem Symbol blinkt.
5Stellen Sie die gewünschte Uhrzeit für die
Beendigung des Garvorgangs mit den
Tasten + und – ein.
6Anschließend schaltet die kontrollleuchte
von Blink- auf Dauerlicht um.
7Wählen Sie eine Kochfunktion aus und stel-
len Sie die gewünschte Temperatur ein.
8Der Herd bleibt ausgeschaltet, die kontroll-
leuchte neben den Symbolen
und sind eingeschaltet. Damit ist Ihr
Herd programmiert.
9Bei Erreichen der Uhrzeit für den Beginn
des Garvorgangs schaltet sich der Herd ein
und führt den Garvorgang während der ein-
gestellten Zeitdauer aus.
10
Nach Ablauf der eingestellten Uhrzeit für
die Beendigung des Garvorgangs schaltet
sich der Herd ab, es ertönt ein akusti-
sches Signal und die kontrollleuchte
neben dem Symbol beginnt zu blinken.
11
Betätigen Sie eine beliebige Taste zum
Abstellen des Signaltons, hierdurch wird
der Herd erneut eingeschaltet.
12
Zum Abschalten des Herds bringen Sie
alle Bedienelemente in Stellung .
Achtung
Durch Betätigen der Taste MODE können Sie
auf der Schaltuhr alle eingestellten program-
mierten Funktionen anzeigen und bei Bedarf
mit den Tasten + und – verändern. Nach
Auswahl der gewünschten Funktion wird die
kontrollleuchte neben dem entsprechenden
Symbol eingeschaltet.
Nach einem Ausfall der Netzspannung wird
die gesamte Programmierung der elektroni-
schen Schaltuhr gelöscht. Sie müssen diese
anschließend stellen und erneut program-
mieren.
MODE
3172723-001 26/01/15 09:53 Página 11

12
Control Panel
21 3 4
1Function selector.
2Electronic clock.
3Temperature selector.
4Heating indicator light.*
Oven Functions
Switch off oven
Conventional with fan
Appropriate for roasts and cakes. The fan
spreads the heat uniformly inside the oven.
Conventional
It is used for sponges and cakes where the
heat received must be uniform to achieve a
spongy texture.
MaxiGrill with fan
Allows uniform roasting at the same time as
surface browning. Ideal for grills. Special for
large volume pieces, such as poultry game etc.
It is recommended to put the item on a rack
with a tray beneath to collect the stock and
juices.
MaxiGrill
Allows greater surfaces to be prepared, than
with the grill, together with higher power
reducing the time required for browning of the
food.
Grill
For preparing dishes with superficial roasting.
It allows the outer layer to be browned without
affecting the inside of the food. Ideal for flat
food, such as steaks, ribs, fish, toast.
Caution
While using the Grill, MaxiGrill or MaxiGrill with
fan, the door must be kept closed.
Grill and Lower element
Special for roasts. It can be used for any
piece, whatever its size.
Lower element
Heats only from beneath. Suitable for heating
dishes and raising pastry and similar.
Defrosting
This cooking mode is suitable for gently
defrosting of food. In special food to be
consumed unwarmed, e.g.: cream, custard,
pastry, tarts, cakes, fruit,...
Note
The pilot light remains on in any cooking
function.
* Indicates that the oven is still heating up, light goes out when the selected temperature is reached.
3172723-001 26/01/15 09:53 Página 12

13
ENGLISH
Use of the Oven
Programming the cooking time
1Press the MODE button until the indicator
next to the symbol begins to flash.
2Select the length of time, pressing the “+”
or “–“ buttons.
3Subsequently, the indicator that was flash-
ing will light, indicating that the oven will
switch itself off automatically.
4The clock will then show the current time.
5Select a temperature and cooking function.
6When the set time has elapsed, the oven
will disconnect, an alarm will sound and the
indicator will begin to flash.
7Press any button to switch off the alarm,
reconnecting the oven.
8Set the controls in the position to switch
off the oven.
Programming the end of cooking time for the
oven
1Press the MODE button until the indicator
next to the symbol begins to flash.
2Select the time that cooking is to finish,
pressing the “+” or “–“ buttons.
3Subsequently, the indicator that was flash-
ing is lit, indicating that the oven will switch
itself off automatically.
4The clock will then show the current time.
5Select a temperature and a cooking func-
tion.
6When the programmed time is reached, the
oven will disconnect, an alarm will sound
and the indicator will begin to flash.
7Press any button to switch off the alarm and
the oven will reconnect.
8Set the controls to the position to switch
off the oven.
This function may be used even though you are
already cooking in your oven. To do so, follow
the instructions given except Nº 5.
Setting the time on the clock
On connecting the oven, you will notice that
12:00 appears on the clock and that a light
begins to flash next to the symbol. Pressing
the “+” and “–“ buttons the correct time can
be set on the clock, which is subsequently
stored and the flashing light goes out.
Manual use
After setting the correct time, the oven is ready
for use. Select a temperature and a cooking
function.
To switch off the oven, set the controls to the
position .
Functions of the Electronic Clock Programmer
Timer function: This function generates a
warning tone at a specified time.
Cooking time: This function allows to pro-
gramme the oven to cook for a specified time,
after which it will switch itself off.
End of cooking time: This function allows to
establish the exact hour, after which the oven
will switch itself off.
Duration and automatic stop: This function is
used to control the duration and the time at
which the oven will turn itself off. This function
allows the oven to start and stop automatically.
Warning function
1Press the MODE button until the signal next
to the symbol begins to flash.
2Choose the time when you want the alarm to
sound, pressing the “+” or “–“ buttons.
3Subsequently, the light will remain on indi-
cating that the alarm is programmed.
4At the end of the programmed time, an
alarm will sound and the light will begin to
flash.
5Press any button to turn off the alarm and
the screen shows the current time again.
3172723-001 26/01/15 09:53 Página 13
14
Programming the duration and automatic
stop
1Press the MODE button until the indicator
next to the symbol begins to flash.
2Select the length of cooking time pressing
the “+” or “–“ buttons.
3Subsequently, the indicator that was flash-
ing will remain lit.
4Press the mode button until the indicator
next to the symbol begins to flash.
5Select the time that cooking should finish
pressing the “+” or “–“ buttons.
6Subsequently, the indicator that was flash-
ing will remain lit.
7Select a function and cooking temperature.
8The oven will remain disconnected with the
indicators next to the and symbols
lit. Your oven is programmed.
9When the time to begin cooking is reached,
the oven will switch itself on and will con-
tinue cooking during the programmed time.
10
When the programmed finishing time is
reached, the oven will disconnect, an alarm
will sound and the light next to the sym-
bol will begin to flash.
11
Press any button to switch off the alarm
and the oven will reconnect.
12
Set the controls to the position to
switch of the oven.
Caution
Pressing the MODE button the display on the
screen shows any function programmed. It
can be changed by pressing the “+” or “–“
buttons. On selecting the desired function,
the indicator next to the corresponding sym-
bol will light.
In the event of a power cut, all the program-
ming of the electronic clock will be erased.
The correct time has to be reset and the
watch reprogrammed.
MODE
3172723-001 26/01/15 09:53 Página 14

15
ESPAÑOL
Frontal de Mandos
21 3 4
1Selector de funciones.
2Reloj electrónico programador.
3Selector de temperaturas.
4Piloto de calentamiento.
Funciones del Horno
Desconexión del horno
Convencional con Turbina
Adecuado para asados y pastelería. El ventila-
dor reparte de forma uniforme el calor en el
interior del horno, reduciendo el tiempo y la
temperatura de cocinado.
Convencional
Se usa en bizcochos y tartas en los que el
calor recibido debe ser uniforme y para que
consigan una textura esponjosa.
MaxiGrill con Turbina
Permite el asado uniforme al mismo tiempo
que dora superficialmente. Ideal para parrilla-
das. Especial para piezas con gran volumen
como aves, caza,... Se recomienda colocar la
pieza de carne sobre la parrilla del horno y la
bandeja por debajo, para el escurrido de jugos
o grasa.
MaxiGrill
Permite el gratinado en mayores superficies
que en Grill, así como una mayor potencia de
gratinado, obteniendo un dorado del alimento
de forma más rápida.
Grill
Gratinado y asado superficial. Permite el dora-
do de la capa exterior sin afectar al interior del
alimento. Indicado para piezas planas como
bistec, costillas, pescado, tostadas.
Atención
Durante el uso de la función Grill, MaxiGrill o
MaxiGrill con Turbina la puerta debe mante-
nerse cerrada.
Grill y Solera
Especial para asados. Puede usarse para cual-
quier pieza, independiente de su tamaño.
Solera
Calor sólo desde la parte inferior. Apropiado
para calentar platos o levantar masas de
repostería y afines.
Descongelación
Esta función es apropiada para descongela-
ciones suaves de alimentos. En especial aque-
llos que son consumidos sin calentar, por
ejemplo cremas, pastas, tartas, pasteles, etc.
Nota
La lámpara permanece encendida en cualquier
función de cocinado.
3172723-001 26/01/15 09:53 Página 15

16
Manejo del Horno
4Transcurrido el tiempo programado, sonará
una señal acústica y el indicador empezará
a parpadear.
5Pulse cualquier botón para detener la señal
acústica, volviendo la pantalla a mostrar la
hora actual.
Programación de la Duración del Cocinado
1Pulse el botón MODE hasta que el indicador
encima del símbolo empieze a parpadear.
2Seleccione la duración, pulsando los boto-
nes + ó –.
3Posteriormente el indicador que estaba par-
padeando, se iluminará indicando que su
horno se apagará de forma automática.
4El reloj mostrará entonces la hora actual.
5Seleccione una temperatura y una función
de cocinado.
6Transcurrida la duración del cocinado, el horno
se desconectará, sonará una señal acústica y
el indicador comenzará a parpadear.
7Pulse cualquier botón para detener la señal
acústica, encendiéndose el horno de nuevo.
8Ponga los mandos en posición para apa-
gar el horno.
Programación de la Hora de Finalización del
Cocinado
1Pulse el botón MODE hasta que el indicador
encima del símbolo empieze a parpadear.
2Seleccione la hora de finalización del coci-
nado, pulsando los botones + y –.
3Posteriormente el indicador que estaba par-
padeando se iluminará indicando que su
horno se apagará de forma automática.
4El reloj mostrará entonces la hora actual.
5Seleccione una temperatura y una función
de cocinado.
6Alcanzada la hora de finalización del cocina-
do, el horno se desconectará, sonará una
señal acústica y el indicador comenzará a
parpadear.
Puesta en Hora del Reloj Electrónico
Al conectar su horno, observará que en el reloj
aparece la indicación 12.00 y que una señal
luminosa encima del símbolo comienza a
parpadear. Pulsando los botones + y – podrá
poner el reloj en hora, posteriormente ésta se
almacenará, apagándose la señal luminosa.
Funcionamiento Manual
Tras poner el reloj en hora, su horno está listo
para cocinar. Seleccione una temperatura y
una función de cocinado.
Para apagar el horno, ponga los mandos en
posición .
Funciones del Reloj Electrónico
Avisador: Genera una señal acústica al cabo
del tiempo, para ello no es necesario que el
horno esté cocinando.
Duración del Cocinado: Permite cocinar duran-
te un tiempo seleccionado, a continuación el
horno se apagará de forma automática.
Hora de Finalización del Cocinado: Permite
cocinar hasta una hora establecida, a conti-
nuación el horno se apagará de forma auto-
mática.
Duración y Fin del Cocinado: Permite progra-
mar la duración y la hora de finalización del
cocinado. Con esta función el horno se pondrá
en marcha de forma automática a la hora
necesaria para cocinar durante el tiempo
seleccionado (Duración) y finalizando de forma
automática a la hora que le hayamos indicado
(Fin del Cocinado).
Programación del Avisador
1Pulse el botón MODE hasta que el indicador
encima del símbolo empieze a parpadear.
2Seleccione el tiempo tras el cual desea que
el reloj avise, pulsando los botones + ó – .
3Posteriormente el indicador se quedará ilu-
minado indicando que el avisador ya está
programado.
3172723-001 26/01/15 09:53 Página 16

17
ESPAÑOL
7Pulse cualquier botón para detener la señal
acústica, encendiéndose su horno de nuevo.
8Ponga los mandos en posición para apa-
gar el horno.
Puede emplear esta función aunque usted ya
esté cocinando con su horno. Para ello siga las
instrucciones indicadas salvo la número 5.
Programación de la Duración y Fin del
Cocinado
1Pulse el botón MODE hasta que el indicador
encima del símbolo empieze a parpadear.
2Seleccione la duración del cocinado pul-
sando los botones + y – .
3Posteriormente el indicador que estaba par-
padeando se iluminará de forma permanente.
4Pulse el botón MODE hasta que el indicador
encima del símbolo empieze a parpadear.
5Seleccione la hora de finalización del coci-
nado pulsando los botones + y – .
6Posteriormente el indicador que estaba par-
padeando se iluminará de forma permanente.
7Seleccione una función y una temperatura
de cocinado.
8El horno permanecerá desconectado, que-
dándose iluminados los indicadores enci-
ma de los símbolos y . Su horno está
programado.
9Cuando se alcance la hora de comienzo del
cocinado, el horno se pondrá en marcha y
se realizará el cocinado durante el tiempo
seleccionado.
10
Alcanzada la hora de finalización que se
había programado, el horno se desconec-
tará, sonará una señal acústica y el indi-
cador luminoso encima del símbolo
comenzará a parpadear.
11
Pulse cualquier botón para detener la
señal acústica, encendiéndose su horno
de nuevo.
12
Ponga los mandos en posición para
apagar el horno.
Atención
Pulsando el botón MODE puede visualizar en
el reloj cualquier función que esté programa-
da y modificarla si usted lo necesita pulsan-
do los botones + y –. Al seleccionar la fun-
ción deseada se iluminará el indicador enci-
ma del símbolo correspondiente.
En caso de un corte de suministro eléctrico,
se borrará toda la programación de su reloj
electrónico. Deberá ponerlo en hora y pro-
gramarlo de nuevo.
MODE
3172723-001 26/01/15 09:53 Página 17

18
Pannello di controllo
21 3 4
1Selettore funzione.
2Orologio elettronico.
3Selettore temperatura.
4Spia pilota riscaldamento.*
Funzioni del forno
Spegnimento del forno
Standard ventilato
Adatto ad arrosti e dolci. La ventola diffonde il
calore in modo uniforme all'interno del forno.
Standard
Utilizzato per pan di spagna e dolci in cui il
calore deve essere uniforme per ottenere una
consistenza morbida e spugnosa.
MaxiGrill ventilato
Gratinatura e cottura arrosto superficiale.
Ideale per i piatti grigliati. Particolarmente
adatto a pezzi di grandi dimensioni come
pollame, cacciagione, ecc. Si raccomanda di
sistemare il pezzo su una griglia con un
vassoio sottostante per raccogliere il brodo e
il succo di cottura.
MaxiGrill
Consente di cuocere alimenti con superficie
maggiore rispetto al grill e offre maggiore
potenza riducendo così i tempi di necessari
per la gratinatura del cibo.
Grill
Funzione adatta alla preparazione di piatti con
gratinatura superficiale. Consente di dorare
lo strato esterno degli alimenti senza
modificarne la parte interna. Indicato per
alimenti come bistecche, costine, pesce, pane
tostato.
Attenzione
Durante l’utilizzo della funzione Grill, MaxiGrill
o MaxiGrill ventilato, lo sportello deve rimanere
chiuso.
Grill + inferiore
Adatto agli arrosti. Si utilizza per qualsiasi
pezzo di carne, indipendentemente dalle sue
dimensioni.
Inferiore
Il calore proviene solo dalla parte inferiore del
forno. Adatto per riscaldare piatti o far lievitare
impasti.
Scongelamento
Questa funzione è indicata per scongelare gli
alimenti in modo graduale. In particolare quelli
che verranno consumati senza scaldarli, come
creme, paste, torte, pane, frutta, ecc.
Nota
La lampadina resta accesa con qualsiasi
funzione di cottura.
* Indica la trasmissione del calore all’alimento e si spegne quando viene raggiunta la temperatura impostata.
3172723-001 26/01/15 09:53 Página 18

19
ITALIANO
Uso del forno
Programmazione del tempo di cottura
1Premere il pulsante MODE fino a quando
l'indicatore sopra il simbolo inizia a
lampeggiare.
2Selezionare la durata premendo i pulsanti
“+” o “–“.
3L'indicatore lampeggiante resterà illuminato
per indicare che il forno si spegnerà
automaticamente.
4L'orologio tornerà a mostrare l'ora attuale.
5Selezionare una temperatura e una funzione
di cottura.
6Trascorso il tempo impostato, il forno si
spegne, viene emesso un segnale sonoro e
l'indicatore inizia a lampeggiare.
7Premere qualsiasi pulsante per spegnere
l'allarme, riaccendendo il forno.
8Portare i comandi in posizione per
spegnere il forno.
Programmazione dell'ora di fine cottura
1Premere il pulsante MODE fino a quando
l'indicatore sopra il simbolo inizia a
lampeggiare.
2Selezionare l'ora di fine cottura premendo i
pulsanti “+” o “–“.
3L'indicatore lampeggiante resterà illuminato
per indicare che il forno si spegnerà
automaticamente.
4L'orologio tornerà a mostrare l'ora attuale.
5Selezionare una temperatura e una funzione
di cottura.
6Trascorso il tempo impostato, il forno si
spegne, viene emesso un segnale sonoro e
l'indicatore inizia a lampeggiare.
7Premere qualsiasi pulsante per spegnere
l'allarme e il forno si riaccenderà.
8Portare i comandi in posizione per
spegnere il forno.
Questa funzione può essere usata anche se il
forno è già acceso. A tal fine seguire le
istruzioni fornite saltando il punto 5.
Impostazione dell'ora sull'orologio
Quando si collega il forno all'alimentazione
elettrica, si noterà che sull'orologio appare
12:00 e che una luce inizia a lampeggiare
sopra il simbolo . Premendo i pulsanti "+"
e "–" è possibile impostare l'ora giusta
sull'orologio; questa sarà quindi salvata e la
luce lampeggiante sparirà.
Funzionamento manuale
Dopo aver impostato l'ora corretta, il forno è
pronto per essere utilizzato. Selezionare una
temperatura e una funzione di cottura.
Per spegnere il forno, basterà portare i
comandi in posizione .
Funzioni dell'orologio elettronico
Allarme acustico: genera un segnale acustico
in un dato momento.
Durata di cottura: consente di cuocere per il
tempo impostato, trascorso il quale il forno si
spegnerà automaticamente.
Ora di fine cottura: consente di cuocere fino a
un orario definito, trascorso il quale il forno si
spegnerà automaticamente.
Tempo di cottura e arresto automatico:
consente di programmare il tempo di cottura e
l'ora di fine cottura. Questa funzione consente di
accendere e spegnere il forno automaticamente.
Programmazione dell'allarme acustico
1Premere il pulsante MODE fino a quando il
segnale sopra il simbolo inizia a
lampeggiare.
2Selezionare il tempo dopo il quale si
desidera che l'orologio emetta l'allarme
acustico toccando i pulsanti “+” o “–“.
3La luce resterà accesa per indicare che
l'allarme è programmato.
4Trascorso il tempo programmato, verrà
emesso un segnale acustico e la luce
inizierà a lampeggiare.
5Premere qualsiasi pulsante per spegnere
l'allarme e il display mostrerà nuovamente
l'ora attuale.
3172723-001 26/01/15 09:53 Página 19

20
Programmazione del tempo di cottura e
dell'arresto automatico
1Premere il pulsante MODE fino a quando
l'indicatore sopra il simbolo inizia a
lampeggiare.
2Selezionare la durata della cottura
premendo i pulsanti “+” o “–“.
3L'indicatore lampeggiante resterà acceso.
4Premere il pulsante MODE fino a quando
l'indicatore sopra il simbolo inizia a
lampeggiare.
5Selezionare l'ora di fine cottura premendo
i pulsanti “+” o “–“.
6L'indicatore lampeggiante resterà acceso.
7Selezionare una funzione e una
temperatura di cottura.
8Il forno resterà spento con gli indicatori
sopra i simboli e accesi. Il forno
adesso è programmato.
9Quando viene raggiunto l'orario di inizio
cottura, il forno si accende e cuocerà per il
tempo programmato.
10 Quando viene raggiunto l'orario di fine
cottura, il forno si spegne, viene emesso
un segnale sonoro e la luce sopra il
simbolo inizia a lampeggiare.
11 Premere qualsiasi pulsante per spegnere
l'allarme e il forno si riaccenderà.
12 Portare i comandi in posizione per
spegnere il forno.
Attenzione
Premendo il pulsante MODE, il display sullo
schermo mostra le eventuali funzioni
programmate. Per modificarle, premere i
pulsanti “+” o “–“. Quando si seleziona la
funzione desiderata, l'indicatore sopra il
simbolo corrispondente si accenderà.
Nel caso di interruzione dell'alimentazione
elettrica, tutta la programmazione
dell'orologio elettronico sarà cancellata.
Sarà quindi necessario reimpostare l'ora e
riprogrammare il timer.
MODE
3172723-001 26/01/15 09:53 Página 20
Table of contents
Languages:
Other Novy Oven manuals


