9
PORTUGUÉS
Manejo do Forno
Atenção
O relógio electrónico incorpora tecnología
Touch-Control. Para o manusear, basta tocar
nos símbolos sobre o vidro.
A sensibilidade do touch-control adapta-se
continuamente ás condições ambientais. Ao
ligar o forno à rede, ter a precaução que a
superfície do vidro do painel de comados está
limpa e sem qualquer obstáculo.
Se ao tocar no vidro com o dedo, o relógio não
responder correctamente, então é necessário
desligar o forno da rede eléctrica e após uns
instantes voltar a ligá-lo. Deste modo, os sen-
sores ajustam-se automaticamente e reagem
de novo ao toque.
Acertar o Relógio Electrónico
Ao ligar o forno, no relógio aparece a indica-
ção 00.00 a piscar. Poderá acertar o relógio,
tocando nos símbolos + ou –, de seguida
ouvirá dois sinais sonoros consecutivos como
confirmação da hora seleccionada.
Se desejar alterar a hora do relógio, deve
tocar simultaneamente nos símbolos +, e
, ficando no modo de ajuste horário, de
seguida deixe de tocar nos símbolos e
, e tocando nos símbolos + ou – poderá
alterar a hora. A alteração da hora será con-
firmada por dois sinais sonoros consecutivos.
Funcionamento Manual
Depois de acertar o relógio, o forno está pron-
to para cozinhar. Seleccionar uma temperatu-
ra e uma função de cozinhado.
Para desligar o forno, colocar os comandos na
posição .
Funções do Relógio Electrónico
Duração do cozinhado: Permite cozinhar
durante um tempo seleccionado, desligando o
forno de forma automática.
Hora de finalização do cozinhado: Permite
cozinhar até a uma hora estabelecida, desli-
gando o forno de forma automática.
Duração e Fim do cozinhado: Permite progra-
mar a duração e a hora de finalização do
cozinhado. Com esta função, o forno entrará
em funcionamento automaticamente à hora
necessária para cozinhar durante o tempo
seleccionado (Duração), e finalizando de
forma automática na hora indicada (Fim do
Cozinhado).
Indicador de aviso: Gera um sinal acústico
decorrido algum tempo; para tal não é neces-
sário que o forno esteja em funcionamento.
Segurança para Crianças: Permite bloquear a
utilização do forno para a segurança das
crianças.
Programação da Duração do Cozinhado
1Tocar no vidro sobre o símbolo até o indi-
cador luminoso superior começar a piscar.
2Seleccionar a duração, tocando no vidro
sobre +.
3Posteriormente soarão dois sinais sono-
ros consecutivos e o indicador que estava
a piscar fica iluminado, indicando que o
forno desligar-se-á de forma automática.
4O relógio mostra a hora actual.
5Seleccionar uma temperatura e uma fun-
ção de cozinhado.
6Para alterar o tempo seleccionado tocar
sobre o símbolo e de seguida nos sím-
bolos + ou – ; após dois sinais sonoros de
confirmação, o relógio voltará para o for-
mato de hora.
7Decorrida a duração do cozinhado, o forno
desligar-se-á, soará um sinal acústico e o
indicador começará a piscar.
8Colocar os comandos na posição para
desligar o forno.
9Tocar no vidro sobre qualquer indicação
para parar o sinal acústico.
NOTA
Se continuar a tocar no símbolo durante
mais de dois segundos, no visor aparecerá o
tempo restante para o final do cozinhado e o
indicador luminoso permanecerá a piscar
8
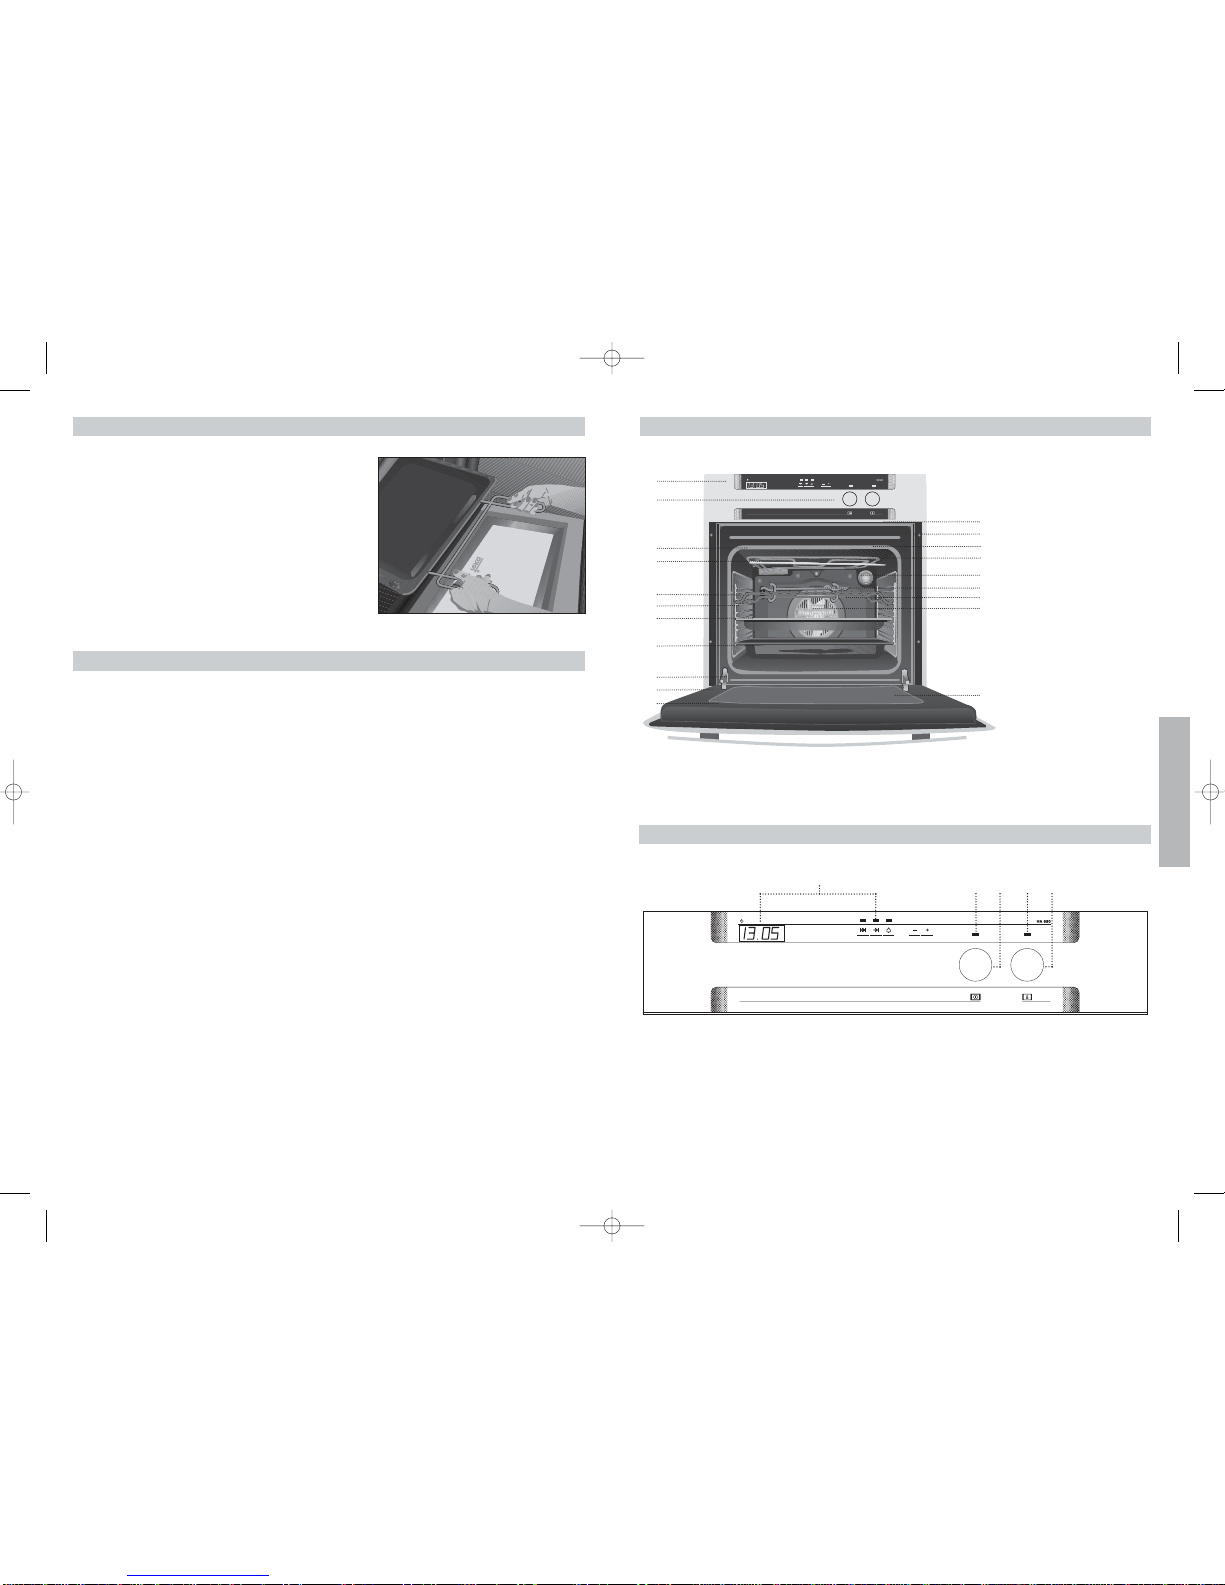
Desconexão do forno
Convencional
Usado em bolos e tartes nos quais o calor
recebido deve ser uniforme para que adquiram
uma textura esponjosa.
Convencional com Turbina
Adequado para assados e pastelaria. O venti-
lador reparte de forma uniforme o calor no
interior do forno.
Grill
Gratina e assa superficialmente. Permite alourar
a camada exterior sem afectar o interior do
alimento. Indicado para pedaços planos como
filetes, costelas, peixe, tostas.
MaxiGrill
Permite gratinar superfícies maiores que com o
Grill, bem como gratinar com maior potência,
alourando assim o alimento de forma mais rápida.
MaxiGrill com Turbina
Permite assar de modo uniforme ao mesmo
tempo que aloura superficialmente. Ideal para
churrascos. Especial para pedaços com grande
volume como aves, caça,… Recomenda-se colocar
a porção de carne sobre a grelha do forno com a
bandejaporbaixo,pararecolher os molhos ou gorduras.
Atenção
Durante o uso da função Grill, MaxiGrill ou
MaxiGrill com Turbina deve-se manter a porta
fechada.
Turbo
A Turbina reparte o calor que provém de uma
resistência situada na parte de atrás do forno.
Devido à uniformidade da temperatura produzida
permite cozinhar em 2 alturas ao mesmo tempo.
Resistência Inferior
Calor somente na parte inferior. Apropriado para
aquecer pratos ou levantar massas de confeitaria
e semelhantes.
Resistência Inferior com Turbina
Distribui o calor que provém da parte inferior do
forno. Ideal para pastéis com recheio de geleia
ou fruta, os quais só necessitam de calor na
parte inferior. É sempre necessario realizar um
pré-aquecimento.
Grill e Resistência Inferior
Especial para assados. Pode ser usado para
qualquer porção, independente do seu tamanho.
Nota
A lâmpada permanece acesa em qualquer função
de cozinhado.
Funções do Forno