3
3
TABLE OF CONTENTS
Plan the Installation 3
Hose Lengths 3
Power Unit Selection 3
Valve Locations 3
Plan Pipe Runs 3
Rough In 4
Determine Valve Height 4
New Construction 5
Pipe Runs 6
Low Voltage Wire 7
Test the System 7
Trim Kit 12
Installation in an Existing Home 14
Notes 15
Warning
This manual was designed for installers with working knowledge and
experience installing traditional central vacuum systems.
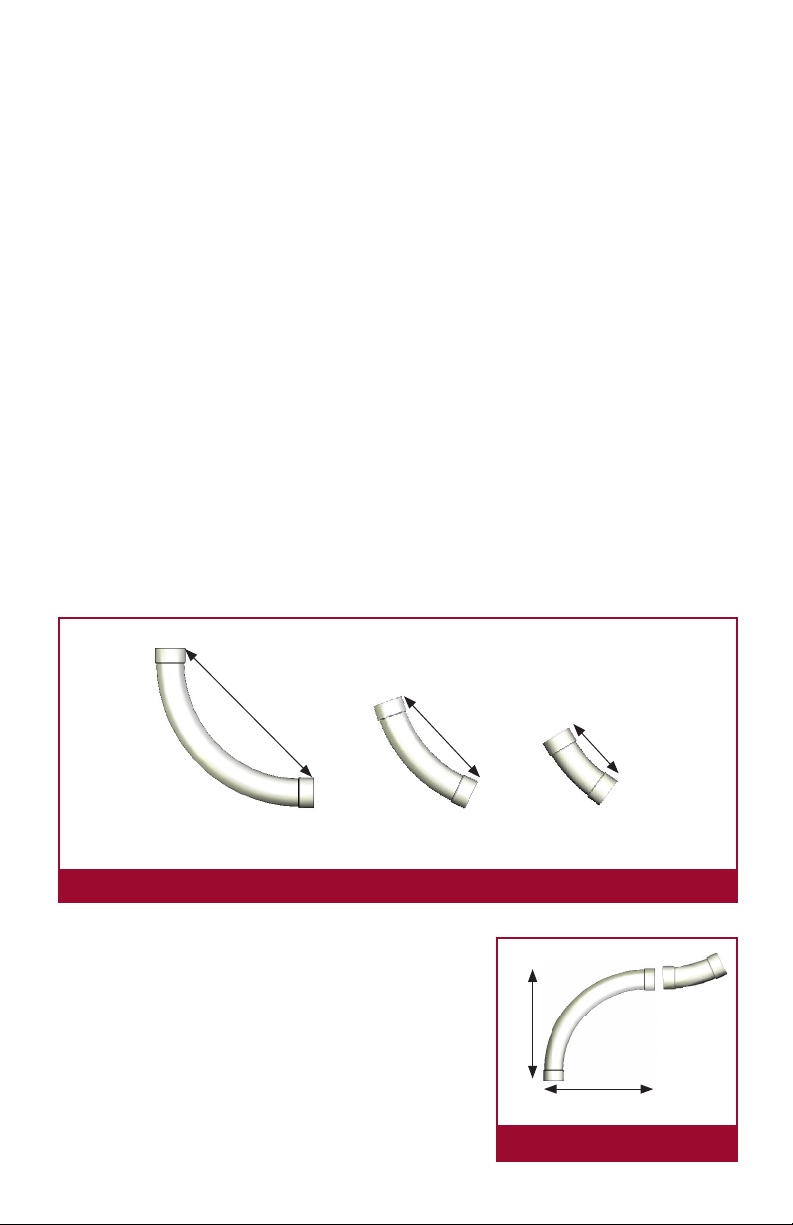
It is critical that only parts designed for the retractable hose system
be used in the installation.
Parts include: screws, seals, washers, hoses, elbows (90’s, 45’s), etc.
Failure to use these parts will void any warranty offered by the manu-
facturer.
Installers are responsible for adhering to all local building codes.
PLAN THE INSTALLATION
Planning is the key to a successful central vacuum system installation.
A balance between the best locations for the inlet valves and practicality
of these locations is essential. With a little ingenuity most locations can
be reached.
Hose LengtHs
Let clients know that you will custom the hose length to t each oor.
Hose kits come in 30’ (9,1m), 40’ (12,2m) or 50’ (15,2m) lengths.
Power Unit seLection
It is important to keep in mind that air ow is reduced with longer hoses.
To compensate for the loss of air ow, a more powerful unit is required.
VaLVe Locations
A 50'(15,2m) hose will usually cover between 1800-2300 square feet
(167 to 213m2). Inlets should, if possible, be located in a hallway or in other
areas that do not have high visibility.
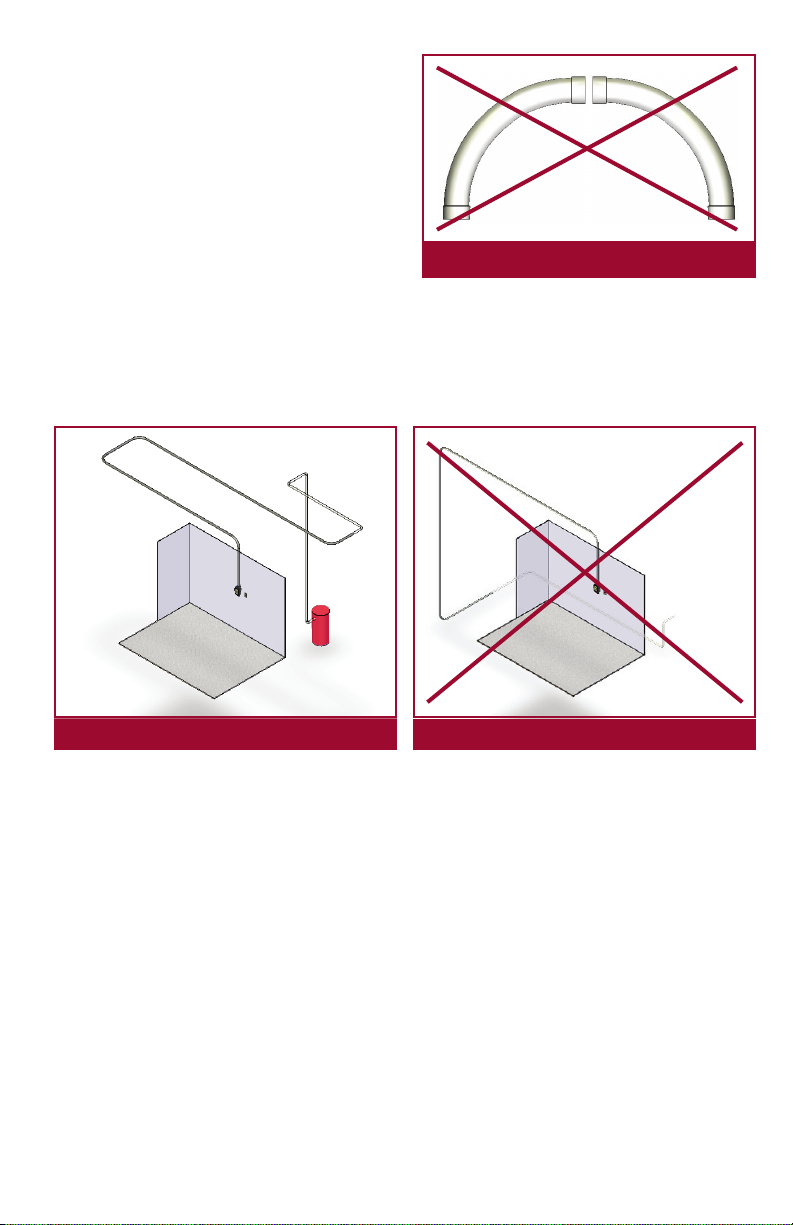
PLan PiPe rUns
Carefully read the section in this guide on “Pipe Runs”. A diagram of four
typical pipe runs is also available in this section.
14
gura16
gura17
gura18
INSTALACIÓN EN UNA CASA YA
EXISTENTE
Utilizar la placa temporaria como
modelo para hacer el agujero en
la pared (gura 16).
Insertar la placa de montaje verticalmente para
hacerla girar hacia arriba (gura 17).
Independientemente de donde se sitúa el 2x4,
tendrá que cortar uno o dos triángulos de jación
de la placa de montaje.
Insertar los 2 triángulos de jación ubicados en
la parte baja de la placa de montaje (gura 18).
Para asegurar una mejor jación, insertar los cla-
vos para jar la toma con la contratoma
Seguir las mismas instrucciones para instalar los conductos de PVC y la
toma.