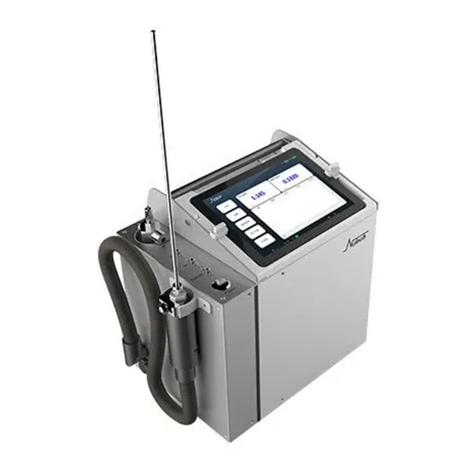
NuTech 2701 User manual

1 | P a g e
Nutech Instruments, Inc.
Technical Support
Call: 972-480-8908 Fax: 972-480-8308
E-mail: services@nutechins.com
NUTECH 2701
AUTO AIR SAMPLING TIMER
OPERATION MANUAL
Version V 2.0
March 2020
©202003-2701-USA. All Rights Reserved.
Nutech 2701
Sampling inlet with
water prevention
The latest product that brings integrated air sampling into
the 21st century
Auto Air Sampling Timer
Pressure gauge
2701 Sampling timer
Capillary/ flow orifice
controller
Summa or SilcoCanTM
Canister

2 | P a g e
Nutech 2701 Operation Manual
Introduction
Thank you for purchasing a Nutech 2701 sampling timer. Please read this manual carefully before
using this product.
The Nutech 2701 is designed for integrated air sampling.
Operation Keys
USB port
Start Auto Mode
Power charge port
Left arrow
Right arrow
Confirm key or Start up key
Set Key
Manual operation key

3 | P a g e
Display Window
There are three function display areas:Power Status, Clock Setting, and Timer Operation.
Battery Check – Prior to Use
Confirm the battery display , is fully charged. If the battery display appears to have zero or one
bar ,please charge the battery using the supplied USB adaptor before use. If the battery
shows zero bars, complete charging may take up to 12 hours.
Operation procedures
Timer Setting
Open the Nutech 2701. The timer is in “sleep” mode, and there will be no LCD display. Press the
USB connection
(disconnected)
Battery status
Auto operation
mode (On)
Manual
operation mode (off)
Days of the week
Clock: 24 hous mode,
military time
Sequence: Event
indicator
Event Number
(Max. 12 timed
events)
Auto sampling actived
Valve Closed
Valve opened
Sampling time
Indicates sampling
stopped
Indicates sampling
stopped

4 | P a g e
[Enter] key once to turn on the display panel. If there are no further critical operations within 60
seconds, the timer will return back to sleep mode automatically to save on battery life.
NOTE: If there is no display after pressing [Enter], the battery is depleted and needs to be charged.
Please refer to the Battery Check section (pg.3) before proceeding.
Set up Time/Clock
Push [Set] key twice to enter the time setting mode. The LCD will start flashing. Using the digital
keys set the clock (military time). If necessary, the left or right arrow keys can be used to make a
correction. Once the minutes are typed in, the day of the week will start flashing. Using the left
or right arrow key, move the cursor to the desired day. Press the [Enter] key to complete the time
and day settings.
Tips: General steps for auto operation mode: set initial time/clock, set event start time, set event
close time, press Auto to activate event.
Example:
You need to set two timed events for Monday sampling. The first sampling event starts at
9:00am and stops at 10:00am. The second sampling event starts at 10:30am and stops at
11:30am:
1. Press [Enter] to wake the unit.
2. Press [Set] once to enter event setting SEG 01.
3. Enter 01 for the first event by press [0] and [1]. Open is flashing indicates you are on
the setting for event opening time.
4. Press [Enter]. Time is flashing.
5. Enter 09:00 to select the time. Day of the week arrow is flashing.
6. Use the [left] or [right] arrow keys to select M for Monday.
7. Press [Enter]. The event start time is now complete.
8. Press [Set] again to select SEG 01.
9. Press [right] or [left] arrow key to select Closed. Closed is flashing indicates you are
on the setting for event closing time.
10. Press [Enter]. Time is flashing.
11. Enter 10:00. Day of the week arrow is flashing.
12. Use the [left] or [right] arrow keys to select M for Monday.
13. Press [Enter]. The event stop time is now complete.
Repeat this for your second event setting, using 02 for the 2nd (SEG) event and 10:30 and 11:30
for the start and stop times.
14. Press [Auto] to activate the automatic running mode for the sequence event created
above. An active sign will appear on the screen indicate the auto mode is now
functioning.

5 | P a g e
NOTE: If you want to make any changes, you must start from step one.
Auto Operation setting
1. Setting Start Time(OPEN)
Press [Enter] to wake the unit, and press [Set] to begin setting the event. Set event number
(SEG) using the digital keys. Select 1 to 12 as your event number. Once you set the event
number, the Open will start flashing for you to set the valve function. Push [Enter] to
confirm this function. The time will start flashing indicating that it is ready. Using the
digital keys, enter the sampling start time. Use the right and left arrow keys to select the
desired day, followed by [Enter] to finish the sampling start time. The display will return
back to the clock setting.
2. Setting Stop Time(CLOSED)
Press [Set] to begin setting the event. Set event number (SEG) using the digital keys. Select
1 to 12 as your event number. Once you set the event number, the Open will start flashing
for you to set the valve function. Use the left or right arrow key to switch to Closed position.
Push [Enter] to confirm this function. The time will start flashing indicating that it is ready.
Using the digital keys, enter the sampling stop time. Use the right and left arrow keys to
select the desired day, followed by [Enter] to finish the sampling stop time. The display
will return back to the clock setting.
Repeat steps 1 and 2 for all other sampling events. Up to 12 sampling events can be
programmed.
3. Event Setting Check
You may check your event setting any time before the event starts. Push [Enter] to power
up the timer. Push [Set] and enter the SEG number you wish to check. Press the right arrow
to toggle between the open and closed settings, and press [Enter]. Press [Enter] to see the
set time, and press [Enter] again to see the day of the event. If there is no change, press
[Enter] to exit out of this setting.
4. Event Setting Erase
For the events you do not need, simply enter 00:00 number for both Open and Closed time.
5. Start or Stop the Auto Sampling
After you have finished entering the event settings, press the [Auto] key to start the AUTO

6 | P a g e
operation. The word “Activated” will be displayed in the lower left hand corner of the
display panel. Once an event sampling has started and the valve is in open position
(sampling in processing), the Auto sign will be locked until the event is completed and the
valve is closed.
NOTE: You can stop the sampling by pressing [Auto] button again. The timer will stop and
(Activated) display will no longer be displayed.
NOTE: You cannot set more timed events once the first timed event is running. Doing so will result
in both events not working correctly.
NOTE: For 24-hour sampling, you may sample for 1mintue past 24 hours or 1 minute short of 24
hours. The timer does not allow for exactly 24 hours.
Manual Control
1. Open Valve
Press the [Manu] button to enter manual mode. The Open or Closed on LCD will indicate
the valve status. If the valve status is Closed push [Manu] key and it will toggle back to
Open status. When the valve is Open, the canister picture will show “sampling in” and the
timer next to the canister will show the sampled time. The timer will “beeping” 5 times
before sampling.
2. Closed Valve
If the valve status is Open, push [Manu] key and it will close the valve. LCD will display
Manual mode. In the Closed position, there will be no indications of “sampling in” flashing
lines into the canister and the timer will not be active.
3. Valve Function Check
It is recommended to push the [Manu] key several times slowly to toggle between Open
and Closed before programming to make sure the valve function is operating correctly.
Specifications
➢Function
•Automatic time sampling
•12 time events: Sampling time 1 minute to 168 hours
•Auto or Manual operation
•4X4 key
•LCD displays time, event, logo, mode, battery status, & etc
•Battery may continuously be used for a month with one full charge

7 | P a g e
➢Electronics
•Power: Board:+3.6V,+/-5% LCD:+3.6V,+/-5% Valve:+9V,+/-5%
Battery capacity:1000mAH Ni ion
•USB:Voltage:+5 V
•Solenoid valve Voltage:+9V Coil R:9R +/-5% Pulse:30ms +/-15% Media
temperature:-20~80℃ Life time:150000 Times on/off time Pressure: -0.1~
+0.8MPa
•Working condition:-20~80℃
➢Sampling Connection
•Sampling in :1/4” Swagelok union
•Sampling out :1/4” Swagelok tube
➢Nutech 2701 Size:
•150 X 100 X 70 mm. Weight: 600 g
Table of contents
Other NuTech Measuring Instrument manuals