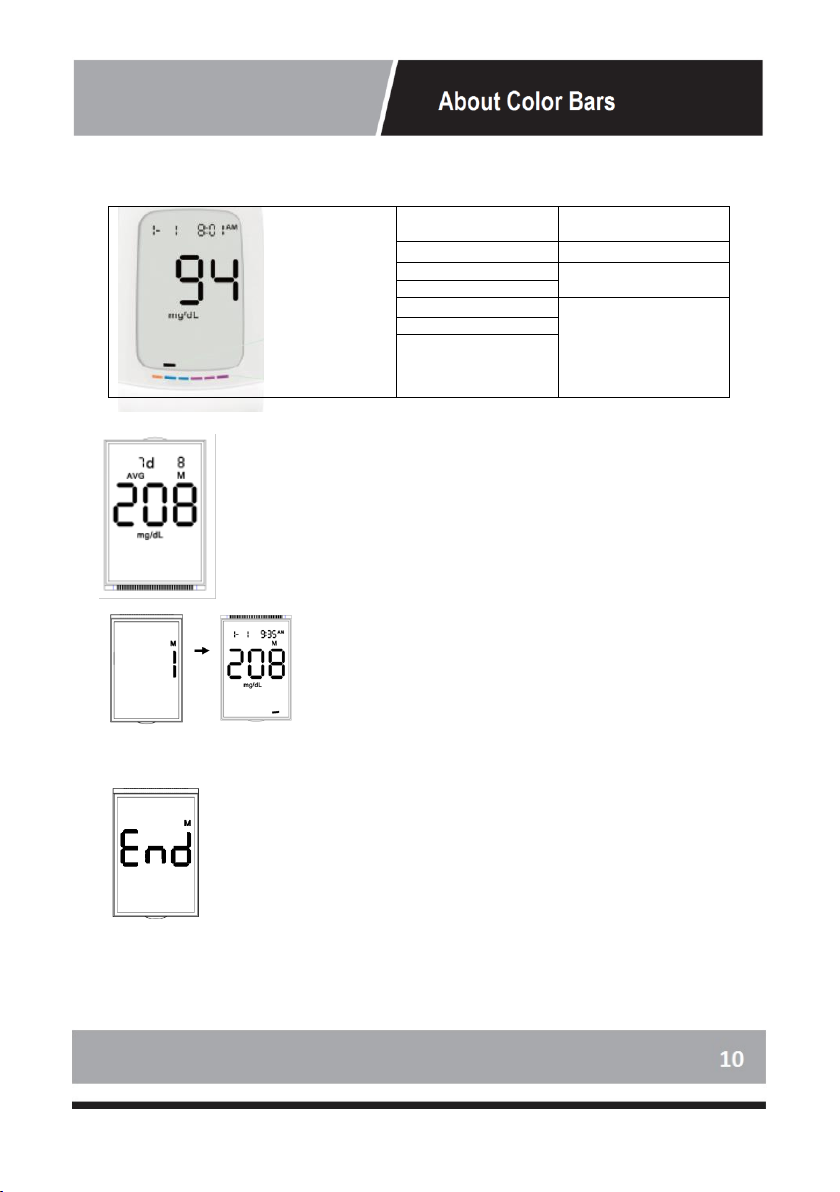
NuvoMed MBG10-6/0741 User manual

MBG10-6/0741
Blood Glucose Monitor
Instruction Manual
Please read all instructions carefully and retain for future use

Know your Device
Principle of Operation
Intended use of the equipment
Limitation of Use
3
Important Safety Information and precautions
4
Preparation
5
Introduction for Use
Before Use, Setting the monitor
6
Delete Memory
7
Instruction for Use
8
About Color Bars
10
Physical and Performance Deterioration
11
Alternative Site Testing
Care and Maintenance
12
Units of Measure
13
Troubleshooting
14
EMC Declaration
16
FCC Compliance
19
Specifications
20
Analysis
21
Additional Glucose Test Strips
22
Warranty Information

KNOW YOUR DEVICE
Principle of Operation
Testing with the Blood Glucose Monitoring is based on the measurement of electrical currents
generated by the reaction of glucose with the reagent of the strip. The blood glucose monitoring
system measures the current and converts it to the corresponding blood glucose level. The
strength of the current produced by the reaction depends on the amount of glucose in the blood
sample.
Intended use of the equipment
This device is intended to be used for:
•Quantitative measurement of glucose in fresh capillary whole blood samples drawn from the
fingertip, palm, forearm, upper arm, calf, or thigh.
•Single person measurement only (it should not be shared)
•Self-testing outside the body (in vitro diagnostic use) by people with diabetes at home as an
aid to monitor the effectiveness of diabetes control.
This device should not be used for the diagnosis of or screening for diabetes, or for neonatal use.
Alternative Site Testing (AST) should be done only during steady state times when glucose levels
are not changing rapidly.
The Blood Glucose Test Strips (NGS50-24/0726) are intended for use with the Blood Glucose
Monitor (MBG10-6/0741) to quantitatively measure glucose in fresh capillary whole blood samples
drawn from the fingertips, palm, forearm, upper arm, calf or thigh.
MEDICAL DISCLAIMER: This device and manual are not meant to be a substitute for advice
provided by doctors or other medical professionals.
Contact your physician for interpretation of measurements, or if you have or suspect you have a
medical issue.
Limitation of Use
•The Blood Glucose Monitor is not intended for use on neonates.
•The Blood Glucose Monitor is not intended for use on artery blood, serum, plasma and
venous blood samples.
•The Blood Glucose Monitor should be only used with the test strips (NGS50-24/0726).
•The Blood Glucose Monitor cannot be used above an altitude of 10744 feet (3275 meters)
•If you are taking acetaminophen containing drugs (Tylenol and other medicines containing
acetaminophen, blood concentrations >5 mg/dL) or Vitamin C (ascorbic acid, blood
concentrations >4 mg/dL) at doses higher than recommended, these may interfere with your
glucose monitor and cause you to get inaccurate results with this system
•Not for use for patients in a hyperglycemic-hyperosmolar state, with or without ketosis.
•Not for use on critically ill patients.
•Not to be used for patients who are dehydrated, hypertensive, hypotensive, or in shock.
•Do not use during or soon after xylose absorption testing.

Important Safety Information and Precautions
•Misuse of the blood glucose monitoring system can cause electrocution, burns, fire, and
other hazards.
•The glucose monitor and lancing device are for single patient use. Do not use either item on
multiple patients.
•Do not share the monitor or lancing device with anyone, including other family members.
•Do not place the blood glucose monitoring system in or near liquid.
•Use the blood glucose monitoring system only for the purpose described in the Owner’s
Manual.
•Use only accessories that are supplied by the manufacturer.
•Do not use the blood glucose monitoring system if it has sustained any damage or is not
working properly.
•Do not block test ports or place the blood glucose monitoring system on soft surfaces that
may block them. Keep test ports free from lint, hair, debris, etc.
•Do not place anything on top of the blood glucose monitoring system.
•Do not place foreign objects into any opening in the blood glucose monitoring system.
•Do not use the monitor in a manner not specified by the manufacturer.
•All parts of the system are considered biohazards and can potentially transmit infectious
diseases, even after you have performed cleaning and disinfection.
•Refer to the resources identified below for detailed information:
FDA Public Health Notification
Use of Fingerstick Devices on More than One Person Poses Risk for Transmitting Bloodborne
Pathogens: Initial Communication” (2010)
http://www.fda.gov/MedicalDevices/Safety/AlertsandNotices/ucm224025.htm
CDC Clinical Reminder
Use of Fingerstick Devices on More than One Person Poses Risk for Transmitting Bloodborne
Pathogens” (2010)
http://www.cdc.gov/injectionsafety/Fingerstick-DevicesBGM.html
Battery Warning
•Do not mix alkaline, stand (carbon-zinc) and rechargeable batteries (nickel hydride).
•Do not mix old and new batteries.
•Non-rechargeable batteries are not to be recharged.
•Rechargeable batteries are to be removed from the unit being charged (if removable).
•Rechargeable batteries are only to be charged under adult supervision (if removable).
•Exhausted batteries are to be removed.
•The supply terminals are not to be short-circuited.
•Only batteries of the same or equivalent type as recommended are to be used.
•Batteries are to be inserted with the correct polarity.

PACKAGE CONTENTS
•Blood Glucose Meter
•10 Test Strips and 10 Lancets
•Storage Case and Log Book
•Lancet Device
•Instruction Manual
PARTS OF MONITOR
Date
Display monitor’s date
Time
Display monitor’s time
Average Range
Display the 7/14/21/28/60/90 days average
Memory
Appears when checking past test result
CTL Symbol
Appears when doing a control test and indicates that the result will
not be stored in the memory
Measurement Unit
Appears with the test result either in mg/dL or mmol/L
Low Battery
Appears when battery is low
Alarm Clock
4 Memories for Alarm
Blood Sample
Flashes when it is ready to apply the sample
SET Button
Long press to turn on the monitor and set the parameter
MEM Button
Long press to turn on the monitor and view past test results
Eject Button
Remove the test strip automatically
PARTS OF TEST STRIPS
Use only the test strips (NGS50-24/0726) with (MBG10-6/0741). Each strip can be used only once.

Before Use
•Severe dehydration and excessive water loss may cause inaccurate results. If you believe you are suffering
from severe dehydration, consult your healthcare professional immediately.
•Inaccurate results may occur in severely hypotensive individuals or patients who are in shock. Test results that
are lower than actual values may occur in individuals who are in a hyperglycemic-hyperosmolar state, with or
without ketosis. Critically ill patients should not be tested with blood glucose monitor.
•If you think your blood glucose results are inconsistent with your feeling or symptoms which you are
experiencing, repeat the test first. If you have symptoms or continue to get similar results, follow the
treatment advice of your healthcare professional.
•If you are experiencing symptoms that are inconsistent with your blood glucose test, and you have followed all
of the instructions provided in this Owner’s Manual, contact your healthcare professional immediately.
•Use only fresh whole blood samples to test your blood glucose.
•Do not use test strips that are expired or appear to be damaged as they may return inaccurate results.
•The lancing device is for self-use only. Do not share or re-use lancets. Please refer to the Lancing Device
Manual for the detailed procedure.
Battery Installation
1. Open the battery compartment at the back of device.
2. Insert 2 AAA batteries according to the +/- markings.
3. Re-attach the battery cover back, ensuring it clicks into place.
NOTE: When the low battery symbol appears on screen, turn off this device and follow the instructions above to replace batteries.
CAUTION: Never leave any low battery in the battery compartment as it may leak and cause damage to this device.
Setting the Monitor
Before using this device for the first time or if you change the battery, you should check and update these settings.
Make sure you complete the steps below and have your desired settings saved.
When the year flashing, press M
until the correct year appears. Press
Sto confirm.
When the month flashing, press
Muntil the correct month
appears. Press Sto confirm.
When the day flashing, Press Muntil
the correct day appears. Press S.
When the hour flashing, Press Muntil
the correct hour appears. Press S to
confirm.
When the minute flashing, Press
Muntil the correct minute
appears. Press Sto confirm.
Press Mto select the unit of
measurement. The unit of
measurement will be preset to mg/dL
before being sold to the U.S.A. Press
S to confirm.

Delete Memory
Delete Memory
When “dEL” is flashing and a “ ” symbol appears on the
screen, press Mto delete all the memory. “___” will flash
three times and screen will auto off.
Setting of Alarm
You may set up any or all of the alarms (1 - 4).
When “dEL” is flashing and a “ ” symbol appears on the screen, press Sto
set the alarm.
When the “OFF” or “On” and “ ”
symbols appear on the screen, press Mto
turn on or off the first alarm.
Press Mto select on, press Sto set the hour.
When the hour
flashing, press Mto
add an hour. When the
correct hour is set,
press S to confirm.
When the minute flashing,
press M to add one minute.
Hold Mlonger to add
minutes faster.
When the correct minute is
set, press Sto confirm and
go to the next alarm.
If you do not wish to set an alarm, press Sto
skip this step.
If you wish to turn off an alarm, find the
alarm number by pressing Sin the setting
mode, press Mto change from “ON” to
“OFF”
At the time of your alarm setting, the monitor will beep and automatically turn on.
If you do not want to test at this time, press Sagain and again can skip setting alarms and
screen will finally off. If you do not press S, the monitor will switch off after 2 minutes.

Before Taking Test for Blood Glucose
To reduce the chance of infection:
•Choose a clean, dry work surface.
•Never share a lancing device or lancet with other person.
•Always use a new and sterile lancet.
•Always use a new test strip. the test strip is for single use only.
•Avoid getting lotion, oils, dirt, or debris in or on the lancet and lancing device.
A sample may be obtained from the finger by the following steps:
1. Wash your hands all the time, before the following steps.
2. Insert the test strip into the monitor’s strip port with the contact bars facing toward you. The
monitor and Blood Sample Symbol will display (see below).
Prepare the lancing device.
Snap off the lancing device
cap
Insert a new lancet firmly into
the lancing holder cup
Twist the lancet cover
off
Replace the lancing device
cap
Set the lancing level
Twist the handle until it
clicks

1. Obtain a blood sample
Press the lancing device against the site to be lanced. Press the release button to
puncture the site. Squeeze your finger until a drop of blood forms. Wipe away the
first blood drop and squeeze until a second small blood drops forms.
2. Apply the blood sample to the test strip
Quickly apply the blood sample to the absorbent hole of the test strip. Make sure
the confirmation window of the test strip is completely filled with the blood sample.
Quickly remove your finger from the test strip when the countdown (from 5 to 1)
begins on the monitor display.
3. Test result will appear on the monitor
Note: The results obtained from the glucose monitor are plasma-calibrated. This helps
you and your physician or other qualified healthcare providers to compare your monitor
results with laboratory tests. Refer to the instructions given by your physician or other
qualified healthcare providers, do not deviate from these instructions on the basis of the
result without first consulting your physician.
4. Discard the used test strip and lancet. Remove the used test strip from the monitor
using a small amount of tissue paper. Discard the used test strip and lancet
properly. (Tips: Prior to disposal, stick the lancet into the cover.)

About the Color Bars
On the panel of the Blood Glucose Monitor (MBG10-6/0741), there is a color bar. It is used for indicating blood
glucose value range. The Color Bar’s image is showing in picture (c) as below.
The flashing black block means the present blood glucose value range which is listed as the following table
Value of Blood Glucose
(mg/dL)
Block in Color Bar
<70
Orange Block
70≤N<110
Blue Block
110≤N<126
126≤N<140
Purple Block
140≤N<200
≥200
Reviewing Saved Result on the Monitor
Day Average Result
1. Long press the MEM button for 3 seconds to view the
test results stored in the monitor. The first reading is
your recent 7-day average blood glucose result.
2. Press MEM button to review 7-,14-, 21-, 28-, 60- and
90- day average results stored in the monitor.
Reviewing Test Result
3. After review 90-day average results ,keep to press
MEM button again, and the first reading you see is
the last blood glucose result along with date, time.
4. Press M to recall the test results stored in the
monitor each time you press.
Note: When the memory is full, the oldest result is dropped and the newest result is
added.
Exit the Memory Mode
When reaching the last test result. “End” will display,
and the monitor will turn off automatically.

PHYSICAL AND PERFORMANCE DETERIORATION
If you start experience one of the following, Stop using and contact local customer services or the place of
purchase for assistance.
1. The device does not work.
2. Discoloration of the monitor casing or lancing device; for example, it is difficult to read the labeling
information.
3. Corrosion, crazing (fine cracks), embrittlement, and/or cracking of the monitor casing or lancing device.
ALTERNATIVE SITE TESTING (AST)
What Is Alternate Site Testing?
Alternative site testing (AST) is the use of parts of the body,
other than the fingertips, to check blood glucose levels. The
Glucose Monitoring System allows you to test on the palm,
forearm, upper arm, calf, or thigh with equivalent results to
fingertip testing when used at appropriate times.
There are limitations for doing AST. Please consult your
healthcare professional before you conduct AST. The Glucose
Monitoring System should only be used for AST under steady-
state blood glucose conditions.
What Is the Advantage of Alternative Site Testing?
Pain is felt more readily on the fingertips because they are full
of nerve endings (receptors). At other body sites where nerve
endings are not so condensed, pain is not felt as acutely.
When Should You Use Alternative Site Testing?
Food, medication, illness, stress, and exercise can affect blood glucose levels. Capillary blood from the
fingertips reflects these changes faster than capillary blood from other sites. Therefore, when testing
blood glucose levels during or immediately after meals exercise, or when another of the above-noted
conditions applies, take a blood sample from your fingertips only. AST should be used only during steady–
state times when glucose levels is not changing rapidly.
Blood glucose results from the forearm, upper arm, hand, thigh and calf are not always the same as
results from fingertips. Alternative Site Testing is suitable in the following instances:
•In a pre-meal or fasting state (two hours or more after the last meal)
•Two hours or more after taking insulin
•Two hours or more after exercising
Caution: Do not use sites other than fingertips for testing when blood glucose is rapidly rising or falling,
within 2 hours of eating, after taking insulin, immediately after exercise, or when you are ill or under
stress. Alternative Site Testing should not be used to calibrate continuous glucose monitoring systems
(CGMs). Results from Alternative Site Testing should not be used in insulin dose calculations. Do not use
AST if:
•You think your blood glucose is low
•You are unaware that you might have hypoglycemia
•You are testing for hyperglycemia
•Your AST results do not match the way you feel
•Your routine glucose results fluctuate often

Compare Glucose Monitor Test Result with Laboratory Results
The results obtained from the glucose monitor are plasma-calibrated. The result you obtain from your
glucose monitor may differ somewhat from your laboratory results due to normal variation. Monitor
results can be affected by factors and conditions that do not affect laboratory results in the same way.
To make an accurate comparison between monitor and laboratory results, follow the guidelines below.
Before the Lab Test
•If possible, fast at least eight hours before conducting a comparison test.
•Take your monitor to the lab.
While at the Lab
Make sure that samples for both tests are taken and tested within 15 minutes of each other.
•Wash your hands before obtaining a blood sample.
•Never use your glucose monitor with blood samples collected in a test tube.
•Use fresh capillary blood only.
CARE AND MAINTENANCE
•For regular maintenance, this device only needs to be wiped gently with a soft, dry cloth.
Never immerse this device or any components in water.
•Do not carry out repairs of any kind yourself. If a defect occurs, please contact your local
authorized distributor. Use only authorized parts and accessories.
•The cleaning and disinfection is absolutely necessary for the test procedure, because cleaning
can insure the monitor works well (for example, display will be clear to see after cleaning); and
disinfection can avoid the infection to you or to the other people, and the cross-infection.
•The monitor and lancing device should be cleaned and disinfected following each use.
•The monitor and the lancing device are for single‐patient use, if user test 6 times every day,
the monitor and lancing device should be cleaned and disinfected 6 times per day which equals
to 10950 number of cycles over the 5 year life of the devices. The monitor and lancing device
were validated for 11,000 cycles which could support up to 6 cleaning and disinfection cycles
per day.
•Below are the steps on how to clean and disinfect the monitor and lancing device.
1. After a test, clean and wash your hands.
2. Use wipes carefully to clean the entire external surface of the monitor.
3. Then wipe the entire external surface of the monitor with another wipe, keep the surface
wet for 2min.
4. Use the same method with the wipes to clean and disinfect the lancing device.
•Note:
-Wash hands thoroughly with soap and water after handling the monitor, lancing device, or test
strips.
-Only the surface of the monitor can be cleaned and disinfected with the disinfecting towelette.
Do not insert the disinfecting towelette into the test strip port and the metal connector, or else
the performance of the monitor may be affected.
-If you have any questions you can call your local customer service.
-If the monitor is being operated by a second person who is providing testing assistance to the
user, the monitor and lancing device should be cleaned and disinfected prior to use by the
second person.

INTERNATIONAL BLOOD GLUCOSE UNITS OF MEASURE
Country
Unit of Measure Used
Country
Unit of Measure Used
Algeria
mg/dL
Australia
mmol/L
Argentina
mg/dL
Canada
mmol/L
Austria
mg/dL
China
mmol/L
Bahrain
mg/dL
Czech Republic
mmol/L
Bangladesh
mg/dL
Denmark
mmol/L
Belgium
mg/dL
Finland
mmol/L
Brazil
mg/dL
Germany
mmol/L
Caribbean Countries
mg/dL
Hong Kong
mmol/L
Chile
mg/dL
Ireland
mmol/L
Colombia
mg/dL
Kazakhstan
mmol/L
Ecuador
mg/dL
Malaysia
mmol/L
Egypt
mg/dL
Malta
mmol/L
France
mg/dL
Netherlands
mmol/L
Georgia
mg/dL
New Zealand
mmol/L
Greece
mg/dL
Norway
mmol/L
India
mg/dL
Qatar
mmol/L
Indonesia
mg/dL
Russia
mmol/L
Israel
mg/dL
Singapore
mmol/L
Italy
mg/dL
Slovakia
mmol/L
Japan
mg/dL
South Africa
mmol/L
Jordan
mg/dL
Sub-Saharan Africa
mmol/L
Korea
mg/dL
Sweden
mmol/L
Kuwait
mg/dL
Switzerland
mmol/L
Lebanon
mg/dL
Ukraine
mmol/L
Luxembourg
mg/dL
United Kingdom
mmol/L
Mexico
mg/dL
Vietnam
mmol/L
Oman
mg/dL
Peru
mg/dL
Philippines
mg/dL
Poland
mg/dL
Portugal
mg/dL
Saudi Arabia
mg/dL
Spain
mg/dL
Syria
mg/dL
Taiwan
mg/dL
Thailand
mg/dL
Tunisia
mg/dL
Turkey
mg/dL
United Arab Emirates (UAE)
mg/dL
United States
mg/dL
Uruguay
mg/dL
Venezuela
mg/dL
Yemen
mg/dL
Note: The default setting in US is mg/dL. Please contact customer support if your monitor isn’t set to mg/dL when
purchased.

If you follow the recommended action but the problem persists, or error messages other than the ones below
appear, please call your local customer service. Do not attempt to repair the monitor by yourself and never try to
disassemble the monitor under any circumstances.
Display Messages
Message
What It Means
What To Do
Blood glucose level is lower than
20mg/dL (1.1mmol/L).
The message indicates very low
blood glucose. Consult with your
healthcare professional.
Blood glucose level is higher
than600mg/dL (33.3mmol/L).
The message indicates severe
hyperglycemia (high blood
glucose). Seek immediate medical
assistance.
The battery in your monitor in low on
power.
Please change the battery.
Problem with the monitor.
Re-test with a new test strip.
Problems have occurred that are related
to test strip use, such as:
-test strip may be wet or damaged
-test strip may be removed too early
-you applied more blood after testing
began
Retest using a new test strip.
The environmental temperature is
lower than 50℉(10℃).
The operating temperature is 50°F
~ 104°F (10°C ~ 40°C)
The environmental temperature is
higher than 104℉(40℃).
The operating temperature is 50°F
~104°F (10°C ~ 40°C)

(continued)
Problem
Possible Causes
Solution(s)
Display remains blank after
the test strip has been
inserted into the monitor.
1. Battery power is too low for
use.
2. Too much time has passed
between inserting the test
strip and performing
the test.
3. Test strip has not been fully
inserted into the monitor.
1. Please change the battery.
2. Reinsert the test strip into
the monitor.
3. Reinsert the test strip into
the monitor, pressing firmly.
Test results are inconsistent.
1. Not enough sample in the
test strip.
2. Test strip has expired.
3. Test strip has been damaged
due to heat or humidity so
that the sample cannot be
applied, or the speed of
application is too slow.
4. System is not performing
due to the environment
being above or below room
temperature.
1. Re-test with a new test strip
and make sure that enough
sample has been applied.
2. Re-test with a new test strip.
3. Replace with new vial of test
strips.
4. Bring the system to a room-
temperature environment
and wait approximately 30
minutes before performing a
new test.
The monitor countdown did
not start.
Test strip has not been
inserted correctly.
Use a new test strip and redo
the test.

ELECTROMAGNETIC COMPATIBILITY INFORMATION
Table 1 For all ME EQUIPMENT and ME SYSTEMS
Guidance and manufacture’s declaration - electromagnetic emissions
This device is intended for use in the electromagnetic environment specified below.
The customer or the user of this device should assure that it is used in such an environment.
Emissions test
Compliance
Electromagnetic environment - guidance
RF emissions
CISPR 11
Group 1
This device uses RF energy only for its internal
function. Therefore, its RF emissions are very low and
are not likely to cause any interference in nearby
electronic equipment.
RF emissions
CISPR 11
Class B
This device is suitable for use in all establishments,
including domestic establishments and those directly
connected to the public low-voltage power supply
network that supplies buildings used for domestic
purposes.
Harmonic emissions
IEC 61000-3-2
Class A
Voltage fluctuations/
flicker emissions
IEC 61000-3-3
Complies
Guidance and manufacturer’s declaration - electromagnetic immunity
This device is intended for use in the electromagnetic environment specified below. The
customer or the user of this device should assure that it is used in such an environment.
Immunity Test
IEC 60601 Test
level
Compliance level
Electromagnetic environment -
guidance
Electrostatic
discharge (ESD)
IEC61000-4-2
± 6 kV contact
± 8 kV air
± 6 kV contact
± 8 kV air
Floors should be wood, concrete
or ceramic tile. If floors are
covered with synthetic material,
the relative humidity should be
at least 30 %.
Power frequency
(50/60 Hz) magnetic
field IEC61000-4-8
3 A/m
3 A/m
Power frequency magnetic fields
should be at levels characteristic
of a typical location in a typical
commercial or hospital
environment.
NOTE: UTis the a.c. mains voltage prior to application of the test level.

Table 2 For ME EQUIPMENT and ME SYSTEMS that are not LIFE-SUPPORTING
Guidance and manufacturer’s declaration - electromagnetic immunity
This device is intended for use in the electromagnetic environment specified below. The customer
or the user of this device should assure that it is used in such an environment.
Immunity Test
IEC 60601 Test
Level
Compliance
Level
Electromagnetic environment - guidance
Radiated RF
IEC 61000-4-3
3 V/m 80 MHz
to 2,5 GHz
3 V/m
Portable and mobile RF communications
equipment should be used no closer to any
part of this device, including cables, than the
recommended separation distance calculated
from the equation applicable to the frequency
of the transmitter.
Recommended separation distance:
d = 1.2 80 MHz to 800 MHz
d = 2.3 800 MHz to 2,5 GHz
Where P is the maximum output power rating
of the transmitter in watts (W) according to
the transmitter manufacturer and d is the
recommended separation distance in meters
(m).
Field strengths from fixed RF transmitters, as
determined by an electromagnetic site
survey,ashould be less than the compliance
level in each frequency range.b
Interference may occur in the vicinity of
equipment marked with the following symbol:
NOTE 1 At 80 MHz and 800 MHz, the higher frequency range applies.
NOTE 2 These guidelines may not apply in all situations. Electromagnetic propagation is affected
by absorption and reflection from structures, objects and people.
a. Field strengths from fixed transmitters, such as base stations for radio (cellular/cordless)
telephones and land mobile radios, amateur radio, AM and FM radio broadcast and TV
broadcast cannot be predicted theoretically with accuracy. To assess the electromagnetic
environment due to fixed RF transmitters, an electromagnetic site survey should be considered.
If the measured field strength in the location in which this device is used exceeds the applicable
RF compliance level above, this device should be observed to verify normal operation. If
abnormal performance is observed, additional measures may be necessary, such as re-orienting
or relocating this device.
b. Over the frequency range 150 kHz to 80 MHz, field strengths should be less than 3V/m.

Table 3 For ME EQUIPMENT and ME SYSTEMS that are not LIFE-SUPPORTING
Recommended separation distances between
portable and mobile RF communications equipment and this device
This device is intended for use in an electromagnetic environment in which radiated RF
disturbances are controlled. The customer or the user of this device can help prevent
electromagnetic interference by maintaining a minimum distance between portable and mobile RF
communications equipment (transmitters) and this device as recommended below, according to
the maximum output power of the communications equipment.
Rated
maximum
output
power of
transmitter
W
Separation distance according to frequency of transmitter
(m)
150 kHz to 80 MHz
d = 1.2
80 MHz to 800 MHz
d = 1.2
800 MHz to 2,5 GHz
d = 2.3
0,01
0,12
0,12
0,23
0,1
0,38
0,38
0,73
1
1,2
1,2
2,3
10
3,8
3,8
7,3
100
12
12
23
For transmitters rated at a maximum output power not listed above, the recommended
separation distance d in meters (m) can be determined using the equation applicable to the
frequency of the transmitter, where P is the maximum output power rating of the transmitter in
watts (W) according to the transmitter manufacturer.
NOTE 1: At 80 MHz and 800 MHz, the separation distance for the higher frequency range applies.
NOTE 2: These guidelines may not apply in all situations. Electromagnetic propagation is affected
by absorption and reflection from structures, objects and people.
NOTE 1 It is the manufacturer’s responsibility to provide equipment electromagnetic compatibility
information to the customer or user.
NOTE 2 It is the user’s responsibility to ensure that a compatible electromagnetic environment for the
equipment can be maintained in order that the device will perform as intended.
Use of this instrument in a dry environment, especially if synthetic materials are present (synthetic
clothing, carpets etc.) may cause damaging static discharges that may cause erroneous results.
Do not use this instrument in close proximity to sources of strong electromagnetic radiation, as these
may interfere with the proper operation.

This device complies with Part 15 of the FCC rules. Operation is subject to the following
two conditions:
(1) this device may not cause harmful interference, and
(2) this device must accept any interference received, including interference that may
cause undesired operation.
Caution: Changes or modifications to this device not expressly approved by the party
responsible for compliance could void the user’s authority to operate the equipment.
NOTE: This equipment has been tested and found to comply with the limits for a Class B
digital device, pursuant to Part 15 of the FCC Rules. These limits are designed to provide
reasonable protection against harmful interference in a residential installation. This
equipment generates, uses and can radiate radio frequency energy and, if not installed
and used in accordance to the Instructions, may cause harmful interference to radio
communications. However, there is no guarantee that interference will not occur in a
particular installation. If this equipment does cause harmful interference to radio or
television reception, which can be determined by turning the equipment off and on, the
user is encouraged to try to correct the interference by one or more of the following
measures:
-Reorient or relocate the receiving antenna.
-Increase the separation between the equipment and receiver.
-Connect the equipment to an outlet on a circuit different from that to which the
receiver is connected.
-Consult the dealer or an experienced radio/TV technician for help.

Model
MBG10-6/0741
Product Size
110mm (L) x 52mm (W) x 20.5mm (D)
Measuring Method
Amperometric technology using glucose dehydrogenase
Result Range
20 mg/dL ~600 mg/dL (1.1 mmol/L ~33.3mmol/L)
Power
DC3V 2 AAA (Not Included)
Storage Condition - Monitor
-4°F~131° F (-20°C~55°C); Humidity 10%~80%RH
Storage Condition –Test Strips
39.2°F~86°F (4°C~30°C), Humidity 10% ~85%RH
Operating Condition
50°F~104°F (10°C~40°C) , 25%RH~80%RH
Blood Source
Fresh capillary whole blood
Blood Volume
Minimum 0.7 micro liter
Life Span
5 Years
CALIBRATION AND SERVICE
The accuracy of this blood pressure monitor has been carefully tested and is designed for a long
service life. It is generally recommended to have this device inspected and calibrated every 2 years
to ensure correct functioning and accuracy. Please consult you authorized distributor.
Always use care when handling the Blood Glucose Monitor. Dropping or throwing the monitor may
cause damage.
Always wash your hands with soap and water, and rinse and dry them completely before handling
the Blood Glucose Monitor and test strips.
Table of contents
Popular Blood Glucose Meter manuals by other brands

Accu-Chek
Accu-Chek Inform II Competency manual

Accu-Chek
Accu-Chek Guide user manual

Lifescan
Lifescan SureStep Blood Glucose Monitor Operator's guide

A. Menarini Diagnostics
A. Menarini Diagnostics Glucoject Dual PLUS Instructions for use

Arkray
Arkray GLUCOCARD Shine Connex user manual

BETACHEK
BETACHEK C50 instructions