1
SENECA SURFACE MOUNT PRO EMERGENCY LUMINAIRE INSTRUCTIONS
Issue 03 3rd December 2021
THANK YOU for buying this product. To help ensure it gives complete satisfaction please
install it according to these instructions and then pass the instructions to the appropriate
person for retention and future reference.
SAFETY This is a mains powered product. It is designed to be installed by
suitably qualified personnel only and in accordance with the applicable building
and electrical regulations. Before installation or maintenance, the electrical supply to the
product must be isolated.
INSTALLATION SUPPORT If installation advice or accessories are required, please
contact us at the above address. We will do our best to help. When reporting a suspected
fault or seeking installation support the problem is likely to be resolved most quickly if you
have full product details to-hand, as well as details of when and where it was purchased.
LUMINAIRE INSTALLATION
Remove the front cover molding by releasing the three clips on the side wall using a flat
head screwdriver.
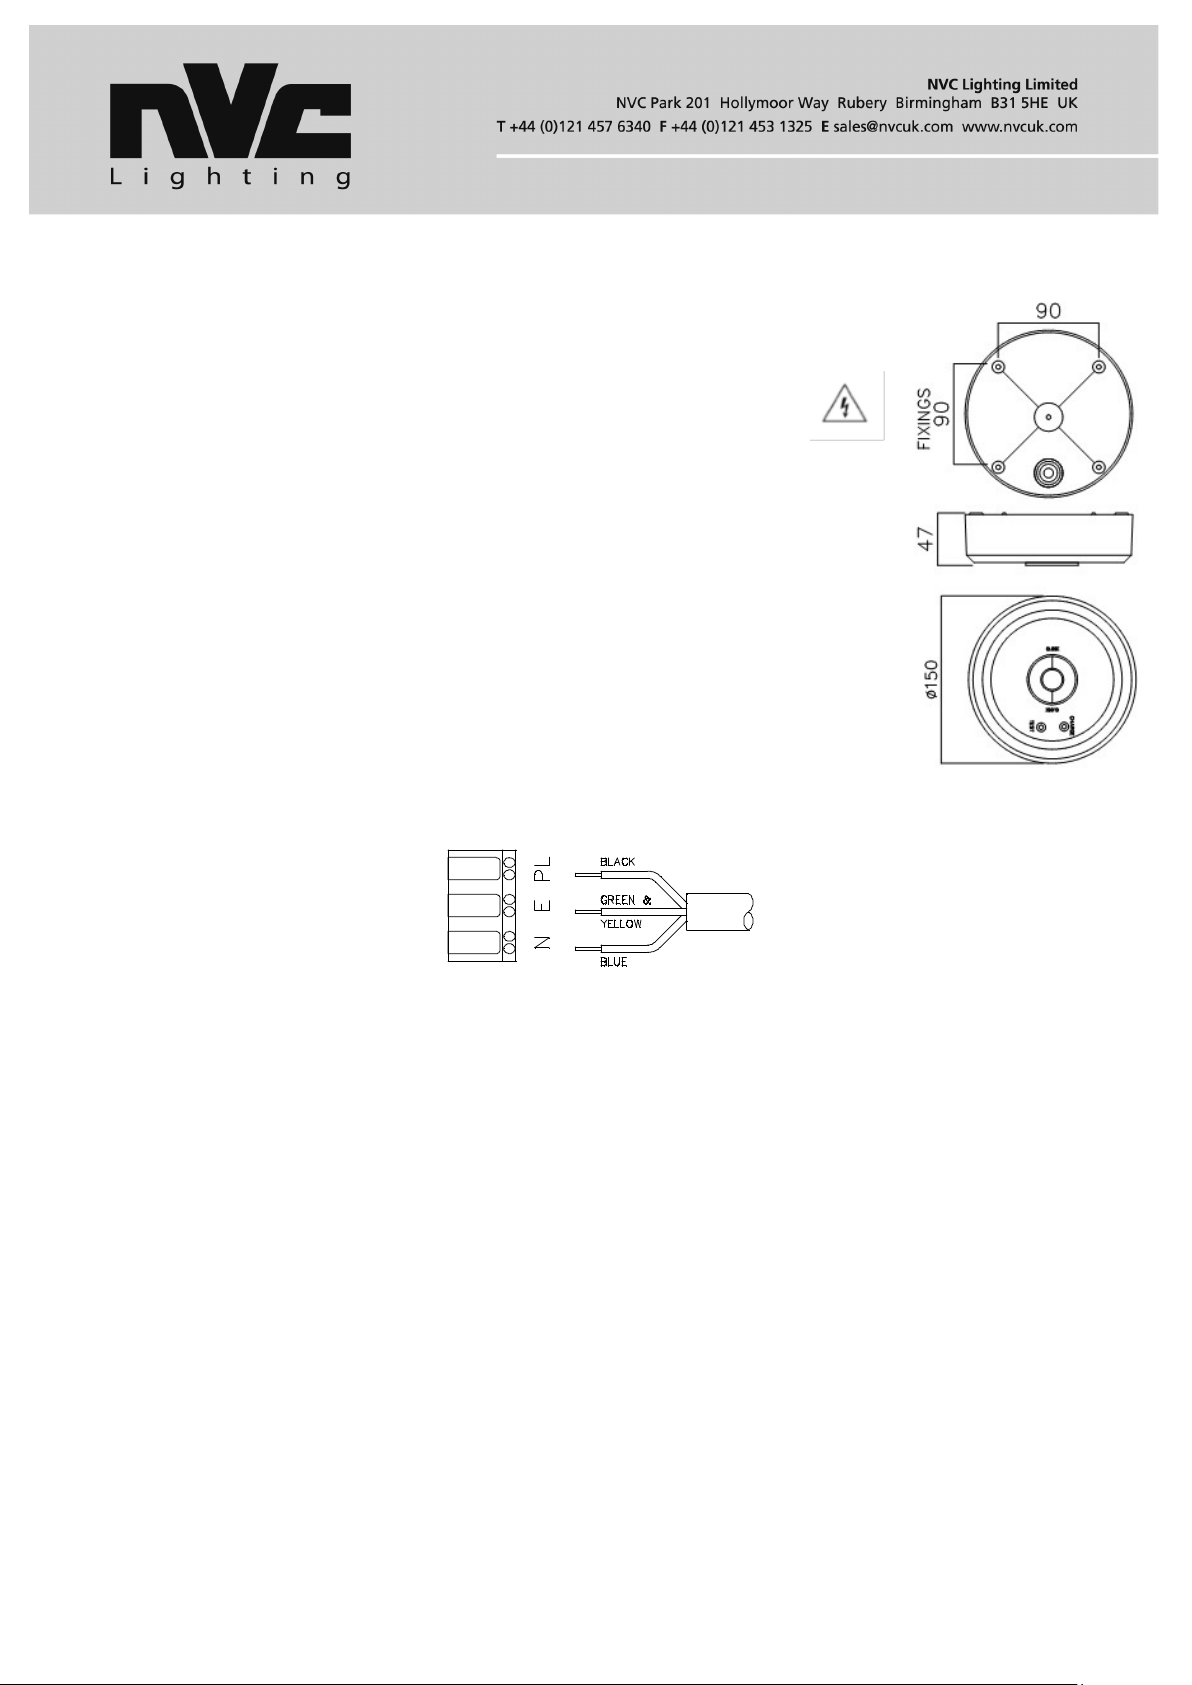
1. Prepare the surface & mains supply cable.
2. Route the mains supply cable through the hole in the base & then screw fix the
base to the mounting surface using the four fixing points provided at 90mm
centres.
3. Route the mains supply cable to the terminal block & terminate as shown.
4. Connect the battery pack to the PCB by connecting the 2-pole female socket on the battery wires to the
larger 2-pole male plug mounted on the PCB labeled “+ BATT -”. Ensure correct orientation.
5. Enter the “Installation Date” in the appropriate place on the battery pack label.
6. Offer the front cover to the base & connect:
a. The 2-pole connector to the 2-pole plug on the main PCB labeled “LED-/ LED+”, ensuring correct
orientation.
b. The 3-pole connector to the 3-pole plug on the main PCB, ensuring correct orientation.
7. Refit the front cover molding by snap fixing over the four clips & ensuring there are no wires trapped.
Note! There is a location peg that needs to align with a recess in the front cover molding.
8. Reconnect the power supply & check the green LED charge indicator illuminates.
9. The batteries should be allowed to charge for at least 24 hours before carrying out a full discharge test to
check they are charging correctly & the maintained duration is being achieved.
10. The luminaire operating temperature range is 0⁰C - +40⁰C.
LENS SELECTION
The luminaire comes fitted with a wide distribution lens as standard.
1. There is an option to change to the oval distribution lens (supplied) by following the below steps:
a. Remove the wide distribution lens by turning it anti-clockwise from the closed position to the
unlocked open position (aligned with the two arrows).
b. Locate the oval distribution lens onto the front cover in the unlocked open position (aligned with the
two arrows) and turn clockwise to lock the lens into the closed position.


