Oasis Aquatics PLT Series User manual


PLT SERIES POOL & SPA PUMP - INSTALLATION AND OPERATION MANUAL Page 1of 13
TABLE OF CONTENTS
1. IMPORTANT WARNINGS & SAFETY INSTRUCTIONS.............................................................. 2
2. GENERAL OVERVIEW................................................................................................................ 4
3. INSTALLATION & OPERATING INSTRUCTIONS....................................................................... 5
LOCATION...................................................................................................................................... 5
WEATHER PROTECTION .............................................................................................................. 5
POWER CONNECTION.................................................................................................................. 5
PIPE CONNECTION ....................................................................................................................... 5
STARTING THE PUMP................................................................................................................... 6
PUMP OPERATION........................................................................................................................ 6
LIMITS............................................................................................................................................. 6
WATER QUALITY........................................................................................................................... 6
EMPTYING THE HAIR AND LINT POT........................................................................................... 7
4. SYSTEM TROUBLESHOOTING.................................................................................................. 8
5. SPECIFICATION DETAIL.......................................................................................................... 10
6. WARRANTY .............................................................................................................................. 11
7. WARRANTY REGISTRATION................................................................................................... 12
8. TECHNICAL SUPPORT............................................................................................................. 12

PLT SERIES POOL & SPA PUMP - INSTALLATION AND OPERATION MANUAL Page 2of 13
1. IMPORTANT WARNINGS & SAFETY INSTRUCTIONS
IMPORTANT WARNINGS
This manual contains important information about the installation, operation and safe use of this
product. This information should be given to the owner and/or operator of this equipment. When
installing and using this electrical equipment, basic safety precautions should always be
followed. Failure to follow safety warnings and instructions in this manual can result in serious
injury and/or damage to your equipment. Read and follow all warning notices and instructions
which are included in this manual.
The internal power supply contains live components. There is a danger of electric shock if
opened. If the power cord is damaged then it should be replaced by the manufacturer, their
agent or similar.
To reduce the risk of injury, DO NOT permit young children to use this product unless they have
been trained by the person responsible for their safety and they acknowledge their ability to use
such equipment. To reduce the risk of accidents or incidents, service on the unit should only be
performed by your local pool Professional.
CAREFUL REMINDER
•Please check your pump basket, skimmer and entire pool system regularly to maximize the life of
your pool equipment & personal safety. Turn pump off first before checking baskets
•Make sure that all pressure gauges installed are in working condition and the operating pressure
is within limits as specified on the product
•Make sure that each suction inlet, and main drain has a cover that is securely attached and in
safe working condition to meet with all current legislation
•Make sure that all skimmer covers (deck lids) are securely attached and in safe working condition.
These should be replaced every 3 to 4 years
•Remove any obstructions or debris from the main drain cover
•Ensure theskimmer baskets and thepump hair and lint potsare free ofleaves and debrisregularly
•Remove obstructions and combustibles from around the pump motor
•Make sure all wiring connections are clean and that all wiring and electrical equipment is in good
condition. Damaged wiring must be repaired or replaced by a qualified electrician as soon as
damage is discovered
•Do not add chemicals directly to the pool skimmer. Adding undiluted chemicals may damage
pump, heater, etc and void warranty
•Check water balance and sanitizer levels at your local pool shop
•Pump suction is hazardous and can cause entrapment, drowning or disembowel bathers
•Do not block or cover any pool/spa suction
•Do not use or operate swimming pools, spas or spa baths if a suction cover is broken, missing or
loose
•Suction covers and inlets must be installed as per Australian Standards guideline and provided
for every pump to avoid suction entrapment

PLT SERIES POOL & SPA PUMP - INSTALLATION AND OPERATION MANUAL Page 3of 13
DANGER - HAZARDOUS SUCTION!
Do not block water entry into filtration system with any part of your body as the suction can trap hair or
body parts, causing severe injury or death. Do notblock suction. Turn off pump immediately if someone
becomes trapped.
CAUTION!
•In the interest of safety, we advise that all brands and types of pool pumps must be installed in
accordance with AS3000 wiring rules or equivalent
•If the pump and filter are located below pool water level, it is necessary to fit isolating valves in
the pipe between the pump and the skimmer box and in the return pipe from the filter to the pool
•The fittings on this product are constructed of ABS. Some PVC jointing compounds are
incompatible with ABS. Check compound suitability before use
•Oasis Aquatics recommends that all installations are fitted with earth leakage or residual current
protection devices
•Ensure that an electrical isolation switch is located with easy access so that the pump can be
switched off in an emergency

PLT SERIES POOL & SPA PUMP - INSTALLATION AND OPERATION MANUAL Page 4of 13
2. GENERAL OVERVIEW
Congratulations on your recent purchase of your Oasis Aquatics PLT Series Pool & Spa Pump.
Please take a moment to read through the entire manual before installing your new unit. Oasis
Aquatics pool and spa pumps have been designed to circulate swimming pool and spa water in
conditions set out in the Australian Standard for swimming pool water quality (AS 3633).
While every effort has been made to ensure that the information contained in this guide is accurate and
complete, no liability can be accepted for any errors or omissions. Oasis Aquatics reserves the right
to change the specification of the hardware and software described herein at any time without prior
notice.
There is one design, comprising 4 different size models in our range:
PLT100
PLT150
PLT200
PLT300
The Oasis Aquatics PLT Series Pool & Spa Pump has been designed to circulate swimming pool
and spa water in conditions set out in the Australian Standard for swimming pool water quality (AS
3633)
Oasis Aquatics designs its own electric motors specifically for its pumps. The matched motor and
“pump wet end” are designed to provide quiet operation and energy efficiency.
Oasis Aquatics totally enclosed fan-cooled motor incorporates “thermal cut-out” overload protection
designed to protect the motor from overheating.
Every Oasis Aquatics pool and spa pump is thoroughly water tested against flow, pressure, voltage,
current and mechanical performance parameters.
Oasis Aquatics advanced pump technology provides reliable and efficient performance that lasts.
Oasis Aquatics pool and spa pumps are designed with high flow and the head pressures are ideally
suited for the modern pool or spa with extensive equipment.
Oasis Aquatics pool and spa pumps are designed to operate with most chlorinators, heaters and other
pool equipment producing correct water flow and energy efficiency.
Thank you again for choosing an Oasis Aquatics PLT Series Pool & Spa Pump.

PLT SERIES POOL & SPA PUMP - INSTALLATION AND OPERATION MANUAL Page 5of 13
3. INSTALLATION & OPERATING INSTRUCTIONS
LOCATION
The pump should be located as close to the water as practicable and mounted on a firm base in a well-
drained position, high enough to prevent any flooding. It is the installer’s/owners responsibility to locate
the pump so that it can be accessed for service and maintenance.
The rear fan shroud should be installed at a minimum distance of 100 mm away from any walls or
obstructions. This is to allow adequate air flow from the fan to cool the motor.
Overheating due to a lack of cooling voids warranty.
WEATHER PROTECTION
It is recommended that the pump be protected from the weather.
Enclosures should be ventilated to allow a free flow of air for the fan cooled motor.
POWER CONNECTION
Oasis Aquatics PLT Series Pool & Spa Pump are suitable for connection to a nominal 240-volt 50Hz
power supply.
The motor is equipped with a flex and 3-pin plug. If a power outlet is not available within 2 meters of the
pump, a 3-pin power point in a safe, dry place may need to be provided by an electrician.
Note:
•Pumps must be either
Supplied by an isolating transformer, or
Supplied through a residual current device (RCD) with a rated residual operating current
not exceeding 30mA
•Extension cords are unsafe around pools and must be avoided
•If the supply cord of this product is damaged the dealer or manufacturer must replace it, with
genuine Oasis Aquatics pool and spa pump spares
•Water temperature is not to exceed 45 degrees
PIPE CONNECTION
A barrel union is provided for connecting to the piping from the pool.
The pumps are designed to accept the following PVC Pipes:
•Inlet PVC Position 40mm pipe ID or 50mm fitting ID PVC pressure pipe fittings
•Outlet PVC Position 40mm pipe ID or 50mm fitting ID PVC pressure pipe fittings
The use of pipe with a smaller ID than those specified above is not recommended and may cause
damage to the pump voiding warranty.
A straight length of pipe measuring no less than 300mm should be installed in front of the inlet of the
pump allowing quieter and smoother operation.
Suction piping should be free from all air leaks and any humps and hollows, which may cause suction
difficulties.
The outlet piping from the pump should be connected to the inlet connection on the swimming pool filter
(at the filter valve). For pump installations above water level, it generally requires a check valve in the
suction line.
Do not use type ‘P’ (green) plumber’s glue on the barrel unions as this may cause damage to the
material used.
Always install pump for maintenance and service accessibility.

PLT SERIES POOL & SPA PUMP - INSTALLATION AND OPERATION MANUAL Page 6of 13
STARTING THE PUMP
To operate efficiently andto prevent damage to the pump there must be a free flow of water to and from
the pump. Before starting ensure that:
▪All pipe work is correctly sealed
▪The pool/spa water level is at the correct height
▪Barrel unions on the inlet and outlet are hand tightened and the pipework is installed square to
the pump.
▪That all appropriate valves are open and there is nothing preventing the flow of water through the
system
1. First prime the pump by removing the strainer basket lid and filling the strainer basket area with
water. Replace the lid, ensuring that it seals on the large o-ring.
2. Connect to the power supply and switch on.
3. Allow the pump to run, so that any air trapped in the pipe work and pump may be expelled.
4. If prime is not established within approximately two minutes, as evidenced by a strong flow of
water from the outlet, switch off the pump for 10 secs and repeat the procedure.
Continued evidence of air under the hair and lint pot lid indicates an air leak in the suction piping
work, which should be rectified to avoid pump damage.
5. After cleaning the lint basket, if water flow through the pump is constantly difficult to obtain at
start-up, then an examination of the system to determine the reason and correct the problem
should be performed. (ie. Check valve, air leaks, faulty seal/s, crack lid)
PUMP OPERATION
For optimum pump performance, the strainer basket housing should always be full of water and free
from air bubbles.
The water levelof the pool should always be maintained to at least halfwayup the skimmer box ensuring
water is in the pump at all times. From time to time it may be necessary to re-prime the pump. This
should be carried out as described above.
LIMITS
Water temperature Max 45°C Ambient Temperature Max 55°C DBa @ 1 meter 62
WATER QUALITY
Maintaining balanced water chemistry is important to the life of your pool pump.
This pump is designed to be used with Pool & Spa water, balanced in accordance with Langlier
Saturation Index, with a pH level of between 7.2 and 7.8 and is regularly treated with a chlorine
sanitizing agent with the level not exceeding recommended chlorine levels.
Please consult your local pool shop regularly to have your water tested.

PLT SERIES POOL & SPA PUMP - INSTALLATION AND OPERATION MANUAL Page 7of 13
EMPTYING THE HAIR AND LINT POT
The hair and lint pot strainer basket should be inspected frequently through the transparent lid and
emptied when a build up of rubbish is evident. Follow the directions below.
1. Switch off pump.
2. Unscrew the hair and lint pot strainer basket lid anti-clockwise and remove.
3. Remove the hair and lint pot strainer basket by lifting upwards from its housing.
4. Empty the trapped refuse from the basket. Hose out with water if necessary.
5. Check the hair and lint pot strainer basket for cracks, replace the strainer basket in the pump if
OK.
6. Replace the lid and ensure that it seals on the large rubber o-ring.
Firm hand tightness only is required.
•The o-ring & thread can be lubricated with silicone grease.

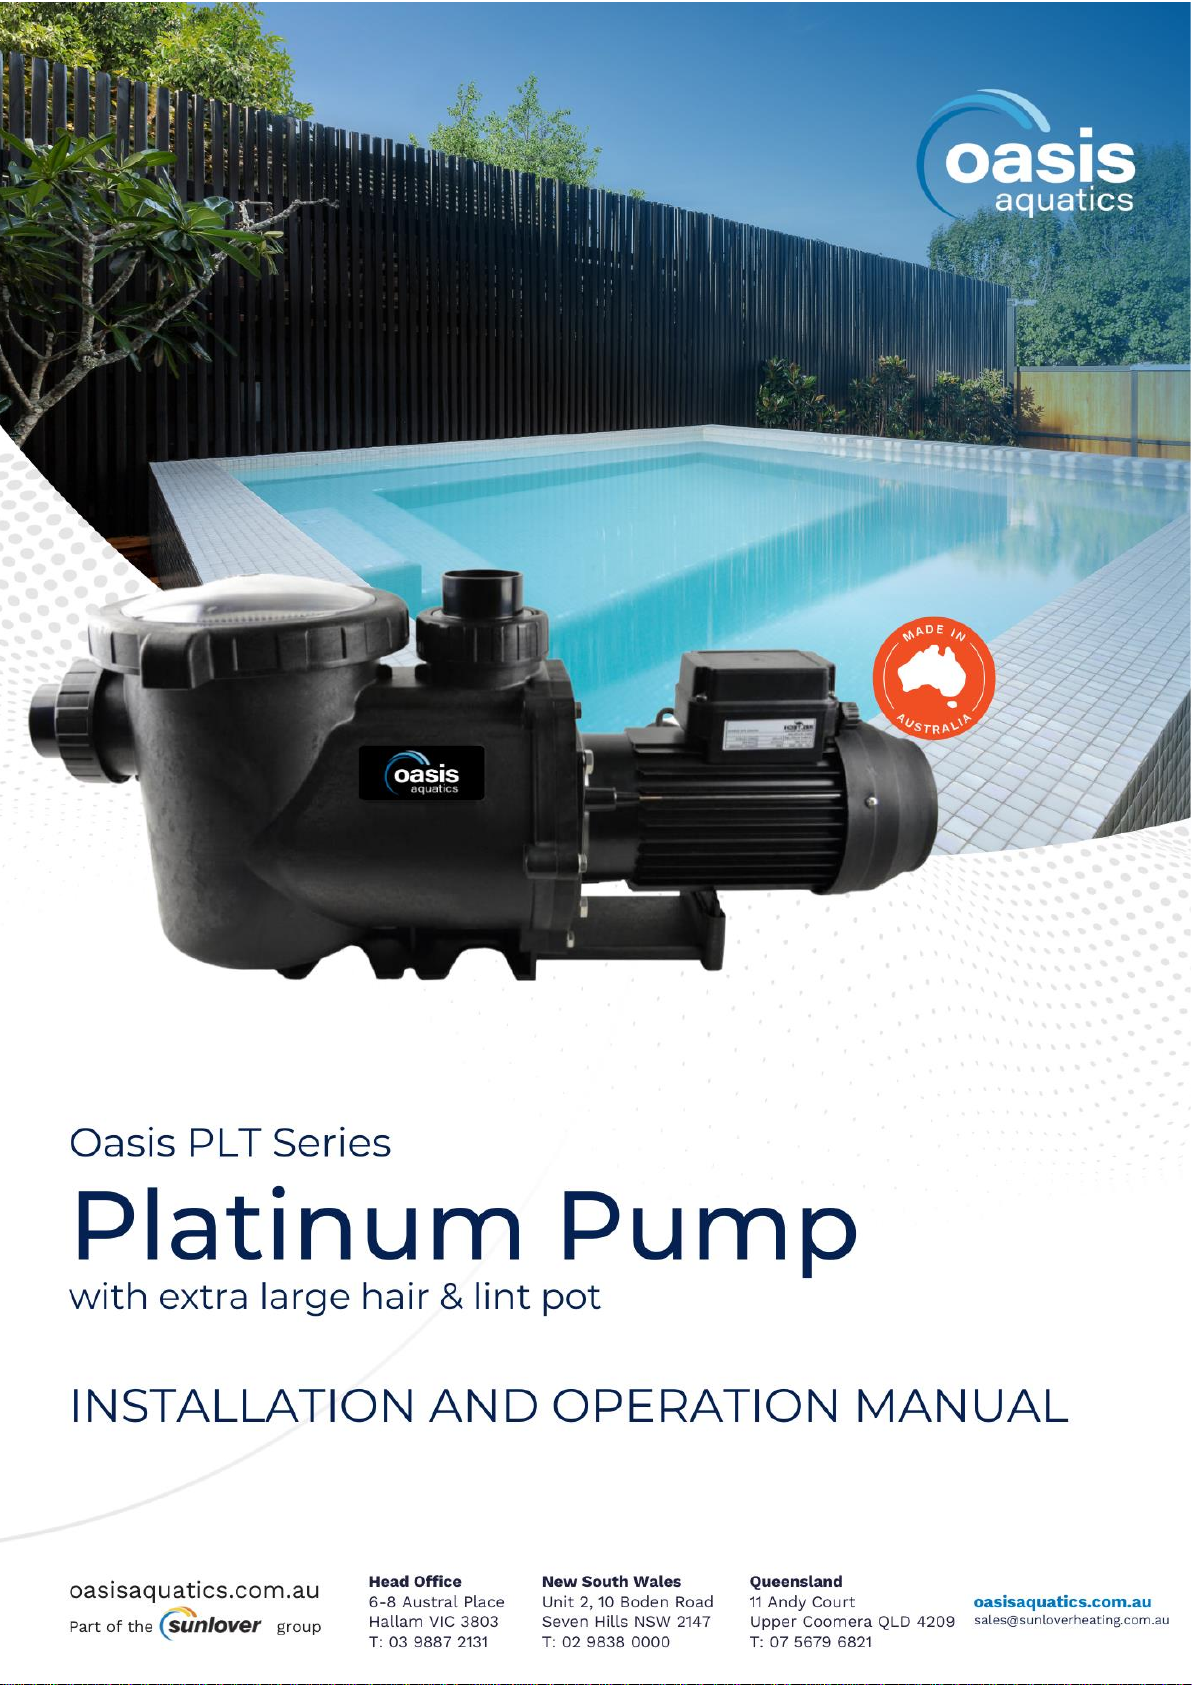
PLT SERIES POOL & SPA PUMP - INSTALLATION AND OPERATION MANUAL Page 8of 13
4. SYSTEM TROUBLESHOOTING
If you suspect for any reason your Oasis Aquatics PLT Series Pool & Spa Pumps are not
performing or running as it should be, here are some handy troubleshooting tips that may assist
you.
If the pump does not operate, one of the following conditions may apply:
•The power is not connected. For 240 volt only
•Check the power point by plugging in a portable appliance to ensure power is available
•Check fuses and the main power supply switch
•Automatic overload is tripped. The pump has an in-built thermal overload, which will re-set
automatically after the motor has cooled following an overheating period. Determine the cause of
the overload tripping and rectify
•Pump needs to be disconnected for 10 secs and reconnected
•Blockage is preventing the pump from rotating
•If plugged into chlorinator, disconnect and reconnect directly to power after 10 secs. If it then
works, please check your chlorinator manual
•Motor is burnt out - burning smell is evident. Replacement is required
•If you are unable toresolve any installation or operation difficulties with your Oasis Aquatics pool
and spa pump, contact the supplier from whom the pump was purchased or your nearest
Authorized Oasis Aquatics pool and spa pump Pool Equipment Service Centre. If any further
assistance is required, contact the Oasis Aquatics Customer Service Centre at the address
indicated in this manual
If the pump runs but there is no water flow or water flow is reduced, the following
condition may apply:
•The filter requires backwashing or it is blocked.
•The pump is not primed. (See Starting the pump).
•There are air leaks in the suction piping. Check all piping and eliminate leaks, also check for a
loose strainer basket lid. Air bubbles in the water flowing back to the pool would indicate a leak in
the suction to the pump allowing air to infiltrate the pipe work.
•The pump is not able to get water from the pool. Check that the valves to the pump are fully open
and that the pool water level is up to the skimmer box.
•A leaking pump seal may also prevent operating. Evidence of this would be water on the ground
under the pump.
•Blockage in the piping or pump. Remove the hair and lint pot strainer basket and check for any
blockage to the pump impeller entry.
•To check if impeller is rotating, please lodge a flat-head screwdriver in the back motor through
the fan cowl and twist.
Removal of the Pump from Pipe work
To remove the pump, follow these instructions:
1. Switch off the power and remove the plug from the power source.
2. Close the water valves on the pool return and the pump inlet pipe work.
3. Remove the discharge & suction barrel unions taking care not to lose the o-rings.
4. Move the pipe work with the barrel unions attached until the pump can be moved clear.

PLT SERIES POOL & SPA PUMP - INSTALLATION AND OPERATION MANUAL Page 9of 13
PLEASE NOTE
•If the pump is hard wired, a qualified electrician should remove the wiring
•On some models the pump is fitted with an internal check valve to reduce reverse flow of water
through the pump
•Barrel unions need to be hand tightened. No sealant, glues or silicones are required
•When making any enquiries about your Oasis Aquatics PLT Series Pool & Spa Pump be
certain to quote the model number from the nameplate located on motor
•Never run pump dry. Running the pump with no water may damage themechanical seals, causing
leakage and flooding. Dry running damage and associated damage is notcovered underwarranty
•Failure to undertake regular maintenance may cause damage not covered by warranty
•The pump is not intended for use by young children or infirm persons without supervision. Ensure
that young children are supervised at all times to ensure that they do not play with the pump

PLT SERIES POOL & SPA PUMP - INSTALLATION AND OPERATION MANUAL Page 10 of 13
5. SPECIFICATION DETAIL
The Oasis PLT Series Pumps are the largest pool pump available, with
an extra-large capacity heavy duty hair and lint basket.
Features
•Powerful and reliable motor rated for
continuous operation ensures a long
life.
•Easy removable clear inspection lid
for quick and easy routine
maintenance and cleaning of strainer
basket.
•Elevated motor stand assembled to
main body ensures balanced support
for motor and pump, reduces noise
and vibration and keeps moisture
away from the motor.
•Durable, reliable, safe & designed to
last
•User friendly & functional
•Powerful, quiet & energy efficient
•The PLT Series is covered by a limited 3 year warranty against defects in materials and workmanship
Specifications
Model
Horse
Power
Flow Rate
at 8mtr Head
Volts
Phase
Full Load
Amps
Watts
Input
Max Noise
dB(A) at 1mtr
Length of
Pump (A)
PLT100
1.0
330
240/1
4.97
1150
62
710
PLT150
1.5
420
240/1
6.4
1500
63
720
PLT200
2.0
520
240/1
8.6
1980
65
750
PLT300
3.0
610
240/1
12.4
2250
70
770
Dimensions

PLT SERIES POOL & SPA PUMP - INSTALLATION AND OPERATION MANUAL Page 11 of 13
6. WARRANTY
THIS EQUIPMENT HAS BEEN MANUFACTURED AND TESTED TO THE HIGHEST STANDARD
AND ACCORDINGLY CARRIES THE FOLLOWING WARRANTY.
Your Oasis Aquatics PLT SERIES pool and spa pump is covered by a limited three-year warranty.
Please refer below for details as follows:
•3 year limited warranty against defects in workmanship and materials excluding obvious neglect,
misuse, improper installation or improper maintenance from date of purchase
•3 years on pump body and seal plate
•2 years on motor
•12 months on Mechanical Seals
Items that are replaced as part of routine maintenance are not covered by this warranty. These items may
include O’ rings, gaskets and mechanical seal.
This warranty is subject to the conditions and limitations herein after stated. You must notify Oasis Aquatics
of the failure of any component of your pool and spa pump and motor within 7 days of the recognised fault.
Oasis Aquatics will at its option, repair or replace any defective parts. Component failure mustbe due solely
to a defect in materials or workmanship. The manufacturer will not be held liable for damage caused by, but
not limited to, corrosion, scaling or stress.
This warranty does not apply if failure is due to any abuse, misuse, improper installation or accident
or to any of the following:
•Improper chemical balance in the water
•Incorrect power supply and/or connection
•Water damage from external sources
•Cement, pebbles, render or other pool surface finish blocking the impeller
•Use on non swimming pool or spa pool application, (salt water aquaculture)
•Running the pool and spa pump dry
•Inadequate ventilation
•Installed on uneven ground or in a sump area that collects significant water
•Addition of salt, chlorine and/or any other pool chemicals through skimmer or pump basket
•Installation is carried out incorrectly by any person other than a person authorised by us to do so
•Damage beyond our control
•Keep your original purchase invoice and serial number in a safe place
•This warranty is applicable to workmanship and materials only
•This warranty is not transferable under any circumstance
To stand behind our commitment to provide warranty coverage, Oasis Aquatics has established a network
of authorized warranty agents throughout Australia. To obtain warranty service, contact our Service
Department.If your request for warranty service is diagnosed to be non-warrantable, you will still be charged
for a service call.
12 month in field labour warranty is applicable in some capital city metropolitan areas or within a 20 km
radius of an Authorised Oasis Aquatics Service Agent. A travel fee may be charged on all other areas.
Oasis Aquatics shall have no liability for incidental or consequential damages. No person is authorized to
make any representation or warranty on behalf of Oasis Aquatics other than what is stated here.
On Commercial Installations, such as health clubs, swim schools, motels/hotels and hydrotherapy, parts and
in field labour warranty (within capital city metropolitan areas or 20km radius of authorised service agents)
is 6 months from the date of purchase.
Oasis Aquatics assumes no liability for consequential damages of any kind.

PLT SERIES POOL & SPA PUMP - INSTALLATION AND OPERATION MANUAL Page 12 of 13
7. WARRANTY REGISTRATION
Registering your Oasis Aquatics products is fast and easy, providing peace of mind that you’ve
got great backup support for the life of your pool heating!
•Go to sunloverheating.com.au/service-request/warranty-
registration or scan the QR code
•No Need to create an account
•Fill in your details
•Upload a photo of your serial number
•Submit
8. TECHNICAL SUPPORT
For all warranty enquiries please contact your local distributor or contact Oasis Aquatics directly and
we will either direct you to your nearest authorised repairer or assist you.
OASIS AQUATICS
Ph: 1800 815 913
Website: oasisaquatics.com.au
Email: info@oasisaquatics.com.au
DISCLAIMER
Information in this guide is intended to provide general information on a particular subject(s) in good
faith and is not an exhaustive treatment of such subject(s). Its use is beyond the control of the author,
contributor, publishers and distributors and should not be relied upon without consulting your local
Professional for comprehensive advice.
This guide includes subject(s) that should only be performed by or under the direction and advice of
your local Professional and under no circumstances should the guide be used as a substitute for such
professionals.
No representations or warranties are made that the content, advice and recommendations in this guide
are current, free from errors or omissions, or appropriate for the user’s circumstances or abilities. No
liability or responsibility is accepted for any loss suffered as a result of any user’s reliance on such
content.

PLT SERIES POOL & SPA PUMP - INSTALLATION AND OPERATION MANUAL Page 13 of 13
A part of the
Group
Victoria
6-8 Austral Place
Hallam VIC 3803
Australia
T: 03 9887 2131
New South Wales
Unit 2, 10 Boden Road
Seven Hills NSW 2147
Australia
T: 02 9838 0000
Queensland
11 Andy Court
Upper Coomera QLD 4209
Australia
T: 07 5679 6821
This manual suits for next models
4
Table of contents
Popular Water Pump manuals by other brands

Aquatec
Aquatec PondMAX PX20000 instruction manual

Pfeiffer Vacuum
Pfeiffer Vacuum HEPTA 630 P operating instructions

fluid-o-tech
fluid-o-tech MONO Series instruction manual

IML
IML ATLAS Installation and maintenance manual

Drive
Drive 14001E user manual

Ranpump
Ranpump E40-SX Operating and maintenance manual