TROUBLESHOOTING GUIDE
1. If the information listed in the troubleshooting guide can’t solve your problem, please
email us for help.
2. Failure to keep this unit clean from mineral deposits may affect operation of this unit.
3. Customer failure to follow these instructions may void the warranty.
3
1
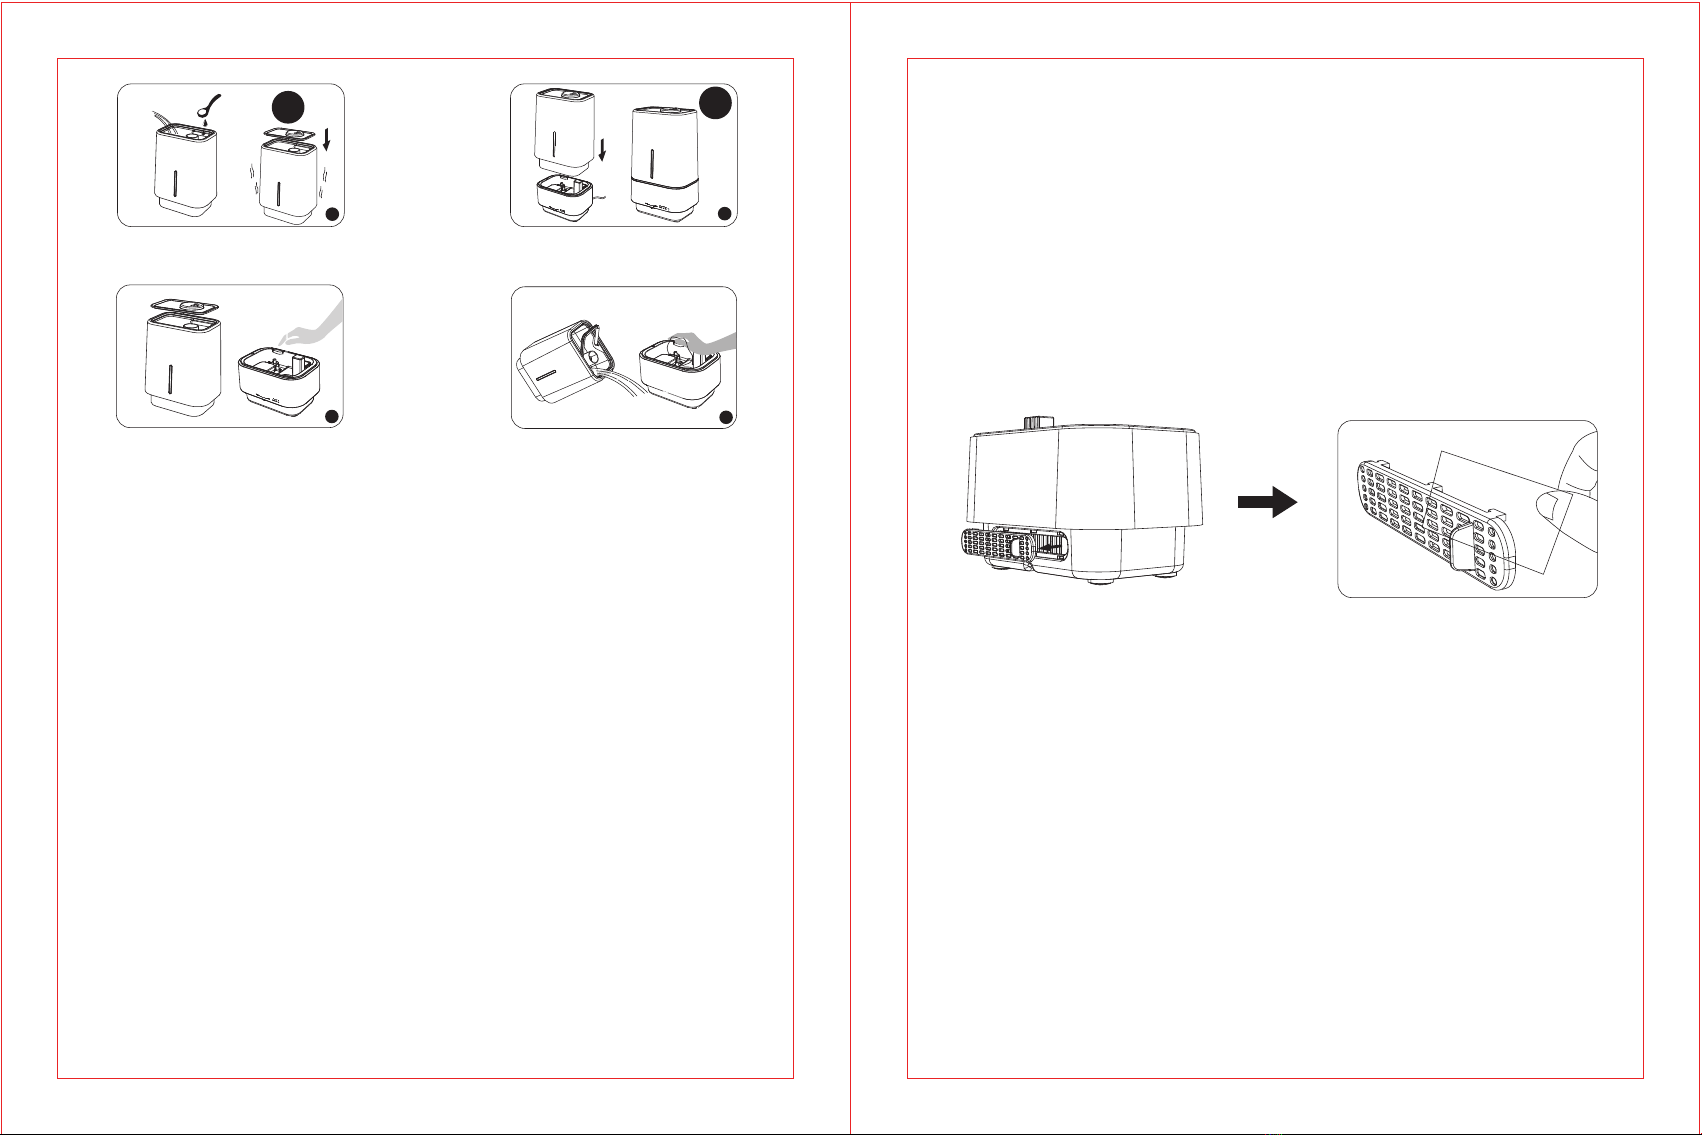
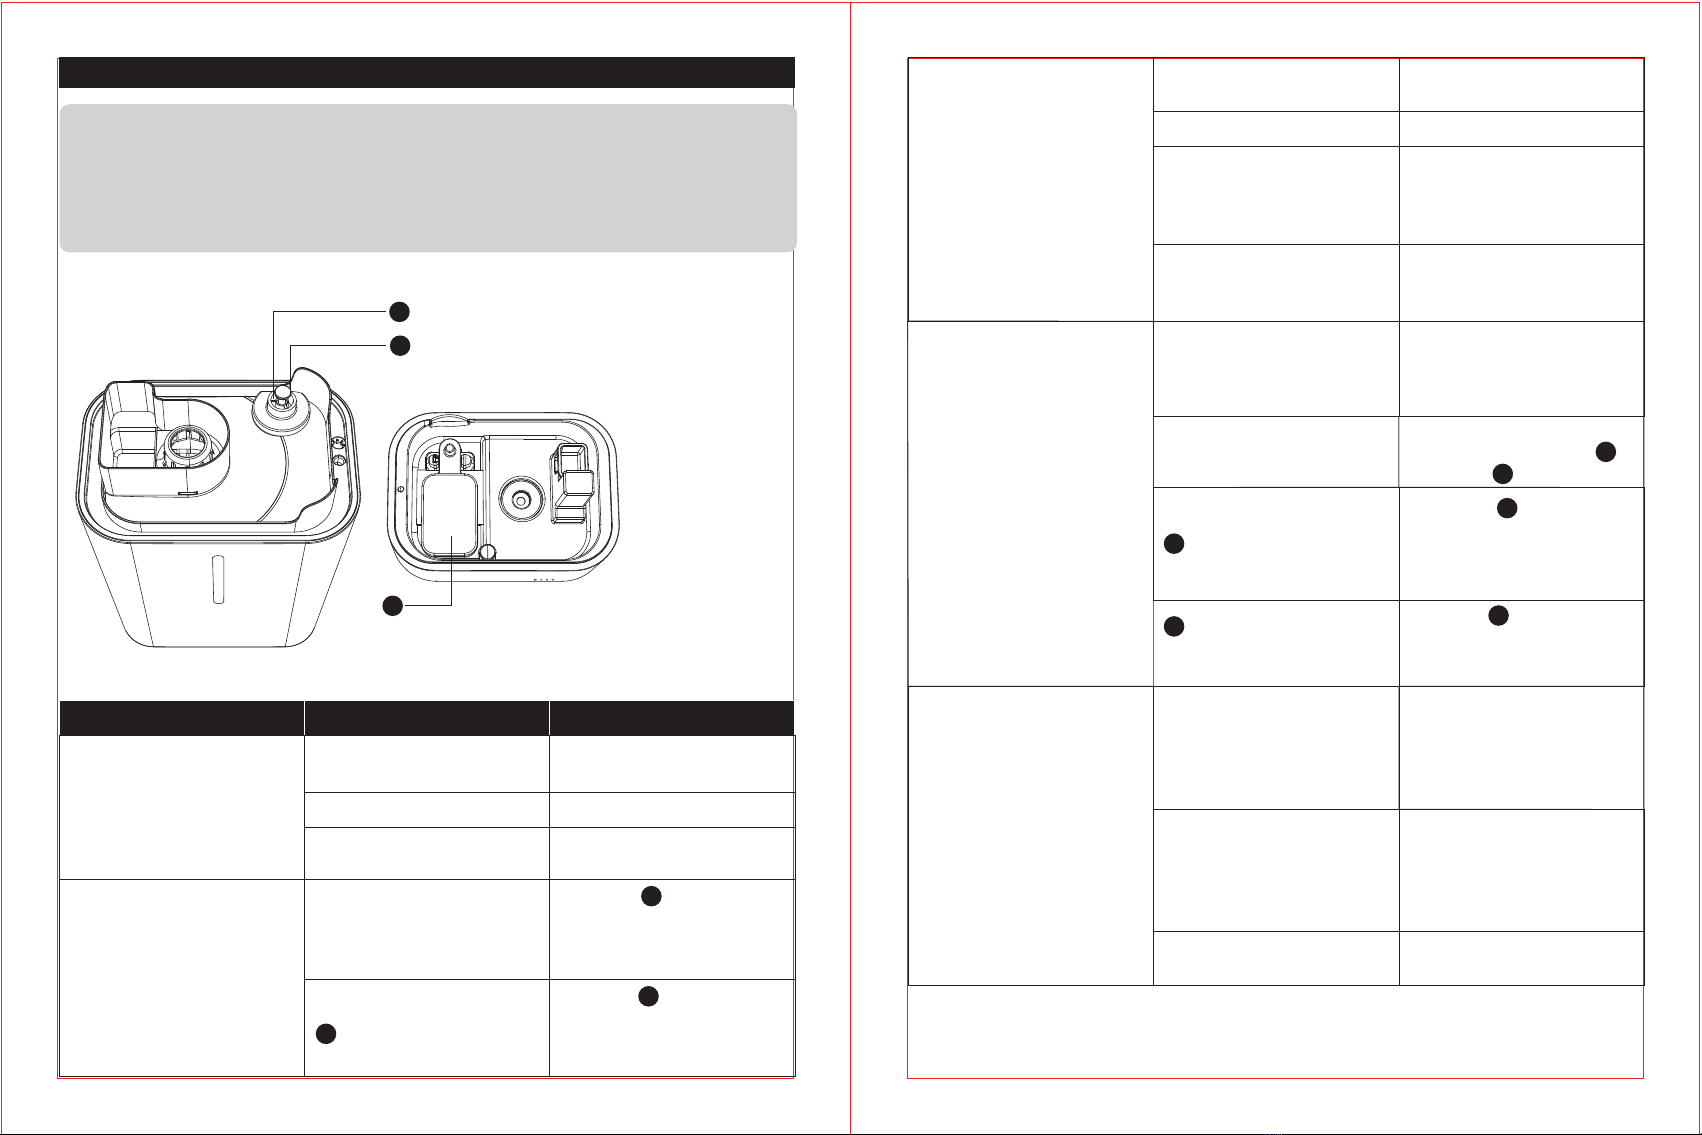
1. Spring
2. Sealing Ring
3.Water Floater
Problem Possible Cause Solution
Unit not plugged in
No power from power outlet
Did not turn on the unit
Ensure unit is properly
plugged in
Try another power outlet
Check the Control Knob is
turned to the working position.
LED indicator is off
Ensure the Spring is
secured properly to the tank
bottom allowing water to pass
through to the base
1
Adjust the water floater to
a horizontal position and
make sure it can rise up with
water
3
Water floater stuck
3
No water in the water
reservoir
LED indicator stays red
Not enough water inside the
tank Refill and reinstall the water tank
The LED Indicator is red but
no mist or little mist is
produced
Mist level is set too low Adjust to maximum mist
Mineral buildup on the
atomize
Feel if any air comes out from
the nozzle. If yes, then clean
water scale on the atomizer
as instructed
The base might be overfilled
Remove the tank, empty the
base and place the filled tank
on the empty base
Tank leakage
Tank may be damaged Check for possible cracks in
the tank. If there is a crack,
please contact our customer
service to solve it.
Dust and impurities in the
water tank
lean the water tank. Make sure
there is no dust over the
spring and sealing ring
Spring stuck
Ensure the spring is
properly secured to the tank
bottom allowing water to
pass through to the base.
1
1
Sealing ring was not
installed on tank cap
Install the sealing ring on
the tank cap, please contact
us if it is missing
22
Mist level is set too high for
the room size
1. Check if the room is too
humid and adjust to lower
mist. 40%-60% works best
2. Open door and windows,
or change to a larger room
Air inlet is blocked Humidifier should be placed
on a hard flat surface, make
sure no objects around the
air inlet.
Low indoor temperature
leads to liquefaction
Raise the room temperature
to 25°C / 77°F
Mist height is low, damping
surrounding desk or floor.
Condensation forms around
humidifier or on windows
and walls
14
13
2
1
2