ODYS SOLO
9
EN
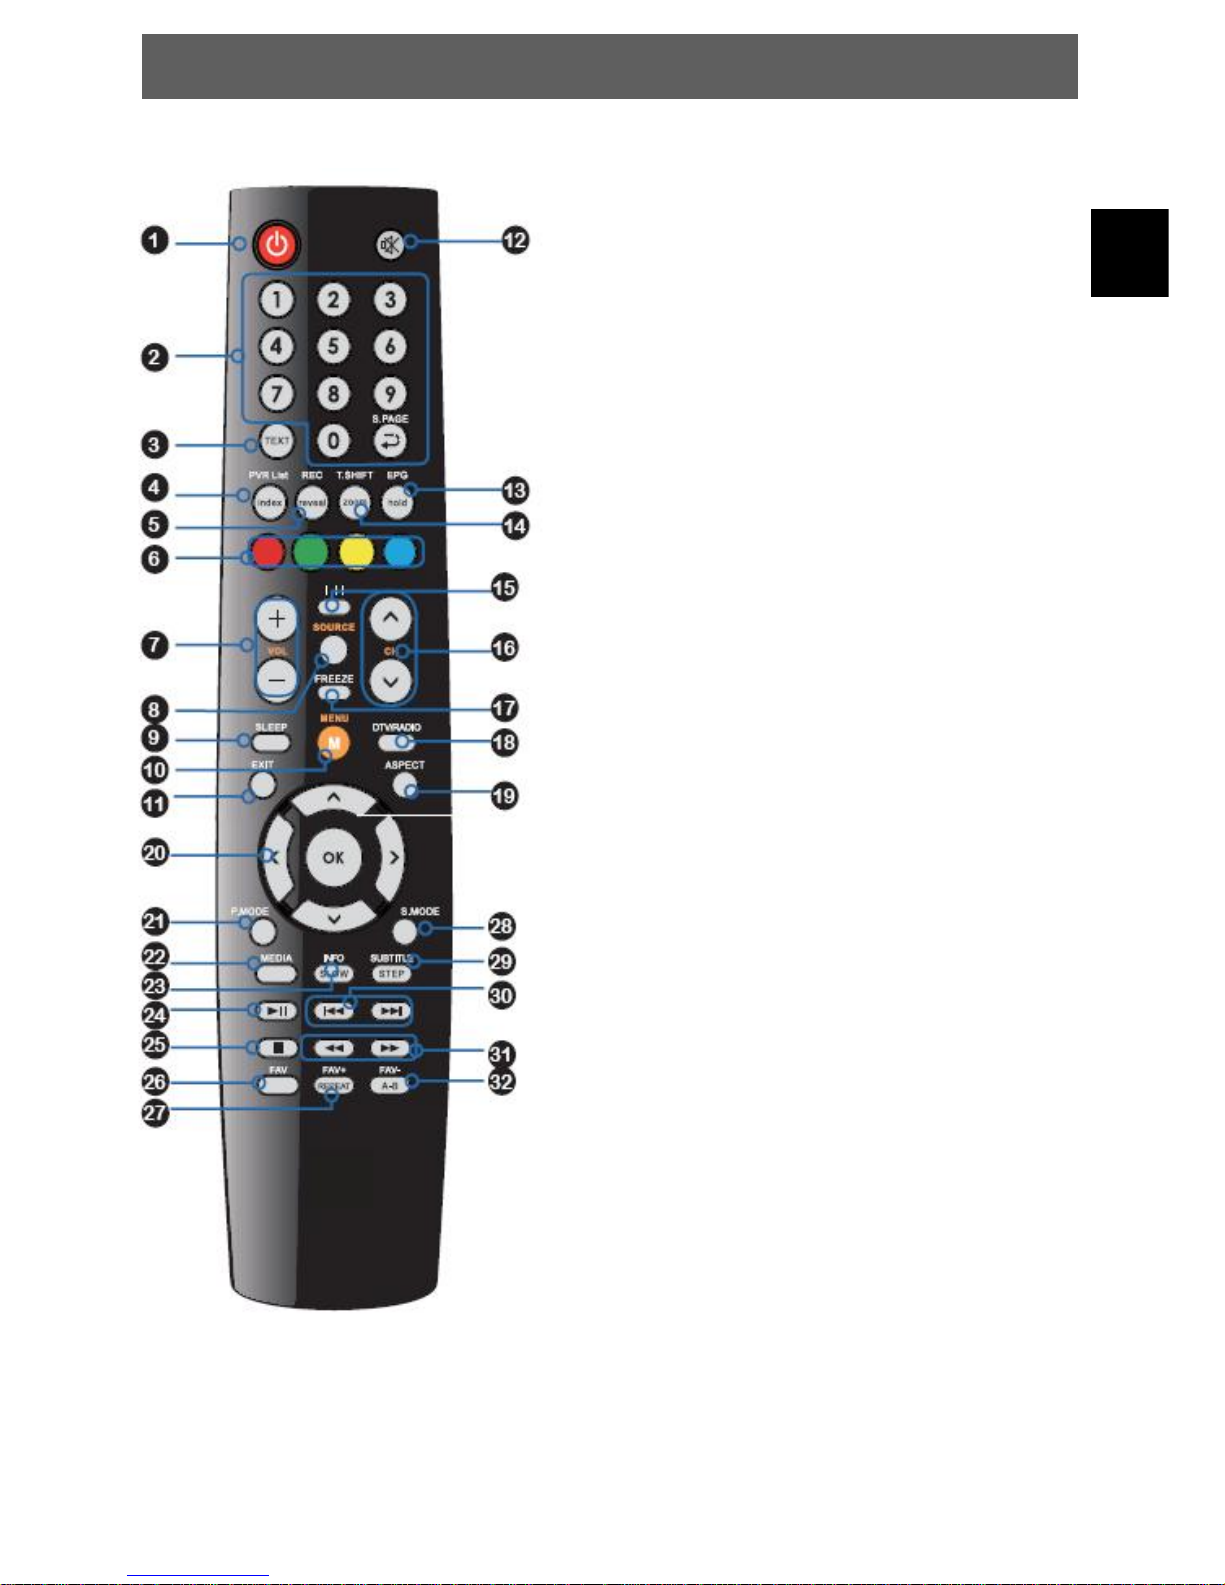
2.3 Remote Key Function:
1. STANDBY: Turns the TV on and into standby mode.
2. 0-9/S.Page: Pressing a number selects a channel. /
In the text display menu Press S.PAGE
button to display the text pages.
Press to return to the previously viewed channel.
3. TEXT: Turns on and off the Teletext function.
4. FAV/INDEX: Pressing FAV display favourite list. /
Displays the main index in TELETEXT mode.
5. FAV+/ REVEAL: Change the favourite channels up. /
Reveals hidden information such as the answer to a quiz
in TELETEXT mode.
6. Teletext keys
7. VOL.+-: Increases and decreases volume.
8. SOURCE: Press it to displays the source List.
9. SLEEP: Cycles through the TV sleep time.
10. MENU: Displays the OSD menu on the screen.
11. EXIT: Exits the OSD menu.
12. Mutes and restores your TV sound.
13. EPG/HOLD: Displays the programme EPG on the
screen in DTV mode. Pressing again to turn EPG off. /
Freezes a multi-page passage on screen in TELETEXT
14. FAV-/ZOOM: change the favourite channels down, /
Displays the top, bottom or all of page, to easily read in
TELETEXT mode.
15. AUTO: Cycles through the TV sound options(NICAM):
MONO/DUAL/STEREO.
16. CH.+-: Scans up and down the channels.
17. FREEZE: Freeze the current picture
18. DTV/RADIO: In DTV mode, press DTV/RADIO button
to enter DTV or RADIO mode.
19. ASPECT: press to select picture mode,4:3,16:9 etc.
20. ▲▼►◄:Cycles through OSD options and
21. P.MODE: Selects picture mode: Standard/
Personal/Mild/Dynamic.
22. MEDIA: Press MEDIA button to get quick access
to media mode.
23. INFO: Pressing once displays a variety of
information such as the current channel
and the input source.
24. ►: In Media mode, press to start playback
or pause.
25. STOP: In Media mode, press to stop playback
and return back to the previous menu.
26. GOTO: In Media mode, go to the certain time of video
file.
27. REPEAT: Press to repeat playback.
28. S.MODE: Selects sound effect options: Personal/
Spots/Movie/Music/Standard.
29. SUBTITLE: Cycles through the TV subtitle options
30. In Media mode, press to jump to the next/previous of
the currently played chapter or track.
31. In Media mode, use to advance/reverse playback rapidly.
32. A-B: Pressing A-B repeat A-B. (MEDIA mode)