Tools required: 9/16” ratchet, Allen wrenches (included in hardware pack)
Note: These instructions are intended for various models and congurations, with and without arms. Your products may not look
exactly as those shown in the diagrams.
Important: The assembly process requires that some hardware be kept loose until later in the sequence. Follow these instructions
closely to ensure correct assembly.
Recommendation: Retighten all bolts on a seasonal basis to ensure your product remains strong and stable for many years of
use.
Weight Capacity: All chairs in these series have a weight capacity of 275 lbs. per seat, unless otherwise stated.
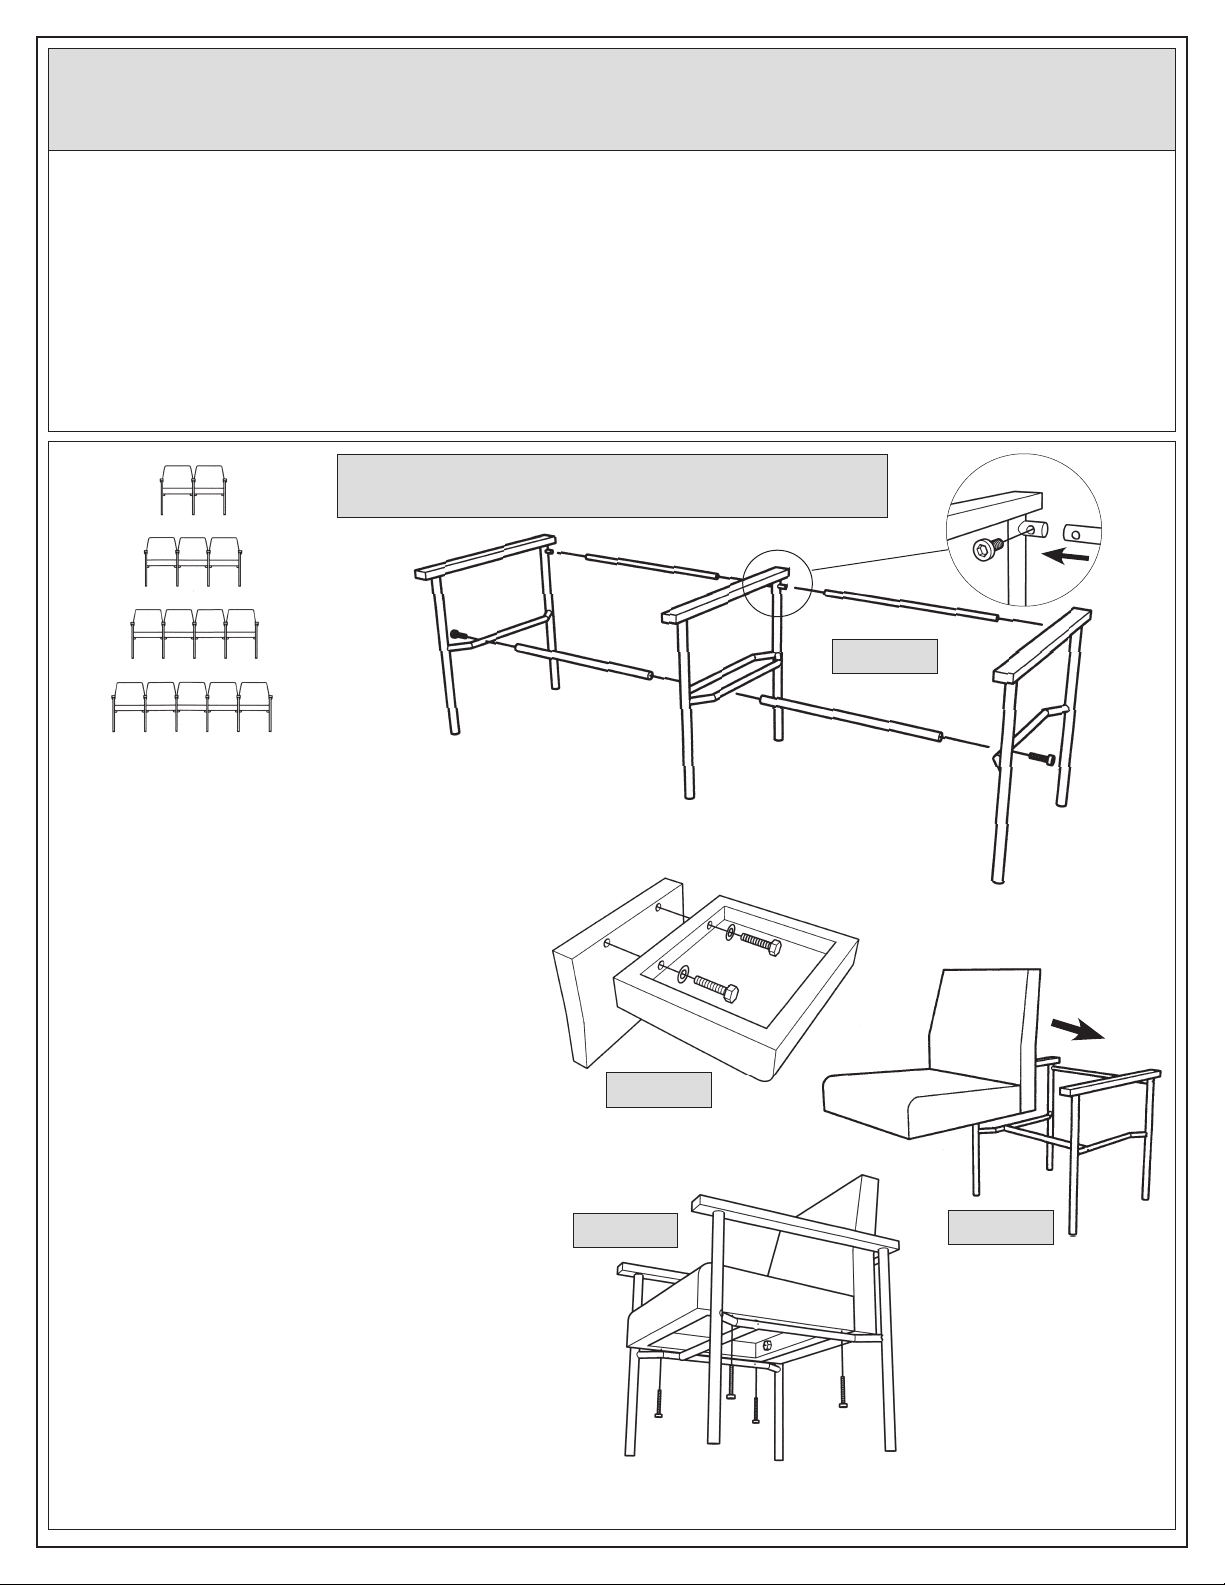
Connecting Chairs & Sofas
Figure 6
Figure 7
Figure 8
Figure 9
Back Cross
Tube
Right Leg
Frame
Lower
Cross Tube
Left Leg
Frame
Assembly Instructions
For Connecting Chairs and Sofas
1. Unpack and identify all parts. Separate left, right,
and center leg frames.
2. Build complete frame assembly by connecting
back and lower cross tubes between legs as
shown in gure 6. Use 2” Allen bolts for lower
cross tubes and keep these bolts loose for now.
(Leave about ¼” of exposed threads) Use ½”
Allen bolts for back cross tubes. Tighten these
bolts very securely at this time.
3. Frame can be set aside for the time being.
4. Attach seat cushions to back cushions using
3” hex bolts and washers as shown in gure 7.
Keep these bolts loose for now. Repeat until all
cushion sets are assembled.
5. Set each cushion assembly into each chair frame
as shown in gure 8. Align holes in frame with
holes in cushions and connect using 3” Allen
bolts as shown in gure 9.
6. Tighten all bolts securely at this time, including
all lower cross tube bolts from step 2 and all seat
cushion hex bolts from step 4.
7. Your product is now assembled and ready to use.
Center
Leg Frame
May 2016


