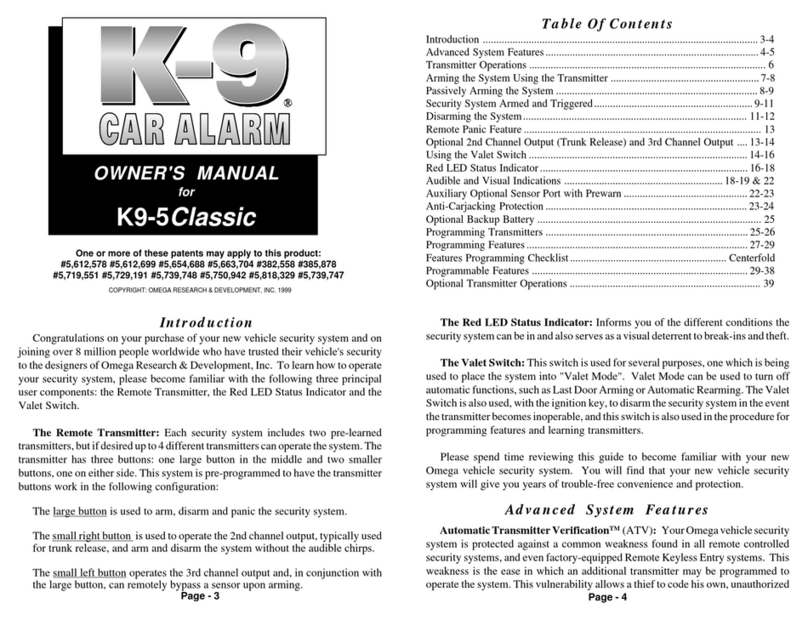
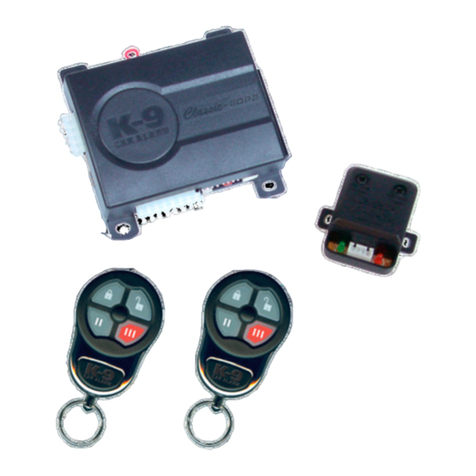
Omega Vehicle Security K9-6ATV2 User manual

OWNER'S MANUAL
for
K9-6ATV2
One or more of these patents may apply to this product:
#5,612,578 #5,612,699 #5,654,688 #5,663,704 #382,558 #385,878
#5,719,551 #5,729,191 #5,739,748 #5,750,942 #5,818,329 #5,739,747
COPYRIGHT: OMEGA RESEARCH & DEVELOPMENT, INC. 1999
Table Of Contents
Introduction ......................................................................................................3-4
Advanced System Features...............................................................................4-5
Transmitter Operations ........................................................................................ 6
Arming the System Using the Transmitter .......................................................7-8
Passively Arming the System ...........................................................................8-9
Security System Armed and Triggered...........................................................9-11
Disarming the System................................................................................... 11-12
Remote Panic Feature ........................................................................................ 13
Optional 2nd Channel Output (Trunk Release) and 3rd Channel Output .... 13-14
Using the Valet Switch .................................................................................14-16
Red LED Status Indicator............................................................................. 16-18
Audible and Visual Indications ........................................................... 18-19 & 22
Auxiliary Optional Sensor Port with Prewarn .............................................. 22-23
Anti-Carjacking Protection........................................................................... 23-24
Optional Pager Unit and Backup Battery .......................................................... 25
Programming Transmitters ........................................................................... 25-26
Programming Features.................................................................................. 27-29
Features Programming Checklist.......................................................... Centerfold
Programmable Features ................................................................................29-38
Transmitter Options ........................................................................................... 39
Introduction
Congratulations on your purchase of your new vehicle security system and on
joining over 8 million people worldwide who have trusted their vehicle's security
to the designers of Omega Research & Development, Inc. To learn how to operate
your security system, please become familiar with the following three principal
user components: the Remote Transmitter, the Red LED Status Indicator and the
Valet Switch.
The Remote Transmitter: Each security system includes two pre-learned
transmitters,butifdesiredupto4differenttransmitterscanoperatethe system.The
transmitter has three buttons: one large button in the middle and two smaller
buttons, one on either side. This system is pre-programmed to have the transmitter
buttons work in the following configuration:
The large button is used to arm, disarm and panic the security system.
The small right button is used to operate the 2nd channel output, typically used
for trunk release, and arm and disarm the system without the audible chirps.
The small left button operates the 3rd channel output and, in conjunction with
the large button, can remotely bypass a sensor upon arming.
Page - 3
The Red LED Status Indicator: Informs you of the different conditions the
securitysystemcanbein and also servesasavisualdeterrenttobreak-ins and theft.
TheValet Switch:This switch is used for several purposes, one which is being
used to place the system into "Valet Mode". Valet Mode can be used to turn off
automaticfunctions,such as Last Door Arming orAutomatic Rearming. TheValet
Switchisalsoused,withtheignitionkey, to disarm the security system in the event
thetransmitterbecomesinoperable,andthis switchisalsousedintheprocedure for
programming features and learning transmitters.
Please spend time reviewing this guide to become familiar with your new
Omega vehicle security system. You will find that your new vehicle security
system will give you years of trouble-free convenience and protection.
AutomaticTransmitterVerificationTM (ATV):YourOmegavehiclesecurity
system is protected against a common weakness found in all remote controlled
security systems, and even factory-equipped Remote Keyless Entry systems. This
weakness is the ease in which an additional transmitter may be programmed to
operate the system. This vulnerability allows a thief to code his own, unauthorized
Page - 4
Advanced System Features

transmitter to operate your system for the purpose of stealing your vehicle or its
contents.
Additionally,in normal operation, everytimetheignition switch is turned "on",
theLEDStatusIndicatorwillflash andpauseforten seconds,thenumberof flashes
between each pause being equal to the number of transmitters encoded to operate
your system. For example: two flashes and a pause indicate that only two
transmitters are coded to operate your system. In the event the system alerts you
to a recent transmitter addition, you can now immediately reprogram your
transmitters, effectively erasing any unauthorized transmitters.
Transmitter Code JumpingTM:The transmitter sends a digitally coded signal
tothesecurity system. The transmitter and security systemwill advance toanother
code to use for the transmission. With each use, this digital signal changes. This
Code JumpingTM feature prevents a thief from using a "code grabber" device to
record and play back a transmission for the purpose of disarming your vehicle
security system. Page - 5
For the first 48 hours after any transmitter is encoded to operate the
system, every time the ignition switch is turned "on", the siren will chirp
rapidlyfortwoseconds,andtheLEDStatusLightwillflashfor90seconds.
Transmitter Operations
Also see pages 26 and 38-39 LED Light- Illuminates
when a button is pressed.
Large Transmitter Button-
Pressing and releasing this button will arm and disarm the security system. If the optional
doorlockinterfaceis installed,thedoors willlockupon arming, andunlock upon disarming
(however, if the system is in a triggered condition, disarming will not unlock the doors). If
you have the optional unlock driver's door feature, then upon disarming only the driver's
door will unlock, and if the large button is pressed again within 4 seconds, all of the doors
will unlock. Pressing and holding this button for 3 seconds will "Panic" the system- which
will sound the siren or horn, flash the exterior and interior lights and also lock the doors.
Page - 6
Small Right Transmitter
Button- If this button is
heldfor3 seconds,thesecu-
rity system will activate the
2nd channel output (typi-
callyusedfortrunkrelease).
If this button is pressed
twice, the system will arm
or disarm without audible
chirps.
KK
KK
K -
9
Small Left Transmitter
Button-Pressing the small
left transmitter button for
2.5secondsactivatesthe3rd
channel output, which may
be used to operate optional
devices. Ifanoptional aux-
iliary sensor is part of the
system,pressingthisbutton
within 4 seconds after arm-
ing the system will turn the
sensor off.
Arming The System Using The Transmitter
Arming The Security System Using The Transmitter: The security system
can always be armed from the transmitter provided the ignition key is “off” and the
system is disarmed and not in the Valet Mode. To arm the system, after you exit
the vehicle and close all of the doors, simply press and release the large transmitter
buttononce.Instantlytheparkinglightswillflashonce,thesirenwillchirponceand
the LED Status Indicator will begin to flash confirming that the system is armed.
Further,thedoors willlockandthe starterinterruptrelaywill engagetopreventany
attempt to start the vehicle. Your security system is now fully armed, and is ready
to respond if an intrusion attempt is detected.
Arming Bypass: Upon arming, if any sensing circuit is inoperable, that circuit
willbebypassed.Forexample, if the trunk is leftopen,youcanstillarmthe system
with the transmitter. The bypassed circuit will automatically be reinstated for
protection 5 seconds after the circuit becomes operative, i.e., when the trunk is
closed. When a triggered circuit is in a bypassed state, all other operating circuits
will be protected normally.
Sensor By-Pass: Your security system provides you with the convenience of
temporarily deactivating any optional auxiliary sensor without affecting other
Page - 7
trigger circuits. To deactivate the sensor, simply press and release the small left
transmitterbuttonwithin4 seconds after pressingthelargetransmitterbuttonwhen
arming the system. You will hear a second siren chirp confirming that the security
system has armed without the sensor protecting the vehicle. The next time you arm
thesecuritysystem,thesystemwillresettoitsnormalcondition,andthesensorwill
again be part of your protection.
Passively Arming The System
Passively Arming The Security System Using Last Door Arming: You can
also pre-select your security system to automatically arm and lock the doors when
the vehicle's last door is closed. The moment the last door closes the siren (or horn,
if used) will chirp once, the parking lights will flash once and the LED Status
Indicator will begin to flash rapidly. Thirty seconds later the siren will chirp again,
thedoorswilllock(providedthatthePassiveLockfeaturehasbeen chosen)andthe
LEDStatusIndicatorwillslowtoasteadyflash,confirmingthatthesecuritysystem
is fully armed. If a point of entry is reopened before the single siren chirp at 30
seconds,thepassive armingprocessstopsandwill resettostartoverwhen thepoint
of entry is re-closed.
Automatic Last Door Arming offers a high level of security, since you do not
have to remember to arm the security system every time you leave the vehicle.
Page - 8

Additionally, Automatic Last Door Arming may entitle you to an insurance
discount. Please note that the previously mentioned Arming By-Pass feature does
not operate with the Automatic Last Door Arming feature. The bypass feature is
designed to operate only when arming the system with the transmitter and all
protected entries must be closed to initiate the Automatic Last Door Arming
sequence. Last Door Arming does not effect the operation of Active Arming.
To prevent the system from automatically arming while the vehicle is being
refueledyouhavetheseoptions: put the system in ValetMode(page14),keepyour
door open, or turn on your dome light switch so the system detects that your door
is still open. We do not recommend leaving your ignition key turned "on".
Security System Armed And Triggered
While the security system is armed, the LED Status Indicator will be flashing.
Should any intrusion attempt occur, your system will instantly "trigger". Once
triggered, the security system will respond by:
1) The electronic siren will sound*.
2) The parking lights will flash on and off for the duration.
3) The doorswill relock. Thisfeature is sounique that thesecurity system can
detect an open door and wait until the door is closed; at that time the door
re-locks so that the thief cannot easily regain entry.
Page - 9
* Theelectronic sirenfeatures sixdifferenttones,andevery5seconds thesiren willchange
thetonetogeneratemore attentiontothe vehicle. Thevehicle'shornmaybe usedifdesired.
The horn, if used, will honk on and off for 10 seconds, then pause for 5 seconds, repeating
this cycle for the duration of the activated alarm period. This prevents the horn from
overheating. Please ask the installer for details on utilizing the horn.
Thesirenandtheparkinglightswillstayactivefor60secondsunlessyoudisarm
thesystemwiththetransmitterortheValetSwitch.Ifallprotectedentriesaresecure
at the end of 60 seconds, the system will stop and rearm automatically to detect
another entry attempt. If there is a protected entry still open or if an optional sensor
isstillin a triggeredstateattheend of 60seconds,thesystemwill reactivatefortwo
more 60 second cycles. In this case the system will stop after a total of 3 minutes
and rearm automatically, while ignoring only the open entry or triggered sensor.
When the entry is closed or the triggered sensor is reset, protection will begin
instantly for the formerly affected circuit.
Oncethesecuritysystemhasbeenactivatedandreset,thedisarmingconfirmation
willnolongerbe2sirenchirps,andtheparkinglightsstayingon.Instead,thesystem
will respond with 4 siren chirps and the parking lights flashing 4 times before
stayingonfor30seconds. The LED Status Light willchangetoflashingonetofour
times between pauses to indicate which protection circuit triggered the system.
These audible and visual indications will remain until the ignition is turned “on”.
Page - 10
Anytime the security system triggers, the LED Status Light will indicate which
zone triggered the system by flashing one to four times, pausing between flashes.
This code will continue to flash, even after disarming. The system can hold two
different violation codes in it's memory, which is cleared by turning the ignition
switch "on".
Safety Disarm/Storm Mode: While the system is activated, i.e. sounding the
siren and flashing the lights, pressing the large transmitter button will disarm the
system only. The system will not chirp twice or illuminate the parking lights, nor
unlock the doors if the system is configured to also operate the door locks. This
safety feature ensures that the vehicle remain secure should the system require
disarming due to being activated from nuisance or malicious false sensory inputs,
such as typically produced by severe weather conditions. To remotely unlock the
doorsif the system is disarmedwhile activated,repeat thearm/disarm operationby
pressing and releasing the large transmitter button once, then again. If disarmed
from a panic mode, the normal disarm indications are present, including the
unlocking of the doors.
Disarming The System
Disarming The System Using The Transmitter: While the security system is
in the armed state, pressing and releasing the large transmitter button once will
Page - 11
instantly disarm the system and unlock the doors. If you have the optional unlock
driver's door feature, then upon disarming only the driver's door will unlock, and
if the large transmitter button is pressed again within 5 seconds, or at any time if a
door is open, all of the other doors will unlock.
Disarming is confirmed by the siren chirping twice, and the parking lights
turning on for 30 seconds. However, the lights will turn off instantly if the ignition
switchisturned "on". If the system was triggered and reset while you areaway, the
disarmconfirmationwillchangeto4sirenchirps,4lightflashes,and thenthelights
will stay on for 30 seconds. The security system will have this response upon
disarming until the ignition switch is turned "on", which clears the unit's memory.
AutomaticRearming Feature: Should you unknowingly press the transmitter
button, which will result in your system disarming, the system can automatically
rearm itself 90 seconds later and once again lock the doors. This feature is
programmable, and may be turned off.
Automatic Rearming can be paused by opening the door or stopped by turning
"on"the ignition switch. Also,AutomaticRearmingcan be cancelled bytheSafety
Disarm/Storm Mode feature; if the system is disarmed while triggered, Automatic
Rearmingwillnotoccur. Automatic Rearming isconfirmedbyafastflashing LED
StatusIndicatorafterdisarming,unlessthesystemwastriggeredandreset,inwhich
case a Zone Violation code will flash instead.
Page - 12

Remote Panic Feature
RemotePanicActivationFromTheTransmitter:Shouldyoufeelthreatened
or the need to attract attention you can activate your system's Remote Panic feature
at any time by depressing and holding the large transmitter button for 3 seconds.
Your system will respond by sounding the siren, locking the doors and flashing the
exterior and interior lights for the normal activated period of 60 seconds. Should
wishto enter your vehicleordisengageRemote Panic, simply press andreleasethe
large transmitter button.
Optional 2nd Channel and 3rd Channel Output
Optional 2nd Channel Output (Trunk Release): If your vehicle is equipped
with electric trunk release, your installing dealer can configure your system to
accomplish trunk release from your transmitter. Use of the 2nd channel output is
recommended to operate this option; simply press and hold the small transmitter
buttononthe rightfor2.5seconds. Your vehiclewillrespondby releasingthetrunk
lidorrearhatch,chirpingthesirentwice,disarmingthesystem,unlockingthedoors
andturningonyourparkinglightsfor30seconds.Thetrunkreleasewillnotoperate
with the ignition switch "on" unless the vehicle's door is open. If desired, the
security system can be programmed to remain armed when this feature is used.
Page - 13
Optional 3rd Channel Output: This output's operation is similar to the trunk
releaseoutputexceptforthefollowing:pressthesmalltransmitterbuttonontheleft
for 2.5 seconds to activate the 3rd channel output. The 3rd channel output will
operateregardlessof the ignition switch being "on" or "off", andthere is noaudible
or visual confirmation. This output can be used to operate optional equipment such
as remote car starters or window roll-up modules.
Using The Valet Switch
The primary function of the Valet Switch is to enter your security system into
ValetMode,whichpreventsthesystemfromarming.Youwillfindthisusefulwhen
stopping at service stations, having your vehicle serviced, having your car valet
parkedor while having yourcarwashed.The Valet Switch, in conjunction with the
ignition key, can be used to disarm the system should your transmitter be lost or
become inoperable. The Valet Switch is typically mounted in same housing as the
LED Status Indicator. However, some custom installations may have the Valet
Switch mounted in a hidden location; if so, be sure your installing dealer indicates
the location of the Valet Switch to you to avoid potential inconvenience.
Normal Valet Mode: This unique feature can be activated anytime the system
is disarmed and allows you to enter the Valet Mode by simply depressing and
Page - 14
holding the Valet Switch, provided the system is not armed. If the system is armed
orinthetriggeredstate,however,theignitionmustbeturned"on"andthentheValet
Switch must pressed within 5 seconds to disarm the system and enter Valet Mode.
While the system is disarmed, simply press and hold the Valet Switch for 2
seconds to activate the Valet Mode. The system will confirm that it is in the Valet
Mode by chirping the siren twice, and the LED Status Indicator will illuminate
steady Red. The security system will stay in the Valet Mode when the ignition
switch is "on" or "off". While in the Valet Mode, although the system will not arm,
thetransmitters willstilloperate theRemotePanic feature,thedoorlocks, andtrunk
release; the doors will also lock when the ignition switch is turned "on" and unlock
when it is turned "off"'. While the security system is in the Valet Mode, every time
the ignition switch is turned "off", the siren will chirp once as a reminder.
To Exit Valet Mode: Simply press the Valet Switch, and instantly the security
systemwillexitValet Mode. To confirmthattheValetModeis turned off,theLED
Status Indicator will turn off.
Disarming The Security SystemIf The TransmitterIs Lost: In the event the
transmitter is lost, damaged, or its batteries become exhausted, the Valet Switch
and your ignition key can be used to disarm the system:
Page - 15
STEP 1. With the system in the armed condition, enter via the driver's door (be
aware that the security system will trigger the when the door is opened).
STEP 2. Use the ignition key to turn the ignition switch "on".
STEP 3. Within 5 seconds, press the Valet Switch. The system will disarm.
Red LED Status Indicator
TheLED Status Indicator feature isavisualindication of what state thesecurity
system is in at any given time. The LED Status Indicator is normally positioned in
alocationthatiseasilyobservedbythedriver.Thesearethepossibleconditionsthat
the security system can be in as reflected by the LED Status Indicator:
1) Off = The security system is disarmed and not performing any
automatic functions.
2) On Constant = The security system is in the Valet Mode.
3) Flashing Slow = The security system is Fully Armed.
4) Flashing Fast = The 30 second Last Door Arming feature or 90 second
Automatic Rearming feature is in progress. This fast
flashing also occurs during the 3 second or 45 second
arming delay.
Page - 16

Automatic Transmitter VerificationTM:After the ignition is turned "on", the
LED Status Indicator will flash and pause to indicate the number of transmitters
programmed to operate your security system. For example: two flashes and pause
indicatesthatonlytwotransmittersareencodedto operate your system. Whenever
youleave yourvehicleandkeyswithsomeone,youwillnowhavethepeaceofmind
in knowing that only your transmitters will operate the security system and that no
additionaltransmittershavebeencodedintoyoursystemforthepurposeofstealing
yourvehicleoritscontents.ThisIndicatorflashingoccursfor10secondseverytime
the ignition switch is turned "on".
5) Flash-1x & Pause = 1 transmitter code is stored in the system's memory.
6) Flash-2x & Pause = 2 transmitter codes are stored in the system's memory.
7) Flash-3x & Pause = 3 transmitter codes are stored in the system's memory.
8) Flash-4x & Pause = 4 transmitter codes are stored in the system's memory.
Zone Violation: If the system is triggered, the LED Status Indicator will start
toflashandpauseoneofthefollowingsequencestoindicatewhichprotectedcircuit
triggered the system. This is seen while the system is armed, and after disarming,
until the ignition switch is turned "on", which will clear the Zone Violation code.
The unit's memory can store two different violation codes.
9) Flash-1x & Pause = The security system was triggered from the current
sensing circuit.
Page - 17
10) Flash-2x & Pause = The security system was triggered from the hood or
trunk circuit.
11) Flash-3x & Pause = The security system was triggered from the door circuit
.
12) Flash-4x & Pause = The security system was triggered from the Auxiliary
Sensor Port circuit.
Page - 18
Audible And Visual Indications
TheSecuritysystem'saudibleoutputandthevehicle'sparkingandinteriorlights
areutilizedtoindicateanumberofeventsorprocesses associated with the system's
operation:
1) One siren chirp and one light flash upon closing the vehicle's door: The system
hasstartedapassiveLastDoorArming countdown and will become armed after
the 30 second countdown expires. This chirp indicates that the starter interrupt
will engage and the doors will lock when the alarm becomes fully armed in 30
seconds.
2) One siren chirp, one light flash, & doors lock: The system has armed passively
oractivelyfromthetransmitter.Thestarterinterrupthasengagedandthedoors
Page - 19
have locked. The optional sensor will become operational 5 seconds later.
3) One siren chirp after the arming chirp previously mentioned: The auxiliary
sensor circuit is bypassed by pressing the small transmitter button within 3
seconds of pressing the large transmitter button.
4) One siren chirp, and no light flash, but only at the moment the ignition switch is
turned "off": The alarm is in Valet Mode, and will not arm actively or passively.
5) Two siren chirps and the parking lights stay on for 30 seconds:
The system has just disarmed or 2nd channel output has been activated.
6) Two siren chirps and two light flashes: The system has entered the Valet Mode.
7) Four siren chirps and the lights stay on for 30 seconds: The system has just
disarmed and was activated while you were away. The system will have this
disarming confirmation until the ignition switch is turned "on".
8) Sirensounding, changingsounds every5seconds, andthe parkinglights flashing
on and off: The system is in an activated state. This will also relock the doors.
continued on page 22
This device complies with FCC Rules part 15. Operation is subject to the following two
conditions, (1) This device may not cause harmful interference and, (2) This device must
accept any interference that may be received, including interference that may cause
undesired operation.
The manufacturer is not responsible for any radio or TV interference caused by unautho-
rizedmodificationsto thisequipment.Such modificationscouldvoid the user'sauthority to
operate the equipment.
Products manufactured and sold by OMEGA RESEARCH & DEVELOPMENT, INC. (the Company), are
warrantedto be free from defectsin materials andworkmanship under normaluse. If a product sold bythe Company
proves to be defective, the Company will repair or replace it free of charge within the first year and thereafter all
parts to be repaired will be free with only a nominal charge for Omega Research and Development, Inc.'s labor and
return shipping, to the original owner during the lifetime of the car in which it was originally installed.
All products for warranty repair must be sent postage prepaid to Omega Research & Development, Inc., P.O.
Box 508, Douglasville, Georgia 30133, with bill of sale or other dated proof of purchase. This warranty is
nontransferable and does not apply to any product damaged by accident, physical or electrical misuse or abuse,
improper installation, alteration, any use contrary to its intended function, unauthorized service, fire, flood,
lightning, or other acts of God.
This warranty limits the Company's liability to the repair or replacement of the product. The Company shall
not be responsible for removal and/or reinstallation charges, damage to or theft of the vehicle or its contents, or any
incidental or consequential damages caused by any failure or alleged failure of the product to function properly.
Under No Circumstances Should This Warranty, Or The Product Covered By It, Be Construed As A Guarantee Or
Insurance Policy Against Loss. The Company neither assumes nor authorizes any person or organization to make
any Warranties or assume any liability in connection with the sale, installation, or use of this product.
L I M I T E D L I F E T I M E W A R R A N T Y
MO_K9-6ATV2

This checklist helps when programming features. Before
attempting feature programming, please carefully read pages
27-38tobecomefamiliarwiththefeaturesandtheprogramming
procedure.
Tobestusethis checklist, markeachapplicablebox with "\"
next to the feature to be changed before entering Features
Programming Mode. As each feature is programmed, change
its mark to "X".
To program features, follow these steps:
Features Programming Checklist
Step1-Turntheignition"off",andpressthevaletswitch5times.
(the system will respond a chirp, then briefly sounding the
siren and the Status LED begins flashing)
Step2- Pressthevaletswitchthesamenumberoftimesasthe
feature number.
(the system will acknowledge the valet switch entry by
repeating the same number of siren chirps and the Status
LED flashes a like amount)
Step 3 -Pressthetransmitter'scenterbuttontoturnthefeature
"on", or press the left button to turn the feature "off".
(turning the feature "on" is indicated by one horn chirp and
theStatusLEDbeingon;turningthefeature"off"isindicated
by two horn chirps and the Status LED being off)
Repeat - Steps 2 and 3 for each feature to be changed
1 Ignition-Activated Anti-Carjacking Protection OFF (left button)
2 Door-Activated Anti-Carjacking Protection OFF (left button)
3 Last Door Arming ON (centerbutton)
4 Doors Lock With Last Door Arming ON (centerbutton)
5 Current Sensing ON (centerbutton)
6 Doors Lock At Ignition "On" ON (centerbutton)
7 Unlock #1 At Ignition OFF ON (centerbutton)
8 Unlock #2 At Ignition OFF OFF (left button)
9 Open Door Bypass To Features #6, #7, #8 ON (center button)
10 LightsOn5/30SecondsUponDisarm 30Seconds(centerbutton)
11 Automatic Rearming ON (centerbutton)
12 2nd Channel Output Disarms System ON (center button)
13 .8 / 3 Second Doorlock Pulse .8Second(centerbutton)
14 Double Unlock Pulse OFF (left button)
15 3 / 45 Second Arming Delay 3Second(centerbutton)
16 Confirmation Chirp ON (center button)
17 30/60SecondActivatedAlarmCycle 60Seconds(centerbutton)
18 Pulsed Horn / Steady Siren Output Steady Siren (left button)
19 Loud / Soft Pulsed Horn Chirps Loud (center button)
20 Total Closure Lock Output OFF (left button)
21 Remote-ActivatedAnti-CarjackingProtection OFF(leftbutton)
22 One/ Two Button Arming / Disarming OneButton (centerbutton)
# FEATURE DEFAULT
If no programming activity occurs within a 10 second
period, the Features Programming Mode will expire.
ThesystemexitingFeaturesProgrammingModeisindicatedby
the siren briefly sounding.
Page - 22
continued from page 19
9) A series of siren chirps lasting two seconds after the ignition switch is turned
"on": The Automatic Transmitter VerificationTM feature (page 4) has been
activated. This will also occur for 48 hours after installation.
10) Three siren chirps upon arming the system: The Zone Bypass feature is
indicating that the system is arming, but bypassing a violated protected zone.
11)Threesirenchirpswhilethesystemisarmed:ThePrewarningfeaturehasbeen
activated.
Your vehicle security system features a port which allows an optional auxiliary
sensortobeeasilyaddedtoincreasetheeffectivenessofyoursystem. Alightshock
or impact to the vehicle will initiate the Prewarn feature, while a heavier shock or
impact will trigger the security system. Other sensors are available which include
those that monitor shock to the vehicle, detect changes in atmospheric pressure
within the vehicle, and radar sensors that can detect motion inside and outside the
vehicle.
Auxiliary Optional Sensor Port With Prewarn
Page - 23
This security system features three optional forms of Anti-Carjacking protec-
tion. The Anti-Carjacking features may be activated by turning "on" the ignition
switch,openingandclosingadooraftertheignitionhasbeenturned"on",orbythe
transmitter activating the 3rd Channel Output, but only when the ignition is "on".
Anti-Carjacking Protection
The sensor may be temporarily bypassed using the transmitter. If the system is
triggered by the sensor plugged into this port, the Zone Violation feature will flash
the LED Status Light four times between pauses.
Prewarning Shock Detection Circuit: This circuit requires connection to an
auxiliary detection sensor device. When the sensor is triggered by a light impact or
shock to the vehicle, the security system will respond by chirping the siren (or
honking the horn) 3 times and locking all of the doors. After this circuit has been
triggered 5 times it will automatically shutdown until the alarm system is rearmed
again. This will prevent the security system from being a nuisance to the general
public, and in some cases to allow compliance with local noise ordinances.

Page - 24
The Anti-Carjacking feature automatically activates for each of the three
described conditions, provided that each has been programmed to operate. In each
of the three methods, the vehicle operator has 53 seconds to press the Valet Switch
to cancel the Anti-Carjacking feature. If not cancelled, at 53 seconds the siren will
start chirping, to remind the operator that Anti-Carjacking will engage. This will
continue for 7 seconds, during which time the Anti-Carjacking feature may still be
cancelledbypressing the Valet Switch. At 60seconds, the Anti-Carjackingfeature
fully engages, sounding the siren and flashing the parking lights. Thirty seconds
after the siren sounds and the parking lights flash, the starter interrupt will engage.
During this 30 second period, if the ignition is turned "off" the starter interrupt will
instantly engage.
Once fully activated, the Anti-Carjacking feature can only be deactivated by
turning the ignition "off", then "on" again, after which the ValetSwitch must be
pressed within 5 seconds. When the Anti-Carjacking feature is fully engaged, the
system will not respond to the transmitters, nor will it automatically reset after 60
seconds. TheAnti-Carjackingoperationwillcontinueuntildeactivated or until the
vehicle's battery is drained.
Optional Pager Unit And Backup Battery
This security system is designed for easy compatibility with the Omega Pager
unit and also for a Backup Battery (both of which are optional additional compo-
nents). The Omega Pager will alert the user to a security system violation, and also
indicatewhichprotectedzonecausedtheviolation.TheBackupBatteryoptionwill
allow the security system to operate even if power is removed from the system's
control module or if the vehicle's battery is disconnected. The Omega dealer from
which you purchased your vehicle security system can provide more details on the
exact operations of each of these options.
Programming Transmitters
When adding or deleting transmitter codes to operate the security system,
follow this process:
1) Turn "on" the ignition.
2) Within5secondsofturning"on"theignition,presstheValetSwitch5times.The
siren will chirp, confirming that for the next 10 seconds the system is ready to
learn a transmitter code. When the first transmitter code is learned all existing
storedcodeswillbeerased. Toenteratransmittercode,simplypressandrelease
Page - 25
the transmitter button which is desired to arm and disarm the system.
3) Repeatthisprocedureforeachtransmitterdesiredtooperatethesecuritysystem.
The system will chirp the siren once to confirm that each transmitter code was
learned. Both of the other two transmitter button's functions will automatically
be learned when the arm / disarm button is learned. If a code is not received
within a 10 second period, the learning process will automatically terminate.
Although this security system is programmed at the factory for the large center
transmitter button to arm and disarm the system, any one of the transmitter's three
buttons may be programmed to arm and disarm the security system. Upon the
system learning the arm / disarm button, the other two buttons are automatically
assigned other functions, as follows:
Arm / Disarm Trunk Release 3rd Channel
Large Center Button Small Right Button Small Left Button
Small Right Button Large Center Button Small Left Button
Small Left Button Large Center Button Small Right Button
Page - 26
Programming Features
Your vehicle security system has 22 programmable features that allow your
systemtobecustomizedtofityour personal needs. To program these features "on"
or "off", follow this process:
1) Turn "off" the ignition.
2) Within 5 seconds of turning "off" the ignition, press the Valet Switch 5 times.
The siren will chirp, followed by a short siren burst, confirming that for the next
10 seconds the system is ready to receive a feature number.
3) Press the Valet Switch the number of times that is equal to the feature number.
Example: Press the Valet Switch six times if Feature #6 is to be changed.
4) The siren will respond by chirping the same amount as the feature number.
Example: The siren responds with six chirps.
5) Press the large transmitter button to turn the feature "on". When done, the siren
will respond with one chirp.
Page - 27

6) Press the small left transmitter button to turn the feature "off". When done, the
siren will respond with two chirps.
If the Valet Switch is not pressed or if a transmitter signal is not received within a
10 second period, the Programmable Features learning process will automatically
terminate. The 22 Programmable Features are:
1) Ignition-Activated Anti-Carjacking Protection: Default OFF.
2) Door-Activated Anti-Carjacking: Default OFF.
3) Last Door Arming: Default ON.
4) Doors Lock With Last Door Arming: Default ON.
5) Current Sensing: Default ON.
6) Doors Lock At Ignition "On": Default ON.
7) Unlock Output #1 At Ignition "Off": Default ON.
8) Unlock Output #2 At Ignition "Off": Default OFF.
9) Open Door Bypass To Features #6, #7, #8: Default ON.
10) Lights On 5 / 30 Seconds Upon Disarm: Default 30 Seconds.
11) Automatic Rearming: Default ON.
12) 2nd Channel Output Disarms System: Default ON.
13) .8 / 3 Second Doorlock Pulse: Default .8 Second.
14) Double Unlock Pulse: Default OFF.
Page - 28
Feature #1: Ignition-Activated Anti-Carjacking Protection
(Factory Setting: OFF)
FeatureTurnedOn:Afterturningtheignitionswitch"on"andstartingthevehicle,
youmustpresstheValetSwitchwithin60seconds.IftheValetSwitchisnotpressed
the security system will begin chirping the siren 53 seconds after the ignition was
turned"on".ThesechirpsaretoremindyouthatAnti-Carjackingisabouttoengage;
pressingtheValetSwitchduringthe chirpswillcanceltheAnti-Carjackingfeature.
Thechirpswilllastfor7seconds,afterwhichtimethesirenwillsoundcontinuously
and the parking lights will begin flashing to attract attention to the vehicle.
15) 3 / 45 Second Arming Delay: Default 3 Seconds.
16) Confirmation Chirp: Default ON.
17) 30 / 60 Second Activated Alarm Cycle: Default 60 Seconds.
18) Pulsed Horn / Steady Siren Output: Default Steady Siren.
19) Loud / Soft Pulsed Horn Chirps: Default Loud.
20) Total Closure Lock Output: Default OFF.
21) Remote-Activated Anti-Carjacking Protection: Default OFF.
22) One / Two Button Arming / Disarming: Default One Button.
Programmable Features
Page - 29
Thirty seconds after the siren and parking lights engage, or if the ignition is turned
"off", the starter interrupt will engage. Once the Anti-Carjack is engaged, the only
waytodisengageitis to turn the ignition "off",thenback"on"again,andthenpress
the Valet Switch within 5 seconds. Altogether, there are three Anti-Carjacking
Programmable Features, which may be programmed independently.
Feature #2: Door-Activated Anti-Carjacking Protection
(Factory Setting: OFF)
FeatureTurnedOn:ThisfeatureoperatesthesameastheAnti-Carjackingfeature
described above, except that opening a door while the ignition is "on" will initiate
the 60 second Anti-Carjacking cycle.
Feature #3: Last Door Arming (Factory Setting: ON)
Feature Turned On: The security system will arm itself automatically when the
vehicle'slastdoorisclosed.Atthemomentthelastdoorisclosedthesirenwillchirp
theexteriorlights willflashonce,and the StatusLEDwillflash fast.Thirtyseconds
later the siren will chirp once again, the lights will flash, and the Status LED will
flash slowly, indicating that the security system is fully armed. If feature #4 is
selected,thedoorswillalsolock atthistime.Iftheinstanttrigger isgroundedat any
time during the thirty second countdown (Example: opening the trunk), the
Page - 30
Automatic Last Door Arming feature will be interrupted. When the instant trigger
becomes ungrounded, the security system will become fully armed thirty seconds
later. All of the doors and the trunk must have the proper connection of the control
module's wiring. This feature allows unhurried passenger exit and trunk access, as
the Last Door Arming process does not start until the last door or trunk is closed,
and opening any door or the trunk will interrupt the process. You can still actively
arm the security system with the transmitter at any time.
Feature #4 Doors Lock With Last Door Arming (Factory Setting: ON)
FeatureTurnedOn:Whenthe security systempassivelyarmsfromtheLast Door
Armingfeature,thedoorswillalsolockifanoptionaldoorlockinterfacewasadded.
This will occur when the system becomes fully armed 30 seconds after closing the
last door. Feature #3 must be on in order for this feature to operate.
Feature #5: Current Sensing (Factory Setting: ON)
FeatureTurnedOn:Whenthesecuritysystemisarmed,currentsensingcandetect
apositive current draw from the vehicle'sbattery. (Example:the dome light comes
on when a door is opened or the brake lights come on when the brake pedal is
pressed). With this feature on, the security system will trigger if a current draw is
detected.
Page - 31

Feature #6: Doors Lock At Ignition "On" (Factory Setting ON)
Feature Turned On: The security system will automatically lock the vehicle's
doors one second after the ignition switch is turned "on". This feature adds
considerable personal security to you and your family.
Feature #7: Unlock Output #1 At Ignition "Off" (Factory Setting ON)
Feature #8: Unlock Output #2 At Ignition "Off" (Factory Setting OFF)
TheseFeatureswill cause the security system toautomatically unlock eitherthe
driver'sdooror allofthevehicle's doorsinstantlywhenthe ignitionswitchisturned
"off". Please note that the exact operating parameters of these Features depends
upon the configuration of the security system and your vehicle's power doorlocks.
Thissystemmaybeconfiguredtounlock only the driver's door upon disarming.
Then if desired, pressing the large transmitter button again within 5 seconds will
unlock all of the doors. These Features can operate one of two ways: first, if all of
the doors unlock upon disarming, these Features will unlock all of the doors
whenthe ignitionisturned"off".Second,ifyourvehicleisconfiguredtounlockthe
driver's door only upon disarming, these Features can be configured to unlock only
the driver's door upon the ignition being turned "off". Please consult with the
installer as to the feasibility of adding the driver's door only unlock configuration
toyourvehicle,aspowerdoorlockingsystemsdifferincompatibilitytothisfeature.
Page - 32
Feature#9:OpenDoor BypassToFeatures#6, #7,#8 (FactorySettingON)
Feature Turned On: When the security system locks and unlocks the doors from
Features #6, #7 and #8, if a door is open the doors will not automatically lock when
the ignition switch turns "on", or automatically unlock when the ignition switch is
turned "off".
Feature #10: Lights On 5 / 30 Seconds Upon Disarm
(Factory Setting 30 Seconds)
Feature Turned On: Upon disarming, the exterior and interior lights will stay on
for 30 seconds, to illuminate the way to your vehicle.
Feature Turned Off: The exterior and interior lights will stay on for 5 seconds
when the system is disarmed.
Feature #11: Automatic Rearming (Factory Setting ON)
Feature Turned On: When the transmitter has disarmed the security system, the
system will rearm and relock the doors 90 seconds later, unless a door is opened or
the ignition is turned on. This feature prevents the system from being accidentally
disarmed if a transmitter button is unknowingly pressed by an object while in a
pocket or purse, or from children playing with the transmitter.
Page - 33
Feature Turned Off: When the transmitter has disarmed the security system, the
system will stay disarmed until the transmitter is used to arm it again.
Feature#12:2nd ChannelOutputDisarmsSystem (FactorySettingON)
Feature Turned On: When the 2nd channel output is utilized, the security system
will also disarm at the same time, chirping the siren twice, unlocking the doors and
turningtheexteriorlightsonforthirtyorfiveseconds.The2ndchanneloutput,and
this feature, can be used for remote trunk release operation.
Feature #13: .8 / 3 Second Doorlock Pulse (Factory Setting .8 (ON)
Feature Turned On: The doorlock outputs have a .8 second negative pulse to an
optional doorlock interface to operate the vehicle's power doorlocking system.
Feature Turned Off: The doorlock outputs have a 3 second negative pulse to an
optional doorlock interface to operate the vehicle's vacuum doorlocking system.
Feature #14: Double Unlock Pulse (Factory Setting OFF)
Somenewervehiclesrequireadoorlockinterfacewhichprovidesadoubledoorlock
output pulse to unlock all of the vehicle's doors. Feature #12 must be .8 second
doorlock pulse time (Feature #12 turned ON) for Feature #14 to operate.
Feature Turned On: The unlock output provides two pulses.
Feature Turned Off: The unlock output provides a single pulse.
Page - 34
Feature #15: 3 / 45 Second Arming Delay (Factory Setting 3 Seconds (ON)
Feature Turned On: The security system will be become fully armed 3 seconds
after the arming siren chirp confirmation.
Feature Turned Off: The security system will be become fully armed 45 seconds
after the arming siren chirp confirmation.
Note: During the arming delay if any protected circuit should go into a triggered
state, the system will arm, but that circuit will be unprotected until it reverts back
to an non-triggered state.
Feature #16: Confirmation Chirp (Factory Setting ON)
FeatureTurnedOn:Thesecuritysystemwillchirpthesirenforconfirmationthat
the system armed and disarmed.
Feature Turned "Off": The security system will not have siren chirps for the
armingand disarming confirmation. Turningthisfeatureoff will also eliminate the
threechirpsuponarmingiftheinstanttriggercircuitisgrounded,andthefourchirps
upondisarmingifthesystemwastriggeredandreset.However,thePrewarnFeature
and the Programmable Features chirps will still operate.
Regardlessofthis Feature, eliminatingthesirenchirpmay be doneonaonetime
temporary basis as desired by pressing the small left transmitter button twice for
armingordisarming.EvenifthisFeatureisusedtoremovetheconfirmationchirps,
the audible Automatic Transmitter VerificationTM feature will still operate.
Page - 35

Feature #17: 30 / 60 Second Activated Alarm Cycle
(Factory Setting 60 Seconds (ON)
Feature Turned On: Upon activation, the siren will sound and the parking lights
will flash for 60 seconds.
Feature Turned Off: Upon activation, the siren will sound and the parking lights
will flash for 30 seconds.
Please note that the shorter 30 second activated time may be required in some
localities to comply with noise nuisance ordinances.
Feature #18: Pulsed Horn / Steady Siren Output
(Factory Setting Steady Siren (OFF)
Feature Turned On: This Feature allows the use of the vehicle's horn in place of
the electronic siren for the audible output of the security system. When configured
for use with a horn, this output pulses for 10 seconds, then pauses for 5 seconds,
repeating this cycle for the duration of the activated alarm period. This prevents
the horn from overheating, thereby ensuring a maximum useful life to the vehicle
owner.
Feature Turned Off: The output is a continuous, steady output which the elec-
tronic siren requires. The siren features six different siren tones, which change
every 5 seconds.
Page - 36
Feature #19: Loud / Soft Pulsed Horn Chirps (Factory Setting Loud (ON)
Feature Turned On: 12 Millisecond Confirmation Honks.
Feature Turned Off: 8 Millisecond Confirmation Honks.
If your security system is configured to use the vehicle's horn, this Feature allows
a degree of compensation for the variance which is found in the length of the pulse
required to honk the horn in a satisfactory manner.
Feature #20: Total Closure Lock Output (Factory Setting OFF)
Feature Turned On: 28 Second Doorlock Output.
Feature Turned Off: .8 Second Doorlock Output.
If the vehicle is so equipped, this Feature allows the installer to take advantage of
a preexisting Total Closure System.
Feature #21: Remote-Activated Anti-Carjacking Protection
(Factory Setting OFF)
Feature Turned On: Anti-Carjacking Protection Feature Activated By 3rd
Channel Output. This Feature allows remote activation of the Anti-Carjacking
Feature. If this Feature is turned ON, pressing the Small Left Button on the trans-
mitter for 3 seconds will activate the Anti-Carjacking Feature, but only when the
ignition switch is "on". This Feature may be activated regardless of the setting of
Features #1 and #2 (Ignition and Door Activated Anti-Carjacking Protection).
Page - 37
Feature Turned Off: 3rd Channel Will Not Operate Anti-Carjacking.
Feature #22: One / Two Button Arming / Disarming
(Factory Setting One Button (ON)
Feature Turned On: One Button Arming / Disarming. This Feature controls
how the transmitter operates the security system. If this Feature is turned ON, the
transmitter's Large Center Button will alternate arming and disarming the system
with each press of the button. This type of operation is also described as a "single
button toggle" for the arming and disarming of the system.
Feature Turned Off: Two Button Arming / Disarming. Having this Feature set
to the OFF setting causes the system to operate in a "dedicated button for arming
and dedicated button for disarming" fashion. This Feature's "Two Button" setting
maybeusedwiththestandard3-buttontransmitter;whenconfiguredinthisfashion
the large center button arms the system, and the small right button disarms the
system. Pressing the small right button operates trunk release; pressing the large
center button and small right button together operates the 3rd channel output.
Enhanced "Panic" operation: Having feature #22 configured for "Two Button
Arming / Disarming" enhances the "Panic" feature's operation; using the "arm"
button activates "Panic" with an armed system, locking the doors, and using
"disarm" button results in "Panic" with a disarmed system and unlocked doors.
Page - 38 Page - 39
Transmitter Options
Feature #22 configured for
"Two Button Arming / Disarm-
ing" with supplied transmitter
Disarms
system, and
engages
"panic"
with
system
disarmed
Operates
2nd channel
output
Operates
3rd channel
output
Arms system, and engages
"panic" with system armed
Optional4-button transmitter with
Feature #22 configured for "Two
Button Arming / Disarming"
J
JJ
II II
OUTPUT
III
Arms system, and
engages "panic"
with
system
armed
Operates
2nd channel
output
Optional 4-button trans-
mitter for K9-6ATV2 is
part number #105-07
KK
KK
K -
9
K9-6ATV2 434MHz w/Green LED (#103-01)
Table of contents
Other Omega Vehicle Security Car Alarm manuals
Popular Car Alarm manuals by other brands

KUSSMAUL
KUSSMAUL 091-148-12 Installation and wiring instructions

Clarion
Clarion UNGO MS3001 installation manual

Avital
Avital Diablo 2 owner's manual

Fortin
Fortin EVO ONE Wiring and Setup Guide

Brazel's RV Performance
Brazel's RV Performance UltraTrac UTF53V8R instructions

Clifford
Clifford Arrow II owner's manual